Table of Contents
Advertisement
Quick Links
Installation and Operation Manual
Manual P/N 5900262 — Manual Revision A1 — January 2021
Model:
MB-240X
Designed and engineered in Southern California, USA. Made in China.
⚠
DANGER
Wheel Balancer
Read the entire contents of this manual before using this
product. Failure to follow the instructions and safety precautions in
this manual can result in serious injury or death. Make sure all other
operators also read this manual. Keep the manual near the product
for future reference.
you agree that you fully understand the contents of this
manual and assume full responsibility for product use.
By proceeding with setup and operation,
1645 Lemonwood Dr.
Santa Paula, CA 93060 USA
Tel: (877) 432-6627
Dannmar.com
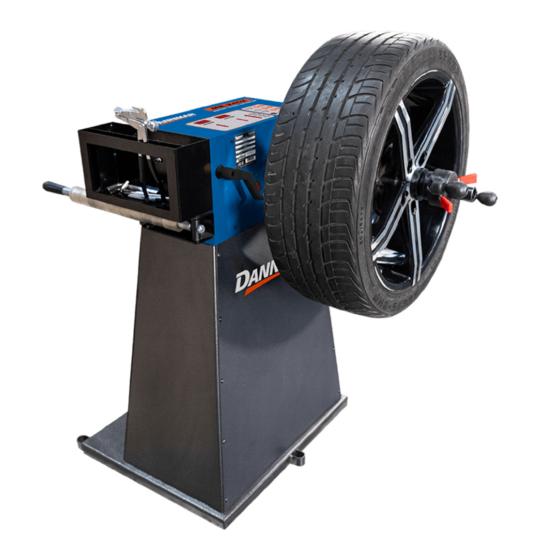
Shown with optional stand.
Advertisement
Table of Contents

Related Manuals for Dannmar MB-240X


Summary of Contents for Dannmar MB-240X
- Page 1 Wheel Balancer Installation and Operation Manual Manual P/N 5900262 — Manual Revision A1 — January 2021 Model: MB-240X Shown with optional stand. Designed and engineered in Southern California, USA. Made in China. ⚠ Read the entire contents of this manual before using this product.
- Page 2 Copyright. Copyright © 2021 by Inc. All rights reserved. You may make copies of this document if you agree that: you will give full attribution to BendPak Dannmar Inc., you will not make changes to the content, you do not gain any rights to this content, and you will not use the copies for commercial purposes.
-
Page 3: Table Of Contents
This manual describes the installation and operation of the Dannmar MB-240X Wheel Balancer. The MB-240X is a computer-based Wheel Balancer that provides fast, accurate Wheel balancing for a wide variety of Wheels. No internal motor is utilized; Wheels are rotated manually. The Balancer is designed to accommodate mounting in three different configurations. -
Page 4: Shipping Information
Make a visual inspection of the product before using it each time. Do not use the product if you find any missing or damaged parts. Instead, take the unit out of service, then contact an authorized repair facility, your distributor, or Dannmar Products at (877) 432-6627. thorough •... - Page 5 • Use of this equipment for purposes other than those described in this Manual. • Modifications to the equipment without prior, written permission from Dannmar. • Injury or death caused by modifying, disabling, overriding or removing safety features. •...
-
Page 6: Components
Storage Tray. Storage for Clip-On Weights and other items you want to have handy. • Cone Hangers . (Not shown.) Hold the MB-240X Wheel Mounting Cones when not in use. Not all components visible in the photo above. Balancer accessories include: •... - Page 7 Wheels. You will need to know where you want to put the Weights and select the appropriate ALU Mode. ALU Modes generally use Adhesive Weights, which are less visible than Clip-On Weights. MB-240X Wheel Balancer P/N 5900262 — Rev. A1 — Jan. 2021...
-
Page 8: Faq
Adhesive Weights because they are less visible. Q: Can the MB-240X use 220 VAC power? A: The MB-240X is shipped ready for 110 VAC operation. The Balancer can be modified to operate must use a licensed Electrician on 220 VAC. For 220 VAC operation, you to wire the MB- 240X plug in accordance with applicable electrical codes. -
Page 9: Specifications
9.25 in. / 235 mm Length 16.75 in. / 426 mm Depth 9.5 in. / 241 mm Weight (MB-240X Only – No stand or mounting bkts.) 79.4lbs. / 36kg Power Cord Length 72 in. Min. / 1828 mm Min. Working Temperature +32°F to +122°F / 0°C to +50°C... -
Page 10: Installation Checklist
Installation Checklist Following are the steps needed to install an MB-240X Wheel Balancer. Perform them in the order shown. ☐ 1. Review the installation Safety Rules. ☐ 2. Plan for Electrical Work. ☐ 3. Make sure you have the necessary Tools. -
Page 11: Installation
Electrician. ⚠ CAUTION Certain parts of installing the Balancer are difficult for just one person. Dannmar strongly recommends having two or more persons work together to install the Balancer. If you have to use an extension cord, make sure its current rating is equal to or greater than that of the equipment being used. - Page 12 For safety and to allow enough space to work with Wheels, a certain amount of clearance around the Balancer is required. Not drawn to scale. Figure above shown with optional Mounting Stand MB-240X Wheel Balancer P/N 5900262 — Rev. A1 — Jan. 2021...
- Page 13 Balancer could be damaged. Installing the MB-240X on the Mounting Stand An optional Mounting Stand is available for the MB-240X. The MB-240X Mounting Stand comes complete with all attaching hardware required to install the Balancer.
- Page 14 Fig. A Item Description MB-240X M10 x 20 Screws Cross recessed Screw Stand Cover Mounting Stand MB-240X Wheel Balancer P/N 5900262 — Rev. A1 — Jan. 2021...
- Page 15 The diameter of the drill bit must be the same as the diameter of the Anchor Bolt. So if you are using an M10 diameter Anchor Bolt, for example, use an M10 diameter drill bit. MB-240X Wheel Balancer P/N 5900262 — Rev. A1 — Jan. 2021...
- Page 16 Important: Installing the MB-240X on the Tire Changer The MB-240X is shipped with a Weldment Base Assembly for installation on the Dannmar DT-50 Series Tire Changer. The Base Assembly is a bolt-on addition to the DT-50 Tire Changer allowing the Tire changing and balancing all in one location, saving space and time wasted in transporting the Tire from changing to balancing stations.
- Page 17 Fig. B Item Description MB-240X Weldment, Base Assy. SHCS M6X30 Tool Holder Mtg. Plt. Lock Washer Hex Screws M10 x 20 Screws DT-50-A Tire Changer MB-240X Wheel Balancer P/N 5900262 — Rev. A1 — Jan. 2021...
- Page 18 MB-240X on a core-filled masonry block, or a reinforced concrete wall. The wall must be capable of supporting the weight of the MB-240X, the Wheel and the Tire. This combined weight can exceed 225 lbs. / 102 kg. Anchors in drywall will not support this Balancer and Wheel.
- Page 19 Fig. C Item Description MB-240X Bracket Arm Wall Bracket Screw Lock Washer Anchor Washer Anchor Nut Tooling Bracket Screw M10 Screws Anchor MB-240X Wheel Balancer P/N 5900262 — Rev. A1 — Jan. 2021...
- Page 20 The Wheel Balancing Machine comes configured for a 110 VAC power source. It may be converted to function with 220 VAC, if desired. Plug. The Power Cord has a 110 VAC three prong plug. MB-240X Wheel Balancer P/N 5900262 — Rev. A1 — Jan. 2021...
- Page 21 110 VAC plug on the end of the Power Cord and attach a 250 VAC NEMA 30A, 2-Pole, 3-Wire plug. The MB-240X does not come with Do not change the 110 VAC plug to a 220 VAC this plug.
- Page 22 If you were using the unit in a European country, the color codes on the wiring that comes with the MB-240X correspond to: Brown: Live Blue: Neutral Green/Yellow: Ground Information about color code conventions in other regions and countries is available online. Make sure your Electrician installs the Plug in accordance with all applicable local electrical codes.
-
Page 23: Operation
Keep the work area clean and well lit. Dirty, cluttered, and dark work areas increase the chances of an accident happening. • Do not remove the Storage Tray unless instructed to do so by Dannmar Support. There are no user serviceable parts underneath. must •... - Page 24 Placement Indicators under the OUTER Display Window . When Weight needs to be added to a Wheel, slowly turn the Wheel and watch the indicators under the Outer Display MB-240X Wheel Balancer P/N 5900262 — Rev. A1 — Jan. 2021...
- Page 25 S + F keys Hold the keys down until the Wheel position indicators stop flashing (about 5 seconds) then release. Shifts weight units between grams S + (Distance / ounces. — (Distance MB-240X Wheel Balancer P/N 5900262 — Rev. A1 — Jan. 2021...
- Page 26 Of the five Balancing Modes supported by the MB-240X, four of them balance on two planes at the same time. The fifth mode, Static (STA) Mode, is included for older, thin, Automobile Wheels and Motorcycle Wheels, which are not big enough to be balanced on both planes at the same time.
- Page 27 Outer Edge. This value is measured and read off the Wheel caliper supplied with the Balancer. • Diameter. The distance from Wheel’s Outer Edge to Outer Edge through the center. This value is read off the Tire side wall. MB-240X Wheel Balancer P/N 5900262 — Rev. A1 — Jan. 2021...
- Page 28 Front-Cone Mounting. The preferred method, as it generally produces the most accurate balancing results. Refer to Figure E below. An appropriately sized Mounting Cone goes on the Shaft after the Wheel, then the Quick Nut. Fig. E MB-240X Wheel Balancer P/N 5900262 — Rev. A1 — Jan. 2021...
- Page 29 Figure G below. The Spring goes on the Shaft first, then an appropriately sized Cone, the Wheel, a second appropriately sized Cone, and finally the Quick Nut. Fig. G MB-240X Wheel Balancer P/N 5900262 — Rev. A1 — Jan. 2021...
- Page 30 Typically used with steel rims. If the Wheel is out of balance, weights are clamped on the Inner and Outer Edges. • Static (STA). Used for older Wheels under 4 inches wide and motorcycle Wheels. Weight is applied to the Center Plane only. MB-240X Wheel Balancer P/N 5900262 — Rev. A1 — Jan. 2021...
- Page 31 CAUTION Wheels and Tires can be heavy. Be aware of your own safety. Lift carefully, and if the Wheel is too heavy request assistance mounting and de-mounting the Wheel. MB-240X Wheel Balancer P/N 5900262 — Rev. A1 — Jan. 2021...
- Page 32 Even though there is no motor driving the Wheel it can severely injure you if it is in motion. Release the handle and wait. The display will go blank then the imbalance values will appear in the Inner and Outer display windows. MB-240X Wheel Balancer P/N 5900262 — Rev. A1 — Jan. 2021...
- Page 33 Mount the Wheel you want to balance. Verify the Wheel is clean and remove any weights from previous balancing. Refer to Mounting a Wheel for mounting instructions, if required. MB-240X Wheel Balancer P/N 5900262 — Rev. A1 — Jan. 2021...
- Page 34 Spin the Wheel to test the balance again. The Wheel is balanced when both the Inner and Outer Windows show 00. It may take several attempts to get the imbalance to 0. MB-240X Wheel Balancer P/N 5900262 — Rev. A1 — Jan. 2021...
- Page 35 Release the handles and wait. The display will go blank then the imbalance value will appear in the Inner and Outer display windows. Pull the brake to stop the Tire rotation. MB-240X Wheel Balancer P/N 5900262 — Rev. A1 — Jan. 2021...
- Page 36 Spin the Wheel to test the balance again. The Wheel is balanced when both the Inner and Outer Windows show 00. It may take several attempts to get the imbalance to 0. MB-240X Wheel Balancer P/N 5900262 — Rev. A1 — Jan. 2021...
- Page 37 Wheel to find the best location to put the weight. When all the indicators on the Outer Edge/Plane are lit, engage the brake to hold the Wheel and apply the correct value weight to MB-240X Wheel Balancer P/N 5900262 — Rev. A1 — Jan. 2021...
- Page 38 Spin the Wheel to test the balance again. The Wheel is balanced when both the Inner and Outer Windows show 00. It may take several attempts to get the imbalance to 0. MB-240X Wheel Balancer P/N 5900262 — Rev. A1 — Jan. 2021...
- Page 39 Turn the Wheel slowly again to find the best location for the weight on the Outer Plane. The Outer Edge/Plane placement indicators located under the Outer Display Window light up or go out as you move the Wheel to find the best location to put the weight. MB-240X Wheel Balancer P/N 5900262 — Rev. A1 — Jan. 2021...
- Page 40 Spin the Wheel to test the balance again. The Wheel is balanced when both the Inner and Outer Windows show 00. It may take several attempts to get the imbalance to 0. MB-240X Wheel Balancer P/N 5900262 — Rev. A1 — Jan. 2021...
- Page 41 Calibration Calibrate the Balancer on a regular basis using the 100 g weights included with the MB-240X. IMPORTANT: When placing the calibration weights on Wheels, apply weights exactly perpendicular to the shaft at the 12 o’clock position. Incorrect placement will result in additional weight call outs and/or an improperly calibrated machine.
- Page 42 When turning the Wheel slowly to light all the outside Wheel weight indicators the outside edge 100 gram weight is at the 6 o’clock low position ±4º with all the weight position indicators lit. MB-240X Wheel Balancer P/N 5900262 — Rev. A1 — Jan. 2021...
-
Page 43: Maintenance
⚠ WARNING: Do not operate your Wheel Balancer if you find issues; instead, take the unit out of service, then contact your dealer, visit Dannmar.com/support, or call (877) 432-6627. MB-240X Wheel Balancer P/N 5900262 — Rev. A1 — Jan. 2021... -
Page 44: Troubleshooting
1. Tire parameter(s) are incorrect, re-enter them. few hundred grams. a. Inside distance measurement. b. Wheel Width. c. Wheel Diameter. 2. The Tire error is too large, replace the Tire. MB-240X Wheel Balancer P/N 5900262 — Rev. A1 — Jan. 2021... - Page 45 If you continue to have problems with your Wheel Balancer, visit dannmar.com/support or call Dannmar at (877) 432-6627. Pressure Sensor Adjustment This adjustment is to be performed if the sensors are damaged or if Error Code 00 appears on the display.
- Page 46 Figure H MB-240X Wheel Balancer P/N 5900262 — Rev. A1 — Jan. 2021...
-
Page 47: Wiring Diagram
Wiring Diagram 220 V Power Board MB-240X Wheel Balancer P/N 5900262 — Rev. A1 — Jan. 2021... -
Page 48: Labels
Labels MB-240X Wheel Balancer P/N 5900262 — Rev. A1 — Jan. 2021... - Page 49 MB-240X Wheel Balancer P/N 5900262 — Rev. A1 — Jan. 2021...
-
Page 50: Parts
Hexagon Nut M6 Cone Hanger Tool Holder Mounting Plate 5327132 Weldment, Base Assembly (Welding Piece) SHCS M10X20 Washer φ6 SHCS M6X16 Side Storage Rack Dam-board Cross Recessed Pan Head Screw M4X10 MB-240X Wheel Balancer P/N 5900262 — Rev. A1 — Jan. 2021... - Page 51 SHCS M4X12 Tooth 32T Bearing Cover SHCS M6X20 Nut M30x1.5 Snap ring; 30 Bearing; 6006 Bearing; 6005 Seeger Ring; 25 Spindle Bushing Weldment 5327179 Thread Shaft/Spindle SHCS M14X240mm 5327330 MB-240X Wheel Balancer P/N 5900262 — Rev. A1 — Jan. 2021...
- Page 52 Pressure Sensor Assy. Pressure Sensor Assy. Parts List Part Number Description Hexagon Nut M10 Piezo Pad Sensor 5327140 Piezo Horizontal Shaft 5327139 Piezo Vertical Shaft Spring Washer, M10 MB-240X Wheel Balancer P/N 5900262 — Rev. A1 — Jan. 2021...
- Page 53 5327870 SHCS M4X8 Spring pad M4 Washer M4 5327090 Photovoltaic Panels; Hexagon Nut M3 Spring Pad M3 Washer M3 Encoder Bracket; Cross Recessed Pan Head Screw M3 x 10 MB-240X Wheel Balancer P/N 5900262 — Rev. A1 — Jan. 2021...
- Page 54 Spring Column Pin Distance Arm Rod; Pull Ruler Fixing Frame Snap Ring 25 Long Pull Rod Set SHCS M6X16 Inner Distance Handle Washer φ6 SHCS M6X16 Short Pull Rod Set MB-240X Wheel Balancer P/N 5900262 — Rev. A1 — Jan. 2021...
- Page 55 Hexagon Nut M3 Cross Recessed Countersunk Head Screw M3x30 Cross Recessed Countersunk Head Screw M6x12 Power Liner Assembly Welding Power Board 5327146 Transformer Cross Recess Pan Head Screw M4x16 MB-240X Wheel Balancer P/N 5900262 — Rev. A1 — Jan. 2021...
- Page 56 Brake Assy. Parts List Part Number Description 5327591 Handle 5328023 Crowbar Shaft SHCS M6x16 Coaming Assembly Welding Piece Pin Roll 5328022 Lock Nut M10 Snap Ring; 20 Snap Ring; 20 Rubber Ring MB-240X Wheel Balancer P/N 5900262 — Rev. A1 — Jan. 2021...
- Page 57 Allen Wrench; 12mm 5328055 Allen Wrench; 6mm 5346425 Weight Hammer Pliers Quick Nut; 36mm 5402187 Wheel Width Caliper 5346879 Calibration Weight 5530304 SHCS M8x20 Allen Wrench; 8mm; Anchor Bolt;M10X100 MB-240X Wheel Balancer P/N 5900262 — Rev. A1 — Jan. 2021...
- Page 58 Maintenance Log MB-240X Wheel Balancer P/N 5900262 — Rev. A1 — Jan. 2021...
-
Page 59: Maintenance Log
Maintenance Log MB-240X Wheel Balancer P/N 5900262 — Rev. A1 — January 2021... - Page 60 1645 Lemonwood Drive Santa Paula, CA 93060 USA © 2021 BendPak Inc. All rights reserved. Dannmar.com...
Need help?
Do you have a question about the MB-240X and is the answer not in the manual?
Questions and answers