Table of Contents
Advertisement
Quick Links
Advertisement
Table of Contents

Related Manuals for OpenEye OE-C7032-WR


Summary of Contents for OpenEye OE-C7032-WR
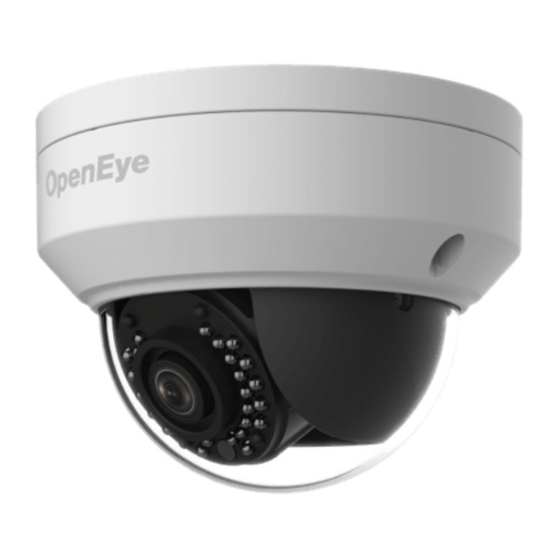
- Page 1 2MP / 4MP MINI IP DOME CAMERA USER MANUAL MODELS: OE-C7032-WR / OE-C7034-WR...
- Page 2 The information in this publication is provided “as is” without warranty of any kind. The entire risk arising out of the use of this information remains with recipient. In no event shall OPENEYE be liable for any direct, consequential, incidental, special, punitive, or other damages whatsoever (including without...
- Page 3 Important Safeguards Read Instructions Read all of the safety and operating instructions before using the product. Retain Instructions Save these instructions for future reference. Attachments / Accessories Do not use attachments or accessories unless recommended by the appliance manufacturer as they may cause hazards, damage product and void warranty.
- Page 4 Installation and Storage • Do not install the camera in areas of extreme temperatures in excess of the allowable range; install the camera in areas with temperatures within the camera’s operating temperature, including the following: -31 ~ 140 °F (-35 ~ 60 °C) Avoid installing in humid or dusty places.
- Page 5 Caution C A U T I O N RISK OF ELECTRIC SHOCK DO NOT OPEN CAUTION: TO REDUCE THE RISK OF ELECTRIC SHOCK, DO NOT REMOVE COVER (OR BACK). NO USER-SERVICEABLE PARTS INSIDE. REFER SERVICING TO QUALIFIED SERVICE PERSONNEL. 35298AE...
-
Page 6: Table Of Contents
TABLE OF CONTENTS Introduction ........................7 Overview ..............................7 Product Features ..........................7 Getting Started ......................8 Box Contents ............................8 Camera Overview ............................. 9 Camera Dimensions ..........................9 Connections ............................10 NETWORK CAMERA MANAGER ..................11 Launching Network Camera Manager ....................11 Finding Network Devices ........................ -
Page 7: Introduction
-31°F making them a perfect fit for extreme weather installations. In addition, the OE-C7032-WR and OE-C7034-WR are IK10 rated and can be fully powered over PoE, reducing installation labor and giving you peace of mind in vandalism prone installation locations. -
Page 8: Getting Started
GETTING STARTED BOX CONTENTS Before proceeding, please confirm that the box contains the items listed here. Please contact your dealer for assistance if any item is missing or has defects. Mini IP Dome Camera Waterproof Cable Connector Torx Tool Screws and Anchors x3 Paintable Housing Desiccant Packet Quick Start Guide... -
Page 9: Camera Overview
CAMERA OVERVIEW CAMERA DIMENSIONS Side 1.6in (41.5mm) 3.2in (81mm) Bottom 3.93in (100mm) 35298AE... -
Page 10: Connections
CONNECTIONS Connection Definition RJ-45 For network and PoE connections Power (12vDC) Power connection Green Audio In L Brown Audio In R Audio I/O Gray Audio Out Purple Ground Ground Blue Orange Alarm Input Audio I/O White Alarm Out - Yellow Alarm Out + *OE-C7034-WR only. -
Page 11: Network Camera Manager
NETWORK CAMERA MANAGER OpenEye Network Camera Manager (NCM) is a software tool that allows you to quickly and easily connect and configure your OpenEye IP Cameras. This software allows you to apply the camera password, assign IP addresses, configure video settings, and update firmware on multiple cameras at once. -
Page 12: Username And Password
The admin user password can be set using the following methods: 1. OpenEye recorders running Apex 2.1 or newer will automatically set a new unique password Connected to an M-Series recorder with a built in PoE switch. -
Page 13: Live View
LIVE VIEW Note Live view is broadcast in MJPEG pass-through. Stream settings will be broadcast to your recording device according to the selected Codec type. Setup – View additional camera settings. Proportional – Dropdown menu with Live View image options including: Stretch: Fit the camera image to the entire viewing window without scaling the image proportionately to the original view. -
Page 14: Setup & Configuration
SETUP & CONFIGURATION BASIC CAMERA SETTINGS Basic Information The Basic Information tab displays the product model, firmware, network, and MAC address for the connected camera, along with the current camera Status. The nested Image, Video, Network, and Time tabs are shortcuts to the more advanced menu options further down the Setup list. -
Page 15: Network Settings
NETWORK SETTINGS Network The Network tab allows you to configure the connected camera network settings. DHCP IP Address The default static IP address of the camera is 192.168.51.2, and the default subnet mask is 255.255.255.0. DHCP is turned on by default. If a DHCP server is used in the network, the IP address of your camera may be assigned dynamically. - Page 16 HTTP Port – Configure your relevant port number. Note If the HTTP port number has been occupied already, a “Port conflicts” message will display. Ports 23, 81, 82, 85, 3260, and 49152 are occupied by default. HTTPS Port – The default HTTPS Port is 443; setting range: 1024 ~65535. RTSP Port –...
-
Page 17: Port Mapping
Port Mapping To enable Port Mapping: Check the Port-Mapping Enable checkbox. • Use the Mapping Type dropdown menu to select a type. • • If selecting Manual, the external ports must be configured. Note If the configured port is already occupied, then the Status will show as inactive and a new port must be selected. - Page 18 Use FTP (file transfer protocol) to upload snapshots from network cameras to a specified server. To configure FTP: Set the IP address and port for the FTP server, username and password used to upload • images to the FTP server, select Upload Images, Overwrite Storage and set Overwrite At (threshold for overwriting images).
- Page 19 Email The camera can send an e-mail via Simple Mail Transfer Protocol (SMTP) when a variety of events occur. Two sets of SMTP accounts can be configured. Each set includes SMTP Server, Account Name, Password and E-mail Address settings. For SMTP server, contact your network service provider for more specific information.
-
Page 20: Streaming Settings
STREAMING SETTINGS Video The Video Settings menu configures the camera’s video settings, including resolution, frame rate, bit rate, and the image quality. To configure camera streams: Use the dropdown menus to configure the Resolution, Video Compression, Frame Rate • Bitrate Type, GOP, and Smart Encoding. Enable and configure the Sub-Stream if desired. - Page 21 It is possible to connect to OpenEye IP cameras using third party software like VLC media player. To connect some types of software will need to know the stream URL. All OpenEye IP cameras can deliver two RTSP streams, as well as streaming MJPEG over HTTP.
- Page 22 Snapshot The Snapshot tab is used to configure the settings for timed or continual snapshots. To configure Snapshots: Use the dropdowns to select the desired Resolution, Image Quality, Snapshot Interval, and • the Number of Snapshots. If you desire Scheduled Snapshots, select Timed Snapshot Mode, and designate an Interval. •...
- Page 23 Audio (OE-C7034-WR only) The Audio tab allows you to configure the audio encoding settings for your camera. To configure Audio setup: Check the Audio Input On checkbox. • • Configure the Audio settings as desired. Save Note Only one Audio Channel can be active at a time. It is recommended to configure only channel 1.
- Page 24 Region of Interest (ROI) When Region of Interest (ROI) is enabled, the system ensures the image quality for the ROI first if the bit rate is insufficient. To enable ROI: Click , and then drag the mouse to cover the intended part of the images . To delete , select the area and then click Changes will be saved automatically.
- Page 25 To configure media streams: • Click the + on the right side of the title bar and the Add Media Stream page will appear. Select a Stream Type, and then set the IP Address and Port Number of the unicast or multicast group for the decoding device that receives audio and video streams from the camera.
-
Page 26: Picture Settings
PICTURE SETTINGS Image The Image tab allows you to configure the setting for the camera image as seen in Live View. When adjusting your image settings, the changes will be saved automatically and will display in the camera image preview window. Scenes Scene allows you to set the image parameters to achieve the desired image effects based on live video in different environments. - Page 27 Parameter Description Automatic: The camera automatically adjusts exposure according to the • environment. Custom: The user sets exposure as needed. • Indoor 50Hz: Reduce stripes by limiting shutter frequency. Exposure • Mode Indoor 60Hz: Reduce stripes by limiting shutter frequency. •...
- Page 28 Note: You can set this parameter only when Exposure Mode is not set to Manual. Automatic: The camera outputs the optimum images according to the light condition. Day/Night In this mode, the camera can switch between night mode and day mode automatically. Night: The camera provides high-quality black and white images using the existing light Mode Day: The camera provides high-quality color images using the existing light.
-
Page 29: White Balance
Set the intensity level of the IR light. Illumination The greater the value, the higher the intensity. 0 means that the IR light is turned off. Level Note: You can set this parameter only when Control Mode is set to Manual. White Balance White balance is the process of offsetting unnatural color cast in images under different color temperatures so as to output images that best suit human eyes. - Page 30 On-Screen Display Up to 8 on-screen displays (OSD) can be configured for the camera image. To add an on-screen display: 1. Select the position and content of the OSD. a. Position: Click the desired box in the Live View area. After the cursor shape is changed, click and hold the button to move the box to the desired position.
- Page 31 Privacy Mask Add a privacy mask to your camera image to hide desired areas from view. To add a privacy mask: Click Add. • Click and drag the newly generated mask square to the desired location on the camera image. •...
-
Page 32: Events Settings
EVENTS SETTINGS Alarms Motion Detection Motion detection is used to detect motion in a specified area during a period of time. The use of motion detection requires setting a detection area, detection sensitivity, object size, and history. When these requirements are met, the motion detection alarm will activate. To configure Motion Detection: 1. -
Page 33: Audio Detection (Oe-C7034-Wr Only)
Save • Trigger Actions Snapshot to SD Card - With Snapshot to SD Card selected, the camera will automatically upload snapshots to the microSD card when an alarm is triggered. Note: This option is only available if the camera has a microSD card installed. Alarm Output 1 - This setting is the alarm output interface linked to motion detection alarm. - Page 34 Select the Trigger Actions to occur once the audio detection alarm has been triggered. See the • Motion Detection section for more information about the Trigger Actions.If desired, enable an Audio Detection schedule. See the Motion Detection section for more information about the Alarm Schedule.Save.
- Page 35 Note The “difference” refers to the numerical difference between two volumes. The ‘threshold’ refers to a maximum numerical value that must be exceeded for the alarm to trigger. Note - Audio Detection results are shown in real time. The red bars indicate the volume of the audio alarm has reached the threshold.
-
Page 36: Alarm Output (Oe-C7034-Wr Only)
Alarm Output (OE-C7034-WR only) After an alarm output is triggered by a motion detection alarm, audio alarm, or other third-party configured alarm, the camera can trigger an alarm output to a third-party device. To configure Alarm Input: Select the Alarm and the Alarm Name. •... -
Page 37: Storage Settings
STORAGE SETTINGS STORAGE SETTINGS OpenEye IP cameras include an integrated microSD™ card (Memory Card) slot that can be used to record video or images. The card slot is compatible with a microSD™ card up to 128GB. Note - Formatting the microSD card causes the camera to restart... - Page 38 Planned Storage Note - Camera date and time must be synced with system or server to insure accurate recording timestamps. Click Edit to open the schedule and add recording days and times Save Note Video recorded to the microSD card cannot be accessed through Video Management Software.
- Page 39 RECORDING DOWNLOAD Recording download page allows you to search a selected date range for video and snapshots recorded to the microSD card. 1. Search for video within a specified period. The results will be shown in a list below. 2. Select your video and click Download. 35298AE...
-
Page 40: Security Settings
SECURITY SETTINGS User There are two types of users: Administrator- referred to as “admin” in this manual. The default name of the administrator is admin, which cannot be modified. Admin has full permission and can manage all users and devices. Only one admin user is allowed. Common user- referred to as “user”... - Page 41 Network Security You can use the Network Security tab to set a secure channel for data transmission. To configure Network Security: Click Network Settings, and then click Port, and then enter the port number in the HTTPS Port • box. Click Save.
- Page 42 IP Address filtering IP Address filtering allows you to forbid access from specified IP addresses to your camera. Check the Enable checkbox. • Select a Filtering Mode, and then click the + symbol to add the desired IP addresses to the list. •...
-
Page 43: Maintenance
MAINTENANCE Time By default, the time setting Sync Mode will be set to Sync with NTP Server. Manually Setting or Synchronizing the System Time Select a sync mode. Set the correct time zone and system time. You may also click Sync with Computer Time to synchronize the time settings of your camera with that of your PC. -
Page 44: Software Upgrade
Maintenance Software Upgrade To update your camera software: Click Browse, select the software file, click Open, and then click Upgrade. Note The software file must be a .zip file. Device Restart This will restart your camera. A restart may be necessary for some camera settings to take effect. Config Management 1. - Page 45 All rights reserved. No part of this publication may be reproduced by any means without written permission from OpenEye. The information in this publication is believed to be accurate in all respects. However, OpenEye cannot assume responsibility for any consequences resulting from the use thereof.
Need help?
Do you have a question about the OE-C7032-WR and is the answer not in the manual?
Questions and answers