Advertisement
Table of Contents
- 1 Table of Contents
- 2 Introduction
- 3 Kit Contents
- 4 Installing and Removal of the Measuring Beaker
- 5 Preparation of the Reagent
- 6 Configuration and Operation of the Device
- 7 Water Filter
- 8 Devuce Setup
- 9 Connect to Wi-Fi
- 10 Description of the Device Functions
- 11 Calibration Procedure
- 12 Error Signalisation and Irregularities During the Operation
- 13 Additional Functions
- 14 The Device Reset
- 15 Device Operation from the Smart Reef System
- 16 Technical Problems and Troubleshoot Guide
- Download this manual
Advertisement
Table of Contents

Related Manuals for Reef Factory kH keeper


Summary of Contents for Reef Factory kH keeper
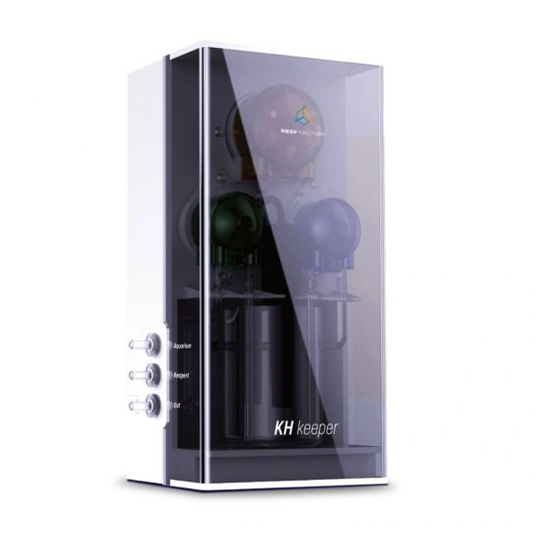
- Page 1 Thank you for purchasing our device kH keeper KH Keeper Manual / 1 36...
- Page 2 Installing and removal of the measuring beaker. Prepara)on of the reagent. Configura)on and opera)on of the device. Descrip)on of the device func)ons. Calibra)on procedure. Error signalisa)on and irregulari)es during the opera)on. Addi)onal func)ons. Technical problems and Troubleshoot guide. KH Keeper Manual / 2 36...
- Page 3 Kit contents. The following items are included with your kH keeper device (see graphic below): ● 10ml high measuring cup for calibrating the reagent dosing pump (1), ●...
- Page 4 ● Pull out the connector of the pump that pours water from the aquarium, which is located in the beaker on the right side, from the plastic holder. Pay attention to the installed tube to not damage it (B), KH Keeper Manual / 4 36...
- Page 5 WARNING: It is very important to put the beaker right (to the maximum position) against the back wall of the device. If it is not adjusted properly, there is a risk that the magnetic stirrer KH Keeper Manual / 5 36...
- Page 6 (stirring function). IV. Prepara)on of the reagent. Make sure that you have purchased a dedicated Reef Factory reagent for measurements with the device. It must be purchased separately because it is not included with the device. If you do not have a dedicated reagent, the measurement will not be possible (result will be incorrect).
- Page 7 To configure the device correctly, follow the instructions below. 1. Please refer to the graphics below to properly connect peripheral devices to the kH keeper. Pay attention to the marking of individual components so as not to make a mistake when making connections.
- Page 8 2. Pay particular attention to the proper connection of the hoses, liquids (aquarium water, reagent) and the water outlet to the waste container. WARNING: The water filter must be completely submerged in the water, and its elements must not protrude above the water. KH Keeper Manual / 8 36...
- Page 9 3. There is a magnetic stirrer in the glass beaker, be careful not to lose it. 4. Try to place the reagent container as close to your kH keeper as possible, preferably at the same height or maximum 20 cm below.
- Page 10 When you are connecting to a Reef Factory device, the connection status may state‘no internet’. Please ignore it. This appears on a smartphone, tablet, laptop or any other device, because you are connected to a Reef Factory device WiFi and you have no internet access through these devices.
- Page 11 B/G/N standards, and the channel width is 20Mhz. Incorrect configuration of the router in MIX mode (variable/mixed channel width 20Mhz/40Mhz) may cause the device to disconnect and reconnect to the router in random cases. KH Keeper Manual 11 36...
- Page 12 Set up your device in five easy steps. Step one - choose the language you want to use while operating the device. KH Keeper Manual 12 36...
- Page 13 0.01 dKh.This can be modified at any time after set up is complete. Step three - connect the device to your home Wi-Fi wireless internet network. If the network is secured, enter the password that protects the home network against unauthorized access. KH Keeper Manual 13 36...
- Page 14 Please note that the device that KH Keeper connects to must have internet access to communicate with the Smart Reef system. When KH Keeper has successfully connected to the Wi-Fi wireless network, the IP address assigned to your device will appear in the upper left corner of the screen.
- Page 15 KH Keeper Manual 15 36...
- Page 16 Reef account, please enter your login details to add another device. If you do not want to manage your device remotely, you can skip this step, but you will lose a number of additional benefits regarding this operation, including the ability to update your device. KH Keeper Manual 16 36...
- Page 17 Step Five - Congratulations, the KH Keeper setup is complete. WARNING: The first time the device is turned on, it is recommended to place the probe in the aquarium water (brine) for 30 minutes and then take some test measurements.
- Page 18 (details will be described further in this manual). In case the change is too abrupt, the device performs another control measurement - see the measurement column. When its result is the same, the device considers it correct. KH Keeper Manual 18 36...
- Page 19 Reef account, the ability to set the current date and time, change the language and the function of restoring the device to factory settings. In addition, the icons show the current connection status with your wireless network and the Smart Reef system. KH Keeper Manual 19 36...
- Page 20 The contents of the sachet should be poured into 250 ml of Reverse osmosis water (with a temperature close to 25 ° C), please do not begin the calibration process until the contents of the sachets have been KH Keeper Manual 20 36...
- Page 21 After this time, a confirmation button for starting the calibration process will appear on the screen. Then remove the probe from the PH4 solution and rinse it with RO water, pat dry then immerse the probe into the PH7 solution. KH Keeper Manual 21 36...
- Page 22 The calibration process is complete. Do not throw away your pH 4.0 and 7.0 solutions as you will be able to test accuracy at the end of the calibration process An additional function of checking the pH probe is KH Keeper Manual 22 36...
- Page 23 50 ml. This amount of water from the tank is required for the correct KH measurement, therefore the correct calibration of this pump is very important. After pressing the button aquarium pump B, additional functions are displayed. KH Keeper Manual 23 36...
- Page 24 . After pressing it, a message will be displayed on the screen informing about the readiness to perform the calibration and the time during which the pump will pour water from the aquarium. To start the calibration press button KH Keeper Manual 24 36...
- Page 25 After pressing the start button, the pump should pour 50 ml of the liquid with an accuracy of +/- 0.5 ml. If the amount of liquid added is lower or higher, it is necessary to recalibrate pump B. KH Keeper Manual 25 36...
- Page 26 10 ml beaker, then start the pump calibration process by pressing the button . After pressing it, a message will be displayed on the screen informing about the readiness for calibration and the time in which the pump will fill the reagent. KH Keeper Manual 26 36...
- Page 27 Try to make the indicated value as accurate as possible, e.g. given with one decimal place. Alternatively, you can use a precise scale with a measurement accuracy of 0.01 grams, this will allow a much more accurate pump calibration. KH Keeper Manual 27 36...
- Page 28 6. Set reminder function - allows you to set a reminder about the need to recalibrate the device, according to the graphic below. KH Keeper Manual 28 36...
- Page 29 Five days before the end, the kh keeper will inform you when the reagent is running out, so you have time to refill it.
- Page 30 (its results will be consistent with the reference measurement). WARNING: If there is a difference in the measurement between the KH meter and another reference measurement, you should recalibrate the kH keeper first, then use the Measurement Fit feature if there are still differences.
- Page 31 After pressing it, an additional field appears, as in the graphic below, where you can enter the difference value at which the function is to be automatically started. If the measured value is still outside of the indicated range after re-measurement, your KH keeper will notify of a sudden change in kH.
- Page 32 In the case of an error or irregularity in the measurements, see below summary of messages that the KH Keeper can send to the user: ● The KH level is too low - the level of kH measured is below the declared value, ●...
- Page 33 They allow you to change the language, view the history of notifications that the device has registered, contact us and access many other interesting functions that are worth learning about. KH Keeper Manual 33 36...
- Page 34 Wi-Fi network and then running the update program. Then follow the prompts on the monitor screen. Technical problems and troubleshoot guide. The table below presents the problems that you may run into while using the device, and proposes what to do to eliminate them yourself. KH Keeper Manual 34 36...
- Page 35 Pour water into the beaker about half its height (approx. 50 ml), and then start the stirrer. KH Keeper Manual 35 36...
- Page 36 Remember that the purchased reagent is concentrated and requires mixing with RO water. Additional and most up-to-date information about the operation and configuration of the device can be found on our website www.reeffactory.com in the product sheet. KH Keeper Manual 36 36...
Need help?
Do you have a question about the kH keeper and is the answer not in the manual?
Questions and answers