Table of Contents
Advertisement
Quick Links
Viewing Test Results continued
Frequency tests
• Tests included are: VF/AC Balance, WB Balance, WB
Attenuation, Return Loss, Load Coils, Locator Tone, TX/
RX Tone and RX Tone with FED. Select an icon to run a
test, which then displays pass/fail status and detailed results
(except locator tone).
• WB Balance, WB Attenuation, Return Loss Sweep, Load
Coils, and RX Multiple Tone with FED display results in
graphical format. For WB Balance, you can view the graph in
portrait /landscape mode. The Select Graph button opens a new
selection of function keys which allow you to maneuver the graph.
• Threshold Settings can be set within each test that provide a
pass/fail status.
TDR
The TDR test locates cable faults and displays the reflections
and their distances, in text and graphical measurements, so
that you can find and resolve faults. Graphs can be displayed
in either Portrait or Landscape mode, and a Cursor / Marker
can be independently selected displaying the distance Δ (Delta)
value between them on the top-center of the graph.
There are 3 modes of operation:
• Auto TDR automatically determines the length of the cable,
finds the nearest significant event, and configures the
parameters, updating results in real time, until you stop the
test. Variable Gain automatically increases the amplitude
gain as distance increases on the graph. Options are:
Disabled / Enabled or Disabled / Enabled with Auto Scale.
• Manual TDR does not automate any function or settings and
gives you full control over TDR parameters such as Range,
Gain, VOP, and Pulse Width; also Current Trace, which is
only available in this mode.
• xTalk (crosstalk) TDR test allows you to detect and isolate split pairs or electrical dissimilarities
between tip (A) and ring (B) copper wires which may be causing service disruptions. The test
transmits on pair one and receives on pair two to locate the split pairs. A hookup diagram pops
up at the start of the test, showing you how to connect your cables.
RFL
• Single Pair test locates resistive faults between T-G/A-E, or R-G/B-E.
• Connect the strap to the far end of the wires connected to T/A and R/B.
• Separate Good Pair test determines the distance to a short, ground, or battery cross in a
faulty cable pair using a separate good cable pair.
• Connect a first strap to the far ends of the wires connected to
T1/A1 and T/A, and a second strap to the far ends of the wires
connected to T/A and R/B.
• RFL-K-Test locates faults on both conductors of one pair;
specialized for detecting double faults. One of the faults must
be greater in resistance than the fault on the other pair. When
FED is enabled, you can turn on Repeat Mode.
Auto test
The POTS Auto Test Summary page displays detailed results of
the loop current, power influence and voice frequency measurement
values, pass/fail status, and parameters of the POTS Auto Test.
• Threshold Settings button allows you to set values for Loop DC
Current, Loss, Power Influence, VF Noise and VF/AC Balance.
The User Auto Test Summary page displays the overall status
of the tests selected.
• Test Selection button allows you to select the test types to include.
• Results are displayed for the following test groups: Multimeter, Noise, Frequency, TDR and
DRP. Saved Results can be uploaded to an FTP site or USB.
System settings
• Display and Language provides the setup for backlight,
information on the title bar, language choice, Touchscreen
Calibration and enabling screenshots. The Remote
Display tab allows you to connect the 6100-Cu to your
computer remotely.
• Date and Time sets the date, time, their formats and time
zone.
• Battery Info displays battery status and power schemes
including Power Save Mode.
• Software Options lists all the Configured Options
present on the unit.
• Information shows hardware/software/product information.
• Upload Setup allows you to enable uploading to an FTP
server using Wi-Fi or Ethernet.
Working with the keypad
To access and modify on screen parameters:
Use the arrow keys to select an on-screen item then
press
.
To activate function buttons:
Press the key below the desired Function
button
Back
Home and Help key
Enter
A quick press and release acts as Home.
Power
Holding for 2 or more seconds activates
the onboard help or screenshot capture
Arrow keys
Start / Stop test
Note: Any reference to pushing buttons on the keypad can be replaced in most cases by
clicking / tapping the touchscreen.
Charging the battery
Plug in the power adaptor (9 V, 1.66 A) and wait up to 6-8 hours to completely charge the
battery or until the Battery Status displays 100 %.
To view the battery status:
1. From the Home pane, select System Settings and press
2. Select the Battery Info icon and press
. Battery Status indicates the current power
level for the battery, as a percentage.
Visit www.radiodetection.com
Radiodetection Ltd. (UK)
Western Drive, Bristol, BS14 0AF, UK Tel: +44 (0) 117 976 7776 rd.sales.uk@spx.com
Radiodetection (USA)
28 Tower Road, Raymond, Maine 04071, USA
Toll Free: +1 (877) 247 3797 Tel: +1 (207) 655 8525 rd.sales.us@spx.com
Follow us on:
Copyright © 2020 Radiodetection Ltd. All rights reserved. Radiodetection is a subsidiary of SPX Corporation.
Radiodetection and 6100 are trademarks of Radiodetection Ltd. Due to a policy of continued development, we
reserve the right to alter or amend any published specification without notice. This document may not be copied,
reproduced, transmitted, modified or used, in whole or in part, without the prior written consent of Radiodetection Ltd.
90/UG-6100-CU-ENG/01
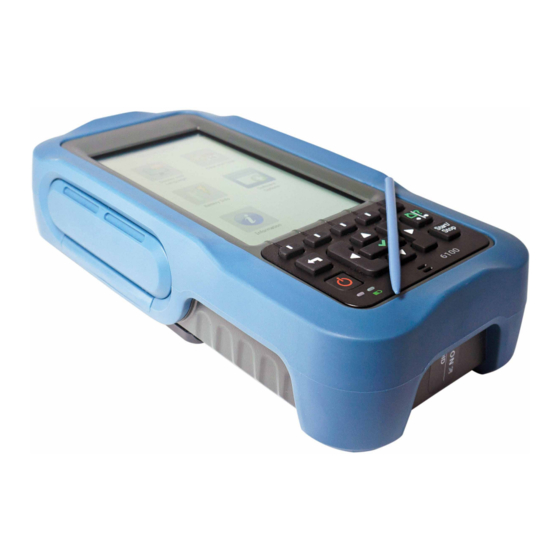
6100-Cu
Multifunction Phone Network Analyzer and Copper Tester
User guide
Radiodetection's 6100-Cu is a handheld device designed to qualify and troubleshoot
copper-loop plant using pass/fail-driven automated functionalities.
Cable connections
Primary Tip/A and Ring/B connectors
Note: To ensure optimal performance, run Test Lead Compensation on a regular basis.
Copper main menu
To access the Copper Main Menu:
1. From Home, select Copper Test and press
open the Copper Main menu page.
2. Navigate to each icon using the up / down left / right
arrow keys on the keypad.
3. Press to run a test, bring up the sub-menu, or perform
the application of the selected icon.
• Test Configuration provides the utilities to setup
test parameters.
• Setup allows you to configure parameters common
.
to all tests.
• Dialer allows you to place POTS calls using the unit
as a telephone (with the built-in speaker or external
headset) and the on-screen phone keypad as a
dialer. If FED option is enabled, the Dialer icon will
appear in the Multimeter menu.
• FED Control is an optional feature. If enabled, the icon appears on the Copper Main
page. The feature tells the test set to detect and control the Teletech TS125 or Viavi
UltraFEDTM IIB remote FED (far end device) during testing.
• Result Manager allows you to view, Upload, Export and Delete any of your previously
saved test results.
Note: System Settings can be found on the Home pane and allow you to set the
parameters of the unit.
This guide is intended as a quick reference guide only. For detailed instructions, including
the use of accessories, please refer to the 6100-Cu Operation manual, which is available to
download from www.radiodetection.com.
WAN port
Secondary Tip/A and Ring/B connectors
Ground / Earth
Terminal
to
Advertisement
Table of Contents

Related Manuals for SPX Radiodetection 6100-Cu


Summary of Contents for SPX Radiodetection 6100-Cu
- Page 1 Copyright © 2020 Radiodetection Ltd. All rights reserved. Radiodetection is a subsidiary of SPX Corporation. This guide is intended as a quick reference guide only. For detailed instructions, including • Test Selection button allows you to select the test types to include.
- Page 2 Setting up tests Running tests Viewing Test Results Once a test has run, the results obtained are displayed on To setup the Dialer function: To run a test: the screen. 1. From the Copper Main or Multimeter (if FED option From the Copper Main pane, select the desired test icon and sub-menu icon in the case of enabled) menu, select Dialer and press Multimeter, Noise and Frequency Tests, TDR and Auto Test, and press...
Need help?
Do you have a question about the Radiodetection 6100-Cu and is the answer not in the manual?
Questions and answers