Table of Contents
Advertisement
Advertisement
Table of Contents

Summary of Contents for Nice FIBARO YH-001
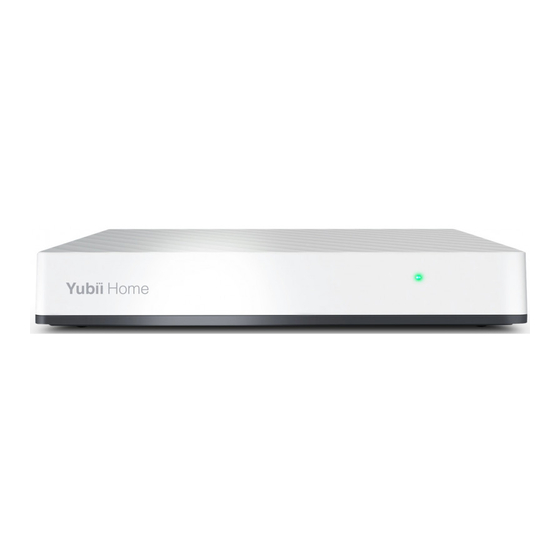
- Page 1 USER MANUAL YH-001 HC3-001 HC3L-001 v1.0...
-
Page 3: Table Of Contents
TABLE OF CONTENTS 1: Important safety information 2: Installation 2.1: Connecting the gateway using Wi-Fi 2.2: Accessing configuration interface 3: Adding Z-Wave™ devices 3.1: Adding using Inclusion Mode 3.2: Adding using SmartStart 4: Removing Z-Wave devices 4.1: Removing devices using Exclusion Mode 4.2: Removing failed nodes 5: Managing Provisioning List 5.1: Adding devices to Provisioning List... - Page 4 11: Updating firmware 11.1: Updating firmware of gateway 11.2: Updating firmware of Z-Wave devices 12: Z-Wave specification 12.1: Supported command classes 12.2: Controlled command classes 12.3: Basic Command Class 12.4: Security Command Class 12.5: Association Command Class 12.6: Indicator Command Class...
-
Page 5: 1: Important Safety Information
1: IMPORTANT SAFETY INFORMATION Read this manual carefully before installing and operating the product. Warning! • The manufacturer will not be held responsible for any loss or damage resulting from not following the instructions. Store this manual in a secure place for future reference. •... -
Page 6: 2: Installation
2: INSTALLATION 2.1: CONNECTING THE GATEWAY USING WI-FI 1. Plug the provided power adapter into an outlet and connect it to the gateway. 2. The gateway will turn on, wait for the indicator to turn solid red. 3. Connect your computer to Wi-Fi network created by the gateway. You will find Wi-Fi SSID (name) and password on the bottom of the device. -
Page 7: 3: Adding Z-Wave™ Devices
3: ADDING Z-WAVE™ DEVICES 3.1: ADDING USING INCLUSION MODE To add the device to the Z-Wave network manually: 1. Open the Configuration Interface. 2. Go to > Devices. 3. Click 4. Select Z-Wave Device. 5. There are few available settings: •... -
Page 8: Adding Using Smartstart
3.2: ADDING USING SMARTSTART SmartStart enabled devices can be added into a Z-Wave network by entering the Z-Wave DSK Code present on the product. The devices will be automatically added to the Z-Wave network using secure connection encrypted with Z-Wave S2 security framework. To add the device to the Z-Wave network using SmartStart: 1. -
Page 9: 4: Removing Z-Wave Devices
4: REMOVING Z-WAVE DEVICES 4.1: REMOVING DEVICES USING EXCLUSION MODE To remove the device from the this or other Z-Wave network: 1. Open the Configuration Interface. 2. Go to > Devices. 3. Click 4. Select Z-Wave Device. 5. Follow removing procedure on the device (according to its manual). 4.2: REMOVING FAILED NODES To remove the device from the Z-Wave network if it is not responding: 1. -
Page 10: 5: Managing Provisioning List
5: MANAGING PROVISIONING LIST The Provision List is used to add Z-Wave devices using SmartStart or bootstrap classic S2 inclusion. 5.1: ADDING DEVICES TO PROVISIONING LIST 1. Open the Configuration Interface. 2. Go to > Z-Wave > Smart Start. 3. Click DSK. -
Page 11: 6: Managing Devices
6: MANAGING DEVICES 6.1: CONTROLLING AND CHECKING STATE OF DEVICES You can control the device and check its last known state using Dashboard. 1. Open the Configuration Interface. 2. Go to 3. You will see list of all devices and their status. 4. -
Page 12: Viewing Events History
6.4: VIEWING EVENTS HISTORY Using History panel you can check all events in the system, like: changes in statuses of devices, activated scenes and notifications. 1. Open the Configuration Interface. 2. Go to 3. You will see full history of your system. 6.5: PERFORMING ACTIONS ON DEVICES WITH SPECIFIC COMMAND CLASSES Basic... - Page 13 • Click – start enhancing component, • Click – start fading component, • Click – stop enhancing/fading component. Door Lock In the Dashboard , click on device tile, then on the displayed side- bar you will see the last known state and you will be able to: •...
- Page 14 • Click MUTE – mute the sound switch, • Click – unmute the sound switch, UNMUTE • Change Volume slider position – set new volume. In the Device Settings ( > Devices), click the device to expand it and go to Advanced tab.
-
Page 15: 7: Z-Wave Associations
7: Z-WAVE ASSOCIATIONS Associations allow devices to control other devices directly within the Z-Wave network without the participation of the gateway. Devices such can continue to work and operate selected devices even when the gateway is damaged or turned off (in case of a fire, flood, or system malfunction). -
Page 16: 8: Rediscovering Z-Wave Devices
8: REDISCOVERING Z-WAVE DEVICES Rediscovery – the process of reading the device’s capabilities after alter- ing them. 1. Open the Configuration Interface. 2. Go to > Devices. 3. Click the device to expand it. 4. Go to tab. Device configuration 5. -
Page 17: 9: Connecting With Existing Z-Wave Network
9: CONNECTING WITH EXISTING Z-WAVE NETWORK 9.1: ADDING/REMOVING TO/FROM EXISTING Z-WAVE NETWORK This gateway can be added to an existing Z-Wave network only if no Z-Wave devices are added to it. 1. Start adding/removing procedure on the primary controller (according to its manual). -
Page 18: Dsk And Pin
9.3: DSK AND PIN In case you need full DSK or PIN code of the gateway you will find it on the device or on the box: Gateway Full DSK Label under Label under HC3-001 Label under box device (underlined) device HC3L-001 Label under... -
Page 19: 10: Resetting To Factory Defaults
10: RESETTING TO FACTORY DEFAULTS 10.1: RESETTING SYSTEM TO FACTORY DEFAULTS Caution! The whole configuration will be removed and lost if not backed up. This feature allows you to restore the whole system to factory settings. It means the factory software version will be restored and all data from the system A and B will be deleted (users, devices, scenes etc.). -
Page 20: 11: Updating Firmware
11: UPDATING FIRMWARE 11.1: UPDATING FIRMWARE OF GATEWAY 1. Open the Configuration Interface. 2. Go to > Update > Home Center. 3. Click Download Update for the respective update. 4. Wait for the update to be downloaded. 5. Determine whether you want to do the cloud backup, local backup or no backups before the update. -
Page 21: 12: Z-Wave Specification
12: Z-WAVE SPECIFICATION This product can be operated in any Z-Wave network with other Z-Wave certified devices from other manufacturers. All mains operated nodes within the network will act as repeaters regardless of vendor to increase reliability of the network. 12.1: SUPPORTED COMMAND CLASSES Command Class Version Secure... -
Page 22: Controlled Command Classes
12.2: CONTROLLED COMMAND CLASSES Command Class Version COMMAND_CLASS_SENSOR_ALARM [0x9C] COMMAND_CLASS_BASIC [0x20] COMMAND_CLASS_SENSOR_BINARY [0x30] COMMAND_CLASS_SWITCH_BINARY [0x25] COMMAND_CLASS_CENTRAL_SCENE [0x5B] COMMAND_CLASS_CLOCK [0x81] COMMAND_CLASS_SWITCH_COLOR [0x33] COMMAND_CLASS_DOOR_LOCK [0x62] COMMAND_CLASS_METER [0x32] COMMAND_CLASS_SENSOR_MULTILEVEL [0x31] COMMAND_CLASS_SWITCH_MULTILEVEL [0x26] COMMAND_CLASS_NOTIFICATION [0x71] COMMAND_CLASS_PROTECTION [0x75] COMMAND_CLASS_SCENE_ACTIVATION [0x2B] COMMAND_CLASS_SOUND_SWITCH [0x79] COMMAND_CLASS_THERMOSTAT_FAN_MODE [0x44] COMMAND_CLASS_THERMOSTAT_FAN_STATE [0x45] COMMAND_CLASS_THERMOSTAT_MODE [0x40] COMMAND_CLASS_THERMOSTAT_OPERATING_STATE [0x42] COMMAND_CLASS_THERMOSTAT_OPERATING_STATE [0x42]... -
Page 23: Basic Command Class
12.3: BASIC COMMAND CLASS The gateway does not map the Basic Command Class to any functionali- ty and it ignores Basic Get request. 12.4: SECURITY COMMAND CLASS The gateway is a security-enabled device and supports S0, S2 Unauthen- ticated, S2 Authenticated and S2 Access Control mode. Added devices must also support the specific security mode to utilize this feature and provide encrypted communication. -
Page 24: Indicator Command Class
12.6: INDICATOR COMMAND CLASS Indicator CC - available indicators Indicator ID – 0x50 (Identify) Indicator CC - available properties Property Description Values and requirements Starts toggling between ON and OFF Used to set the duration of an On/Off period. Available values: 0x03 On/Off Periods •...
Need help?
Do you have a question about the FIBARO YH-001 and is the answer not in the manual?
Questions and answers