Table of Contents
Advertisement
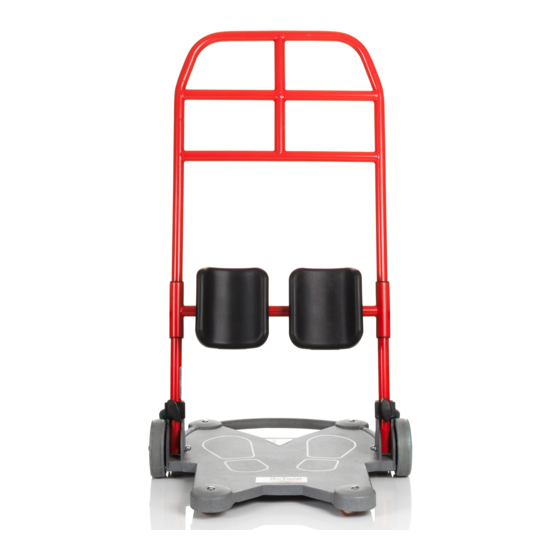
ReTurn7500
SystemRoMedic
TM
ReTurn7400
SystemRoMedic
TM
ReTurn7500, with
opening for ReTurnBelt
Functional inspection
Visual inspection
Check the condition and function of the product regularly. Check to ensure that material is free from damage. If there are
signs of wear, the product must be inspected and serviced.
Always read the manual
Always read the manuals for all assistive devices used during a transfer.
Keep the manual where it is accessible to users of the product.
Do not leave the patient unattended during a transfer situation.
The product should be inspected yearly, and otherwise as required, by a qualified technician. Service must be performed
by a qualified technician.
Manual no: 787 En Ver. 8 150615
ReTurn7500
Service manual - English
ReTurn7400
SWL: 150 kg/330 lbs
Art. no.
7500
7500i
7400
Advertisement
Chapters
Table of Contents

Related Manuals for Handicare ReTurn7500


Summary of Contents for Handicare ReTurn7500
- Page 1 SystemRoMedic ReTurn7400 Art. no. 7500 SystemRoMedic 7500i 7400 ReTurn7500, with ReTurn7500 ReTurn7400 opening for ReTurnBelt SWL: 150 kg/330 lbs Functional inspection Visual inspection Check the condition and function of the product regularly. Check to ensure that material is free from damage. If there are signs of wear, the product must be inspected and serviced.
-
Page 2: Table Of Contents
Table of contents Assembly ......................................General Exploded view ................Rising ladder and leg support with component list ........Chassie with component list ..............Spare parts ................... Spare part list ..................Replacing spare parts ................Periodic inspection ..............10-14 Detail descriptions for Periodic inspection ..........10 Periodic inspection, instruction ............11-14 Care of the product .................15 Technical specifications ................15... -
Page 3: Assembly
Assembly A. Push the rising ladder/tube down into the mounting fixture on the base plate, so that the height-adjustment buttons are facing towards the caregiver. Insert the wing handles and tighten. Check to ensure that the wing handles are securely tightened and that the ladder is solidly secured in to the base plate before using the ReTurn. -
Page 4: Exploded View
Exploded view - Rising ladder and leg support Title Art. nr Raising ladder 90001117 UNLESS OTHERWISE SPECIFIED: FINISH: DEBUR AND DO NOT SCALE DRAWING REVISION DIMENSIONS ARE IN MILLIMETERS BREAK SHARP SURFACE FINISH: EDGES TOLERANCES: LINEAR: ANGULAR: SIGNATURE DATE NAME TITLE: DRAWN I. -
Page 5: Chassie With Component List
Exploded view - Chassie Components Number Name Size Base plate Brake pedal left Brake shoe left Castors swirvel, LRA-POA 35 G Washer Ø16/Ø8,2x2 mm vit POM Washer Ø20/Ø10x9 mm svart POM Washer Ø16/Ø8,2x2 mm vit POM Screw MVBF Din 603 M8x30 fzb Screw K6S ISO 7380 M6x20... -
Page 6: Spare Parts
Spare parts - Spare part list Article no. Product Unit Components Images 7325 Castors 125mm 1 set 2 x Castor 125mm 2 x Distance washer 2 x Screw 2 x Locking nut 7325 7318-10 Brake pads red 1 set 10 x Brake pads red x 10 x 10 7318... -
Page 7: Spare Part List
Spare part list Article no. Product Unit Components Images 7334 Carriage bolt / washers 1 set 2 x Carriage bolt M8x35 2 x Teflon coated washer 4 x Steel washer 2 x Locking acorn nut DIN 986 2 x Washer black 7334 7335 Rising ladder 7500i... -
Page 8: Replacing Spare Parts
Replacing spare parts Centre wheel Loosen the nut and remove the screw. Install the new wheel, placing the washer between the wheel and the chassis. Insert the screw and secure it with the nut. Brakepads, red/green Remove the old brakepads and insert the new ones. Wing handles and stop for wing handles Unscrew the wing knobs and replace them with new ones. - Page 9 Swivel wheel Loosen the bolt underneath the swivel wheel, pull out the screw, and then replace all of the parts for the swivel wheel assembly. Secure the new swivel wheel with the through bolt from the upper side of the foot plate, with the washer and nut on the underside.
-
Page 10: Periodic Inspection
Periodic inspection Detail descriptions for Periodic inspection 1. Rising ladder Page 8 2. Wing handles Page 8 3. Base plate Page 8 4. Brakes (on fixed wheels) Page 9 5. Fixed castors 125mm and axles (2 pcs.) Page 9 6. Castor swirvel 35mm (4 pcs.) Page 10 7. -
Page 11: Periodic Inspection, Instruction
Periodic inspection, instruction Wing handles and catch for wing handles Check that the ladder is solidly secured in to the base plate. Loosen wing handles and release ladder from the base plate. Make sure the wing handles have no visible signs of wear such as damaged threads and/or that an axially grooved surface become visible on the screws attachment on the plastic knob/handle. -
Page 12: Brakes (On Fixed Wheels)
Brakes 1. Remedial measures to improve brake function: If braking effect is inadequate, the brake shoes can be switched; alternatively, a strip of anti-slip tape can be applied to the brake shoe to improve brake function. Anti-slip is available in two thicknesses: 0.9mm and 1.5mm. Name of spare part: Brake shoe anti-slip 0.9 mm, Art. -
Page 13: Castor Swirvel 35Mm (4 Pcs.)
3. To improve braking effect and prevent brake shoe from tipping automatically to braking position: If the brakes do not brake sufficiently and the brake pedal tips automatically to the braking position, the entire brake system should be replaced with a brake kit. This applies if it is not possible to remedy the problem by lightly tightening the nut. -
Page 14: Leg Support
Castor/castor swirvel Castor swirvel Castor swirvel Check to ensure that the castor wheel bolts are securely tightened Castor and that the castors (4 pcs.) rotate and swivel easily. If necessary, remove dirt and hair from wheels. Castor Castor swirvel Castor swirvel Leg support Check both parallel and horizontal adjustment. -
Page 15: Care Of The Product
• Do not use solvents. • To disinfect, use 70% alcohol. Technical specifications ReTurn7500/7500i/7400 ReTurn7500/7500i ReTurn7400 • Art.nr 7500 Complete ReTurn (5 pcs) • Art.nr 7500i Complete ReTurn (5 pcs) • Art.nr 7400 Complete ReTurn (5 pcs) •... - Page 16 Please contact your local Handicare and SystemRoMedic™ representative. A complete list of all our partners with their contact details can be found on our website; www.handicare.com. Handicare offers solutions and support to increase the independence of disabled or elderly people as well as to improve the convenience of those who are caring for them.
Need help?
Do you have a question about the ReTurn7500 and is the answer not in the manual?
Questions and answers