
Related Manuals for Bort BSS-1415-W


Summary of Contents for Bort BSS-1415-W
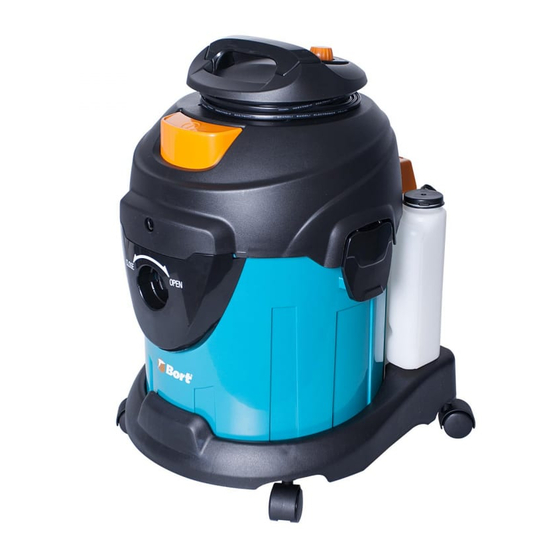
- Page 3 230 V 1400 2520 Blower 15 L 50 Hz L/min function and dry cleaning...
- Page 6 Caution 1. The vacuum has multi functions, please read the manual carefully before operating and select suitable accessories for different cleaning purposes. 2. Don’t leave when the vacuum is running. Please power off and take off the plug after the cleaning.
- Page 7 2. Hold the top hand, take off the floater frame as per direction instruction, check the floater frame, strainer, filter, floater bottom, HEPA and check whether all are fixed in right position. H EPA st r ai ner f l oat er f l oat er f r am e hol d t hi s pl ace sponge f i l t er...
- Page 8 3. Assemble the floater frame according to direction instruction. Put the top onto the water tank, fix the tank buckle. al i gn t he " open" l i ne hol d t hi s pl ace...
- Page 9 4. Insert the main hose adapter, rotate according to direction instruction and fix firmly. Then fix the front solution nozzle in anticlockwise. sol ut i on hol e 5. Connect two parts aluminum tubes together with the solution nozzles.
- Page 10 6. Connect the solution/water floor brush/solution nozzle with the aluminum tube/solution nozzle. 7. Release solution tank buckle and take off the solution tank. Read the solution IM and fill the solution and water in. sol ut i on t ank buckl e sol ut i on t ank cover...
- Page 11 9. Park the solution tank onto the vacuum bottom. sol ut i on t ank buckl e...
- Page 12 10. Plug and power on the vacuum first, then switch on solution pump. Power is adjustable. pow er on vacuum cl eaner f i r st pow er cont r ol but t on t hen st ar t sol ut i on pum p but t on...
- Page 13 11. When vacuuming, check if solution pump working, solution speed, floater protection, water/solution bubble level (no exceeding the MAX line) 12. Full solution tank can last 20-25 minutes working. Check often the solution level as per the tank scale. Power off the pump for 30 seconds before switching off the vacuum. st op vacuum cl eaner w or ki ng af t er 30 seconds st ut of sol ut i on pum p...
- Page 14 13. After vacuuming, take out the solution nozzles and solution tank for cleaning. sol ut i on hol e 14. Take out the top vacuum part, hold the handle and take off the floater frame. hol d t hi s pl ace 15.
- Page 15 H EPA st r ai ner f l oat er sponge f i l t er f l oat er f r am e f l oat er bot t om bow l 16. Once floater is sucked up to the top, power off the machine and clean the floater frame, filters and water tank before next use.
- Page 16 18. Clean away the balance solution after cleaning is finished. 19. Take off the rear blow window and clean the exhaust sponge filter. exhaust f i l t er cover exhaust f i l t er 20. Disassemble all the accessories from the machine after use. Clean and dry for next use. Rear blow function: Caution Don’t switch on solution pump to avoid pump overheating.
- Page 17 exhaust f i l t er cover 2. Fix the hose in. r ear bl ow w i ndow...
- Page 18 3. Plug and switch on the machine for blowing. pow er on bl ow pow er cont r ol but t on...
- Page 19 4. Take out the hose and fix the exhaust filter cover after use. r ear bl ow w i ndow exhaust f i l t er cover Wet & Dry vacuum caution 1. Don’t switch on solution pump. 2. Better take off the solution tank. 3.
- Page 20 Wet & Dry vacuum instruction: 1. Take out top vacuum part and fix the dust bag. 2. Hold the top hand, take off the floater frame as per direction instruction, check the floater frame, strainer, filter, floater bottom, HEPA and check whether all are fixed in right position. H EPA st r ai ner f l oat er...
- Page 21 sponge f i l t er f l oat er bot t om bow l 3. Assemble the floater frame according to direction instruction. Put the top onto the water tank, fix the tank buckle al i gn t he " open" l i ne hol d t hi s pl ace...
- Page 22 4. Connect the hose onto the vacuum main suction hole.
- Page 23 5. Connect two parts aluminum tubes with the ose. 6. Connect the floor brush with the tube.
- Page 24 7. Plug and switch on the machine. pow er on vacuum cl eaner pow er cont r ol but t on...
- Page 25 8. Take out the bag and clean the dust tank. 9. Clean and wash the tank. 10. Take out the HEPA, strainer and floater, take off the floater bottom anticlockwise. Clean the water in the floater bottom if any. Wash the sponge filter and HEPA, then dry in the sunshine for next use.
- Page 30 3,5 . 20-25 t ake out t he dust bag don' t put t he dust bag w hen use t he w ashi ng f unct i on.
- Page 31 H EPA st r ai ner f l oat er f l oat er f r am e hol d t hi s pl ace sponge f i l t er f l oat er bot t om bow l...
- Page 32 al i gn t he " open" l i ne hol d t hi s pl ace...
- Page 33 sol ut i on hol e...
- Page 34 . 30° ). sol ut i on t ank buckl e sol ut i on t ank cover...
- Page 35 sol ut i on t ank buckl e...
- Page 36 pow er on vacuum cl eaner f i r st pow er cont r ol but t on t hen st ar t sol ut i on pum p but t on 20-25...
- Page 37 st op vacuum cl eaner w or ki ng af t er 30 seconds st ut of sol ut i on pum p f i r st sol ut i on hol e...
- Page 38 hol d t hi s pl ace H EPA st r ai ner f l oat er sponge f i l t er f l oat er f r am e f l oat er bot t om bow l...
- Page 39 exhaust f i l t er cover exhaust f i l t er...
- Page 40 exhaust f i l t er cover r ear bl ow w i ndow...
- Page 41 pow er on bl ow pow er cont r ol but t on...
- Page 42 r ear bl ow w i ndow exhaust f i l t er cover...
- Page 43 H EPA st r ai ner f l oat er f l oat er f r am e hol d t hi s pl ace...
- Page 44 sponge f i l t er f l oat er bot t om bow l al i gn t he " open" l i ne hol d t hi s pl ace...
- Page 47 pow er on vacuum cl eaner pow er cont r ol but t on...
- Page 48 40¡ æ 40¡ æ m ax 40¡ æ m ax m ax 24hr...
Need help?
Do you have a question about the BSS-1415-W and is the answer not in the manual?
Questions and answers