Table of Contents
Advertisement
Quick Links
Advertisement
Table of Contents

Related Manuals for i3-TECHNOLOGIES i3SIXTY


Summary of Contents for i3-TECHNOLOGIES i3SIXTY
- Page 1 Admin Guide i3SIXTY...
- Page 2 i3SIXTY...
-
Page 3: Table Of Contents
Table of Contents Product Description ���������������������������������������������������������������������������������������������������������������������������4 Installation Guide ��������������������������������������������������������������������������������������������������������������������������������4 Usage Instructions ������������������������������������������������������������������������������������������������������������������������������5 i3SIXTY menu �����������������������������������������������������������������������������������������������������������������������������������������������������������������������������������������������������5 WHITEBOARDING ������������������������������������������������������������������������������������������������������������������������������������������������������������������������������������������������������������������������������������ ANNOTATING ����������������������������������������������������������������������������������������������������������������������������������������������������������������������������������������������������������������������������������������������10 BROWSING �����������������������������������������������������������������������������������������������������������������������������������������������������������������������������������������������������������������������������������������������������12 PRESENTING ������������������������������������������������������������������������������������������������������������������������������������������������������������������������������������������������������������������������������������������������ Receive Wired ������������������������������������������������������������������������������������������������������������������������������������������������������������������������������������������13 Receive Wireless ����������������������������������������������������������������������������������������������������������������������������������������������������������������������������������� Cast to ... �����������������������������������������������������������������������������������������������������������������������������������������������������������������������������������������������������������������17 CONFERENCING ������������������������������������������������������������������������������������������������������������������������������������������������������������������������������������������������������������������������������������ Administrator Settings �����������������������������������������������������������������������������������������������������������������19 Picture Settings ��������������������������������������������������������������������������������������������������������������������������������������������������������������������������������������������... -
Page 4: Product Description
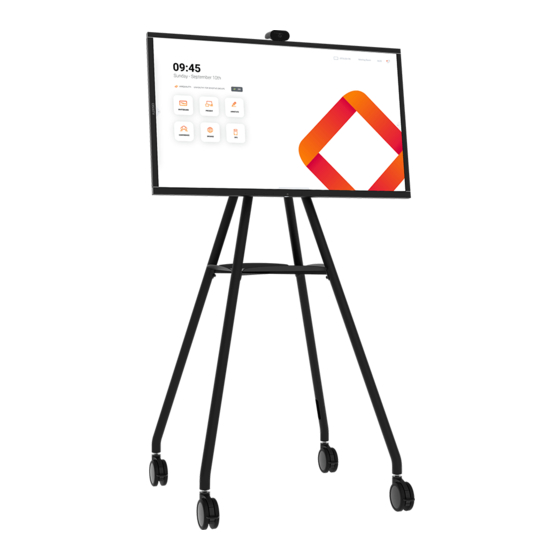
The i3SIXTY turns any area into a modern, easy-to-use collaborative workspace through the wheeled, mobile display with the most natural touch experience. Teams can move the i3SIXTY to any meeting environment and start collaborating with ease. The i3SIXTY offers a 90-degree rotation of the display, built-in camera, advanced whiteboarding, wireless presenting, included browser and support for various video conferencing applications. -
Page 5: Usage Instructions
2. Unfold the menu by pressing the button. 3. Close the menu by pressing the X when the menu is unfolded. Note: The contents of the i3SIXTY menu will look different based on the settings and preferences defined in the admin settings. WHITEBOARDING Initial Calibration Upon first start-up of the whiteboarding application, the i3SIXTY will ask to calibrate the four-finger erase gesture. - Page 6 You will be asked if you want to save/export your notes first, before closing. The whiteboard application is the main application of the i3SIXTY and thus can never be fully closed. Either the latest running application will open, or the whiteboard application will reset.
- Page 7 3 available mail options. Use i3NOTES This option will use the i3-Technologies mail service. Enter the email address to whom you want to send the PDF to. You can enter multiple email addressess separated by a space (" ").
- Page 8 Required: your network firewall will need to allow peer-to-peer connections. Use cloud The cloud option will export the PDF to the i3-Technologies cloud server and make it publicly available to download for everyone that scans the QR code. After 2 hours the PDF will automatically be removed from our server.
- Page 9 Active Capacitive Stylus The i3SIXTY Active Capacitive Stylus will always write with black digital, pressure sensitive ink. This is not amendable. We want you to always be able to take the pen to make a quick note, and have it behave how you’d expect (and not some weird color or size setting that your colleague applied).
-
Page 10: Annotating
This option will provide the user with a cropping view. The user can position and resize the rectangle exactly to the area he wants to screen- shot. At the bottom there will be 2 buttons, to cancel the cropping and to submit and send it to the whiteboard application. i3SIXTY... - Page 11 Pointer The pointer option enables the user to interact with the device without needing to close the annotate application. This will hide the current notes but they will not be deleted, they will be temporally saved in the background. i3SIXTY...
-
Page 12: Browsing
Active Capacitive Stylus The i3SIXTY Active Capacitive Stylus will always write with black digital, pressure sensitive ink. This is not amendable. We want you to always be able to take the pen to make a quick annotation, and have it behave how you’d expect (and not some weird color or size setting that your colleague applied). -
Page 13: Presenting
Receive Wired Pressing the "Receive Wired" tool button in the i3SIXTY menu will open and display the HDMI input source. Connect a HDMI-capable video source with HDMI cable to the back of the i3SIXTY to display the media on- screen. -
Page 14: Receive Wireless
(guests) that can’t or won’t install the client software. Once the i3ALLSYNC HDMI Transmitter is paired only once with the i3SIXTY, you only need to plug in the HDMI and USB cable and press the button to imediately share the HDMI content on-screen. - Page 15 CLOSED: Allows anyone to connect via i3ALLSYNC to the i3SIXTY, however, the controls to display the screen content are on the i3SIXTY. A connected user is standby in the background, until the screen con- tent is activated through the List button.
- Page 16 Press this button to stop the shared content from all connections Start Annotating Press this button to start the annotating function of the i3SIXTY. (This button behaves exactly as the Anno- tate button in the i3SIXTY menu). List all connections Available only in the CLOSED Meeting Mode.
-
Page 17: Cast
Cast to... button. This allows you to keep using the i3SIXTY, while also having the screen content directly shown on a bigger display. -
Page 18: Conferencing
CONFERENCING By default, the i3SIXTY comes pre-installed with ZOOM Video Conferencing software. Join an existing ZOOM meeting by pressing "Join a Meeting" and enter the meeting code. More information about the software can be found at https://zoom.us. i3SIXTY... -
Page 19: Administrator Settings
Cast The "Cast" button controls the appearance of the "Cast to ..." button in the i3SIXTY Menu. The default state of this button is hidden since it has no use when no i3HUDDLE or i3TOUCH is paired. Enable after pairing to at least one device in "Cast Settings". - Page 20 Suggestion for IT administrator: Enable the File Explorer to install a preferred 3th party Conference application, but disable and hide from the i3SIXTY menu after admin configuration. The File Explorer does not provide useful features for users or guests. i3SIXTY...
- Page 21 Long hold menu is disabled by default and 4 finger erase is enabled if you did the required calibration. If you enable a gesture that hasn’t be calibrated yet you will be requested to calibrate it in order to use it. i3SIXTY...
- Page 22 These settings are used to manually recalibrate the gestures, normally you shouldn’t need to use these settings. These values are used for 4 finger erase gestures. You can also use the RECALIBRATE button to go through the calibration process again. Security Enable or disable an administrator password requirement to enter the settings menu. i3SIXTY...
-
Page 23: Picture Settings
Control the back light of the LCD display. (Only available on User Picture Mode) Zoom Mode Set the preferred screen ratio of the wired HDMI video input sources. (Only applies to HDMI input) (Only available on User Picture Mode) Color Temperature Set the color temperature of the display. i3SIXTY... -
Page 24: Sound Settings
Sound Settings Sound Mode Optimize the sound mode with pre-configured equalizer settings. Equalizer Manually adjust the sound equalizer settings. (Only applies in User Sound Mode) i3SIXTY... -
Page 25: Network Settings
Network Settings Wired Set up Ethernet connection. Wi-Fi Set up Wi-Fi connection. Wi-Fi Hotspot Configure a Wi-Fi Hotspot. Network Info Display the network information for the current connection. i3SIXTY... -
Page 26: Intelligence Settings
Intelligence Settings Sleep Time Configure the automatic shut down time. The i3SIXTY will automatically power down each day at the speci- fied time. Boot Time Configure the automatic turn on time. The i3SIXTY will automatically start each day at the specified time. -
Page 27: System Settings
System Settings Default Input Select the default input source the i3SIXTY should display after start-up. Default = i3SIXTY. Change to the HDMI source if you have a fixed HDMI device connected that needs to be displayed by default. AppManager Modify settings of installed applications. -
Page 28: About
View the device information of your i3SIXTY device. Please provide this information when you’re contacting your i3 support contact. Local Name Change the local device name of your i3SIXTY device. This is particularly useful if you operate multiple i3SIXTY units in a network environment. Identify each unit with a unique name. Restore Restore the i3SIXTY back to the settings and state of the manufacturer. - Page 29 i3SIXTY...
Need help?
Do you have a question about the i3SIXTY and is the answer not in the manual?
Questions and answers