
Subscribe to Our Youtube Channel
Related Manuals for Bissell EV675


Summary of Contents for Bissell EV675
- Page 1 EV675 Robotic Vacuum 2601N USER GUIDE BENUTZERHANDBUCH GUÍA DEL USUARIO MANUEL DE L’UTILISATEUR GUIDA PER L’UTENTE...
-
Page 2: Safety Instructions
IMPORTANT SAFETY INSTRUCTIONS READ ALL INSTRUCTIONS BEFORE USING YOUR APPLIANCE. When using an electrical appliance, basic precautions should be observed, including the following: WARNING » Do not use with damaged cable or charger. If appliance is not working as it should, has been TO REDUCE THE RISK OF FIRE, ELECTRIC SHOCK OR INJURY: dropped, damaged, left outdoors, or dropped into »... -
Page 3: Table Of Contents
» Do not pick up toxic material (chlorine bleach, ammonia, drain cleaner, etc.). » Do not pick up anything that is burning or smoking, such as cigarettes, » Do not use appliance in an enclosed space filled with vapours given matches or hot ashes. -
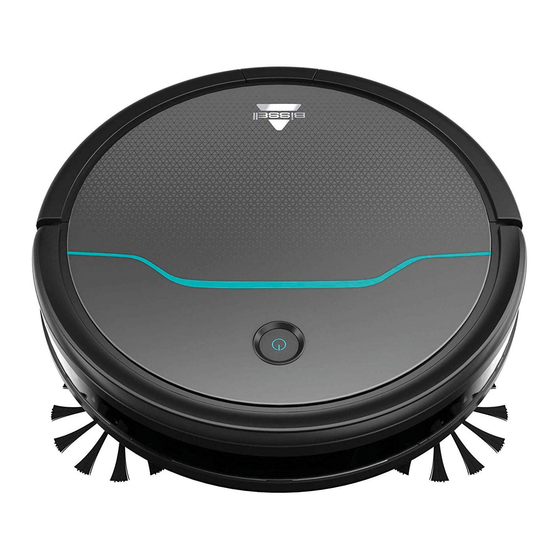
Page 4: Product View
Package Contents Product View Brush Roll 2. Cliff Sensors 3. Contact Points (for automatic charging) 4. Removable Battery Setting Up Your Robot 100cm 100cm 200cm Turn power ON and put on the Docking Place the Docking Station away from Station. The first charge will take 4-5 obstructions. - Page 5 Setting Up the Remote Control Pair the Remote to the Robot NOTE: Be sure to install batteries in the remote. Continue to hold the Play Button and While the Power Switch on the side of the turn the robot ON (I). robot is OFF (0), press and hold the Play Button on the remote for 5 seconds until NOTE: The robot will beep three times to...
- Page 6 Getting Ready to Clean With Remote Control NOTE: Be sure the Power Switch on the Robot is set to the ON position. You can change the cleaning pattern of the robot by pressing one of the following buttons: Auto Mode Robot will drive in a straight path until it encounters an obstacle and change direction.
-
Page 7: Maintenance
Maintenance Open filter door by pulling both sides Press the button on top of the Dust Bin apart. Empty the debris from the Dust Bin. and pull to remove. Remove the filter cover, followed by the Use the Cleaning Tool to brush the filter Foam and Pleated Filters. -
Page 8: Troubleshooting
Replacing the Battery Connect the new battery and install into Turn the Power Switch to the OFF position. Use a Phillips-head screwdriver to remove battery compartment. Use a Phillips- the two screws and battery cover. Remove head screwdriver to replace the battery cover. - Page 9 Status Light and Error Notifications Status Light Color Status Breathing Blue Charging Power Light Off Robot fully charged Solid Blue Cleaning Flashing Blue Returning to Docking Station Flashing Red Error: Check Cliff Sensors, Battery Power Low, Robot is Trapped Error: Check Wheels, Edge Cleaning Brushes, Brush Roll, and Bumper Solid Red Status Error Notification...
-
Page 10: Guarantee
Consumer Guarantee This guarantee only applies outside of the USA and Canada. It is provided by If your product is replaced by BISSELL under this guarantee, the new item will BISSELL International Trading Company B.V. (“BISSELL”). benefit from the remainder of the term of this guarantee (calculated from the date of the original purchase). - Page 11 WICHTIGE SICHERHEITSANWEISUNGEN LESEN SIE VOR EINSATZ IHRES GERÄTES ALLE ANWEISUNGEN. Bei der Nutzung eines elektrischen Gerätes sollten grundsätzliche Vorkehrungen getroffen werden; dies beinhaltet Folgendes: WARNUNG gewartet wird, und wenn Ihr Gerät ein Zubehörteil mit sich bewegender Bürste umfasst. UM DAS RISIKO EINES FEUERS, ELEKTRISCHEN SCHOCKS »...
- Page 12 » Befolgen Sie alle Ladeanweisungen und laden Sie das Gerät nicht » Seien Sie beim Reinigen von Stufen besonders vorsichtig. » Benutzen Sie es nicht, um entflamm- oder brennbare Flüssigkeiten außerhalb des in den Anweisungen festgelegten Temperaturbereichs. Unsachgemäßes Laden oder Temperaturen außerhalb des wie Petroleum aufzunehmen oder in Bereichen, wo jene Flüssigkeiten festgelegten Bereichs können die Batterie beschädigen und das Risiko vorkommen können.
- Page 13 Verpackungsinhalt Produktübersicht Bürstenwalze 2. Absturzsensoren 3. Kontaktpunkte (für automatisches Aufladen) 4. Herausnehmbare Batterie Einrichtung Ihres Roboters 100cm 100cm 200cm Platzieren Sie die Docking-Station an einem Schalten Sie das Gerät EIN und setzen Sie Ort, in dessen Nähe sich keine Hindernisse es auf die Docking-Station.
- Page 14 Fernbedienung einrichten Fernbedienung mit dem Roboter koppeln HINWEIS: Bitte unbedingt Batterien in die Fernbedienung einsetzen. Setzen Sie den Betriebsschalter seitlich am Halten Sie die Start-Taste weiterhin gedrückt Roboter auf AUS (0). Halten Sie dann die Start- und schalten Sie den Roboter EIN (I). Taste auf der Fernbedienung 5 Sekunden lang HINWEIS: Der Roboter gibt nach erfolgreicher gedrückt, bis auf der Anzeige das Uhr-Symbol...
- Page 15 Vorbereitung auf die Reinigung Mit der Fernbedienung HINWEIS: Bitte stellen Sie sicher, dass der Betriebsschalter des Roboters sich in der EIN- Position befindet. Sie können das Reinigungsmuster des Roboters durch Drücken einer der folgenden Tasten ändern: Auto-Modus Der Roboter fährt geradeaus, bis er auf ein Hindernis trifft und die Richtung ändert.
- Page 16 Instandhaltung Filtertür durch Ziehen an beiden Seiten öffnen. Die Taste oben am Staubbehälter drücken Staubbehälter leeren. und zum Abnehmen ziehen. Die Filterabdeckung und die Filter mit dem Filterabdeckung abnehmen und danach Reinigungswerkzeug abbürsten. Filter nicht Schaum- und Faltenfilter herausnehmen. waschen. Filter und Filterabdeckung wieder ein- bzw.
- Page 17 Batterie austauschen Setzen Sie den Betriebsschalter in die Setzen Sie die neue Batterie in das AUS-Position. Entfernen Sie mit einem Batteriefach ein. Setzen Sie die Abdeckung des Batteriefachs wieder auf und Kreuzschlitzschraubendreher die beiden Schrauben des Batteriefachs und nehmen Sie ziehen Sie die Schrauben mit einem Kreuzschlitzschraubendreher fest.
- Page 18 Statuslicht und Fehlermeldungen Farbe des Statuslichts Status Blau verschwommen Lade- Betriebsanzeige Aus Roboter voll aufgeladen Blau permanent Reinigung Blau blinkend Rückkehr zur Docking-Station Rot blinkend Fehler: Absturzsensoren überprüfen, niedriger Batteriestand, Roboter eingeschlossen. Rot permanent Fehler: Räder, Randbürsten, Bürstenwalze und Stoßfänger überprüfen Farbe des Fehlermeldungen Mögliche Ursachen...
- Page 19 Kundengarantie Diese Garantie gilt nur außerhalb der USA und Kanada. Sie wird durch BISSELL Datum des Erstkaufs). Der Zeitraum dieser Garantie wird nicht verlängert, ungeachtet, ob International Trading Company B.V. („BISSELL“) bereitgestellt. Diese Garantie wird durch Ihr Produkt repariert oder ersetzt wurde.
- Page 20 INSTRUCCIONES DE SEGURIDAD IMPORTANTES LEE TODAS LAS INSTRUCCIONES ANTES DE UTILIZAR EL APARATO. Al utilizar un aparato eléctrico, se debe tomar una serie de precauciones básicas, incluidas las siguientes: ADVERTENCIA accesorio, debes desenchufarlo antes de conectar o desconectar dicha herramienta. PARA REDUCIR EL RIESGO DE INCENDIO, DESCARGA »...
- Page 21 » La película de plástico puede ser peligrosa. Para evitar el riesgo de » No la uses para aspirar sustancias tóxicas (lejía con cloro, amoniaco, asfixia, procura mantenerla fuera del alcance de los niños. limpiatuberías, etc.). » Utilízala solo como se indica en la guía del usuario. »...
- Page 22 Contenido del paquete Vista del producto Cepillo cilíndrico 2. Sensores de desnivel 3. Puntos de contacto (para la carga automática) 4. Batería extraíble Cómo configurar el robot 100cm 100cm 200cm Encienda el equipo y póngalo en la base de Coloque la base de carga lejos de carga.
- Page 23 Configuración del control remoto Emparejar el control remoto con el robot NOTA: Asegúrese de colocar pilas en el control remoto. Cuando el botón de encendido del lateral Siga pulsando el botón de ejecución y del robot esté apagado, OFF (0), mantenga encienda el robot con la opción ON (I).
- Page 24 Preparación para limpiar Con control remoto NOTA: Asegúrese de que el botón de encendido del robot está en la posición ON. Puede cambiar el patrón de limpieza del robot si pulsa uno de los siguientes botones: Modo automático El robot se moverá por una trayectoria recta hasta que se encuentre un obstáculo y cambie de dirección.
- Page 25 Mantenimiento Abra la puerta del filtro tirando de ambos Pulse el botón en la parte superior del lados. Quite los residuos del depósito de polvo. depósito de polvo y tire de él para retirarlo. Retire la tapa del filtro, seguido del filtro de Utilice la herramienta de limpieza para cepillar la tapa del filtro y los filtros.
- Page 26 Sustitución de la batería Conecte la batería nueva e instálela en Ponga el interruptor de alimentación en la posición de apagado (OFF). Utilice un el compartimento de la batería. Use un destornillador Phillips para quitar los dos destornillador Phillips para volver a colocar la tapa de la batería.
- Page 27 Luz de estado y avisos de fallo Color de la luz de estado Estado Azul con parpadeo suave Cargando Luz de encendido Robot completamente cargado apagada Azul fija Limpieza Azul parpadeante Vuelta a la base de carga Rojo parpadeante Error: compruebe sensores de bordes, batería baja, el robot está atrapado Error: compruebe las ruedas, los cepillos de limpieza de rincones, el cepillo cilíndrico y el Roja fija parachoques...
- Page 28 CL: www.BISSELL.cl/contactenos ES: www.BISSELL.es/contacto Visita el sitio web de BISSELL: www.BISSELL.eu Cuando te pongas en contacto con BISSELL, ten a mano el número de modelo del producto. Anota el número de modelo: Anota la fecha de compra: NOTA: Guarda el recibo de la compra original. Te servirá para acreditar la fecha de la adquisición en caso de tener que reclamar la Garantía.
- Page 29 CONSIGNES DE SÉCURITÉ IMPORTANTES LISEZ ATTENTIVEMENT TOUTES LES INSTRUCTIONS AVANT D’UTILISER VOTRE APPAREIL. Lors de l’utilisation de tout appareil électrique, des précautions élémentaires doivent être respectées, notamment les suivantes: AVERTISSEMENT lorsque vous ne l’utilisez pas, avant de procéder au nettoyage, à l’entretien ou la maintenance de POUR RÉDUIRE LE RISQUE D’INCENDIE, D’ÉLECTROCUTION l’appareil, et s’il est doté...
- Page 30 » Suivez toutes les instructions de chargement et ne chargez pas » N’utilisez pas l’appareil si l'une des ouvertures est obstruée ; nettoyez la l’appareil en dehors de la plage de température spécifiée dans les poussière, les peluches, les cheveux ou tout autre matériau susceptible instructions.
- Page 31 Contenu de l'emballage Vue du produit Rouleau brosse 2. Capteurs de vide 3. Points de contact (pour le chargement automatique) 4. Batterie amovible Paramétrer votre robot 100cm 100cm 200cm Appuyer sur le bouton ON et placer le Placer votre station d'accueil à l'écart robot sur la station d'accueil.
- Page 32 Paramétrer la télécommande Appairer la télécommande avec le robot REMARQUE : vérifier que vous avez inséré des piles dans la télécommande. Continuer d'appuyer sur la touche lecture Avec l'interrupteur d'alimentation du et allumer le robot en appuyant sur ON (I). robot en position OFF(0), appuyer et maintenir appuyée la touche lecture de la REMARQUE : le robot émet trois bips télécommande pendant 5 secondes jusqu'à...
- Page 33 Préparation au nettoyage À l'aide de la télécommande REMARQUE : S'assurer que le bouton d'alimentation du robot est en position ON. Vous pouvez modifier le mode de nettoyage du robot en appuyant sur l'un des boutons suivants : Mode automatique Le robot avance tout droit jusqu'à ce qu'il rencontre un obstacle et change de direction.
- Page 34 Maintenance Appuyer sur le bouton situé au-dessus Ouvrir la porte des filtres en tirant sur les du réservoir de poussière et tirer pour deux côtés. Vider les débris contenus dans l'enlever. le réservoir de poussière. Utiliser l'outil de nettoyage pour brosser le couvercle du filtre et les filtres.
- Page 35 Remplacer la batterie Brancher la nouvelle batterie et l'installer Placer l'interrupteur en position OFF. Utiliser un tournevis cruciforme pour retirer dans son compartiment. Utiliser un les deux vis et le couvercle de la batterie. tournevis cruciforme pour remettre le couvercle de la batterie. Retirer la batterie et la débrancher.
- Page 36 Voyants lumineux et notification des erreurs Couleur du voyant Statut lumineux Bleu clignotant En cours de chargement lentement Voyant d'alimentation Robot complètement chargé éteint Bleu fixe En cours de nettoyage Bleu clignotant Retour à la station d'accueil rapidement Rouge clignotant Erreur : vérifier les capteurs de vide, batterie faible, le robot est coincé.
- Page 37 Si votre produit est remplacé par BISSELL dans le cadre de la présente Garantie, le Service client Si votre produit BISSELL® devait nécessiter une prise en charge par nos services, en particulier dans le cadre de notre Garantie limitée, veuillez nous contacter aux coordonnées suivantes : Site internet :...
- Page 38 ISTRUZIONI IMPORTANTI PER LA SICUREZZA LEGGI TUTTE LE ISTRUZIONI PRIMA DI UTILIZZARE IL TUO APPARECCHIO. Quando usi un dispositivo elettrico, devi seguire sempre le precauzioni di base, incluse le seguenti: AVVERTENZA » L’apparecchio contiene batterie che non sono sostituibili. PER RIDURRE RISCHIO DI INCENDI, FOLGORAZIONI O INFORTUNI: »...
- Page 39 » Le pellicole in plastica possono essere pericolose. Per evitare il pericolo » Non aspirare materiale tossico (candeggina, ammoniaca, disgorgante, di soffocamento, tenerle lontane dai bambini. ecc.). » Utilizzare solo come descritto nella guida per l'utente. » Non utilizzare l'apparecchio in uno spazio confinato saturo di vapori »...
- Page 40 Contenuto della confezione Visualizzazione del prodotto Spazzola rotante 2. Sensori di dislivello 3. Punti di contatto (per la ricarica auto- matica) 4. Batteria rimovibile Configurazione del robot 100cm 100cm 200cm Accendere l'alimentazione e mettere in Posizionare la Docking Station funzione la Docking Station. La prima lontano da ostacoli.
- Page 41 Impostazione del telecomando Accoppiare il telecomando al robot NOTA: Assicurarsi di inserire le batterie all'interno del telecomando. Mentre l'interruttore di alimentazione sul lato Continuare a tenere premuto il pulsante play e del robot è spento, OFF (0), tenere premuto il accendere il robot, ON (I).
- Page 42 Come prepararsi alle attività di pulizia Con il telecomando NOTA: assicurarsi che l'interruttore di alimentazione del robot sia in posizione ON. È possibile modificare il tipo di pulizia del robot premendo uno dei seguenti pulsanti: Modalità automatica Il robot procederà in linea retta finché non incontrerà un ostacolo che lo obbligherà...
- Page 43 Manutenzione Premere il pulsante sulla parte superiore Aprire lo sportello del filtro estraendo del raccoglitore della polvere e tirare per entrambi i lati. Liberare il raccoglitore della rimuoverlo. polvere da eventuali residui. Utilizzare l'accessorio per la pulizia per spazzolare il coperchio del filtro e i filtri. Rimuovere il coperchio del filtro, seguito dalla Non lavare i filtri.
- Page 44 Sostituzione della batteria Connettere la nuova batteria e installarla nel Portare l'interruttore di alimentazione in posizione OFF. Utilizzare un cacciavite a croce comparto della batteria. Utilizzare un cacciavite per rimuovere le due viti e il coperchio della a croce per sostituire il coperchio della batteria. batteria.
- Page 45 Stato delle spie e notifiche di errore Stato colore delle spie Stato Blu vivo Charging Spegnimento della luce Robot fully charged Blu fisso Cleaning Blu lampeggiante Returning to Docking Station Rosso lampeggiante Error: Check Cliff Sensors, Battery Power Low, Robot is Trapped Error: Check Wheels, Edge Cleaning Brushes, Brush Roll, and Bumper Rosso fisso Status...
- Page 46 Garanzia per i consumatori Questa Garanzia si applica solo al di fuori degli USA e del Canada. È offerta da BISSELL originale). Il periodo di questa Garanzia non sarà esteso, indipendentemente dal fatto International Trading Company B.V. (“BISSELL”). Questa Garanzia è offerta da BISSELL.
- Page 48 ©2019 BISSELL Inc. Grand Rapids, Michigan All rights reserved. Printed in China. Part Number 161-8487 02/19...
Need help?
Do you have a question about the EV675 and is the answer not in the manual?
Questions and answers
Battery Replacement for Bissell Robot Vacuum EV675 how do I disconnect the old battery I cannot pull the plastic apart and do not want to break it
To disconnect the old battery from the Bissell EV675 Robot Vacuum, first turn the robot OFF. Then flip it over and use a Phillips-head screwdriver to remove the two screws and the battery cover. After that, remove the battery and disconnect it from the robot.
This answer is automatically generated