
Related Manuals for BENE IDEA WALL BRIDGE


Summary of Contents for BENE IDEA WALL BRIDGE
- Page 1 IDEA WALL BRIDGE IDEA WALL BRIDGE IDEA WALL AVEC TABLE INTÉGRÉE MONTAGE- UND BEDIENUNGSANLEITUNG ASSEMBLY AND OPERATING INSTRUCTIONS INSTRUCTIONS DE MONTAGE ET D’UTILISATION...
-
Page 2: Table Of Contents
INHALT CONTENT SOMMAIRE Sicherheitshinweise. Entsorgung ..3 Safety instructions. Disposal ....3 Consignes de sécurité. Recyclage ..4 Lieferzustand Multimedia ....5 Multimedia as-delivered condition ..5 Conditionnement de Wände positionieren ......6 Position the walls ......6 l’équipement multimédia ....5 Metallteile fixieren ......7 Fixing the metal parts ......7 Mise en place des parois .... -
Page 3: Sicherheitshinweise. Entsorgung
Media-Aufsatzes freihalten. Do not cover the vent opening in the cover plate of the media attachment. Disposal Entsorgung Information about the disposal of Bene products can be found Entsorgungshinweise finden Sie im Umweltbericht unter: in the Environmental Report at: http://www.bene.com. http://www.bene.com... -
Page 4: Consignes De Sécurité. Recyclage
Respecter les remarques jointes au présent document quant à la manipulation de l’écran. Les fentes d‘aération de la réhausse multimédia ne doivent jamais être couverts. Recyclage Conseils pour le recyclage disponibles dans le rapport de déve- loppement durable à l’adresse suivante: http://www.bene.com... -
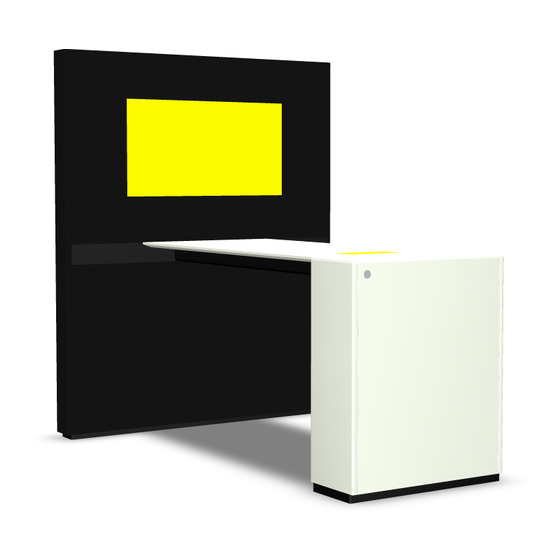
Page 5: Lieferzustand Multimedia
LIEFERZUSTAND MULTIMEDIA MULTIMEDIA AS-DELIVERED CONDITION CONDITIONNEMENT DE L’ÉQUIPEMENT MULTIMÉDIA Hinweis: Darstellung zeigt Note: The picture shows the compon- Remarque : Les composants visualisés Bauteile für den europäischen ents for the European market. For all sont ceux destinés au marché europé- Markt. -
Page 6: Wände Positionieren
WÄNDE POSITIONIEREN POSITION THE WALLS MISE EN PLACE DES PAROIS Platziere den ersten Unterteil der Wand in der richtigen Position nach dem Auspacken. After unpacking place the first bottom-part of the wall in the right position. Après le déballage, mettre le premier élément inférieur de l‘Idea Wall dans la position correcte. Danach platziere den zweiten Unterteil mit einer Distanz zum anderen. -
Page 7: Metallteile Fixieren
METALLTEILE FIXIEREN FIXING THE METAL PARTS FIXATION DES PIÈCES MÉTALLIQUES D990026 SPAX-SKPZ-VZ-5.0x70 Fixiere zwei der vier vertikalen Metallteile am Unterteil der Idea Wall. Fix two of four vertical metal parts to the bottom part of the Idea Wall. Fixer deux des quatre pièces métalliques verticales sur l‘élément inférieur de l‘Idea Wall. Danach fixiere die Metallteile zum ersten Unterteil mit beigefügten Feingewindeschrauben. - Page 8 METALLTEILE FIXIEREN FIXING THE METAL PARTS FIXATION DES PIÈCES MÉTALLIQUES Fixiere dann die Metallteile zum zweiten Unterteil mit den beigefügten Schrauben. Then fix the metal parts to the second bottom-part with added screws. D990013 Fixer ensuite les pièces métalliques au deuxième élément inférieur avec SPAX-SKPZ-VZ-4.0x60 les vis fournies.
-
Page 9: Nivellierung
NIVELLIERUNG LEVELLING MISE DE NIVEAU Wenn notwendig nivelliere mittels Schrauben im Sockel (in der Zukunft: von außen mittels kleinen Sockelfüßen). If needed level out by screws in the pedestal (in the future: from the outside by small base-legs). Si nécessaire, mettre de niveau à l‘aide de vis dans le socle (à... -
Page 10: Ausrichten
AUSRICHTEN ALIGN ALIGNEMENT Der obere und untere Teil müssen vor dem Verbinden bündig ausgerichtet werden. The upper and lower part need to be lined up prior to connection. Les éléments supérieur et inférieur doivent être affleurants avant l‘assemblage. D990013 Verbinde den oberen und unteren Teil mittels Schrauben von unten. SPAX-SKPZ-VZ-4.0x35 Connect the upper und lower part by screws from below. -
Page 11: Blenden Fixieren
BLENDEN FIXIEREN FIX THE SCREENS FIXATION DES CACHES Fixiere die Blenden mit Schrauben von innen. Fix these cover stripes by screws from inside. Visser les caches par l‘intérieur. Füge die Abdeckplatte ganz oben hinzu (sie kann auch am Schluss hinzugefügt werden). D990013 Add the cover plate on the very top (it can also be added at the end). -
Page 12: Montage Lcd-Bildschirm
MONTAGE LCD-BILDSCHIRM ASSEMBLING THE LCD SCREEN MONTAGE DE L’ÉCRAN LCD Reinigung / Cleaning / Nettoyage Bildschirm und Glasscheibe des Media-Aufsatzes vor der Montage mit einem „LCD-Bildschirmreiniger“ und einem Microfasertuch sorgfältig reinigen. Siehe auch Bedienungsanleitung LCD-Bildschirm. Before assembling the screen and glass pane of the media attachment, clean them with an LCD screen clener and microfibre cloth. - Page 13 MIT GLAS. MONTAGE LCD-BILDSCHIRM WITH GLASS. ASSEMBLING THE LCD SCREEN AVEC VERRE. MONTAGE DE L’ÉCRAN LCD Bildschirm in die vorgesehene Aufnahme des Media Aufsatzes einsetzen. Insert the screen into the provided seat in the media attachment. Insérer l’écran dans le logement prévu dans la réhausse multimédia.
- Page 14 MIT GLAS. MONTAGE LCD-BILDSCHIRM WITH GLASS. ASSEMBLING THE LCD SCREEN AVEC VERRE. MONTAGE DE L’ÉCRAN LCD Bildschirm mit vier Winkeln Schrauben im Media-Aufsatz fixieren. Achtung! Keine Schrauben in den Bildschirm schrauben! Winkel 40x40x10 Affix the screen with 4 angle brackets and screws in the media attachment Attention! Do not screw any screws into the screen!
- Page 15 OHNE GLAS. MONTAGE LCD-BILDSCHIRM WITHOUT GLASS. ASSEMBLING THE LCD SCREEN SANS VERRE. MONTAGE DE L’ÉCRAN LCD Der Abstand zwischen Idea Wall und LCD-Bildschirm beträgt 2 mm. The distance between Idea Wall and LCD-screen takes 2 mm. La distance entre Idea Wall et l‘écran LCD est de 2 mm.
- Page 16 OHNE GLAS. MONTAGE LCD-BILDSCHIRM WITHOUT GLASS. ASSEMBLING THE LCD SCREEN SANS VERRE. MONTAGE DE L’ÉCRAN LCD D990252 GWSR-ZKIS-VZ-M6*16 D990357 USCH-VZ-FM6-DIN440...
- Page 17 OHNE GLAS. MONTAGE LCD-BILDSCHIRM WITHOUT GLASS. ASSEMBLING THE LCD SCREEN SANS VERRE. MONTAGE DE L’ÉCRAN LCD D990368 GWSR-ZKIS-VZ-M8*16...
- Page 18 MONTAGE LCD-BILDSCHIRM ASSEMBLING THE LCD SCREEN MONTAGE DE L’ÉCRAN LCD Haupnetzschalter einschalten. Netztaste Schaltet den Monitor ein bzw. in den Standby-Modus. Switch on the main power switch. Power button Switches the power on/standby. Allumez interrupteur main power. Bouton Power Permet d’allumer ou de mettre en veille l’unité.
-
Page 19: Einbau Lautsprecher
EINBAU LAUTSPRECHER INSTALLING THE SPEAKER INTÉGRATION DES HAUT-PARLEURS Rechten und linken Lautsprecher in die vorgesehenen Aussparungen des Unterschranks einsetzen. Insert the right and left speaker into the provided cut- outs of the bottom cabinet. Insérer les haut-parleurs droit et gauche dans les niches prévues à... - Page 20 EINBAU LAUTSPRECHER INSTALLING THE SPEAKER INTÉGRATION DES HAUT-PARLEURS Lautsprecher-Kabel am Lautsprecher anschließen. Lautsprecher in Fach einsetzen. D990007 Connect the speaker cable to the Winkel 40x40x10 SPAX-SKPZ-VZ-3,5x16 speaker . Insert the speaker into the Jeden Lautsprecher mit einem Winkel fixieren. Beschriftung der Lautsprecher compartment.
-
Page 21: Abdeckplatte Montieren
ABDECKPLATTE MONTIEREN MOUNTING THE COVER PLATE MONTAGE DU PANNEAU DE RECOUVREMENT D990427 SPAX-PHPZ-VZ-4.0x20 Vor dem Verbinden der Kabel und Stecker füge die Abdeckplatte der Brücke hinzu. Prior to connecting the wires and plugs add the bridge-plate. Avant de brancher les câbles et les fiches, placer le panneau de recouvrement de la table. -
Page 22: Montage Stauraum - Druckmagnetschnapper
MONTAGE STAURAUM - DRUCKMAGNETSCHNAPPER ASSEMBLY STORAGE - MAGNETIC PUSH SNAP MONTAGE RANGEMENT - FERMETURE AIMANTÉE Druckmagnetschnapper in Beschlägesack beigepackt. The magnetic push snap is in the fittings bag. Fermeture aimantee est en sachet d‘attaches. -
Page 23: Steckerleiste Montieren
STECKERLEISTE MONTIEREN MOUNTING THE CONNECTION PLUG BOARD MONTAGE DE LA NOURRICE D990403 GWSR-SKPZ-SZ-M3x10 Baue die Alusteckerleiste zusammen wie gezeigt. Alle benötigten Teile sind im Lieferumfang. Assemble the aluminium plugbox as shown at. All needed parts are added to the delivery. Assembler la nourrice comme illustré. -
Page 24: Verkabelung. Steckerleiste
VERKABELUNG. STECKERLEISTE CABLING. CONNECTION PLUG BOARD CÂBLAGE. NOURRICE Verbinde die Steckerleiste mit allen Kabeln (Stromkabel,Audiokabel, VGA Kabel und 2 Internetkabel). Connect the plug-box with all cables (power supply cable, audio cable, VGA plug cable and 2 internet cables). Brancher tous les câbles (câble d‘alimentation, câble audio, câble VGA et 2 câbles Internet) dans la nourrice. -
Page 25: Anschlüsse Lcd-Bildschirm
ANSCHLÜSSE LCD-BILDSCHIRM CONNECTIONS LCD SCREEN RACCORDS ÉCRAN LCD Mögliche Fehlerquelle Possible error source Source possible d‘erreur Wenn „Audio IN“ in „Remote IN“ gesteckt wird funktioniert die Fernbedienung nicht. If „Audio IN“ is connected to „Remote IN“, the remote control will not work. Si „Audio IN“... -
Page 26: Verkabelung
VERKABELUNG CABLING CÂBLAGE Verbindungsleitung Audio Stromkabel Bildschirm Verbindungsleitung VGA Interconnecting audio cable Screen power cable Interconnecting VGA cable Câble connectique audio Câble électrique de l’écran Câble connectique VGA Lautsprecher-Kabel Verbindungsleitung HDMI Speaker cable Interconnecting HDMI cable Câbles des haut-parleurs Câble connectique HDMI... - Page 27 VERKABELUNG CABLING CÂBLAGE Alle außerhalb anzusteckenden Kabel ( 1 Stromkabel, 2 Internetkabel) müssen aus der Idea Wall herausstehen. All cables (1 power supply cable, 2 internet cables) to be plugged outside need to stick out of the Idea Wall. Tous les câbles à brancher à l‘extérieur (1 câble d‘alimentation, 2 câbles Internet) doivent sortir de l‘Idea Wall.
- Page 28 VERKABELUNG CABLING CÂBLAGE Schneide die Plastiksockelblende mit einem Stanleymesser in einer Größe vom Kabelbündel aus. Cut out the plastic pedestal front cover by a Stanley knife with the size of cable bundle. Réaliser à l‘aide d‘un cutter Stanley une découpe de la taille du faisceau de câble dans le cache de socle en plastique.
- Page 29 VERKABELUNG CABLING CÂBLAGE Diese Kabel müssen in der Alusteckerleiste verstaut werden. These cables have to be stored in the plug-box. Ces câbles doivent être rangés dans la nourrice. Füge zuerst die untere Rückwand hinzu. Sei vorsichtig um die unten herausstehenden Kabel nicht einzuzwicken.
-
Page 30: Rückwand Montieren
RÜCKWAND MONTIEREN MOUNTING THE BACK WALL MONTAGE DU DOS Danach füge die obere Rückwand hinzu. Afterwards add the upper back wall. Placer ensuite le dos supérieur. Füge die Abdeckplatte ganz oben am Schluss hinzu. Add the cover plate on the very top at the end. Pour finir, installer le panneau de recouvrement supérieur. -
Page 31: Bedienung Idea Wall
BEDIENUNG IDEA WALL USING THE IDEA WALL UTILISATION DE L’IDEA WALL „Power“-Taste : Einschalten des Bildschirms „Input“-Taste : Wahl der Signalquelle „Aspect“-Taste : Anpassung des Seitenverhältnisses Siehe auch Bedienungsanleitung LCD-Bildschirm. „Power“ button : Turn on the screen „ 1 „Input“ button : Select the signal source „Aspect“... -
Page 32: Übergabecheckliste
ÜBERGABECHECKLISTE HANDOVER CHECKLIST LISTE DES VÉRIFICATIONS AVANT REMISE EN ROUTE DE L’ÉCRAN Übergabecheckliste Liste des vérifications avant remise en route de l’écran Sind die Lüftungsschlitze an der Oberseite des Schrankes Les fentes d’aération positionnées sur la face supérieure de freigehalten? l’armoire sont-elles ouvertes ? Sind alle Kabel quetsch- u. -
Page 33: Pflegehinweise. Zertifikate
Zusatz von Reinigungsmitteln, Möbelpolituren oder ligen Herstellers zu reinigen. Informationen bzw. Unterlagen dergleichen. dazu erhalten Sie von Ihrem Bene Betreuer. Sollte eine Reinigung mit einem feuchten Tuch nicht Für Schäden an Oberflächen, die durch unsachgemä- ausreichen, ist die vorsichtige Verwendung von mil- ße Reinigung verursacht wurden, übernimmt Bene keine... -
Page 34: Cleaning Instructions. Certifigates
An enhanced glossy appearance of the surface is difficult to prevent. DISPOSAL Instructions for the disposal of Bene products can be found in the sustainability report at: http://www.bene.com... -
Page 35: Instructions D'entretien. Certifigats
Bene. fit pas, l’utilisation d‘un produit nettoyant pour matière syn- thétique, doux, sans, détergent est autorisé sur les surfaces Bene se dégage de toute responsabilité concernant les sur- en mélamine. faces endommagées suite à une utilisation inappropriée.
Need help?
Do you have a question about the IDEA WALL BRIDGE and is the answer not in the manual?
Questions and answers