
Subscribe to Our Youtube Channel
Related Manuals for Creamsource Vortex8


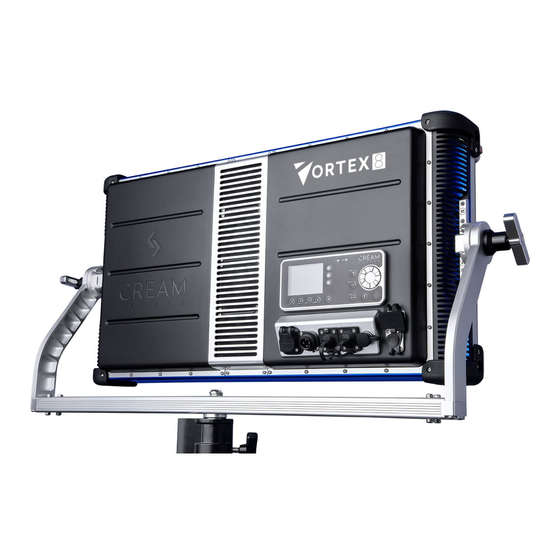
Summary of Contents for Creamsource Vortex8
- Page 1 Support Have any questions? Feel free to get in touch https://creamsource.com/support/...
-
Page 2: Table Of Contents
1.1 Overview 5.1 Controlling the Vortex8 8.1 Running from Batteries 1.2 Part Numbers 5.2 On-board Keypad and Display 8.2 Pinout for DC Power connector on Vortex8 1.3 Warnings 5.3 Introducing CreamOS 9. Specifications 1.4 Compliance Notes 5.4 CreamOS Home Screen 5.5 CreamOS Colour Mode... -
Page 3: About The Vortex8
1.1 Overview The Vortex8 is a versatile 2x1 RGBW system with a CCT range from 2200K to 15000K that can be used as a hard punch light to bounce or push through diffusion, or as a creamy soft light with the Creamsource Dome or DoPchoice Snapbag. Effects and colour gels are built into the latest CreamOS architecture in addition to a range of new features wrapped into an intuitive user interface. -
Page 4: Part Numbers
1. About the Vortex8 1.2 Part Numbers The table below lists part numbers for the Creamsource Vortex system. Part Number Description K-CSV-8-ESS Vortex8 Essentials Kit: Includes Fixture, Yoke, Power Cable, Flat Diffuser. CSV-8 Vortex8 650W Colour Fixture, Head Only Vortex8 User Manual Page 4 Version 1.0... -
Page 5: Warnings
This product is intended for professional use and may only be operated by qualified persons. Do not cover the ventilation slots on the side and rear of the Vortex8. Airflow is required for cooling and operation. Inspect the power cable for damage prior to operation. -
Page 6: Compliance Notes
1. About the Vortex8 1.4 Compliance Notes This device complies with Part 15 of the FCC Rules. Operation is subject to the following two conditions: (1) This device may not cause harmful interference, and (2) This device must accept any interference received, including interference that may cause undesired operation. -
Page 7: Getting Started
2. Getting started 2.1 What’s in the Box Vortex8 ships with the following items included in the box. Vortex8 Yoke AC PowerCON Cable T30 Torx Key Vortex8 User Manual Page 7 Version 1.0... -
Page 8: Water And Temperature
3.1 Water The IP65 rating of the Vortex8 fixture means it can survive low pressure water jets in all directions, but not full submersion. It also means that it has a high resistance to dust and dirt. Precautions are advised. -
Page 9: Transport And Safety
4. Transport and Safety 4.1 Yoke Assembly The Vortex8 ships with a quick release yoke system that is assembled using a T30 Torx tool provided. The standard yoke allows for mounting to a combo stand with a standard baby pin receiver. -
Page 10: Rigging
4. Transport and Safety 4.2 Rigging The Vortex8 has a unique dual 3/8th threaded corner system to support complex rigging setups and Vortex8 arrays . Ensure that mounting point is safe and secure and is rated to take the full unit weight... -
Page 11: Filter Rails
Latch in unlock position. that locks the initial filter in while allowing second filter to be inserted without unlocking. Push top latch down to engage the lock. Push gold button to release to unlock. Vortex8 User Manual Page 11 Version 1.0... -
Page 12: Installing A Dome
4. Transport and Safety 4.4 Installing a Dome Installing the Dome the Vortex8 widens the native 20° beam angle. This modifier softens the source and reduces shadowing. Install the Dome into the safety filter rail as per steps above in the “Rails Filter” section. -
Page 13: Installing A Honeycomb
The honeycomb reduces the beam angle and stops ambient spill of light. This works great in with the standard diffuser in the second slot. Slide the honeycomb into the first filter rail. Push top latch down to engage the lock on each side. Vortex8 User Manual Page 13 Version 1.0... -
Page 14: Installing A Diffuser
The standard diffuser softens the native hard light and widens the beam angle. This modifier works well inconjunction with the dome and the honecomb. Slide the diffuser into the first filter rail. Push top latch down to engage the lock on each side. Vortex8 User Manual Page 14 Version 1.0... -
Page 15: Controls
5. Controls 5.1 Controlling the Vortex8 There are four different ways of controlling the fixture, which are detailed below. Wireless DMX using On-board keypad Wired remote dimmer Wired DMX inbuilt Lumen Radio and display control (sold separately) system 5.2 On-board Keypad and Display... -
Page 16: Introducing Creamos
CreamOS is driven by the following screens: CCT Mode Effects Mode Home screen Options screen Visit www.creamsource.com/support for the latest version of CreamOS. Vortex8 User Manual Page 16 Version 1.0... -
Page 17: Creamos Home Screen
5.4 CreamOS Home Screen Control parameters and access the functions from the home screen. Current mode Notifications tray Colour mode When orange, Effects mode Effects Mode is on Level Selected parameter tile Quick select parameter dock Vortex8 User Manual Page 17 Version 1.0... -
Page 18: Creamos Colour Mode
RGBW Cycle back Select mode GELS CCT HSV CCT RGBW CCT XY CCT GELS Colour mode description Selected colour mode For more information about the Colour Mode menu, go to 5.7 Menu Functions Vortex8 User Manual Page 18 Version 1.0... -
Page 19: Creamos Effects Mode
Paparazzi Colur Cycle Strobe Effect description Selected effect Dual Level Flash Frame Timed Flash Calibrate Random More effects may be added in future firmware updates. Visit www.creamsource.com/support for the latest version of CreamOS. Vortex8 User Manual Page 19 Version 1.0... -
Page 20: Menu Functions
If this is not enabled, then the OLED display will switch off after a period of no key-presses, to lengthen it’s lifespan and prevent screen burn-in Information Displays information screen with serial number, temperatures, unit run-hours and other vital statistics Restore Defaults Restores user defaults including DMX address,Scenario and other settings Vortex8 User Manual Page 20 Version 1.0... - Page 21 Medium - Fans run at constant medium speed High - Fans run at constant high speed Pause - Fans are stopped temporarily until until fixture heats up (should not be used for long periods of time) Vortex8 User Manual Page 21 Version 1.0...
- Page 22 Enable or disable LumenRadio receiver DMX SETUP Shortcut to DMX SETUP Menu Master Mode When enabled this unit will act as a master and transmit colour data over DMX port to other Creamsource fixtures ADVANCED EXTERNAL TRIGGERING Trigger Disabled - No external triggering over Accessory Port...
-
Page 23: Connectivity
6. Connectivity 6.1 Best Of Class Connectivity Vortex8 is equiped with a wide range of connectivity options both wireless and wired. Power 48V DC power CS Accessory USB-A Input port etherCON TOP DMX In DMX Thru connector Vortex8 User Manual Page 23 Version 1.0... -
Page 24: Wired Dmx Control
Please see Lumen Radio documentation for more information about the wireless DMX system. 6.4 Wired Remote Dimmer The wired remote dimmer plugs into the 7 pin Accessory connector on the back of the unit. This will allow basic control of the fixture. Vortex8 User Manual Page 24 Version 1.0... -
Page 25: Firmware Updates Via Usb
Note: Only one *.sfb update file should be copied onto the drive at a time. 2. Insert USB drive into USB connector on Vortex. 3. Power up Vortex8 and it will automatically update to the version copied on the USB drive. -
Page 26: Maintenance
7. Maintenance 7.1 Vortex8 Fuse The Vortex8 has an internal fuse and is not user serviceable. Please contact your nearest authorised repair centre for it to be replaced. Require help finding your nearest authorised repair centre? Feel free to get in touch. -
Page 27: Power
8.1 Running from Batteries The Vortex8 can be run directly from a 48V regulated DC battery source with no additional hardware required. The fixture is also able to hot-swap between AC and DC power sources and is capable of running at 100% brightness while being powered by a battery. -
Page 28: Pinout For Dc Power Connector On Vortex8
8. Power 8.2 Pinout for DC Power connector on Vortex8 Choose a 4 core cable of >15AWG (1.5mm2) and wire all 4 pins Part Number Connector Manufacturer Part Number CSV-8 Vortex8 Ecomate 4 Pin Female Amphenol C016 20D003 110 10... -
Page 29: Specifications
Connector Type: Weipu Socket 7Pin Mating Plug: Weipu Plug 7Pin SF1210/P7II Description TRIGGER Input +Ve (5-24V Input, referenced to GND) DMX Data (-Ve) DMX Data (+Ve) GND, Ground Reference +12V Output, 200mA maximum Vortex8 User Manual Page 29 Version 1.0... -
Page 30: Specs For The Vortex8
8x 3/8” Threaded Insert Rigging Points Accessory, Integrated Lumen radio Timo Two with Bluetooth, Ethernet, USB Type A Yoke Removable quick release yoke Includes Vortex8 650W Colour, Yoke, Power cable, Flat diffuser Filter Rails 2 Filter Rails for Secondary Lenses, Diffusers, Accessories Product Code... -
Page 31: Warranty
We stand by our quality, to learn more about Warranty Terms and Conditions, please visit: https://creamsource.com/5-year-warranty 9.4 Support Have any questions? Feel free to get in touch https://creamsource.com/support Creamsource 2/49 Carrington Road Marrickville, NSW 2204 AUSTRALIA Vortex8 User Manual Page 31 Version 1.0... - Page 32 9. Specifications 9.4 Document History Revision Date Notes 14 Jan 2020 Initial Release Creamsource 2/49 Carrington Road Marrickville, NSW 2204 AUSTRALIA Vortex8 User Manual Page 32 Version 1.0...
Need help?
Do you have a question about the Vortex8 and is the answer not in the manual?
Questions and answers