Table of Contents
Advertisement
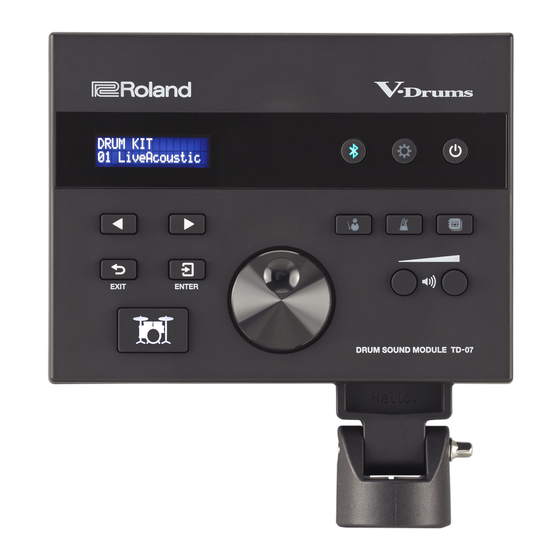
Owner's Manual
Contents
Before using this unit, carefully read "USING THE UNIT SAFELY" and "IMP
Manual (p. 28). After reading, keep the document(s) where it will be available for immediate reference.
© 2020 Roland Corporation
2
2
3
5
5
6
6
7
7
7
8
8
8
9
9
10
11
11
11
12
13
13
14
ORTANT NOTES" (the leaflet "USING THE UNIT SAFELY" and the Owner's
15
15
16
16
16
17
17
18
18
18
19
19
24
24
25
25
26
28
28
29
Advertisement
Table of Contents

Related Manuals for Roland TD-07


Summary of Contents for Roland TD-07
-
Page 1: Table Of Contents
Turning the Power On/Off Resetting a Drum Kit's Settings (KIT RESET) Playing Selecting a Drum Kit Using the TD-07 with a Computer or Smartphone App Playing with the Metronome Using the TD-07 with Computer Software Practicing in Coach Mode (COACH) -
Page 2: Let's Learn About Drums
Let’s Learn About Drums Drum Set Elements Here are some basic terms related to drum sets. Bass drum/Kick Pedal Tom (Tom 1, Tom 2) Played with a kick pedal, it’s the largest drum in the kit. These are usually mounted above the bass drum. * Use a commercially available kick pedal. -
Page 3: The Basics Of Playing
Let’s Learn About Drums The Basics of Playing Drums are played using both hands and both feet. Here we explain how to hold the sticks, strike the drums, and use the pedal. Holding the sticks Using the snare The most common way to hold the sticks is called the Head shot “matched grip”... - Page 4 Let’s Learn About Drums Using the cymbals Using the hi-hat Bow shot In an acoustic drum set, the hi-hat consists of two cymbals placed facing each other vertically on a hi-hat stand. When The most common method, playing the middle area of the you press the pedal, the two cymbals will come together cymbal.
-
Page 5: Quick Start
DRUM your smartphone. You can KIT screen (basic screen) & “Making Detailed Settings also use the TD-07 with a appears. (SETUP)” (p. 19) smartphone app. & “Selecting a Drum Kit” & “Performing Along (p. -
Page 6: Connect Your Equipment
(sold separately). transmit and receive MIDI & “Performing Along and audio data. with a Song from Your Smartphone” & “Using the TD-07 with a (p. 11) Computer or Smartphone App” (p. 18) TRIGGER INPUT jack Connect the included dedicated connection... -
Page 7: Playing
20–260 (bpm) Sets the tempo. For a list of all the drum kits, use the following QR code to Level -INF–+6.0dB Sets the volume. access the “TD-07 Data List” (PDF). Sets the number of beats Beat 1–9 (beat) http://roland.cm/td-07_om per measure. -
Page 8: Practicing In Coach Mode (Coach)
Practicing in Coach Mode (COACH) The TD-07 provides a “coach mode” that helps you to use your practice time most effectively. It contains four menus: TIME CHECK, QUIET COUNT, AUTO UP/DOWN, and CHANGE UP. You can use these menus to improve your skills in speed control, precision, endurance, and timing. -
Page 9: Developing Internal Timing Sense (Quiet Count)
Practicing in Coach Mode (COACH) Developing Internal Timing Sense Parameter Value Explanation Of the measures specified by “Measures, ” this (QUIET COUNT) setting specifies the length of the measures that will be “Quiet” This practice will help you develop a good sense of time/ The length of the QUIET interval will RANDOM randomly change each time. -
Page 10: Playing Along With A Changing Rhythm (Change Up)
Practicing in Coach Mode (COACH) AUTO UP/DOWN settings Playing Along with a Changing Rhythm (CHANGE UP) Here you can specify the duration of your practice time, and set the upper and lower tempo limits. The rhythm type will change every two measures. Starting from half notes, the note values will gradually become In the AUTO UP/DOWN screen, use the [C][A] shorter, and will then return to half notes;... -
Page 11: Performing Along With A Song From Your Smartphone
When you play back a song on your smartphone, you hear * Once a smartphone has been paired with TD-07, there is the sound from the headphones or amplified speakers that no need to perform pairing again. Refer to “Connecting an are connected to the TD-07. -
Page 12: Customizing A Drum Kit (Kit Edit)
The TD-07 let’s you customize each pad’s sound and adjust the effects to your preferences. * Since the TD-07 automatically saves the values that you change, there’s no need to perform a specific operation to save your settings. Settings are also saved when you turn off the power. -
Page 13: Editing The Sound Of Each Pad (Instrument)
For a list of all sounds (an instrument list), access the following QR code and view Use the [C][A] buttons to select “KIT the “TD-07 Data List” (PDF). VOLUME,” and press [ ] (ENTER) button. http://roland.cm/td-07_om The KIT VOLUME screen appears. -
Page 14: Adjusting The Attack And Release (Transient)
Customizing a Drum Kit (KIT EDIT) Adjusting the Attack and Release Adjusting the Tonal Character of Each Pad (TRANSIENT) (PAD EQ) Here’s how to emphasize or de-emphasize the attack or Here’s how to adjust the tonal character of each pad (pad release portion of the sound. -
Page 15: Adjusting The Stereo Feel Of The Drum Kit (Overhead)
Customizing a Drum Kit (KIT EDIT) Adjusting the Stereo Feel of the Drum Kit Adjusting the Reverberation of the Drum (OVERHEAD) Kit (ROOM) Here’s how to adjust the sound of the overhead mics that Here’s how to simulate the reverberation and resonance of capture the entire drum kit. -
Page 16: Applying An Effect To The Drum Kit (Mfx)
Use the [C][A] buttons to select “MIDI NOTE,” and press [ ] (ENTER) button. MEMO The MIDI NOTE NO. screen appears. For a list of multi-effect parameters, access the following QR code and view the “TD-07 Data List” (PDF). MIDI NOTE NO. http://roland.cm/td-07_om KICK H 36C2À... -
Page 17: Copying A Drum Kit (Kit Copy)
Press the [ ] (KIT EDIT) button. Use the [C][A] buttons to select “KIT COPY,” KIT RESET[ENTER] and press [ ] (ENTER) button. 01 TD-07 The KIT COPY screen appears. Use the dial to select the drum kit that you KIT COPY want to reset. -
Page 18: Using The Td-07 With A Computer Or Smartphone App
Using the TD-07 with a Computer or Smartphone App Using the TD-07 with Computer Software If the TD-07 is connected to your computer via a USB cable (commercially available), you can transmit and receive MIDI and audio data. * A USB cable is not included. Use a USB2.0 Hi-Speed cable. -
Page 19: Making Detailed Settings (Setup)
Making Pad Settings Here’s how to make settings to ensure that the TD-07 correctly processes the signals from the pads. Here you can adjust the balance (sensitivity) between the force of a strike on a pad and the resulting volume. - Page 20 FootSpSens -10–+10 Adjusts the amount of how easy to make the foot splash. When using a VH-10 or VH-11 hi-hat, adjust the offset on the TD-07. VH Set – This is necessary in order to correctly detect open/close operations and pedal movement.
- Page 21 Making Detailed Settings (SETUP) Adjusting the Offset of the Hi-Hat (VH-10/VH-11) offset With the hi-hat completely separated from the If the screen indicates adjustment motion sensor unit, power-on the TD-07. “Turn screw L,” turn the screw offset adjustment screw clutch screw OPEN CLOSE counter-clockwise.
- Page 22 Making Detailed Settings (SETUP) Making detailed settings in ADVANCED Parameter Value Explanation Volume change in response to pad strike strength Volume The standard setting. This produces the most natural LINEAR correspondence between playing dynamics and volume change. Playing dynamics LINEAR Volume Volume Compared to “LINEAR, ”...
- Page 23 Making Detailed Settings (SETUP) Parameter Value Explanation Detecting trigger signal attenuation (Retrigger Cancel) When you strike a snare drum etc. to which a commercially available drum trigger is attached, there might be cases in which the waveform is misshapen, causing another trigger to unintendedly occur at point “A” in Time the following illustration (retriggering).
-
Page 24: Midi Settings
MIDI Settings Making System Settings Here’s how to make MIDI-related settings for the TD-07. Here’s how to make settings for the TD-07’s power supply, volume, display, and USB COMPUTER port input/output. Press the [ ] (SETUP) button. Press the [ ] (SETUP) button. -
Page 25: Viewing Version Information
Making Detailed Settings (SETUP) Viewing Version Information Here’s how to show the TD-07’s program version. If a new system program is released, you can update the TD-07. For details, refer to the following URL. http://www roland com/support/ Enter the model name 0 refer to “Updater and Driver”... -
Page 26: Troubleshooting
Troubles with sound Connect amplified speakers or headphones to the p. 6 TD-07’s OUTPUT/PHONES jack. Is the TD-07 correctly connected to the amplified speaker or headphones? If you’re connecting an amplified speaker, connect to – the amplified speaker’s input jack. - Page 27 Bluetooth MIDI compatible app (such as GarageBand). Even if your Bluetooth MIDI smartphone’s Bluetooth device list shows “TD-07 MIDI, ” do not tap it. If you tapped it by mistake, cancel – “TD-07 MIDI, ” turn the Bluetooth function off and then on again, and make the connection again.
-
Page 28: Using The Unit Safely
• Roland assumes no liability concerning the restoration of any • ASIO is a trademark and software of Steinberg Media stored content that has been lost. -
Page 29: Main Specifications
Main Specifications Roland TD-07: Drum Sound Module Drum kits 50 (Preset: over 20) Instruments Pad Equalizer: each pad Overhead Mic Simulator Effect Types Room Multi-Effects: 1 system, 30 types Supported standards: Bluetooth Ver 4.2 Bluetooth Supported profile: A2DP (Audio), GATT (MIDI over Bluetooth Low Energy)
Need help?
Do you have a question about the TD-07 and is the answer not in the manual?
Questions and answers