Advertisement
Quick Links
SRX-Pro NVR series
SAFETY
When installing your U2 NVR be sure to avoid:
Excessive heat, such as direct sunlight or heating appliances
•
Contaminants such as dust and smoke
•
Strong magnetic fields
•
Sources of powerful electromagnetic radiation such as radios or TV
•
transmitters
Moisture and humidity
•
Areas with mechanical vibrations
•
Fluorescent lamps or objects that reflect light
•
Unstable light sources as this may cause flickering
•
Temperatures below 10° C (50° F) or above 30° C (86° F).
•
POWER SUPPLY
U2 Power consumption requirements: 100~ 240VAC.
It is strongly recommended to use an Uninterrupted Power Supply (UPS)
(min. 1000VA) otherwise, all warranties may be voided.
PACKAGE CONTENTS
Ensure that the items received match the following. In addition to this Quick
Guide and the U2 NVR, the packing box includes:
1. USB keyboard
2. USB mouse
3. Power cable
4. SRX-Pro Software and Utilities
DVD
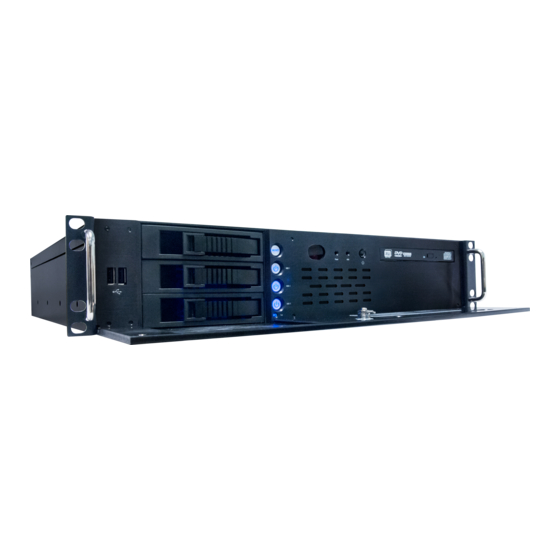
DVR PARTS AND DEFINITIONS
Front Panel
1
2
3
Back Panel
8
9
10
11
12 13
16
17
15
i3 INTERNATIONAL INC.
i3-TRNG-DVR-U2-QIG.indd
5. Security labels (x2)
5
4
7
6
14
1.866.840.0004
www.i3international.com
Quick Installation Guide
No. Item
Description
1
USB ports
USB 2.0 interfaces on front panel (x2)
2
Sata HDD drives Sata HDD drives (x3)
3
HDD Power
Hard drive power buttons to power down HDD for
buttons
removal from Sata box. Reset button. Small Fan
LED light at the bottom.
4
LED lights /
LED light for machine "Power" on, "HDD" recording,
Power button
and Power Button to start machine.
5
DVD drive
slim DVD drive
6
Lock
Locking mechanism
7
Panel cover
Front panel cover with lock
8
Keys
Keys for the lock on the front panel
9
PS2
PS2 port
10
Serial Com Port
Serial com port (x2)
11
DVI-I port
DVI-I monitor port
12
Network Port
RJ45 Network Port (x2) (connection to PoE Switch
made on Left side Port. Wan connection made on
Right port.)
13
Audio
Line in, Line out, Mic in
14
Power
AC Power in and main power switch
15
USB
USB 2.0 on back panel (x2)
16
HDMI
HDMI monitor port
17
USB
USB 3.0 port (x4)
INSTALLATION
Important: Please use the installation guides that came with your IP cameras
to connect the cameras as needed to the PoE Gigabit switch.
The U2 is built in a 2U chassis for convenient Rackmount installation.
Follow safety precautions when selecting an installation location for your U2
NVR.
1. Use supplied screws to secure the U2 if desired to an appropriate
rackmount. Rackmount brackets are pre installed on the U2 Chassis.
2. Make sure the Power Switch is in the OFF position.
3. Ensure the power source is located within 1 meter (3 feet) from the UPS.
4. Ensure the system and its connecting cables have sufficient space and that
the system is placed on an even surface (shelf or Rackmount).
5. Wait until the system is at room temperature before switching it on.
6. Plug the supplied USB mouse and the USB Keyboard into the USB ports on
the back or front panel of the machine as desired.
7. Plug in the monitor. Depending on the monitor model, use either the HDMI
(#16) or the DVI (#11) port on the back panel of the machine.
8. Connect your Audio IN and OUT (#13) devices, if using, to the
corresponding audio connectors on the rear panel.
9. To connect the NVR to your IP camera network, plug the Network cable into
the left Network Port (#12) on the rear panel of the NVR and then plug the
other end into the PoE Gigabit switch.
10. Connect the provided power cable to the AC Power Supply connector (#14)
and then plug it into the UPS unit.
11. Plug the UPS unit into the wall Power supply. Use of the UPS (Uninterrupted
Power Supply) is highly recommended by i3 for added reliability and
longevity of your NVR.
12. Flip Power Switch (#14) into the ON position. The DVR will power on and
the front panel LEDs will light up.
U.S.A
4450 Witmer Industrial Estates Unit 4
Niagara Falls, NY 14305
U2 NVR
Canada 780 Birchmount Road, Unit 16,
Rev.
Scarborough, ON, M1K 5H4
160914
Advertisement

Related Manuals for i3 International SRX-Pro Series


Summary of Contents for i3 International SRX-Pro Series
- Page 1 Power Supply) is highly recommended by i3 for added reliability and longevity of your NVR. 12. Flip Power Switch (#14) into the ON position. The DVR will power on and the front panel LEDs will light up. i3 INTERNATIONAL INC. 1.866.840.0004 U.S.A 4450 Witmer Industrial Estates Unit 4 Canada 780 Birchmount Road, Unit 16, Rev.
- Page 2 Once logged in you will see the SRX-Pro software main screen. Your connected All NVR units sold by i3 international are pre-set to Eastern Time zone (GMT cameras will be visible in the Live View Display window. If the cameras are not -5:00).
Need help?
Do you have a question about the SRX-Pro Series and is the answer not in the manual?
Questions and answers