Table of Contents
Advertisement
Quick Links
TECHNICAL OPERATION HANDBOOK
NEWSWIFT MOTORISED SYSTEM
The Document is supplied on the express terms that it is to be
treated as confidential and that it may not be copied, used or
disclosed to others for any purpose except as authorised by
ADVENT COMMUNICATIONS
Vislink House
27 Maylands Avenue
Hemel Hempstead
Hertfordshire
HP2 7DE
England
Telephone:
Fax:
24 Hour Support
Email
Advent Communications is a brand name of Vislink International
For
Document No. 207160 Rev. B9
Vislink.
National
01442 431 300
01442 431 301
+44 (0)1442 431 410
UKsupport@vislink.com
Advertisement
Table of Contents

Subscribe to Our Youtube Channel
Summary of Contents for Advent VISLINK Newswift 90
- Page 1 ADVENT COMMUNICATIONS Vislink House 27 Maylands Avenue Hemel Hempstead Hertfordshire HP2 7DE England Telephone: National 01442 431 300 Fax: 01442 431 301 24 Hour Support +44 (0)1442 431 410 Email UKsupport@vislink.com Advent Communications is a brand name of Vislink International...
- Page 2 VISLINK This page left intentionally blank Newswift 90-180 Motorised Antenna...
-
Page 3: Table Of Contents
VISLINK CONTENTS AMENDMENT RECORD SHEET EMC DECLARATION WARNINGS AND HAZARDS ADDITIONAL SAFETY INFORMATION STOWAGE WARNING ANTENNA 1.1 INTRODUCTION 5 SPECIFICATION 2.1 6 2.2 DRIVE CONTROL UNIT 7 2.3 MECHANICAL 7 2.4 ENVIRONMENTAL SPECIFICATION 8 ... - Page 4 VISLINK 4.29 F12: POLARISATION SENSOR FAILURE 23 4.30 F16: DCU FPGA PROGRAMMING FAILURE 23 4.31 F17: MANUAL BRAKE OVERRIDE ON 23 4.32 F18: AZIMUTH STOWING FAILURE 24 4.33 F19: ELEVATION STOWING FAILURE 24 4.34 F20: POLARISATION STOWING FAILURE 24 4.35 F23: POWER UP STATE SUSPECT 24 ...
- Page 5 VISLINK 6.5 RETURN PROCEDURES 47 6.6 TRANSPORTATION AND PACKAGING 48 6.7 AUTHORISATION FOR EVALUATION 48 ANTENNA MOUNTING FRAME DESIGN GUIDELINES 7.1 INTRODUCTION 49 7.2 LOAD SUMMARY 49 7.3 VEHICLE ROOF FRAME DESIGN 51 7.4 TYPICAL ANTENNA INSTALLATION IMAGES: 52 ...
-
Page 6: Amendment Record Sheet
VISLINK AMENDMENT RECORD SHEET DATE DESCRIPTION OF CHANGE Author 08/2000 Newswift Manual inc. ACU400 09/2001 ACU4000 Manual Removed ref. to ACU4xxx Inserted 02/2002 6757 Elevation Adjustment Changed to 90° and Other Minor Changes 03/09/2002 6872/6920 Maintenance Information Added. Details of Fuses Clarified and Other Minor Changes 31/01/2006 Add X, DBS and 1.8m Antenna Details... -
Page 7: Emc Declaration
VISLINK EMC DECLARATION Newswift 90-180 Motorised Antenna... -
Page 8: Warnings And Hazards
VISLINK WARNINGS AND HAZARDS FAILURE TO OPERATE AND USE THE EQUIPMENT OTHER THAN INSTRUCTED IN THE MANUAL MAY RESULT IN ELECTRIC SHOCK. HAZARDOUS WARNING LABELS Hazardous AC voltages present. NON-IONISING RADIATION Possible source of radiation hazard, normally located at waveguide connections, waveguide joints and antennas. -
Page 9: Additional Safety Information
VISLINK ADDITIONAL SAFETY INFORMATION Most of the microwave energy is contained within this beam Close Up View Far View The European Standard that defines power levels is ETS300327. The microwave power density limit is 10w/m sq. For a 125w amplifier and 1.2m antenna, the shaded area represents power levels above the limit. -
Page 10: Antenna
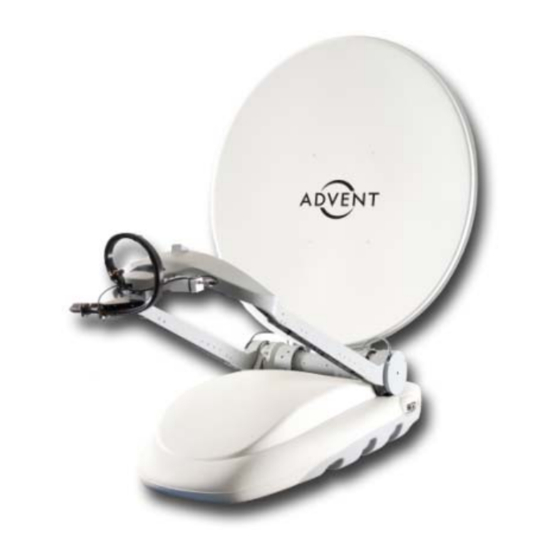
VISLINK ANTENNA INTRODUCTION The Newswift Motorised System is a highly compact satellite earth terminal, capable of operating with most of the geostationary C, X, Ku and DBS band satellites, which are currently in orbit or are planned. Its function is to transmit TV programming (or communications, depending upon the options ordered) and to be capable of monitoring its own transmissions from many sites around the world. -
Page 11: Specification
VISLINK SPECIFICATION Type Single circular Diameter 0.9m, 1.2m, 1.5m, 1.8m Configuration Offset Mount Elevation over Azimuth Frequency C-Band 5.85-6.425 GHz X-Band 7.9-8.4 GHz Ku-Band 12.75-13.25 GHz or 13.75-14.50 GHz DBS-Band 17.3-18.1 GHz (optional 18.4GHz) C-Band 3.7-4.2 GHz X-Band 7.25-7.75 GHz Ku-Band 10.95-12.75 GHz DBS-Band... -
Page 12: Drive Control Unit
VISLINK X-Band UBR84/CPR112 Ku-Band PBR120 DBS-Band UBR140 Feed 2 port ( 3,4 port optional) Power (RF) 500w cw DRIVE CONTROL UNIT Antenna Limits Polarisation ± 92° (Ku, feedhorn cartridge dependent) Azimuth ±180° Elevation 6° to 90° Display Resolution 0.1° Range ±200°... -
Page 13: Environmental Specification
VISLINK ENVIRONMENTAL SPECIFICATION The system will be used outdoors, exposed to the prevailing ambient conditions. Temperature Operational -20 to +50°C Survival -40 to +70°C Humidity 0 to 100 % RH Wind Operation 21m/s (17m/s for 1.8m antenna) Degraded Operation 28m/s (23m/s for 1.8m antenna) Survival 50m/s, antenna stowed... -
Page 14: Installation
V VISLIN 3. INST TALLATIO ANTENNA A AND MOUN The New wswift antenn na will arrive in a wooden n transporta tion box, see e picture on e. Remove the top a nd sidewalls s of the trans sportation bo ox leaving th he base palle et and anten... -
Page 15: Antenna Preparation
V VISLIN ANTENNA P PREPARAT TION Remove the bolts us ing a spanne er and socke et, bolt holes s 'A' in pictu re three, sec curing the transport frame to the e transport b box. Using th he transport frame only, lift the anten nna on to a... -
Page 16: Fitting The Antenna On The Mount
V VISLIN FITTING TH HE ANTENN NA ON THE MOUNT Locate ra atcheting han ndle with sh aft, supplied d separately (or stored w within the veh hicle cab), into the e elevation rota ation axis on n the left han nd side of an ntenna, as s een in pictur... - Page 17 V VISLIN Remove the antenna a retaining bo olts as show wn in picture seven. Take e the strain i in the lifting ropes, an nd carefully l lift the anten nna to the mo ounting posi ition. The an ntenna will h ave to be supported...
-
Page 18: Functional Description
VISLINK FUNCTIONAL DESCRIPTION The functional limits are specified in section 2.1. OPERATING PROCEDURE The normal operation of the antenna is given in the ACU4XXX operation manual. MANUAL OPERATION The antenna may be moved manually if there is a problem with the control circuit. Before the azimuth or elevation axis may be manually moved the electric brake must be disabled, this procedure is described in the DCU Manual. -
Page 19: Drive Control Unit
RF elevation inclinometer and antenna position monitors with cables running out of its front panel via waterproof EMC cable glands. The DCU4000 has a RS485 serial communication link using standard Advent protocol to a controlling ACU (Antenna Control Unit) which gives the DCU simple commands. These commands are then acted upon by the DCU. -
Page 20: Front And Rear Panel
VISLINK FRONT AND REAR PANEL The above diagram shows the front panel layout of the DCU4000. The AZIMUTH, ELEVATION and POLARISATION MOTOR DRIVE cables go to the stepper motor, motor rotation detector and brake, if fitted, of the respective drive axis. The INCLINOMETER cable goes to the RF elevation inclinometer fitted within the elevation pivot axis cover. -
Page 21: Rear Panel
VISLINK REAR PANEL The rear panel has a cooling inlet manifold fitted. This allows the internal fan to cool the drive electronics. This inlet must not be blocked or sealed; otherwise the unit could over heat. DCU4000 LEAD CONNECTIONS The following information gives the details required to directly connect the DCU POWER cable to the DCU POWER OUTPUT connector on the rear panel of an ACU4XXX. -
Page 22: Internal Layout
VISLINK INTERNAL LAYOUT DCU INTERNAL ACCESS To gain access to the DCU, release the two bolts holding the DCU mounting bracket to the antenna base plate. Remove the 4 fixings nuts that retain the front panel to the DCU case. Slide the outer case from the DCU internal chassis. -
Page 23: Functional Description
T he micro control board (MCB) is the controlling element in the antenna DCU. Based on the Advent standard microcontroller block the MCB has the following interfaces, RS485 serial communication control port, MDB (motor drive board) interface, motor rotation detectors (MRD), antenna position sensors, digital inclinometer and safety micro-switch interfaces. -
Page 24: Axis Drive Description
VISLINK 4.11 AXIS DRIVE DESCRIPTION Each drive axis (azimuth, elevation, and polarisation) is motorised using a 2-phase stepper motor. The motor movement is monitored using a motor rotation detector. The azimuth and elevation drive also have an electrically operated brake to hold the axis when power is not applied to the motor. -
Page 25: Axis Position And Stowing Checks
VISLINK 4.14 AXIS POSITION AND STOWING CHECKS As the system uses motor turn and pulse counting to calculate the angular position of the antenna, any motor stall or freewheel can result in errors accumulating in the axis angle. The softlimits act on these axis angles and are designed to stop the antenna from running into the physical hard limits. -
Page 26: Alarms
VISLINK 4.17 ALARMS The following table lists all the alarms for the DCU4000. If the alarm is latched, the alarm is cleared by using the clear alarm command. These are coded into the remote command set as described in section 4.36. B rief Description A larm Latched DCU power supply voltage low. -
Page 27: F2: Dcu Motor Supply Failure
VISLINK 4.19 F2: DCU MOTOR SUPPLY FAILURE The antenna DCU has not detected any motor supply voltage. This means no motor power is available, and so the antenna cannot be moved. Possible causes: The ACU4XXX motor supply has failed. Check output voltages at rear of ACU4XXX, J7. The connections to the DCU motor power supply are reversed. -
Page 28: F8: Drive End Of Travel Detected
VISLINK 4.25 F8: DRIVE END OF TRAVEL DETECTED A drive axis travel limit has been detected. The axis causing this will become uncalibrated. Possible causes: Severe axis stall or freewheel has caused the calculated angle which the soft stop uses to be seriously in error. -
Page 29: F18: Azimuth Stowing Failure
4.39 F28: FPGA WATCHDOG TRIGGERED The FPGA watchdog has been triggered. This indicates a serious timing issue within the DCU software. Contact Advent Communications customer support if seen. 4.40 F31: HAND HELD CONTROLLER ACTIVE The hand held controller attached to the DCU is switched-on. The ACU/DCU cannot control the antenna drive. -
Page 30: F33: Fin 1 Over Temperature
A checksum error has been detected in data held within the E PROM. This indicates a serious error within the system memory area. Contact Advent Communications customer support for advice on clearing this alarm. Other alarms will indicate which area the checksum error has been seen in. -
Page 31: F53: Wooded Area Data Error
Contact Advent Communications customer support for advice. 4.56 F56: EXTERNAL FLASH ERASING/WRITING ERROR An error erasing or writing to the flash memory external to the DCU processor has been detected. Contact Advent Communications customer support for advice. 4.57 REMOTE CONTROL The serial interface is standard RS485. -
Page 32: Packet Protocol
VISLINK 4.59 PACKET PROTOCOL (a) The general packet format is as follows [STX] [BYTE COUNT] [ADDRESS] [DATA..] [CHECKSUM] [ETX] The STX is one byte in size and always represents the start of a transmission. This byte is always assigned the value 2 BYTE COUNT The BYTE COUNT is one byte in size and is the total number of bytes in the packet, i.e. -
Page 33: Commands, Queries And Responses
VISLINK 4.60 COMMANDS, QUERIES AND RESPONSES (a) Unit Specific Commands, i.e. using Equipment unique to Remote Address. Command As in section 4.61 Response to Valid Identical Echo Back of Commands: Command This echo confirms the equipment has obeyed the instruction Response to Invalid Answer Back of command Commands... - Page 34 VISLINK i ACU4000 <Model Text> iACU4000<DCU Type> < DCU Type> DCUXXXX 40YY. NewSwift 42YY. Mantis 43YY: FlyDrive 44YY: Summit YY: Antenna dia. in units of 10cm Query Serial Number Command: Response: Serial No. xxxxxxx xxxxxxx Seven digit unit serial number Query Software revision Command: Response:...
-
Page 35: 4.61.1 Control Remote Commands
VISLINK Set local/remote lock Command: Response: ‘L’: Local ‘R’: Remote 4.61.1 CONTROL REMOTE COMMANDS Rate Command Command: Rn±xxx Response: Rn±xxx ± ° ± ° Goto Command Command: Gn±xxxx Response: Gn±xxxx ± ° ± ° Jog Command Command: Jn±xxx Response: Jn±xxx ±... - Page 36 VISLINK Read movement state Command: Response: MSab Waveguide Switch Control Command: Response: Required Position. A : Position A.. B : Position B. Calibration command Command: Response: Enter re-calibration mode. Deploy Command Command: Dxxx Response: Dxxx Required deployed RF elevation angle. Units 1°. Only accurate when the system is deployed on level ground.
- Page 37 VISLINK Set Elevation Angle Command: SEC±xxx Response: SEC±xxx ±xxx New Elevation angle, in range 0° to 90°. Units 0.1°. Only works if system deployed, elevation axis calibrated, and no inclinometer error. Clear Alarms Command: Response: Monitoring start Command: Response: Monitoring finish Command: Response: Reset Mantis Angles.
- Page 38 VISLINK Set Feed Position Command: SFPx Response: Feed Position 1: Feed position 1 2: Feed position 2. response coded as above. Query Monitoring Voltages Command: Response: MV±aaa±bbb±ccc±ddd±eee±fff±ggg±hhh±iii±jjj±kkk±lll ±aaa 36V motor supply. Units 0.1V. ±bbb 12V electronics supply. Units 0.1V. ±ccc 5V MRD supply.
-
Page 39: 4.61.2 Compass Interface Commands
VISLINK Query GPS Position Command: RDGPS Response: RDGPSabbbb.bbbbccccc.cccc±ddd.deeeeeeffffffff Unit Status a: Not fitted. b: Searching. c: Current valid GPS data. d: Serial comms failure. bbbb.bbbb Latitude data. Format: ddmm.mmmX Degrees (00-90) mm.mmm Minutes. Hemispere. (N/S) ccccc.cccc Longitude data. Format: dddmm.mmmX ddd: Degrees (00-180) mm.mmm... - Page 40 VISLINK Compass Offset value Read: RDCOS Write: WDCOS±xxxx Response: RDCOS±xxxx xxxx Compass offset value. Units 0.1° The new compass offset takes about 1 second to update. During this time, the offset value is fixed at -800.0°. Query Compass data Command: RDCDT Response: RDCDTw<Data Field>...
- Page 41 VISLINK Abort calibration procedure Command: WCSCA Response: WCSCA The calibration responses and final results are output using the QUD responses. (C100 compass calibration only.) Reset Pitch Angle (HMR3300 only) Command: WCRPA Response: WCRPA Sets the HMR3300 pitch angle to 0°. Reset Roll Angle (HMR3300 only) Command: WCRRA...
-
Page 42: 4.61.3 Update Status Commands
VISLINK 4.61.3 UPDATE STATUS COMMANDS Differential Command: Response: See below. If no update required. Request to stop AutoActions. (The STOP key has been pressed, any controller MUST STOP any action in progress.) Or one of the following update responses. UA…….. US…….. - Page 43 VISLINK Waveguide Switch Position Command: Response: A: Position A. [= X(H)] B: Position B. [= Y(V)] M: Moving E: Error State Command: Response: USABCBEFGH System mode O: Operational T: Test U: DUT System Monitoring System State a: STOWED. b: STOWING. c: DEPLOYED.
- Page 44 VISLINK Alarms Command: Response: UEwwwwxxxxyyyyzzzz wwww Alarm1 coded status xxxx Alarm2 coded status yyyy Alarm3 coded status zzzz Alarm4 coded status Alarm coded status: Hexadecimal coding. Fixed length. A larm 1 Bit 1 LSB +12V Power supply voltage low. Bit 2 +36V Motor supply voltage failure.
- Page 45 VISLINK A larm 3 Bit 1 LSB Fin 1 over temperature. Bit 2 Fin 2 over temperature. Bit 3 Fin 3 over temperature. Bit 4 Fin 4 over temperature. Bit 5 Fin 5 over temperature. Bit 6 WGS supply failure. Bit 7 Brake supply failure.
- Page 46 VISLINK Monitoring data Command: Response: MD±aaa±bbb±cccc±ddd±eeee ±aaa Stow Detectors : Decimal number. Fixed length. Bit 1 LSB Stow 1 Bit 2 Stow 2 Bit 3 Stow 3 Bit 4 Stow 4 Bit 5 Stow 5 Bit 6 Stow 6 Bit 7 Not used.
-
Page 47: 4.61.4 Antenna Data
VISLINK 4.61.4 ANTENNA DATA Programmed Data Block Command: Response: PDXY<Data Field> X: Antenna Type identifier. Y: Message coding structure identifier. Mantis Antennas. X: ‘a’. <Data Field> ‘0’ Null data field. No programmed data. ‘A’ ±rrr (NOT IMPLEMENTED YET) Newswift Antennas X: ’b’ <Data Field>... - Page 48 VISLINK Preprogrammed data block Command: Response: RDz±aaa±bbb±ccc±ddd±eee±fffggghhhiiijjkkllmnopqrst Message Version. ‘a’ : Mantis Antenna. ±aaa Azimuth limit. Clockwise. (Units 1°) ±bbb Azimuth limit. Anti-Clockwise. (Units 1°) ±ccc Elevation up limit. (Units 1°) ±ddd Elevation down limit. (Units 1°) ±eee Polarisation limit. Clockwise. (Units 1°) ±fff Polarisation limit.
- Page 49 VISLINK Preprogrammed data block Command: Response: RDz±aaa±bbb±ccc±ddd±eee±fff±ggg±hhh±iii±jjjkkklllm mmnnnoooppqqrrssttuvwxyz±AAA±BBB±CCCD±EEE±FFF±GGGH IJKLM Message Version. ‘b’: Non Mantis antenna coding. ±aaa Azimuth limit. Clockwise. (Units 1°) ±bbb Azimuth limit. Anti-Clockwise. (Units 1°) ±ccc Elevation up limit. (Units 1°) ±ddd Elevation down limit. (Units 1°) ±eee Polarisation limit.
-
Page 50: Newswift Maintenance
Wipe any dirt and grease from the gear teeth, (This process may be eased by removing the gear cover, held in place by 4 screws). (Figure 1). Re-apply a small amount of low temperature grease – Kluber Isoflex LDS 18 (Advent part number G04-000004) or similar. -
Page 51: All Screws/Bolts
VISLINK ALL SCREWS/BOLTS Check that all screws/bolts are tight. Use the following torque settings for different size screws: Screw/bolt size Torque setting (Nm) 13.8 27.1 46.7 RADIATION CHECK Perform a radiation check around the antenna, outside of the main beam. As a guidance, for transmit power of 300 watts the power density will not exceed 10mW/cm sq. -
Page 52: Warranty
VISLINK WARRANTY WARRANTY INFORMATION Under recommended use and service, all Vislink products are warranted against defects in material and workmanship to twelve (12) months from the date of original shipment. Vislink's obligation is limited to repairing or replacing, at our plant, products, which prove to be defective during the warranty period. - Page 53 Vislink. Vislink reserves the right to reject any warranty claim on any item that has been altered or has been shipped by non-acceptable means of transportation. Returned Products should be carefully packed and unless otherwise indicated, shipped to: Advent Communications 27 Maylands Avenue Hemel Hempstead Hertfordshire...
- Page 54 VISLINK ANTENNA MOUNTING FRAME DESIGN GUIDELINES INTRODUCTION The following guidelines are given to assist in the manufacture of the antenna mounting structure on the vehicle to which the Newswift or Newswift HD antenna is fitted. The specific design of this structure is the responsibility of the coachbuilder / system integrator. The Newswift antenna needs a stiff stable structure to be able to meet its stated operational wind speeds.
- Page 55 VISLINK Typical Ku band Newswift HD Single Thread 125W system, W2 (kg) Typical Ku band Newswift HD Fully Redundant/Phase Combined 400W system, W4 (kg) Wind Loading (see co-ordinate system above) Vertical Force, F1 (Newtons) ±600 ±1200 ±1900 ±2665 Horizontal Force, F2 (Newtons) ±800 ±1600 ±2400...
- Page 56 VISLINK Special Notes: All wind loads and moment calculations are based on a wind speed of eighty miles per hour. The forces and moments given for F1, F2, M1 and M2 are maximum values for different antenna orientations and do not necessarily occur simultaneously. All force values are either tensile or compressive, and moments are either clockwise or anti-clockwise.
- Page 57 VISLINK TYPICAL ANTENNA INSTALLATION IMAGES: The following images show typical antenna installations but it should be remembered that each installation will need to be tailored to fit each vehicle type as detailed above. The internal structure is not shown. Antenna in its stowed position: Antenna rotated 90 degrees from it’s stow position: Antenna rotated by 180 degrees from its stow position: Newswift 90-180 Motorised Antenna...
- Page 58 VISLINK Newswift 90-180 Motorised Antenna...
- Page 59 VISLINK FIGURES: DCU FUSE RATINGS FS 5 3A Anti-surge DCU 12V DC input (Advent Part No.Q00-000042) FS 8 5A Anti-surge DCU 36V DC input (Advent Part No.Q00-000043) All fuses are surface mount nanofuse types. FIGURE 1 FIGURE 2 FIGURE 3...
- Page 60 VISLINK FIGURE 5 FIGURE 6 FIGURE 7 FIGURE 8 FIGURE 9 FIGURE 10 Fitting and removal figures for the optional multiband feedarm system: FIGURE 11 FIGURE 12 Newswift 90-180 Motorised Antenna...
- Page 61 VISLINK FIGURE 13 FIGURE 14 FIGURE 15 FIGURE 16 Newswift 90-180 Motorised Antenna...
- Page 62 VISLINK FIGURE 17 – DCU4000 INTERNAL LAYOUT – 209124 FIGURE 18 - SIDE ELEVATION 0.9M NEWSWIFT DWG 401971 ISS DA SHT 1 Newswift 90-180 Motorised Antenna...
- Page 63 VISLINK FIGURE 19 – SIDE ELEVATION 0.9M NEWSWIFT DWG 401971 ISS DA SHT 2 FIGURE 20 – SIDE ELEVATION 1.2M (KU-BAND) DWG 108230 ISS B SHT 1 Newswift 90-180 Motorised Antenna...
- Page 64 VISLINK FIGURE 21 – SIDE ELEVATION 1.2M (C-BAND) DWG 110358 ISS DA SHT 1 FIGURE 22 – PLAN ELEVATION 1.2M DWG 108230 ISS B SHT 2 Newswift 90-180 Motorised Antenna...
- Page 65 VISLINK FIGURE 23 – SIDE ELEVATION 1.5M (KU-BAND) DWG 401908 ISS DB SHT 2 FIGURE 24 – SIDE ELEVATION 1.5M (C-BAND) DWG 110357 ISS DA SHT 2 Newswift 90-180 Motorised Antenna...
- Page 66 VISLINK FIGURE 25 – PLAN ELEVATION 1.5M DWG 109509 ISS A SHT 1 FIGURE 26 – SIDE ELEVATION 1.8M DWG 116511 ISS 1 SHT 1 Newswift 90-180 Motorised Antenna...
- Page 67 VISLINK FIGURE 27 – PLAN ELEVATION 1.8M DWG 116511 ISS 1 SHT 2 FIGURE 28 – ROTARY WAVEGUIDE EXIT (KU-BAND) DWG 108230 ISS B SHT 3 Newswift 90-180 Motorised Antenna...
- Page 68 VISLINK FIGURE 29 – ROTARY WAVEGUIDE EXIT (C-BAND) DWG 110358 ISS DA SHT 3 FIGURE 30 – FIXING RING DWG 108230 ISS A SHT 3 Newswift 90-180 Motorised Antenna...
- Page 69 VISLINK FIGURE 31 – MOUNTING POINTS MOUNTING POINTS Newswift 90-180 Motorised Antenna...
- Page 70 VISLINK FIGURE 32 – SATELLITE GEOMETRY Newswift 90-180 Motorised Antenna...
Need help?
Do you have a question about the VISLINK Newswift 90 and is the answer not in the manual?
Questions and answers