Table of Contents
Advertisement
Quick Links
Quick Start Guide
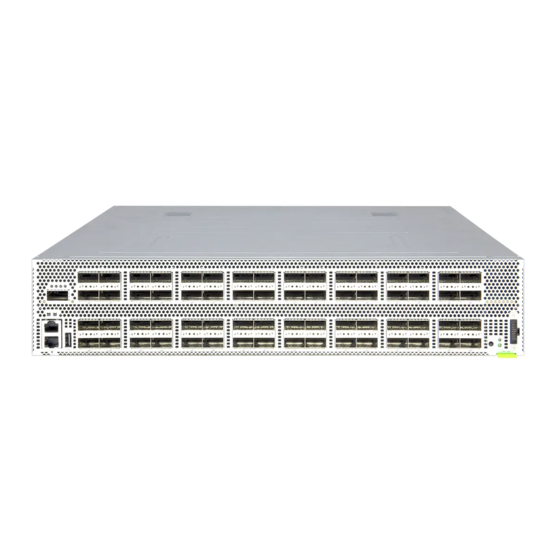
65 Port 100G Ethernet Switch
Wedge100BF-65X
1.
Wedge100BF-65X
2.
Rack Mounting Kit—2 front-post brackets, 2 rear-post
brackets, 20 screws, and 2 ear-locking screws
Note:
For safety and regulatory information, refer to the
Safety and Regulatory Information document included with the
switch.
Caution:
Risk of explosion if battery is replaced by an
incorrect type. Dispose of used batteries according to the
manufacturer's instructions.
Attention:
Risque d'explosion si la batterie est remplacée
par un type incorrect. Éliminez les piles usagées
conformément aux instructions.
Note:
The switch has the Open Network Install
Environment (ONIE) software installer pre-loaded on the
switch, but no switch software image. Information about
compatible switch software can be found at
www.edge-core.com.
1
Mount the Switch
1
3
1.
Attach each of the front- and rear-post brackets to the switch
using four of the included bracket screws.
2.
Use an additional two screws to secure each of the rear-post
brackets at the mid-point on the sides of the switch.
3.
Use the screws and cage nuts supplied with the rack to secure
the switch in the rack.
4.
Lock the position of the rear-post bracket ears using the included
position-locking screws.
You can also adjust the rear-post bracket ears to fit different rack
depths from 56 cm to 85 cm.
www.edge-core.com
Package Contents
4
2
1
2
3.
Power cord—either Japan, US, Continental Europe
or UK
4.
Documentation—Quick Start Guide (this document) and
Safety and Regulatory Information
Caution:
One person should position the switch in the rack, while the
other secures it using the rack screws.
Attention:
un commutateur dans un bâti : La première personne va
positionner le commutateur dans le bâti, la seconde va le
fixer avec des vis de montage.
装置の吸排気に必要な領域をマニュアル上に規定している。
2
Ground the Switch
1.
Ensure the rack on which the switch is to be mounted is properly
grounded and in compliance with ETSI ETS 300 253. Verify that
there is a good electrical connection to the grounding point on
the rack. (no paint or isolating surface treatment)Attach a lug
(not provided)
2.
Attach a lug (not provided) to a #18 AWG minimum grounding
wire (not provided), and connect it to the grounding point on the
switch rear panel. Then connect the other end of the wire to rack
ground.
Caution:
all supply connections have been disconnected.
Attention:
retiré sauf si toutes les connexions d'alimentation ont été
débranchées.
Caution:
location. It should have a separate protective earthing terminal
on the chassis that must be permanently connected to earth to
adequately ground the chassis and protect the operator from
electrical hazards.
Attention:
emplacement à accès restreint. Il doit comporter une borne
de terre de protection distincte sur le châssis, qui doit être
connectée en permanence à la terre pour assurer une mise
à la terre adéquate du châssis et protéger l'opérateur des
risques électriques.
– 1 –
3
Installing the switch in a rack requires two people.
Deux personnes sont nécessaires pour installer
1
The earth connection must not be removed unless
Le raccordement à la terre ne doit pas être
The device must be installed in a restricted-access
L'appareil doit être installé dans un
4
E012019-CS-R01
150200001949A
Advertisement
Table of Contents

Related Manuals for Edge-Core Wedge100BF-65X


Summary of Contents for Edge-Core Wedge100BF-65X
- Page 1 Quick Start Guide 65 Port 100G Ethernet Switch Wedge100BF-65X Package Contents Wedge100BF-65X Power cord—either Japan, US, Continental Europe or UK Rack Mounting Kit—2 front-post brackets, 2 rear-post brackets, 20 screws, and 2 ear-locking screws Documentation—Quick Start Guide (this document) and...
- Page 2 Quick Start Guide The following transceivers are supported: Connect Power ◆ CLR4 100G ◆ LR4/LR4-lite 100G ◆ CWDM4 100G ◆ OpenOptic 100G ◆ If you are using twinax copper cables (DAC cables) for port connections, connect the QSFP28 transceivers on the end of the DAC cables directly into the QSFP28 slots.
- Page 3 Quick Start Guide Hardware Specifications Switch Chassis Size (WxDxH) 440 x 507 x 89 mm (17.32 x 19.97 x 3.50 inches) Weight 20.4 kg (45 lb) Temperature Operating: 5° C to 45° C (41° F to 113° F) Storage: -40° C to 70° C (-40° F to 158° F) Humidity Operating: 10% to 90% (non-condensing) Power Consumption 1100 Watts maximum...
- Page 4 快速入门指南 65 端口 100G 以太网交换机 Wedge100BF-65X 包装清单 电源线 — 日式、美式、欧陆式 , 英国式或中国 Wedge100BF-65X 快速入门指南 安全和管制信息 机架安装套件 —2 个前柱支架,2 个后柱支架,20 个螺丝, 文档 — (本文档)以及 2 个耳锁定螺丝 将交换机接地 注意: 有关安全和管制信息,请参考交换机随带的 “ 安全 和管制信息 ” 文档。 小心: 如果换上类型不正确的电池会有爆炸危险。按照制 造商的说明报废用过的电池。 注意: 本交换机上已预装了 Open Network Install Environment (ONIE) 软件安装程序,但没有交换机软件映...
- Page 5 快速入门指南 小心: 使用交换机随附的 AC 电源线。要在国外使用,您可 硬件规格 能需要更换 AC 电源线。您必须使用所在地已针对插口类型 批准的电源线。 交换机机箱 检查基本交换机运行 尺寸 (WxDxH) 440 x 507 x 89 mm (17.32 x 19.97 x 3.50 英 寸) 重量 20.4 kg (45 磅) 温度 工作时:5° C 到 45° C (41° F 到 113° F) 存放时:-40°...
Need help?
Do you have a question about the Wedge100BF-65X and is the answer not in the manual?
Questions and answers