DMP Electronics X1 Installation And Programming Manual
Door controller
Hide thumbs
Also See for X1:
- Installation and programming manual (24 pages) ,
- Compliance manual (6 pages) ,
- Installation and programming manual (9 pages)
Table of Contents
Advertisement
Quick Links
Advertisement
Table of Contents

Related Manuals for DMP Electronics X1


Summary of Contents for DMP Electronics X1
- Page 1 X1 DOOR CONTROLLER INSTALLATION AND PROGRAMMING GUIDE LT-2264 1.01 21011 © 2021...
- Page 2 TABLE OF CONTENTS X1 Door Controller Overview ���������������������������� 1 Apply Power ������������������������������������������������������� 7 Door Controller Power �����������������������������������������������1 Wire the Input Power ������������������������������������������������7 Door Controller PCB Components ������������������������1 Wire the Battery ����������������������������������������������������������7 Door Controller Plug-In Terminals �������������������������1 Wiring Example �����������������������������������������������������������7 Mount the System ���������������������������������������������� 2 Connection Settings ����������������������������������������...
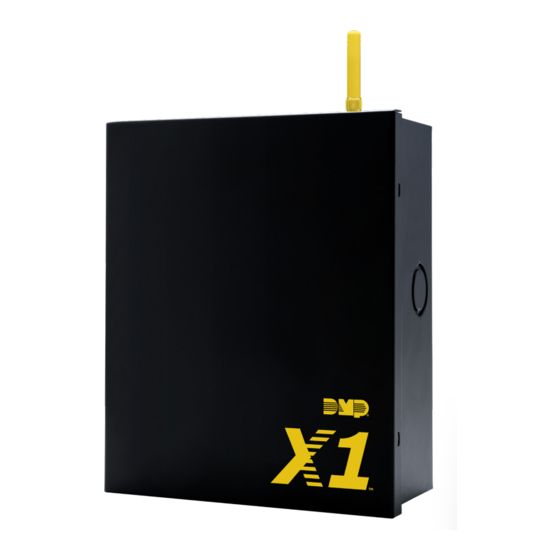
- Page 3 X1 DOOR CONTROLLER OVERVIEW The X1 Series is a cloud-based access control system that is fully programmed in Dealer Admin™ and maintained in Virtual Keypad™� This guide will cover mounting the system, wiring devices to the system, configuring network options, applying power, programming the system in Dealer Admin, and testing the system�...
-
Page 4: Mount The System
MOUNT THE SYSTEM The metal enclosure for the X1 Series must be mounted directly to a wall, backboard, or other flat surface in a secure, dry place to protect the system from damage� Do not remove the PCB from the enclosure�... - Page 5 Attach the negative wire of the device here� The outputs must be less than 98�5 ft (30 m) long� 12V+ (12V) Attach the positive wire of the device here� +AC/DC- +BAT- R2 W2 G2 DS RX X1 INSTALLATION & PROGRAMMING GUIDE | DIGITAL MONITORING PRODUCTS...
-
Page 6: Form C Relay
WIRE THE ELECTRONIC LOCK Form C Relay The X1 Series system provides a Form C (SPDT) relay for controlling locks and other electronically-controlled barriers� The three relay terminals marked NO C NC allow you to connect the device wiring to the relay for module control�... -
Page 7: Ethernet Connection
X-PoE Connection (Optional) For a PoE connection, gently push the PoE Module onto the X1 PoE Module headers� Warning: Make sure that the Ethernet cable is unplugged before connecting the PoE module� Verify that the PoE is in the position Gently press the PoE Module shown here. - Page 8 The yellow Wi-Fi antenna connects to the right of the cell antenna on the enclosure� 1� If the cable has become detached from the X1, simply wire it back onto the Wi-Fi module and run the cable around the module�...
-
Page 9: Apply Power
NEC, NFPA72, ANSI, and with all Authority Having Jurisdiction Wire the Input Power Connect the transformer wires or external power to terminals 1 and 2 on the X1 PCB� Use no more than 70 ft� of 16 gauge or 40 ft� of 18 gauge wire between the transformer and the X1 PCB�... -
Page 10: Connection Settings
If not connecting over Ethernet, connect to Wi-Fi at this time� If connecting over Ethernet, skip to Configure Network Settings� Configure Wi-Fi Settings On power up, the X1 broadcasts an SSID of DMPX1 followed by the system’s serial number� No password is required to connect to the SSID� The Wi-Fi LED blinks during the broadcast�... - Page 11 PROGRAM IN DEALER ADMIN After you’ve installed the X1 Series Door Controller and configured basic communication settings, follow the steps in each of the following sections to program a system in Dealer Admin: 1� Sign In to Dealer Admin 2� Add a Customer 3�...
- Page 12 Add an X1 If door options don’t open automatically, select the X1 that you want to configure� 1� Enter a descriptive name for the door� 2� In Strike Time, enter the number of seconds that you want the door to unlock when access is granted�...
- Page 13 Add an App User Adding an app user to an X1 system automatically adds them as a user in Virtual Keypad� 1� Go to Customers�...
-
Page 14: Test The System
Unscrew the washer on top of the enclosure and remove the Cell Module antenna� 2� Unplug the Cell Module from the Cell Header� 3� Pinch the tab of the standoff to release the module from the Door Controller� X1 INSTALLATION & PROGRAMMING GUIDE | DIGITAL MONITORING PRODUCTS... -
Page 15: Fcc Information
L’exposition aux radiofréquences de ce système a été évaluée selon la norme RSS‑102 et est jugée conforme aux limites établies par le Code de sécurité 6 de Santé Canada. Le système doit être installé à une distance minimale de 7.87 pouces (20 cm) séparant l’antenne d’une personne présente en conformité avec les limites permises d’exposition du grand public. X1 DOOR CONTROLLER Compatibility 263LTE-A-X1 (X1)
Need help?
Do you have a question about the X1 and is the answer not in the manual?
Questions and answers