Table of Contents
Advertisement
Form No. 10-80068 | Rev A | 2/05/2021
Owner's Manual
TR3-E Series Models
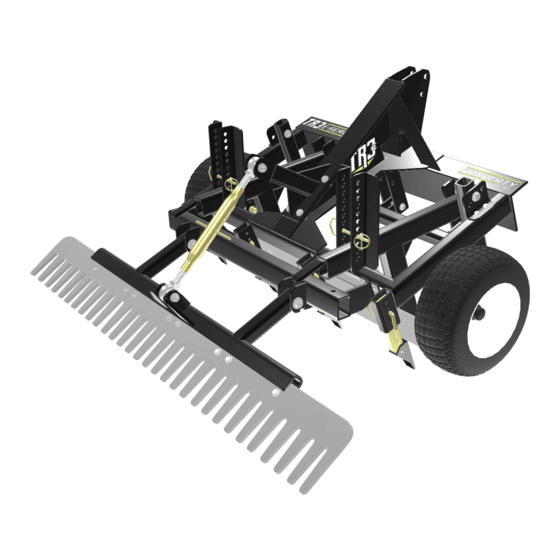
Property | Equine | Trevor Brazile Editions (6FT/7FT/8FT)
NOTE: This Owner's Manual covers several models. Features may vary by model. Not all features in this manual are applicable to
all models and the model depicted may differ from yours.
Advertisement
Table of Contents

Subscribe to Our Youtube Channel
Related Manuals for ABI Attachments TR3-E Series


Summary of Contents for ABI Attachments TR3-E Series
- Page 1 Form No. 10-80068 | Rev A | 2/05/2021 Owner’s Manual TR3-E Series Models Property | Equine | Trevor Brazile Editions (6FT/7FT/8FT) NOTE: This Owner’s Manual covers several models. Features may vary by model. Not all features in this manual are applicable to...
- Page 2 Model and Serial Number Model Number: Serial Number: Invoice Number: Purchaser’s Name: Contact Information Table of Contents General Info & Warranty......3 ABI Attachments, Inc 520 S. Byrkit Ave. Safety............4 Mishawaka, IN 46544 Safety Labels...........7 Uncrating Instructions......8 Customer Support Setup............9 Email: abicustomerservice@abiattachments.com Phone: 877-788-7253 Operartion Guide........10...
- Page 3 ABI ATTACHMENTS TERMS & CONDITIONS “ABI” means ABI Attachments, Inc. 520 S Byrkit Ave, Mishawaka, Indiana 46544, 877.788.7253. The TR3 E-Series rake is warrantied for 36 months, from the original invoice date, against defects in materials and/or workmanship when put to normal and designed residential, farm, &...
- Page 4 Safety WARNING! The SAFETY ALERT SYMBOL indicates there is a potential hazard to personal safety involved and extra safety precaution must be taken. When you see this symbol, be alert and carefully read the message that follows it. In addition to design and configuration of equipment, hazard control, and accident prevention are dependent upon the awareness, concern, prudence, and proper training of personnel involved in the operation, transport, maintenance, and storage of equipment.
- Page 5 • Lower implement to the ground • Replace parts on this implement and follow all shutdown procedures with genuine ABI Attachments parts before leaving the operator’s seat to OPERATION SAFETY only. perform maintenance. • Stay alert for holes, rocks, and roots Do not alter this implement in a way •...
- Page 6 USE SEAT BELT AND ROPS result. • ABI Attachments recommends AVOID UNDERGROUND UTILITIES the use of a CAB or roll-over • protective structures (ROPS) and Dig Safe, Call 811 (USA). KEEP RIDERS OFF MACHINERY seat belt in almost all tow vehicles.
- Page 7 Safety Labels Read Manual Warning Label Falling Blade Hazard Warning Label Crushing and Pinching Hazard Warning Label Email: support@abiattachments.com Call Toll Free: 877-788-7253...
- Page 8 Unpacking Instruction & Setup Initial Setup Instructions 1. Remove bolt (1-1/8” Hex) that secures the Toplink to the Rake attachment from Rake attachment mounting bracket. Tools Needed: Position Toplink end to line up with Rake attachment - Gloves brackets holes and slide bolt thru brackets and Toplink and - Safety Glasses tighten nut (see Figure 1).
- Page 9 Setup (cont'd) Initial Setup Instructions (Equine Edition) 1. Use the same initial Setup Instructions as the Property Edition above. Initial Setup Instructions (Trevor Brazile Edition) 1. For Units that are shipped with outer Rake sections removed (as shown in Figure 4), remove bolts and nuts (3/4” Hex) from Rake support bracket.
- Page 10 Operation Guide If the TR3-E is connected to the bottom holes, be sure to CAUTION: Ensure you have at least 9 inches between the connect the top link in the bottom hole on the mast as well. rear tire and the end of the lower 3-point arm. Likewise, if the lower arms of the tractor are connected to the TR3 in the top hole, connect the top link using the top If tool is closer than 9”, adjust Toplink to top hole on tractor...
- Page 11 Next, adjust the top link to level out the tool. A good • Smaller Tractors: starting point is to have around 1” of thread showing on If using a smaller tractor without a front end loader, front both ends of the Toplink then turn the top link to contract mounted counterweights may be needed to be able to use or extend the linkage until the upright towers of the the ABI tool (see Figure 9).
- Page 12 • Then, adjust from there to achieve desired surface finish look. Adjustments may be needed accounting for moisture changes or vegetation growth in the material. Gage Wheels (tires): The wheels have three operating positions: The bottom hole on the axle block is the standard operation position for general arena maintenance.
- Page 13 Components Property Edition LEVELING BLADE FINISH RAKE SCARIFIER OPTIONAL PROFILE BLADE Email: support@abiattachments.com Call Toll Free: 877-788-7253...
- Page 14 Equine Edition SCARIFIER PROFILE BLADE GROOMING RODS LEVELING BLADE FINISH RAKE Visit: www.abisupport.com...
- Page 15 Trevor Brazile Edition SCARIFIER PROFILE BLADE GROOMING RODS LEVELING BLADE HYDRAULIC FINISH RAKE Email: support@abiattachments.com Call Toll Free: 877-788-7253...
- Page 16 Trevor Brazile Edition Hydraulic Finish Rake First attach the hydrualic hoses to your tractor. One SPEED CONTROL VALVE MUST BE hose will be equipped with the speed control valve. It is ATTACHED TO THE OUTWARD FLOW importmant that the speed control valve is attached to the PORT ON THE TRACTOR outward flow port on the tractor.
- Page 17 Components (cont'd) All of the components on the TR3-E are adjustable using the compatible pins. By removing these pins, adjust the components up and down within their respective pockets. The Profile Blade (1), Leveling Blade (2), Scarifiers (3), Leveling Blade (4) and Profile Blades (5) all have multiple adjustment positions for fine tuned usage.
- Page 18 Scarifying Teeth (Ripping Teeth) The scarifying teeth loosen the ground to eliminate hard spots and easily penetrate compacted arena footing and gravel driveway material or soil. They are primarily used to break up compaction and can be used in conjunction with the leveling blade and the finish rake.
- Page 19 Profile Blades The profile blades are used on the Equine and Trevor Brazile units and can operate at a depth of up to 4” and are adjustable at ½” increments. This attachment cuts parallel to the arena grade, while riding along just above the base, to remove dangerous compaction layers and aerify the footing.
- Page 20 Depth Guide TIRE POSITION PROFILE BLADES SCARIFIERS GROOMING RODS Pocket Hole Blade Hole Depth Pocket Hole Scarifier Hole Depth Pocket Hole Rod Hole Depth 1.5" 3" 3" 2" 4" 4" 2.5" 5" 5" 3" 6" 6" POSITION 3.5" 7" 7" TOP HOLE 4"...
- Page 21 Profile Blade Pocket Holes Scarifier Pocket Holes Profile Shank Holes Scarifier Shank Holes Email: support@abiattachments.com Call Toll Free: 877-788-7253...
- Page 22 Grooming Rod Pocket Holes Grooming Rod Holes Visit: www.abisupport.com...
- Page 23 Replacement Parts All of the ground engaging components are considered wear parts and will need to be replaced as they wear out from use. To reorder, please contact the ABI Support department at 877-788-7253. Grooming Rods Grooming Rods should be replaced if the rod is bent beyond repair or have worn beyond the ability to function (approximately 11 ½”...
- Page 24 Finish Rake As the teeth of the finish rake wear, angle adjustment of the rake is required to maintain a nice finish of the material. If the angle of the finish rake no longer provides the required finish due to excessive rake wear, replacement is required. Profile Blade Profile Blades should be replaced when the edge of the blade has worn down to the weld on the angled shanks.
- Page 25 Maintenance Toplink - Be sure to keep the threaded parts of toplinks greased so they don’t seize over time. Finish Rake - Occasionally over the life the tool, bent finger(s) on the finish rake may appear. If this occurs, place a pipe over the bent finger and use the pipe as leverage to straighten the finger back out.
- Page 26 Troubleshooting & FAQs • Profile blades are making a chattering noise when dragged. This is probably due to the profile blades not being level. This can cause them to chatter or create waves in the arena. To resolve this issue, double check to make sure the upright towers are vertically level when engaged in the material. •...
- Page 27 Parts Description TR3-E Series - 6FT/7FT/8FT SEE DETAIL G SEE DETAIL A SEE DETAIL C SEE DETAIL B SEE DETAIL D SEE DETAIL E Email: support@abiattachments.com Call Toll Free: 877-788-7253...
- Page 28 DETAIL B DETAIL A DETAIL D DETAIL C DETAIL G Item 45 in DETAIL G (10-90285 KIT: BUSHING QUICK HITCH: TR3 E) is only needed when a Quick Hitch is being used to attach the unit to the tractor. DETAIL E Visit: www.abisupport.com...
- Page 29 ITEM PART # DESCRIPTION ITEM PART # DESCRIPTION 10-10078 TOPLINK, 21" W/LOCK:ZINC 10-20206 NYLOCK NUT:3/4-10:ZINC YEL GR 8 10-10096 LBL:PINCH POINT A 1" X 2" 10-20208 NYLOCK NUT:1/4-20:ZINC GR 5 10-10161 ABI SERIES SERIAL NUMBER PLATE 10-20209 NYLOCK NUT:5/8-11:ZINC CL 10-10444 LABEL: DO NOT PUSH BACKWARDS: TR3 E 10-20220...
- Page 30 KIT: Grooming Rods, 6T/7FT/8FT (Equine and Trevor Brazile) ITEM PART # DESCRIPTION 10-20342 3/8 X 1 3/4 RD WIRE LOCK PIN 10-31029 ROD: GROOMING: TR3 E 10-40325 WLDMT: GROOMING ROD SUPPORT 6': TR3 E TB 10-40326 WLDMT: GROOMING ROD SUPPORT 7': TR3 E TB 10-40327 WLDMT: GROOMING ROD SUPPORT 8': TR3 E TB Visit: www.abisupport.com...
- Page 31 ASM: Rake: 6FT/7FT/8FT ITEM PART # DESCRIPTION 10-20050 1/2-13 TOP LKGRC 10-20179 HX HD BOLT: 3/4-10 4.5": ZINC GR5 10-20194 FLT WSHR: 1/2 SAE: CL ZINC 10-20197 FLT WSHR: 3/4 SAE GR5: ZINC 10-20344 NYLOCK NUT: 3/4-10 : ZINC GR5 10-20359 HX HD BOLT: 1/2-13 1.75": ZINC GR5 10-31074...
- Page 32 ASM: Level Blade: 6FT/7FT/8FT ITEM PART # DESCRIPTION 10-10442 COVER: HANDLE DRAG BAR: TR3 E 10-20050 1/2-13 TOP LKGRC 10-20116 HX HD BOLT:1/2-13 1.25":ZINC GR5 10-20187 CARR BOLT:1/2-13 2":ZINC GR5 10-20194 FLT WSHR:1/2 SAE: CL ZINC 10-20333 CARR BOLT:1/2-13 4.5 ZINC GR5 10-31035 PLATE: DRAG BLADE 6': TR3 E 10-31036...
- Page 33 ASM: Profile Blade: 6FT/7FT/8FT (Equine & Trevor Brazile) Email: support@abiattachments.com Call Toll Free: 877-788-7253...
- Page 34 ASM: Profile Blade: 6FT/7FT/8FT (cont'd) ITEM PART # DESCRIPTION 10-20145 5/8 SAE F/W ZNC 10-20194 FLT WSHR:1/2 SAE: CL ZINC 10-20201 NYLOCK NUT:1/2-13:ZINC GR 5 10-20209 NYLOCK NUT:5/8-11:ZINC CL 10-20221 BENT PIN:1/2"X3.5":ZINC 10-20232 LYNCH PIN:1/4"X1.25":ZINC 10-20291 HX HD BOLT:5/8-11 4.0":ZINC GR5 10-20293 CARR BOLT:5/8-13 3.00":ZINC GR5 10-20320...
- Page 35 KIT: Trevor Brazile Hydraulic Option Email: support@abiattachments.com Call Toll Free: 877-788-7253...
- Page 36 KIT: Trevor Brazile Hydraulic Option (cont'd) ITEM PART # DESCRIPTION 10-10096 LBL:PINCH POINT A 1" X 2" 10-10576 CYL: 3 X 12 TUBE ENDS 10-10629 LBL: TR3E RED 10-10630 LABEL: TR3 E INFO SPINE GREY (5.25"X3.25") 10-20050 1/2-13 TOP LKGRC 10-20145 5/8 SAE F/W ZNC 10-20164...
- Page 37 KIT: Trevor Brazile Hydraulic Hose Option ITEM PART # DESCRIPTION 10-10108 FITTING:3/4 NPT:TRACTOR HYDRO 10-10250 FITTING:1/2 JIC - 1/2 O-RING:MALE 90 10-10610 VALVE: NEEDLE 1/2 NPT 10-10611 FITTING: 08MP-08MP HEX NIPPLE 10-10612 HOSE: 60" JIC-6 FEMALE SWIVEL: JIC-1 MALE RIGID 10-10613 HOSE: 50"...
- Page 38 9” Scarifier with hardware ITEM PART # DESCRIPTION 10-10047 TIP: SCARIFIER: ALL TOOLS 9" SCARIFIER SHANK 10-10048 5/16-18 X 1-3/4 HEX C/S GR 8 Z/YEL 10-20121 BASE HEXNUT 10-20200 BENT PIN:1/2"X3.5":ZINC 10-20221 LYNCH PIN:1/4"X1.25":ZINC 10-20232 Visit: www.abisupport.com...
- Page 39 TR3 E-Series Option: 10-90266 KIT: Rail Blade Right (Equine & Trevor Brazile Editions only) ITEM PART # DESCRIPTION 10-10876 INSTRUCTION SHEET: TR3 E RAIL BLADE 10-20230 HITCH PIN:1/2" X 5":ZINC 10-20232 LYNCH PIN:1/4"X1.25":ZINC 10-20339 KIT: TR3 E RAIL BLADE HARDWARE 10-40300 WLDMT: RAIL BLADE RIGHT: RASCAL 10-40313...
- Page 40 Contact Information Customer Support ABI Attachments, Inc Email: support@abiattachments.com 520 S. Byrkit Ave. Phone: 877-788-7253 Mishawaka, IN 46544 Website: www.abisupport.com To order parts or to speak to one of ABI’s Customer Service Representatives contact us Monday to Friday 9am to 5pm EST.
Need help?
Do you have a question about the TR3-E Series and is the answer not in the manual?
Questions and answers
How much are the tips for rippers
How to unhook a 8 ft abi arena drag equine