Table of Contents
Advertisement
Advertisement
Table of Contents

Related Manuals for Daikin FXAQ-M Series


Summary of Contents for Daikin FXAQ-M Series
- Page 1 EDUS 39 - 600 - F6 FXAQ-M Wall Mounted Type AMERICAS...
-
Page 2: Table Of Contents
EDUS39-600-F6 FXAQ-M Wall Mounted Type 1. Features ......................2 2. Specifications ....................3 3. Dimensions ....................5 4. Piping Diagrams..................8 5. Wiring Diagrams..................9 6. Electric Characteristics................10 7. Capacity Tables ..................11 7.1 Cooling Capacity ..................11 7.2 Heating Capacity ..................12 8. Air Velocity and Temperature Distributions..........13 9. -
Page 3: Features
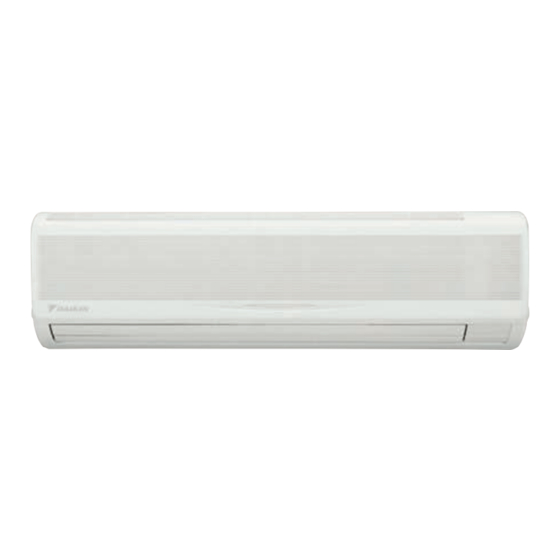
Features EDUS39-600-F6 1. Features External Appearance Compact and stylish design that does not detract from the decor of the room. Drain pan and air filter can be kept clean by mildew-proof polystyrene. Washable grille, the front grille can be easily removed for washing. -
Page 4: Specifications
EDUS39-600-F6 Specifications 2. Specifications Wall Mounted Type Model FXAQ07MVJU FXAQ09MVJU FXAQ12MVJU Cooling Capacity Btu/h 7,500 9,500 12,000 Heating Capacity Btu/h 8,500 10,500 13,500 Casing Color White (3.0Y8.5/0.5) White (3.0Y8.5/0.5) White (3.0Y8.5/0.5) 11–3/8 × 31–1/4 ×9” (289 x 793.7 x 11–3/8 × 31–1/4 × 9” (289 x 793.7 x 11–3/8 ×... - Page 5 Specifications EDUS39-600-F6 Wall Mounted Type Model FXAQ18MVJU FXAQ24MVJU Cooling Capacity Btu/h 18,000 24,000 Heating Capacity Btu/h 20,000 27,000 Casing Color White (3.0Y8.5/0.5) White (3.0Y8.5/0.5) 11–3/8 × 41–3/8 × 911–3/8 × 31–1/4 ×9” (289 x 1051 x 228.6 Dimensions: (H×W×D) in (mm) 11–3/8 ×...
-
Page 6: Dimensions
EDUS39-600-F6 Dimensions 3. Dimensions FXAQ07/09/12MVJU FXAQ-M... - Page 7 Dimensions EDUS39-600-F6 FXAQ18MVJU FXAQ-M...
- Page 8 EDUS39-600-F6 Dimensions FXAQ24MVJU FXAQ-M...
-
Page 9: Piping Diagrams
Piping Diagrams EDUS39-600-F6 4. Piping Diagrams Gas piping connection port Heat exchanger Liquid piping connection port Electronic Filter Filter expansion valve J:DU220-602J R1T : Thermistor for suction air temperature R2T : Thermistor for liquid line temperature R3T : Thermistor for gas line temperature Capacity Liquid φ1/2 (12.7 mm) -
Page 10: Wiring Diagrams
EDUS39-600-F6 Wiring Diagrams 5. Wiring Diagrams FXAQ07M/09M/12M/18M/24MVJU FXAQ-M... -
Page 11: Electric Characteristics
Electric Characteristics EDUS39-600-F6 6. Electric Characteristics 4D046466A FXAQ-M... -
Page 12: Capacity Tables
EDUS39-600-F6 Capacity Tables 7. Capacity Tables Cooling Capacity FXAQ-M Cooling capacity Indoor Air Temp. °FWB Outdoor air temp. Unit size °FDB 10.5 11.1 11.3 10.5 10.9 11.1 10.5 10.7 10.9 10.4 10.6 10.9 10.3 10.4 10.6 10.1 10.2 10.4 10.0 10.2 10.0 10.7... -
Page 13: Heating Capacity
Capacity Tables EDUS39-600-F6 Heating Capacity FXAQ-M Heating Capacity Indoor Air Temp. °FDB Outdoor Air Temp. Indoor unit °FDB °FWB 22.0 20.0 26.0 24.0 30.0 28.0 35.0 32.0 39.0 36.0 44.0 40.0 47.0 43.0 51.0 47.0 54.0 50.0 57.0 53.0 60.0 56.0 22.0 20.0... -
Page 14: Air Velocity And Temperature Distributions
EDUS39-600-F6 Air Velocity and Temperature Distributions 8. Air Velocity and Temperature Distributions FXAQ07M <Cooling mode> AIRFLOW DISTRIBUTIONS TEMPERATURE DISTRIBUTIONS FXAQ07M <Heating mode> AIRFLOW DISTRIBUTIONS TEMPERATURE DISTRIBUTIONS 3D053942 FXAQ-M... - Page 15 Air Velocity and Temperature Distributions EDUS39-600-F6 FXAQ09M <Cooling mode> AIRFLOW DISTRIBUTIONS TEMPERATURE DISTRIBUTIONS FXAQ09M <Heating mode> AIRFLOW DISTRIBUTIONS TEMPERATURE DISTRIBUTIONS 3D053943 FXAQ-M...
- Page 16 EDUS39-600-F6 Air Velocity and Temperature Distributions FXAQ12M <Cooling mode> AIRFLOW DISTRIBUTIONS TEMPERATURE DISTRIBUTIONS FXAQ12M <Heating mode> AIRFLOW DISTRIBUTIONS TEMPERATURE DISTRIBUTIONS 3D052935 FXAQ-M...
- Page 17 Air Velocity and Temperature Distributions EDUS39-600-F6 FXAQ18M <Cooling mode> AIRFLOW DISTRIBUTIONS TEMPERATURE DISTRIBUTIONS FXAQ18M <Heating mode> AIRFLOW DISTRIBUTIONS TEMPERATURE DISTRIBUTIONS 3D052936 FXAQ-M...
- Page 18 EDUS39-600-F6 Air Velocity and Temperature Distributions FXAQ24M <Cooling mode> AIRFLOW DISTRIBUTIONS TEMPERATURE DISTRIBUTIONS FXAQ24M <Heating mode> AIRFLOW DISTRIBUTIONS TEMPERATURE DISTRIBUTIONS 3D052937 FXAQ-M...
-
Page 19: Sound Levels
Sound Levels EDUS39-600-F6 9. Sound Levels Overall Wall-Mounted Type Notes: Operation noise differs with operation and ambient conditions. Model 208~230V, 60Hz FXAQ07MVJU FXAQ09MVJU FXAQ12MVJU FXAQ18MVJU FXAQ24MVJU Octave Band Level 208V~230V FXAQ07MVJU FXAQ09MVJU 4D055848 4D055849 FXAQ12MVJU FXAQ18MVJU FXAQ24MVJU 4D052499 4D052500 4D052498A FXAQ-M... -
Page 20: Installation
EDUS39-600-F6 Installation 10. Installation Installation Example FXAQ-M... - Page 21 Installation EDUS39-600-F6 1. SAFETY CONSIDERATIONS Read these SAFETY CONSIDERATIONS carefully before installing air conditioning equipment and be sure to install it correctly. After completing the installation, make sure that the unit operates properly during the start-up operation. Instruct the customer how to operate and maintain the unit. Inform customers that they should store this Installation Manual with the Operation Manual for future reference.
- Page 22 EDUS39-600-F6 Installation Improper installation may result in water leakage, electric shocks or fire. • Be sure to use only the specified accessories and parts for installation work. Failure to use the specified parts may result in water leakage, electric shocks, fire or the unit falling. •...
- Page 23 Installation EDUS39-600-F6 accordance with the relevant local and national regulations. 2. BEFORE INSTALLATION • When moving the unit while removing it from the packing case, be sure to lift it by the four hanger brackets. Avoid putting any pressure on other parts, especially, horizontal flaps, the refrigerant piping, drain piping, and other resin parts.
- Page 24 EDUS39-600-F6 Installation 2-1 ACCESSORIES Check that the following accessories are included with your unit. (2) Attachment screws (3) Paper pattern for Name (1) Installation panel (4) Insulating tape for the installation panel installation 8 pcs. → FXAQ07, 09, 12 type Quantity 1 set 1 pc.
- Page 25 Installation EDUS39-600-F6 manual. 3. SELECTING INSTALLATION SITE 1. Select an installation site that meets your customer’s approveal and where the following requirements are fulfilled: • Upper space (including the back of the ceiling) of the indoor unit has no possibility of water dripping. from the refrigerant pipe, drain pipe, water pipe, or any other source.
- Page 26 EDUS39-600-F6 Installation 4. INDOOR UNIT INSTALLATION • Use only specification-designated accessories and parts. CAUTION • Install so that the unit does not tilt to either side or forward. • Do not hold the unit by the horizontal flaps when lifting it as doing so may damage the horizontal flaps. (1) Open the piping through-hole.
- Page 27 Installation EDUS39-600-F6 (3) Remove the screw from the service lid and pull the handle forward. Front panel Axis Service lid Axis Handle Axis Screw Fig. 5 (6) Point the pipe in the direction it will be passed out. Insulating tape (4) For bottom-right and back-right piping, refer to Figure 6.
- Page 28 EDUS39-600-F6 Installation (3) Place the drain plug and the pipe insulation to the right side Drain plug Insulating tube Do not place lubricant (refrigerant oil) when inserting. Make sure This may cause deterioration and water leaks. there are no gaps. Insert using a hexagon wrench (4mm).
- Page 29 Installation EDUS39-600-F6 (9) Connect the piping referring to Section 5, REFRIGERANT PIPING WORK and Fig. 10 Refrigerant piping Secure with vinyl tape. Drain hose Transmission wiring and remote controller wiring Transmission wiring and A arrow view Refrigerant piping remote controller wiring Conduit Seal with putty corking material.
- Page 30 EDUS39-600-F6 Installation • To prevent dust, moisture, or other foreign matter from infiltrating the tube, either pinch the end or cover it with tape. • Do not allow anything other than the designated refrigerant to get mixed into the refrigerant circuit, such as air, etc. •...
- Page 31 Installation EDUS39-600-F6 CAUTION • CAUTION TO BE TAKEN WHEN BRAZING REFRIGERANT PIPING Do not use flux when brazing refrigerant piping. Use the phosphor copper brazing filter metal (BCuP) which does not require flux. Flux has an extremely negative effect on refrigerant piping systems. For example, if chlorine based flux is used, it will cause pipe corrosion.
- Page 32 EDUS39-600-F6 Installation 6. DRAIN PIPING WORK (1) Install the drain piping. (Refer to Fig. 16) • The drain pipe should be short with a downward slope and should prevent air pockets from forming. • Pay close attention to the directions in Figure 16 when performing drain work. Make sure the drain Drain hose Drain hose...
- Page 33 Installation EDUS39-600-F6 CAUTION • When connecting drain piping, do not connect the drain piping directly to sewage pipes that smell of ammonia. The ammonia in the sewage might enter the indoor unit through the drain pipes and corrode the heat exchanger. Keep in mind that if water collects on the drain pipe it will become blocked.
- Page 34 EDUS39-600-F6 Installation 8. WIRING EXAMPLE AND HOW TO SET THE REMOTE CONTROLLER 8-1 HOW TO CONNECT WIRINGS • Conduit for power supply wiring Unscrew and remove the conduit mounting plate from the electric parts box. (Refer to Fig. 20) Fix a conduit to the plate with a lock nut and reattach them at original position. Conduit Lock nut Conduit mounting plate...
- Page 35 Installation EDUS39-600-F6 Power supply < Wiring clamp method > terminal block (3P) Clamp small (accessory) (5) In the case of using the power supply terminal together with Power supply wiring Ground terminal the other connecting wirings Ground wiring Insulating tube Transmission wiring Remote controller wiring...
- Page 36 EDUS39-600-F6 Installation PRECAUTIONS 1. Use round crimp-style terminals for connecting wires to the power supply terminal block. (Refer to Fig. 23) If unavailable, observe the following points when wiring. • Do not connect wires of different gauges to the same power supply terminal because loose connections may cause overheating.
- Page 37 Installation EDUS39-600-F6 1. When using 1 remote controller for 1 indoor unit. (Normal operation) use the following diagram: Power supply Power supply Power supply Power supply 208-230V 208-230V 208-230V 208-230V Outdoor unit 60Hz 60Hz 60Hz 60Hz Control box IN/D OUT/D No.
- Page 38 EDUS39-600-F6 Installation NOTE 1. A single switch can be used to supply power to units on the same system. Branch switches and branch circuit breakers must be selected carefully. 2. Do not ground the equipment on gas pipes, water pipes, lightning rods or telephone ground wires. Improper grounding could result in electric shock.
- Page 39 Installation EDUS39-600-F6 Input ON → OFF turns OFF unit. Input OFF enables control by remote controller. (3) How to select FORCED OFF and ON/OFF OPERATION SECOND CODE NO. Mode No. • Turn the power on and then use the remote controller to select operation.
- Page 40 EDUS39-600-F6 Installation 10. TEST OPERATION Make sure the service panels are closed on the indoor and outdoor units. Refer to the installation manual of the outdoor unit. • The operation lamp of the remote controller flashes when a malfunction occurs. Check the malfunction code on on the liquid crystal display to identify the specific problem.
-
Page 41: Accessories
Accessories EDUS39-600-F6 11. Accessories Standard Accessories Check that the following accessories are included with your unit. (2) Attachment screws for the (3) Paper pattern for Name (1) Installation panel (4) Insulating tape installation panel installation 8 pcs. → FXAQ07, 09, 12 type Quantity 1 set 1 pc. - Page 42 AMERICAS 1645 Wallace Drive, Suite 110 Carrollton, TX75006 info@daikinac.com www.daikinac.com May 2007 EDUS39-600-F6 Printed in U.S.A. 05/2007...
Need help?
Do you have a question about the FXAQ-M Series and is the answer not in the manual?
Questions and answers