Table of Contents
Advertisement
Quick Links
Advertisement
Table of Contents

Related Manuals for RoadScan Canada PBC1


Summary of Contents for RoadScan Canada PBC1
- Page 1 RoadScan Canada PBC1 User Instruction Manual...
-
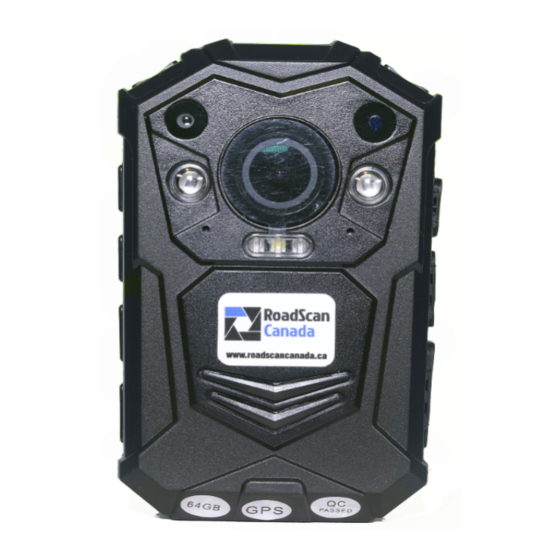
Page 2: Camera Layout
CAMERA LAYOUT Page... - Page 4 Page Power Power On – H old the power button on the top right for 3 seconds – a chime and a WELCOME screen will temporarily be displayed. The view of the camera lens will be displayed on the main LCD screen and the LED at the top of camera will be solid green. Power Off –...
- Page 5 Photographs Press the photo button to take a photograph. Photographs can be taken when the camera is either in or not in video record mode. These files will show as JPEG files on your PC. Page Statements/ Audio Button Record a statement – When the device is n ot recording – press the audio button to record a statement.
- Page 6 Page Playback The playback screen can be viewed by pressing the P lay/Pause button ( located to the left under the LCD view screen) when the camera is in standby mode and on main display screen. You will be prompted to enter a password. The default password is ‘0’ – 6 times, press the ...
- Page 7 F igure 2 Page 5 From the selected tab, to select which file to view you can tab over the files using the Browse-up button t o scroll left and the B rowse-down button t o scroll right and press the ...
- Page 8 Page 6 Menu Access Press the M enu button , otherwise known as the b rowse-down button , (located to the right of the O K button ) while on the main LCD view screen and camera is in standby mode. You will be prompted to enter a password (see Playback for password entry instructions).
-
Page 9: Menu Options
Page 7 Menu Options * L ook at the top right of the menu and the number out of 32 indicates which menu option you are on. ● 1/32 – S et camera video resolution: O ptions are 2304x1296 30P, 1920x1080p 30p, 1440x1080p 30P, 1280x720 60P, 1280x720 30P, 848x480 60P, 848x480 30P, and 720x480 30P. - Page 10 ● 24/32 – K ey tone : When this is on the user will hear a key tone when pushing buttons on the device. Options are on and off. ● 25/32 – V olume : Altering this affects the device’s sound levels including key tone and video/audio playback files. 26/32 - ...
- Page 11 1. Plug the camera into the computer via the USB cable 2. On the camera screen you will be prompted to enter your password. (see Playback for instructions for password entry). Figure 5 Page 9 3. After the password has been successfully entered, the camera screen should show a computer with a bullseye image on it: Figure 6 4.
- Page 12 F igure 7 6. Once opened there should be two folders, DCIM and GPS Player, and one file, OPERATIONDIARY.txt (which is a log of the date and time of the camera operations. For example recording, photo capture, and power) Page 10 7.
- Page 13 F igure 8 8. Now choose the file that your wish to view (MP4, JPEG, WAV) F igure 9 Page 11 To Delete Files Select a file or files on computer and press delete key (like any thumb drive). Or save to your computer.
- Page 14 screen. If there is no satellite image on the file it means that no GPS was captured. Figure 10 5. To view a file, highlight the file and hit the play button, this may take a few seconds to a minute depending on the size of the file. 6.
-
Page 15: Led Lights
USB from the mini camera into the USB port and press the record button on the mini camera to start and stop recording. W hen plugging USB from the mini camera into the PBC1, the USB should easily plug NOTE:... -
Page 16: Troubleshooting
RoadScan Canada Inc. The content of this manual is furnished for informational use only, is subject to change without notice. RoadScan Canada Inc assumes no responsibility or liability for any errors or inaccuracies that may appear in this book. - Page 17 • DO NOT use this product to carry out any illegal activities such as sneak preview, etc. RoadScan Canada Inc shall not be responsible for any consequences’ of illegal activities conducted by users.
-
Page 18: Warranty
LIMITATION OF LIABILITY The liability of RoadScan Canada Inc, arising from this warranty and sale shall be limited to a refund of the purchase price. In no event shall RoadScan Canada Inc be liable for costs of procurement of substitute products or services, or for any lost profits, or for any consequential, incidental, direct or indirect damages, however caused and on any theory of liability, arising from this warranty and sale.
Need help?
Do you have a question about the PBC1 and is the answer not in the manual?
Questions and answers