
Related Manuals for Daikin FC Series


Summary of Contents for Daikin FC Series
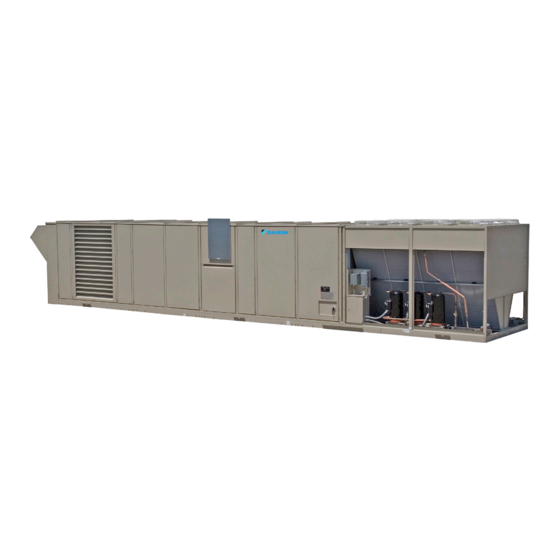
- Page 1 Installation and Maintenance IM 684-6 Group: Applied Air Systems Part Number: IM 684 Date: October 2018 Daikin Rooftop Systems Forced Draft Gas Fired Furnace FC ****A* with RM7897A Flame Safeguard...
-
Page 2: Table Of Contents
Table of Contents Table of Contents Introduction . . . . . . . . . . . . . . . . . . . . . . . . . . . . . . . . . . . . . . . 3 Service . -
Page 3: Introduction
Introduction Introduction Hazardous Information Messages WARNING AVERTISSEMENT FIRE OR EXPLOSION HAZARD! RISQUE D´INCENDIE OU D´EXPLOSION! Failure to follow safety warnings exactly could result in serious injury, death, Le non respect des mises en garde pourrait entraîner des blessures graves, or property damage. la mort, ou des pertes matérielles. -
Page 4: General
. If there is an in-warranty failure, state the date of installation of the unit and the date of failure along with The Daikin rooftop unit is equipped with an outdoor air louver an explanation of the malfunctions and the description of the to supply adequate combustion air. -
Page 5: Installation
Installation Installation Figure 1: Flue Box General The installation of this equipment must be in accordance with the regulations of authorities having jurisdiction and all applicable codes . It is the responsibility of the installer to determine and follow the applicable codes . Sheet metal parts, self-tapping screws, clips, and such items inherently have sharp edges, and it is necessary that the installer exercise caution . -
Page 6: Electrical
. The Daikin burner receives its electrical power from the main unit control panel . No additional power wiring must be routed Install all piping in accordance with the National Fuel Gas Code to the burner . -
Page 7: Valve And Regulator Venting
Installation Gas Piping Routing into Unit Table 3: Specific Gravity other than 0.60 SPECIFIC GRAVITY MULTIPLIER On-The-Roof Piping (Models 020-140) 0 .50 1 .100 1 . Remove knockout (1) at corner of burner vestibule door 0 .60 1 .000 and saw out corner of door . See Figure 3 . -
Page 8: Typical Piping Connections
Installation Gas Piping Typical Piping Connections (Models 150 through 200) Figure 5: Connections The gas piping cannot be routed up to the burner from within the curb on Models 150 through 200 . Gas piping must be routed across the roof to under the burner vestibule, or a pitch pocket can be provided there . -
Page 9: Condensate Drain
Installation Condensate Drain All units are equipped with a 3/4" I .P . stainless steel condensate drain pipe projecting from the back side of the furnace section (see Figure 16 Figure 17) and the flue box corners (see Figure 1) . Drainage of condensate directly onto the roof may be acceptable in certain areas, refer to local codes . -
Page 10: Start-Up And Operating Procedures
Daikin trained technicians who are familiar with working on areas sharing ventilation . Disconnect the pilot gas tube at live equipment . A representative of the owner or the operator... -
Page 11: Low Fire Start
Start-Up and Operating Procedures Main Flame Start-Up Figure 8: RM7897A Flame Safeguard 1 . At the conclusion of the pilot start-up and with the gas test cock closed, measure the air box pressure (see Table 10 on page 36) by holding a rubber manometer tube tightly over the burner air pressure port . -
Page 12: Typical Electrical Schematic For Microtech
Start-Up and Operating Procedures Typical Electrical Schematic for MicroTech III Control System ® with RM7897A IM 684-6 • ROOFTOP SYSTEMS www .DaikinApplied .com... -
Page 13: Typical Sequence Of Operation (3-1 Gas Burner)
Start-Up and Operating Procedures Typical Sequence of Operation (3-1 gas burner) for MicroTech III Control Systems When 120V power is furnished through the system on/off allowed to control the firing rate once the heating stage timer switch (S1), through the burner on/off switch (S3), and through (default 5 minutes) has passed. -
Page 14: Modulating Gas Burner Without End Switch Cycling
Start-Up and Operating Procedures Modulating Gas Burner without End Switch Cycling Similar to the sequence of operation described previously except at any time the burner is operating, the modulating controllers will determine the firing rate. The modulating controls position an operator which will change both gas and airflow proportionally. -
Page 15: Typical Sequence Of Operation (3-1 Gas Burner)
Start-Up and Operating Procedures Typical Sequence of Operation (3-1 gas burner) with no MicroTech III Control System When the rooftop unit is energized, 120 V power is supplied Terminal 10 (Ignition Transformer [IT]) will de-energize when through the System ON-OFF switch (S1) to the Heat ON-OFF the pilot flame is detected. -
Page 16: Service
8 . If the pilot flame signal voltage is within the range General specified above, use that peak midpoint setting as the pilot gas pressure setpoint . The Daikin gas burner (see Figure 20 on page 36) has a pre-mix pilot burner . The pilot pressure gauge tap (2) is a 9 . -
Page 17: Flame Rod Adjustment
M = 20° Models 020 thru 100 Bushing M = 10° Models 110 thru 200 .00 to .03 Gun Assemblies The Daikin gas burner has an easily removable gun assembly Igition Electrode Flame Rod which includes the complete pilot burner assembly and the Adjustment Adjustment main flame burner head. -
Page 18: Modulating Linkage Adjustment
Service Altitude Considerations In general, if the discs are located too far back in the blast tube, uneven heat distribution will result . The back of the For altitudes above 2000 feet, the gas burner must be derated exchanger will get too hot and the front will remain cool . 4% for every 1000 feet of altitude . -
Page 19: Check Co 2 , Co & Stack Temperature
Service Check CO , CO & Stack Cleaning Heat Exchangers Temperature Models 032 thru 200 (see Figure Flue gas samples are to be taken from inside one of the 1 . Remove the flue box front wrap (1) and the rear secondary tubes. -
Page 20: Leakage Symptoms
Service Leakage Symptoms Causes of Failures 1 . Odor - Odors in the building are usually brought in 1 . Improper Application - The furnace rating plate through the outdoor air intakes and do not indicate specifies a “Minimum Airflow CFM.” The furnace must leakage from the furnace . -
Page 21: Replacing A Heat Exchanger
Service Replacing a Heat Exchanger Rear Inspection Cover 1 . Remove the complete flue box, the casing panel through The rear inspection cover is equipped with a stainless steel which the flue tubes pass, and the rear inspection cover. drip shield to keep condensate away from the side of the unit Open the hinged rear door . -
Page 22: Combination Fan And Limit Control
Service Combination Fan and Limit Control Replacing “White Rogers” Fan Limit Controller with “Antunes” The fan limit control is a hydraulic action type with a remote sensing element and connecting capillary tube . The sensing Wire 24 VAC input power to terminals T2 and T3 . Wire element is locked into a bracket located on one of the heat temperature sensor from the secondary tubes at the heat exchanger tubes about halfway toward the back of the furnace,... -
Page 23: Maintenance
Maintenance Maintenance 4 . Motor - Motor life can be increased by proper oiling . Planned maintenance is the best way to avoid unnecessary expense and inconvenience . Have this system inspected There are provisions in both end shields for relubrication . at regular intervals by a trained and experienced service Re-oil each bearing with 150 drops (approximately 1 technician . -
Page 24: Operation
Maintenance Operation LED Display Initiate Period: When the relay module is powered it goes There are five labeled LED’s located on the front of the through a 10 second “Initiate” period . It will also enter into RM7897A which are energized to indicate operation as follows: the “Initiate”... -
Page 25: Troubleshooting
Troubleshooting Troubleshooting The RM7897A flame safeguard is equipped with an LED to aid in the diagnosis of burner operation and problems. Fault identification is a series of fast- and slow-blinking LED lights. The fast blinks identify the tens portion of the fault code (two fast blinks is 20), while the slow blinks identify the units portion of the fault code (two slow blinks is 2) . - Page 26 Troubleshooting In addition, a Keyboard Display Module is available and is a valuable aid for indicating flame signal DC volts, fault messages, sequence status, etc . Refer to Flame Safeguard on page 23 for additional information on the Keyboard Display Module . Some of the steps listed in this troubleshooting chart will be unnecessary if a Keyboard Display Module is used, as that module will pinpoint many problems .
- Page 27 Troubleshooting Burner Motor Runs, But . . . (continued) a . Check Table 7 . The LED code may diagnose the problem . 2 .3 During the 10 second period before shutdown there is: b . Close the main gas cock (pilot gas cock open) and observe the pilot through the inspection window as it goes through a sequence .
- Page 28 Troubleshooting Burner Operates; However . . . a. The furnace is being fired above its rated capacity. See Verify Input Rate on page 18 . b . Heat exchanger needs cleaning . Increased pressure drop through heat exchanger reduces airflow through burner and affects combustion. c.
- Page 29 Troubleshooting Burner Operates; However . . . (continued) a . Check Table 7 . The LED code may diagnose the problem . 4 .5 At the instant spark comes on, the flame safeguard drops out and b . Ignition interference . Flame rod or its wire is sensing voltage from ignition . Also restarts the pre-purge cycle .
-
Page 30: Fault Codes
Fault Codes Fault Codes Table 7: Fault codes Blinking Fault Codes . . . Fault Code System Failure Code 1-1 a . Check the relay module and display module Low AC Line detected . connections . *Low AC Line Voltage* b . - Page 31 Fault Codes Blinking Fault Codes . . . (continued) Fault Code System Failure a. Make sure the flame detector and flame amplifier are compatible. b. Remove the flame amplifier and inspect its connections. Reset the flame amplifier. c . Reset and sequence the relay module . d.
- Page 32 Fault Codes Blinking Fault Codes . . . (continued) Fault Code System Failure a . Make sure the purge card is seated properly . b . Inspect the purge card and the connector on the relay module for any damage or contaminants .
- Page 33 Fault Codes Blinking Fault Codes . . . (continued) a . Check wiring and correct any errors . b . Reset and sequence the relay module . c . Use manual motor potentiometer to drive the motor open and closed . Verify at motor Code 5-2 Either High Fire Switch or Low Fire switch that the end switches are operating...
-
Page 34: Typical Parts List
Typical Parts List Typical Parts List Table 8: Typical Parts List 60 Hz Part Part Qty . Description Sym . Qty . Description Sym . Number Number Burner Wheel – 0 .5" bore, CCW Burner Ignition Assembly 200-1000 MBH Furnace 034861102 200 - 1000 MBH Furnace 034742900... -
Page 35: Controls, Settings And Functions
Controls, Settings and Functions Controls, Settings and Functions Table 9: Controls, Settings and Functions Gas Heating Controls Symbol Description Function Reset Location Setting Range Differential Part No . Proves Gas furnace Blower air presence of 0 .4" w .c ., control 330038B-00 switch... -
Page 36: Capacities And Dimensions
Capacities and Dimensions IM 684-6 • ROOFTOP SYSTEMS www .DaikinApplied .com... -
Page 37: Performance And Service History
Performance and Service History www .DaikinApplied .com IM 684-6 • ROOFTOP SYSTEMS... - Page 38 Daikin Applied Training and Development Now that you have made an investment in modern, efficient Daikin equipment, its care should be a high priority. For training information on all Daikin HVAC products, please visit us at www.DaikinApplied.com and click on Training, or call 540-248-9646 and ask for the Training Department.
Need help?
Do you have a question about the FC Series and is the answer not in the manual?
Questions and answers