
Subscribe to Our Youtube Channel
Related Manuals for Belden Grass Valley Densite 3 Frame


Summary of Contents for Belden Grass Valley Densite 3 Frame
- Page 1 Densité 3 Frame 20 Multiformat Cards in 3 RU Guide to Installation and Operation M844-9900-104 2017-07-14...
- Page 2 Copyright © 2008-2017, Grass Valley Canada. All rights reserved. Belden, Belden Sending All The Right Signals, and the Belden logo are trademarks or registered trademarks of Belden Inc. or its affiliated companies in the United States and other jurisdictions. Grass Valley, iControl, and Densité...
- Page 3 ELECTROMAGNETIC COMPATIBILITY This equipment has been tested for verification of compliance with FCC Part 15, Subpart B requirements for Class A digital devices. NOTE: This equipment has been tested and found to comply with the limits for a Class A digital device, pursuant to part 15 of the FCC Rules.
-
Page 4: Table Of Contents
Guide to Installation and Operation Table of Contents 1 Densité 3 Frame ......................1 1.1 Introduction .............................. 1 1.2 Features ..............................1 1.3 Physical Layout ............................2 2 Installation ........................3 2.1 Unpacking ..............................3 2.2 Mechanical Installation ..........................3 2.3 Opening the Front Panel .......................... -
Page 5: Densité 3 Frame
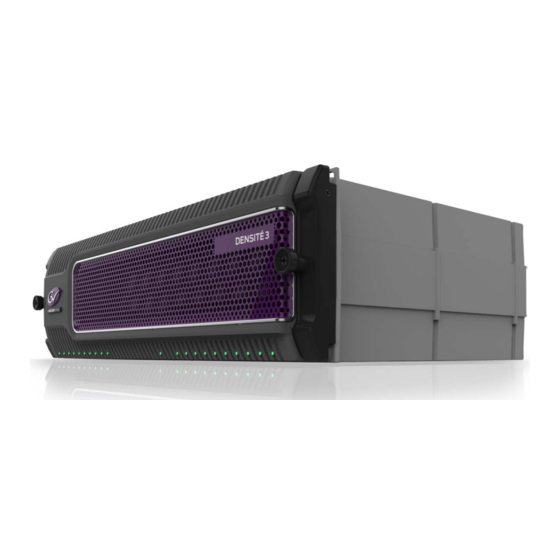
1 Densité 3 Frame 1.1 Introduction The 3 RU Densité 3 Frame can simultaneously process 3G, HD, SD and analog video, as well as AES and analog audio and can be fitted with 3 RU and 2 RU Densité modules (using card extenders). Its front-opening frame features dual hot-swappable power supplies (PSUs) and fans. -
Page 6: Physical Layout
Guide to Installation and Operation 1.3 Physical Layout Front Panel Appearance Card status LEDs Controller Card status LED Card status LEDs Note the openings in the panel (numbered 1 to 20) which allow the status LEDs on the installed cards to be seen while the panel door is closed. -
Page 7: Installation
2 Installation 2.1 Unpacking Make sure the following items have been shipped with your Densité 3 frame: - Densité 3 frame, including 1 Power Supply unit (AC in) and 1 controller card - An AC power cord - Densité series cards (per order) - Blank rear panels (for empty slots) - A second power supply and AC cord (optional) 2.2 Mechanical Installation... -
Page 8: Installing Cards In The Densité 3 Frame
Guide to Installation and Operation 2.4 Installing Cards in the Densité 3 Frame Each card comes with a rear connector panel which must be installed at the same time. All cards and rear panels can be installed with the frame power on. The card has connectors which plug into a mid-frame mother board for distribution of power and for connection to the controller card, and a second connector which plugs directly into the rear connector panel for input and output. -
Page 9: Installing Densité 2 Cards And Rear Modules In A Densité 3 Frame
2.5 Installing Densité 2 Cards and Rear Modules in a Densité 3 Frame The Densité 3 frame supports the many Grass Valley Densité 2 series cards. Should you need to install a Densité 2 card in your Densité 3 frame, you will need two adapters – one for the card, and one for the rear panel. -
Page 10: Ventilation
Guide to Installation and Operation 3. Slip the top of the 2RU rear module into the slot at the bottom of the adapter, and secure it to the frame using the captive screw at the bottom of the module. NOTE: Native 3-RU single and double rear modules are also available for some Densité... -
Page 11: Field-Serviceable Items
3 Field-Serviceable Items 3.1 Changing the Power Supply The Densité 3 frame supports dual redundant hot-swappable power supplies. The basic configuration includes a single supply, plus an empty slot for the optional redundant power supply. Installing a second power supply module and applying power to it automatically engages the redundant supply mode. -
Page 12: Replacing The Controller Card
Guide to Installation and Operation 3.2 Replacing the Controller Card The Controller card is located to the right of the power supply slots at the center of the frame. To replace the card, proceed as follows: 1. Hook your finger through the opening at the top of the card. Pull gently until the card is released from the rear connector, and then slide the card out of the frame. -
Page 13: Replacing The Air Filter
3.4 Replacing the air filter To remove the air filter for cleaning or replacement, proceed as follows: • Open the front panel of the frame • Grasp the top of the filter installed on the rear of the door, and pull it gently out of its mounting slot To install a filter, proceed as follows: •... -
Page 14: Specifications
Guide to Installation and Operation 4 Specifications MECHANICAL Dimensions: 3RU x 485 mm (19”) W x 286 mm (11.25”) D with connectors Weight: 4,6 kg (10.2 lbs.) with 1 PSU and controller card installed POWER Input Range: AC 60-50 Hz, 100-240V Rating: 300 W max.
Need help?
Do you have a question about the Grass Valley Densite 3 Frame and is the answer not in the manual?
Questions and answers