
Related Manuals for Noaton DF 4123


Summary of Contents for Noaton DF 4123
- Page 1 User Manual DEHUMIDIFIER DYD-T23A431 Thank you for choosing this product. Please read this instruction manual before using it.
- Page 2 Read the USER MANUAL carefully before operation. Further information is available in the USER MANUAL, SERVICE MANUAL, and the like. Service personnel are required to carefully read the USER MANUAL and SERVICE MANUAL before operation. Recycle unwanted materials instead of disposing of them. All appliances and packaging should be sorted and tendered at a regional recycling centre and be processed in an ecological manner.
- Page 3 Figure1 Figure2 14 15 Figure3...
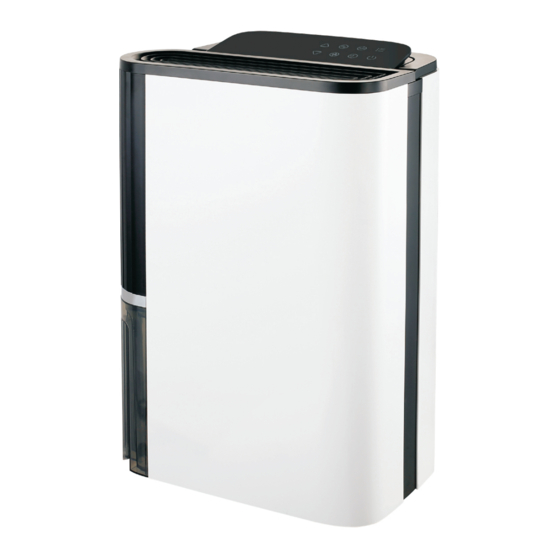
- Page 4 Product Description Components 1. Handle 2. Air Inlet Grille 3. Drainage Outlet 4. Power Cord Bracket 5. Castors 6. Air Outlet 7. Rear Cover 8. Water Tank 9. Power Cord 10. Control Panel 11. Front Cover Control Panel 12. Humidity Reading 13.
-
Page 5: Table Of Contents
Table of Contents Product Instructions................1 Safety Instructions............... 1- 2 Prior to Operation................3 Continuous Drainage..............3 Operation Instructions..............4-8 Cleaning..................9 Storage..................10 Display Error Codes ..............10 Safety Precautions On Servicing..........11-12 Trouble Shooting ................13... -
Page 6: Product Instructions
Product Instructions The dehumidifier is used to remove excessive moisture from the air. The resulting reduction in relative humidity protects buildings and their contents from the adverse effects of excess humidity. The environmentally friendly R290 is used as the refrigerant. R290 has no damaging influence on the ozone layer (ODP), a negligible greenhouse effect (GWP) and is available worldwide. - Page 7 Safety Instructions The appliance shall be stored in a room without continuously operation sources (for example: open flames, an operating gas appliance or an operating electric heater). The appliance shall be stored so as to prevent mechanical damage from occurring. Do not piece or burn, even after use.
-
Page 8: Prior To Operation
Prior to Operation ≥20cm Place the dehumidifier in an upright position on a stable, flat surface. Ensure the dehumidifier is at a safe distance at least 50cm away from a wall or furniture. Supply power should be in correspondence with the value on the nameplate, power outlet needs to be grounded. -
Page 9: Operation Instructions
Operation Instructions Connect the power plug to the correct power supply; all indicators and buttons will light up and then will be off. Desired setting will be confirmed 3s after the operation. Switch On / Switch Off The Unit [ Power button ] Press the power button once to turn on the unit, the unit runs by default mode on manual continuous dehumidifying with medium fan speed. - Page 10 Operation Instructions Humidity Setting [ Up and Down buttons ] Press the up/down buttons to select your preferred humidity from CO-30%-35%-40%-45%-50%-55% -60%-65%-70%-75%-80%-CO. CO means continuous dehumidifying regardless of ambient humidity. Anion Function [ Anion button ] Press the anion button to activate the anion function to fresh up the air quality. Anion function will be off automatically when the fan stops working.
- Page 11 Operation Instructions Multifunction Optional [ Mode button ] Laundry Drying Mode Press the mode button once to select Laundry Drying mode, the unit runs in continuous dehumidification with high fan speed for 6 hours then switch off automatically. Fan speed button and timer button are invalid. Air Purifying Mode Press the mode button 2 times to select Air Purifying mode, the unit runs with high fan speed without dehumidifying.
- Page 12 Operation Instructions Manual Mode Press the mode button 4 times to select Manual mode, the unit runs by default continuous dehumidifying with medium fan speed. At manual mode all buttons are valid. Safety Childlock Function [ Fan Speed button-2 seconds ] Press the fan speed button for 2s to lock all the buttons with a beeping sound, the same operation can unlock it.
- Page 13 Operation Instructions Auto Shut off with Water Tank Full Indicator The unit will go into standby mode when water tank is full or the water tank is not installed properly. After emptying the tank or install the water tank properly, the unit will go on to the previous mode.
-
Page 14: Cleaning
Cleaning When used regularly , the filter may become clogged with dust and particles. Therefore the filter should be cleaned at least every two weeks. Follow these steps: 1. Switch the device off and remove the plug from the socket before cleaning. -
Page 15: Storage
Storage If the dehumidifier will not be used for a long period of time, take the following steps: 1. Remove the plug from the socket and empty the tank, make the tank and the dehumidifier dry completely, this may take a couple of days. 2. -
Page 16: Safety Precautions On Servicing
Safety Precautions On Servicing Please follow these warnings when to undertake the following when servicing a dehumidifier with R290. Checks to the area Prior to beginning work on systems containing flammable refrigerants, safety checks are necessary to ensure that the risk of ignition is minimized. For repair to the refrigerating system, the following precautions shall be complied with prior to conducting work on the system. - Page 17 Safety Precautions On Servicing Checks to the refrigeration equipment Where electrical components are being changed, they shall be fit for the purpose and to the correct specification. At all times the manufacturer’s maintenance and service guidelines shall be followed. If in doubt consult the manufacturer’s technical department for assistance.
-
Page 18: Trouble Shooting
Trouble Shooting Check the following before contacting technical support. PROBLEM POSSIBLE CAUSE SOLUTION The power is not connected Insert the plug into the wall outlet The device does The water tank is full Empty the tank not work The tank has not Replace the tank been replaced correctly Be patient and wait...
Need help?
Do you have a question about the DF 4123 and is the answer not in the manual?
Questions and answers