
Related Manuals for U-Turn Backup RS Series


Summary of Contents for U-Turn Backup RS Series
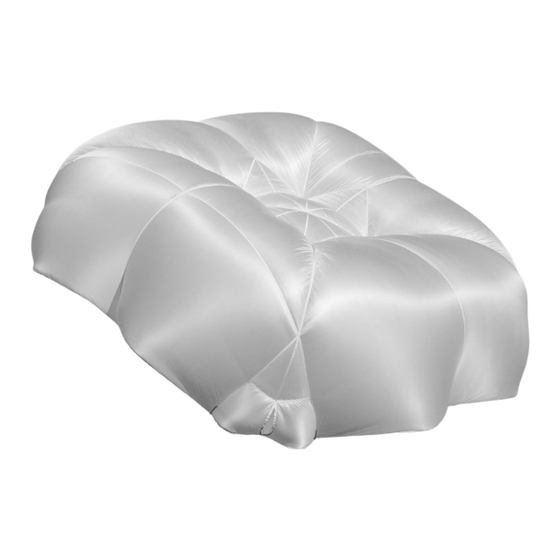
- Page 1 Manual English Rev. 1.1 Effective: April 2019 Please read this manual carefuly before you use your Backup RS reserve parachute.
- Page 3 Congratulations, you chose the newest round square canopy rescue BACKUP RS. We thank you for your trust in U-Turn and view it as confirmation to further pursue and develop our uncom- promising quality demands. We wish you many enjoyable flights and great moments in the air, without having to use your BACKUP.
-
Page 4: Table Of Contents
WELCOME TO THE WORLD OF U-TURN. BACKUP RS – The squaring of the circle Usage Pack and check quidelines Pack and check certificate Two-seated Flying EQUIPMENT DESCRIPTION Short description OPERATING INSTRUCTION Pre-flight check Release, in case of emergency Opening... - Page 5 MINTENANCE AND CARE Maintenance and care Storage Damage and repairs Disposal ASSUMPTION OF RISK Safety advice and liability Liability Claim and renouncement of exclusion LEAFLET FOR INSPECTION AND REPAIRS REPAIR & MAINTENANCE...
-
Page 6: Welcome To The World Of U-Turn
FLYING IS A PRIVILEGE. It creates moments of presence and of bliss. U-Turn is committed to the excitement of flying and is living this not just every day itself but also wants to make it accessible to as many people as possible. -
Page 7: Backup Rs - The Squaring Of The Circle
EN and LFT standards. The consistent lengths of the lines drastically simplify the packing of the rescue and are easily sorted through color coding. Another innovation by U-Turn is the easy connect. Through an integrated soft-link the main bridle of the BACKUP RX can be connected with any junction neat and easy. -
Page 8: Usage
BacKuP Usage The BACKUP RS is a manually released rescue parachute for paragliding pilots. The rescue system enables a safe landing in case of emergency. The BACKUP RS opens reliably fast and sinks with low speed. The continued maintenance and packing according to the instructions provide a reliable usage in an emergency. -
Page 9: Equipment Description
equiPMent descriPtion Short description ① ② ④ ③ ⑤ ⑥ ⑦ ① canoPy ② PacKing looPs ③ corner oPenings ④ Base ⑤ cascade lines ⑥ Middle cascade lines ⑦ Main susPension Belt With line Protection and easy connect M a n u a l u - T u R n 8 | 9 B A C K U P R S... -
Page 10: Operating Instruction
oPeration instruction Pre-flight check Make sure to also check the following points before every start: - is the rescue release handle mounted correctly on the harness. - is the rescue container closed correctly and secured. Release, in case of emergency Grap the rescue release handle with one hand. -
Page 11: Landing
Landing Before the landing the pilot should stand up in the harness and take a ready position. This is easier when the harness has a shoulder suspension. Shortly before landing the knees should be bent lightly and the legs should be about the width of the hip apart. After making ground contact the pilot should roll himself to soften the landing. -
Page 12: Build-In Of The Backup Rs
Build-in of the BacKuP rs We recommend, to have your rescue system built into your harness from authorized packers only. To ensure the rescue parachute has been installed correctly a compatibility verification is mandatory! Also it needs to be recorded in the service record. Build-in of the BACKUP RS with original container The BACKUP RS is delivered with its own container. -
Page 13: Easy Connect System
As another novelty the BACKUP RS is equipped with the Easy Connect. That is an innovation by U-Turn that drastically simplifies the mounting of the reserve. Through an integrated softlink the main bridle can be connected with any junction neat and easy. -
Page 14: Packing Instruction
AttEntion: The mounting of the rescue is to be made exclusively by an authorized U-Turn distribution partner. Laying out and untangling The packing should be made on a packing table is possible, but the minimum requirement is a clean, anti-static surface. The parachute has to be stretched to its overall length. - Page 15 l a y i n g o u t a n d u n t a n g l i n g Thread and fix the packing loops one by one > take care of the correct order (alternating colors) Fix and sort the bridle and lines (left / right / middle) Separate the line bundles (l / r / m )
- Page 16 PacKing instruction The canopy is now arranged so that panel is visible in the middle and panel is left and right Make sure that the number of panels (8) is the same on both sides left and right Now the lines should be pulled - that simplifies the packing and laying of the pan- els and minimizes the risk of...
-
Page 17: Laying Of The Width
l a y i n g o f t h e P a n e l s Pull out the smaller corner panel (5) and place it on the opening neatly Place the second corner panel (4) on top - take care that the lines stay centered Next up is panel (3) the base edge always... - Page 18 PacKing instruction The finished right side is not being fixated with packing claps or weights The last corner is being laid out and the 1 stays on the left side Now the complete left side is being folded over to the right and folded back layer for layer like explained before After laying the left side, the last corner panel (1)
- Page 19 l a y i n g o f t h e P a n e l s Now start with the s-flab and place Now the folded side is being folded the right side onto the left, the point of back to the right.
- Page 20 PacKing instruction S-flap after successfully flipping over the reserve Now the s-flap is Finished canopy in the being continued s-flap...
-
Page 21: Packing Into The Container
P a c K i n g o f t h e c o n t a i n e r Now remove the packing thread from the packing loops. Attention: If the thread were to be left in the reserve would not open!! The laid out reserve is now being folded to the size of the container with small s-flaps. - Page 22 PacKing instruction Once the reserve is folded completely, lay it into the container and fix the leaves of the container temporarily with a pen Lines are now placed in 3-4 bundles with the width of the container and fixed with packing rubber bands.
-
Page 23: Bundling The Lines
l e i n e n B ü n d e l n Finished line bundles The line bundle are being placed on the canopy and the container is being closed according to the numbering by pulling the line loop through the elastic band Check the opening through self weight and remove packing cord. -
Page 24: Closing The Container
PacKing instruction c l o s i n g t h e c o n t a i n e r Close the protection flap and close the container by pulling the line loop through the rubber loops. The BACKUP RS is now ready for build-in into the harness or front- container. -
Page 25: Miscellaneous
general Compatibility verification After the packing the combination harness/rescue should be tested under close to real circumstances. Therefore the harness is fixed at the main suspension and the pilot takes his usual flying position. That is the only way to check if the rescue system can be used without complications in case of emergency in his flying position. -
Page 26: Closing Words For The Handling
Closing words for the handling The BACKUP RS is based on the newest development know-how and therefore stands for the maximum of safety standard of rescue systems. Nevertheless we would like to ask you to always perform aviation with the required caution and respect. - Page 27 The synthetic materials that are used in a rescue system demand appropriate disposal. Please return worn-out equipment to U-Turn GmbH - there they will be disassembled and disposed of appropriately. Even if the rescue system was never activated, we recommend to replace it after ten years of purchase date.
- Page 28 U-Turn BACKUP RS could suffer as a result of the usage of the BACKUP RS. This includes but is not limited to lawful or contractual liability on behalf U-Turn GmbH and all other contracting parties as a result of the of production and processing the U-Turn BACKUP RS and all its com- ponents.
- Page 29 Phone: E-Mail: Model / Size: Serial number: Comments/Remarks: Aeration and re-pack Repair Line check U-TURN GmbH Fax: +49 (07464) 98912828 info@u-turn.de Im Neuneck 1 Tel. +49 (07464) 9891280 www.u-turn.de D-78609 Tuningen M a n u a l u - T u R n...
- Page 30 Copyright © 2018 by U-Turn gmbh, all rights preserved. No part of this publication may be reproduced or developed further on in any way without written approval of the U-Turn gmbh. All technical details in this manual have been carfully checked by U-Turn. however we like to mention that we don‘t take any liability for possible mistakes, neither in legal responsibility, nor in liability...
Need help?
Do you have a question about the Backup RS Series and is the answer not in the manual?
Questions and answers