Pool Technologie UNO Instructions For Use Manual
Salt chlorinator
Hide thumbs
Also See for UNO:
- Instructions for use manual (116 pages) ,
- User manual (108 pages) ,
- Instructions for use manual (88 pages)

Related Manuals for Pool Technologie UNO


Summary of Contents for Pool Technologie UNO
- Page 1 Instructions for use Electrolyseur de sel Salt chlorinator PAPI004172-M - Version 20.09...
-
Page 2: Table Of Contents
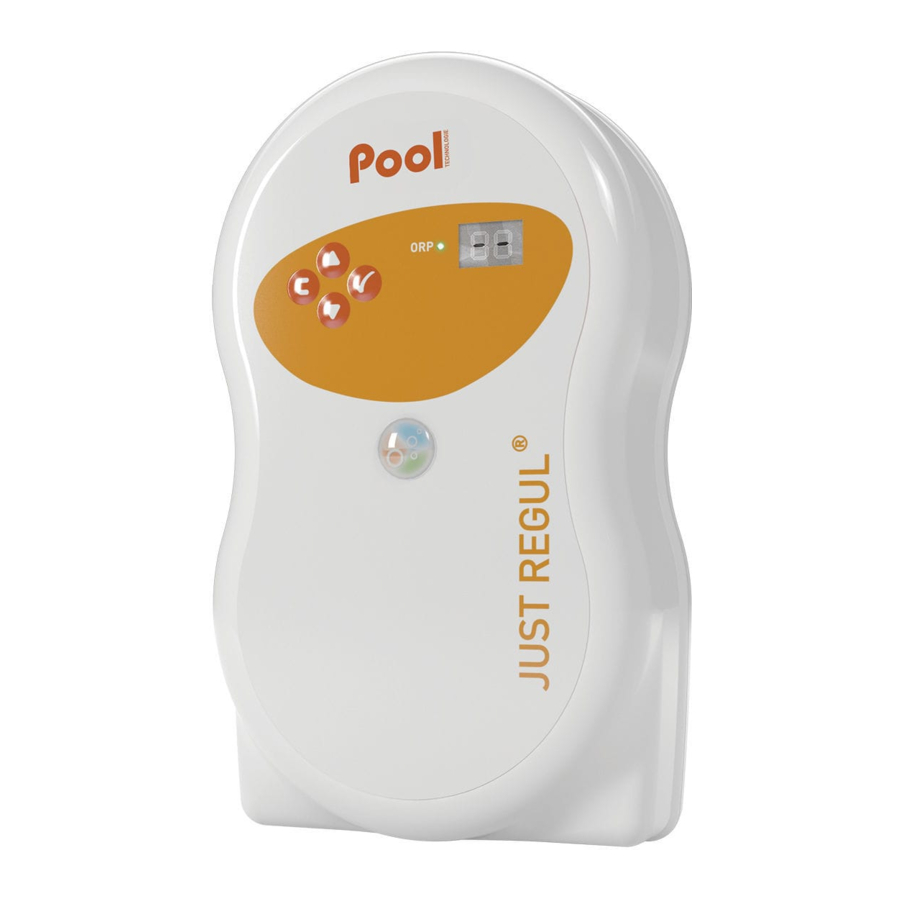
SOMMAIRE FRANCAIS ........................... 2 ............................3 3. COFFRET ELECTRONIQUE ............................. 4 3.1. Première mise en service ............................. 4 3.2. Clavier ................................... 4 3.3. Voyants ................................. 5 3.4. Ecran ..................................5 3.5. Navigation dans les menus ........................... 6 3.6. Fonctionnalités ..............................7 3.6.1. - Page 3 LEGENDE : 1 : Capteur sel / température (en option) 2 : Cellule Modèle UNO : blanc. 3 : Coffret électronique Modèle DUO : blanc + gris. 4 : Filtre lesteur Modèle PRO : blanc + gris + noir.
-
Page 4: Coffret Electronique
3. COFFRET ELECTRONIQUE 3.1. Première mise en service A la première mise sous tension du coffret électronique, effectuer la programmation ci-dessous. Menus Réglages possibles Navigation successifs Français English Deutsch Español Italiano Nederlander Pour chaque paramètre, sélectionner une donnée avec les Portugués touches , puis valider avec la touche OK. -
Page 5: Voyants
3.3. Voyants Couleur Etat Signification Vert Allumé en continu Production en marche Allumé en continu Coffret Rouge Clignotant Alarme déclenchée 3.4. Ecran Si affichage clignotant : information en attente de validation, ou alarme déclenchée. Si affichage figé : information validée ou en lecture seule. AFFICHAGE PAR DEFAUT Réglage MODELE... -
Page 6: Navigation Dans Les Menus
3.5. Navigation dans les menus MENU LEGENDE : Affichage par défaut en ligne Modèle UNO : blanc. Modèle DUO : blanc + gris. Modèle PRO : blanc + gris + noir. Ce schéma inclut toutes les options : bidon vide, Bluetooth, commande externe,... -
Page 7: Fonctionnalités
3.6. Fonctionnalités 3.6.1. Menu Réglages possibles Réglage par défaut Français English Deutsch Español Français Italiano Nederlander Portugués 3.6.2. Menu Réglages possibles Réglage par défaut Jour / Mois / Année 01/01/01 Heure / Minute aléatoire 3.6.3. Spécification du volume de la piscine Menu Réglages possibles Réglage par défaut... -
Page 8: Paramétrage Des Capteurs
3.6.6. Paramétrage des capteurs Menu Capteur Paramètre Réglages possibles Réglage par défaut Volet Mode Volet Cmd ext Volet/Cmd ext Type Débit Mode Débit/Bidon pH Bidon pH Type Température Cmd ext : commande externe. Bidon pH : capteur de bidon vide. ON : capteur activé. -
Page 9: Ajustage De La Mesure Du Taux De Sel
Réglage par défaut (selon modèle) Production constante, suivant la consigne de production. Pour modèles UNO et DUO : %. Contrôle de la production avec sonde ORP, suivant la consigne ORP Pour modèle PRO : ORP. et la consigne de production ORP. -
Page 10: Réglage De La Consigne De Production
3.6.12. Réglage de la consigne de production Mode de fonctionnement Réglage par Menu Instructions spécifiques Réglages possibles défaut Sélectionner directement De 1 à 100 %, par pas de 1. Affichage par valeur avec 0 % ou OFF (selon le mode défaut touches (pas de... -
Page 11: Etalonnage Des Sondes : Informations Préalables Importantes
3.6.16. Etalonnage des sondes : informations préalables importantes sondes pH et ORP à chaque début de saison lors de la remise en service, et après chaque remplacement de sonde. 3.6.17. Etalonnage de la sonde pH 1) Ouvrir les solutions étalon pH 7 et pH 10 (n iltration (et donc le coffret électronique). -
Page 12: Etalonnage De La Sonde Orp
3.6.18. Etalonnage de la sonde ORP 1) Ouvrir la solution étalon ORP 470 mV. 3) Si la sonde est déjà installée : a) Extraire la sonde du porte-sonde, sans la débrancher. -sonde et le remplacer par le bouchon fourni. allée : Raccorder la sonde au coffret électronique. -
Page 13: Communication Bluetooth
3.6.21. Communication Bluetooth Menu Paramètre Fonction Réglages possibles Réglage par défaut Activation/désactivation de la Mode communication Bluetooth. Détection appareils connectables à proximité du coffret électronique (sous Appairage 60 secondes). Mise en réseau du coffret électronique appareils connectés. Suppression du réseau reliant Reset le coffret électronique aux appareils connectés. -
Page 14: Sécurités
3.7. Sécurités 3.7.1. Mode hivernage Le mode hivernage : - est activé par défaut. - se met en marche Lorsque le mode hivernage est en marche : - Le message « - La production est stoppée. - La régulation du pH est maintenue si celle-ci est activée. Pour le mode hivernage : appuyer sur OK. - Page 15 ACTION AUTOMATIQUE POSSIBILITE DE MESSAGE IMMEDIATE DESACTIVATION AFFICHE / Arrêt de la CAUSE VERIFICATIONS ET REMEDES VIA LE MENU DEFAUT Arrêt de la « régulation DETECTE production » du pH Vérifier que : le capteur débit est raccordé au coffret électronique. le capteur débit est activé...
-
Page 16: Précautions Importantes Concernant La Pompe Péristaltique
ACTION AUTOMATIQUE POSSIBILITE DE MESSAGE IMMEDIATE DESACTIVATION AFFICHE / Arrêt de la CAUSE VERIFICATIONS ET REMEDES VIA LE MENU DEFAUT Arrêt de la « régulation DETECTE production » du pH Contrôler le taux de sel dans la piscine avec une trousse Taux récente. -
Page 17: Garantie
4. GARANTIE Avant tout contact avec votre revendeur, merci de bien vouloir vous munir : - du n° de série du coffret électronique. - de la date d'installation de l'équipement. - des paramètres de votre piscine (salinité, pH, taux de chlore, température d'eau, taux de stabilisant, volume de la piscine, temps de filtration journalier, etc.). - Page 18 TABLE OF CONTENTS ENGLISH 1. FUNCTIONS OF THE EQUIPMENT ..........................2 2. INSTALLATION DIAGRAM ............................. 3 3. ELECTRONICS CABINET ..............................4 3.1. First commissioning .............................. 4 3.2. Keypad .................................. 4 3.3. LEDs ..................................5 3.4. Screen ................................... 5 3.5. Menu navigation ..............................6 3.6.
-
Page 19: Installation Diagram
The pH corrector container must be installed a safe distance away from any electrical device or any other chemicals. KEY : 1 : Salt / temperature / low water sensor (optional) UNO model : white. 2 : Cell DUO model : white + grey. 3 : Electronics unit 4 : Filter with ballast PRO model : white + grey + black. -
Page 20: First Commissioning
3. ELECTRONICS UNIT 3.1. First commissioning When switching on the electronics unit for the first time, carry out the following programming. Successive Possible settings Navigation menus Français English Deutsch Español Italiano Nederlander For each parameter, select a data item with the Portugués buttons, then confirm with the OK button. -
Page 21: Leds
3.3. LEDs Colour Status Meaning Green Continuously on Production in progress Continuously on Electronics unit powered off, or wintering mode activated Flashing Alarm activated 3.4. Screen If display flashing : information awaiting confirmation, or alarm activated. If display solid : confirmed or read-only information. DEFAULT DISPLAY Setting via the MODEL... -
Page 22: Menu Navigation
3.5. Menu navigation MENU KEY : Default display in line UNO model : white. DUO model : white + grey. PRO model : white + grey + + black. This diagram includes all the options : empty container, Bluetooth, external... -
Page 23: Features
3.6. Features 3.6.1. Selecting the display language Menu Possible settings Default setting Français English Deutsch Español Français Italiano Nederlander Portugués 3.6.2. Setting the date and time Menu Possible settings Default setting Day / Month / Year 01/01/01 Hour / Minute random 3.6.3. -
Page 24: Sensor Settings
3.6.6. Sensor settings Menu Sensor Setting Possible settings Default setting Cover Mode Cover Ext cmd Cover/Ext cmd Type Flow Mode Flow/pH Can pH Can Type Salt Temperature Ext cmd : external command. pH Can : empty container sensor. ON : sensor activated. OFF : sensor disabled. -
Page 25: Calibration Of The Water Temperature Measurement
Default setting (depending on model) Continual production, following the production setpoint. Inspection of production using the For UNO and DUO models : %. ORP probe, according to the ORP For PRO model : ORP. setpoint and the ORP production setpoint. -
Page 26: Setting The Production Setpoint
3.6.12. Setting the production setpoint Chlorinator Menu Specific instructions Possible settings Default setting operating mode Directly select a value using From 1 to 100 %, in Default display buttons (no increments of 1. confirmation required). 100 % 0 % or OFF (depending on the operating mode of the chlorinator). -
Page 27: Calibrating The Probes : Important Advance Information
3.6.16. Calibrating the probes : important advance information The original pH probe is already calibrated. It is therefore not necessary to carry out calibration of the pH probe when putting the equipment into service for the first time. However, it is imperative to carry out a calibration of the pH and ORP probes at the beginning of each season when returning to service, and after each probe replacement. -
Page 28: Calibrating The Orp Probe
3.6.18. Calibrating the ORP probe 1) Open the ORP 470 mV calibration solution. 2) Turn off the filtration (and therefore the electronics unit). 3) If the probe is already installed : a) Remove the probe from the probe holder, without disconnecting it. b) Remove the probe holder nut and replace it with the stopper supplied. -
Page 29: Bluetooth Communication
3.6.21. Bluetooth communication Menu Setting Function Possible settings Default setting Activation/deactivation Bluetooth Mode communication. Detection of connectible devices near the electronics unit (within 60 seconds). Pairing Networking of the electronics unit and connected devices. Removal of the network connecting the Reset electronics unit to the connected devices. -
Page 30: Safety
3.7. Safety 3.7.1. Wintering mode Wintering mode : - is activated by default. - starts automatically as soon as the water temperature drops below 15°C. When wintering mode is on : - The message « » is displayed. - Production is stopped. - The pH regulation is maintained if it is activated. - Page 31 IMMEDIATE OPTION TO MESSAGE AUTOMATIC ACTION DEACTIVATE DISPLAYED / VIA THE CAUSE CHECKS AND REMEDIES Stopping FAULT MENU Stopping DETECTED « production regulation » Check that : the flow sensor is connected to the electronics unit. the flow sensor is activated («...
-
Page 32: Important Precautions Regarding The Peristaltic Pump
IMMEDIATE OPTION TO MESSAGE AUTOMATIC ACTION DEACTIVATE DISPLAYED VIA THE CAUSE CHECKS AND REMEDIES Stopping / FAULT MENU Stopping DETECTED « production regulation » Check the salt levels in the pool using a recent testing kit. Salt level less than 2.5 g/L with salt (or 1.5 g/L if Low Salt... -
Page 33: Guarantee
4. GUARANTEE Before contacting your dealer, please have the following to hand : - your purchase invoice. - the serial no. of the electronics unit. - the installation date of the equipment. - the parameters of your pool (salinity, pH, chlorine levels, water temperature, stabilizer level, pool volume, daily filtration time, etc.) Every effort and all our technical experience has gone into designing this equipment.
Need help?
Do you have a question about the UNO and is the answer not in the manual?
Questions and answers