Table of Contents
Advertisement
Quick Links
Advertisement
Table of Contents

Subscribe to Our Youtube Channel
Related Manuals for Ozone EXOCEAT


Summary of Contents for Ozone EXOCEAT
-
Page 2: Table Of Contents
CONTENTS Thank You Warning Team Ozone Your Exoceat Preparation Reserve Parachute Installation Fitting Adjustments Features Care and Maintenance Ozone Quality Guarantee Technical Specifications... -
Page 3: Thank You
THANK YOU WARNING • Paragliding is a potentially dangerous sport that can cause serious injury including bodily harm, paralysis and death. Flying an Ozone harness is undertaken with the full knowledge that paragliding involves such risks. Thank you for choosing Ozone. • As the owner of an Ozone harness you take exclusive responsibility for all risks associated with its use. Inappropriate use and or As a team of free flying enthusiasts, competitors and adventurers, our mission is to produce paragliding equipment of the highest quality abuse of your equipment will increase these risks. using cutting edge designs and the best technical materials available. • Any liability claims resulting from use of this product towards the manufacturer, distributor or dealers are excluded. The Exoceat is a modern sleek high performance solo harness intended for experienced pilots. Ergonomically designed from the ground up, • Be prepared to practice as much as you can - especially ground handling, as this is a critical aspect of paragliding. Poor control the Exoceat is very comfortable and efficiently aerodynamic, optimised for serious XC and competition flying. while on the ground is one of the most common causes of accidents. Our development team is based in the south of France. This area, which includes the sites of Gourdon, Monaco and Col de Bleyne, • Be ready to continue your learning by attending advanced courses to follow the evolution of our sport, as techniques and materials guarantees us more than 300 flyable days per year. This is a great asset in the development of the Ozone range. We know that quality and keep improving. value for money are essential considerations when choosing equipment, so to keep costs low and quality high we build all our wings and harnesses in our own production facility. During production all Ozone products undergo numerous rigorous quality control checks. This way • Use only certified paragliders, harnesses with protector and reserve parachutes that are free from modification, and use them only we can guarantee that our equipment meets the same high standards that we expect ourselves. -
Page 4: Team Ozone
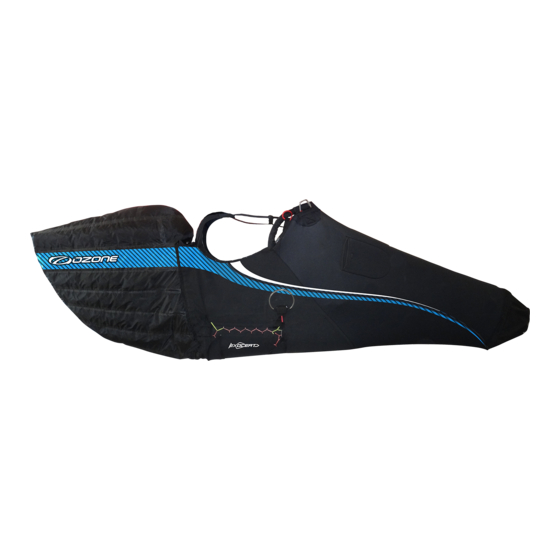
TEAM OZONE YOUR EXOCEAT Everyone at Ozone continues to be driven by our passion for flying, our love of adventure and our quest to see Ozone’s paraglider devel- The Exoceat is a low-drag, high-performance harness for serious XC and competition flying. It is the result of a multi-year development opment create better, safer and higher performing paragliders. process which included extensive testing, wind-tunnel research, and a prolonged beta phase involving the world’s top competition pilots. With a technically advanced foot-support system, bomb bay-reserve deployment system, and super-low-drag fairing developed from real The paraglider design team is led by David Dagault; Dav has a wealth of experience both in competition, adventure flying and paraglider aerodynamic research, the Exoceat is a no compromise next-generation competition harness. design. Also on the design team are Luc Armant, Fred Pieri and Russell Ogden. Luc is a top competition pilot and XC addict with a background in naval architecture, he brings a wealth of knowledge and ideas to the design team. Fred is a mathematician, mechanical Creating a harness design centered around the reduction of drag was the primary concern, testing various faring designs at the ISAE engineer and vol Biv specialist. Together with Luc he works closely with Dav in the design process. Russ is a top competitor and test school in Toulouse, France. The Ozone R&D Team structured the rest of the design around an optimised flight position, faring, and har- pilot, he can usually be found putting the latest creations through a series of test manoeuvres. Harness development is lead by Erich ness frame. Lotscher. Erich has a great deal of experience designing and developing harnesses and is responsible for many of the latest Ozone har- nesses including the Ozium and Forza. The Exoceat features a special air inlet which is result of two important requirements: first, it must be smooth and low drag, and second, it must provide maximum pressure to the faring regardless of its position in the air during harness movement (yaw, pitch, or thermalling Mike Cavanagh is the boss and multiple winner of the UK XC league. When he’s not out flying he generally keeps control of the mayhem. positions). Promotion and team pilots are organised by BASE jumping legend and mini wing specialist Matt Gerdes. He works closely with graphic designer Loren Cox. Loren is a keen pilot from Salt Lake City, USA. As with paraglider design, we focused on the reduction of wrinkles, creases, and deformation throughout the harness. The Exoceat’s inflatable nose cone, rear faring, and main surfaces are all very smooth. Closed cell foam provides a light but rigid shell encompassing Back in the office Karine Marconi, Chloe Vila and Isabelle Martinez run the show. These wonderful ladies look after the ordering system, the pilot and encasing the double reserve container. From leading edge to trailing edge, the Exoceat is remarkably smooth and low-drag, the dealers, the design team and the general day to day running of the company - without them it would be chaos. making it the most efficient harness we have ever built. Our manufacturing facility in Vietnam is headed up by Dr Dave Pilkington who works relentlessly manufacturing gliders and producing In addition to drag efficiency, the design of the Exoceat focuses on pilot comfort and stability. The bucket seat design creates a highly prototypes as well as researching materials and manufacturing processes for our future products. He is backed up by a superb team consistent loading of the frame, with no pressure points or compression zones on the pilot, even in highly-loaded situations such as spiral managed by Khanh and Phong with over 700 production staff. dives. The seat design is fully supported from your upper upper back to the bottom of your feet, with a specially designed stirrup system that creates the sensation of resting your legs “on” something, instead of “pushing” against a bar. This “footrest” sensation, coupled with the rigidity and support of the bucket seat, means that there is no compression against your shoulder straps and you can easily relax against the back of the harness – saving energy and increasing pilot efficiency. -
Page 5: Preparation
PREPARATION Reserve deployment is a very real scenario in high level competition and XC flying, and providing for the widest range of imaginable Upon delivery the harness needs to be assembled before it can be flown. Please watch the assembly video here: reserve deployment situations was integral to the Exoceat’s development and design. The low-drag ambidextrous double-bomb bay http://www.flyozone.com/paragliders/en/products/harnesses/exoceat/watch-the-video/ reserve design was created to provide easy and fast opening in low or high-G situations. With two parachutes installed deployment can be with either hand, this is useful in high G situations where access to one side can be impossible, or if the first parachute fails to deploy cleanly. The Mousse bag is generously padded under the seat of the harness and along the entire length of the back. It is EN and LTF certified with a maximum load of 125kgs and meets or exceeds CIVL Section 7 competition harness requirements. Foot plate Dummy Reserve The flight deck has been positioned so that it is oriented 90 degrees to the pilot’s line of sight. This is important for reading modern instru- ments easily in bright sunlight, as it ensures the minimum amount of glare and reflection. The cockpit floats in front of the pilot, even when Mousse bag loaded with ballast it does not rest on the pilot’s legs allowing freedom of movement and comfort during long flights. The Exoceat is delivered with the following: • Mousse-bag (back foam) OPTIONAL EXTRAS: • Plastic bars x2 Ballast container • Foot plate Rescue carabiner Reserve handles • Seat plate Rescue bridles Bars Cockpit Reserve Pin • Cockpit... - Page 6 BARS Insert x2 white bars into the pockets that run up the length of the back. MOUSSE BAG The openings of these pockets are located under the seat cushioning. The zipped pocket is located Slide the bars in fully, ensure they reach the far end of the pockets. Close under the seat plate. Insert the the bottom ends firmly with the Velcro flaps. Mousse bag thin end first, once fully inserted close the zip. SEAT PLATE Insert the seat plate with the straightest edge facing forwards. Lift up the seat FOOT PLATE cushioning and push the leg straps Open the Velcro at the end of the pod and insert the foot plate. Neatly secure the Velcro apart to create enough space to slide back into place. the seat plate into the space available. Once inserted correctly, align the leg straps over the seat plate and close the flap using the plastic clip.
-
Page 7: Reserve Parachute Installation
RESERVE PARACHUTE INSTALLATION The Exoceat features integral reserve containers for two parachutes. The innovative system uses bomb doors that fully open once the pin is removed, so even in high G situations the parachutes can be deployed freely with either hand. The bomb door containers have large volumes, enough to fit all types of modern parachutes. SPEED SYSTEM Route the speed system line through both pulleys on each side. The first The parachute(s) need to be installed precisely using a new and innovative method, so please refer carefully to the instructional video for pulley is located inside the pod at the rear of the seat plate. The second clear visual instructions. When delivered both parachute containers are closed correctly. Take note of the overall look and pay attention is close to the lumber support attachment. Ensure the lines run cleanly to the trellis thread pattern and where the reserve handle bridle emerges from the bomb door. between the pulleys and pass on the outside of all structural webbing straps. Double-check the lines have not inadvertently wrapped around the structural webbing. Feed the line through the hole on the side of the pod. (3) Attach the bridles to the appropriate attachment points with a suitable connector (not sup- plied). The attachment points are located on the shoulder straps under the Velcro flaps. The bridles should then be routed along the protective Velcro channel. Make sure the harness bridles are attached to the parachute’s bridle using a suitable connector (not supplied). IMPORTANT: The speed bar lines must be of equal length, ensure they are not too short as this will inadvertently Attach the deployment handle to the deployment activate the speed system when under tension in the air. - Page 8 IMPORTANT: Do not snag the blue Dyneema line with the end of the plastic and do not twist the loops as you The parachute container is closed by threading the blue Dyneema loops in a trellis like pattern. It is strongly recommended to watch thread them. the Video and follow the instructions carefully at this point. Now you are ready to secure the rear of the parachute container. Again, use the stitching in the centre of the bottom panel to identify the starting point. Loop the threads using the same technique as before.
-
Page 9: Fitting
The automatic pod closing system can now be connected. First put the male buckle of the left hand pod though the loop found on the front right hand side of the cockpit and fasten it to the female buckle. Double check everything looks visually correct and then make a test deployment. Make sure you perform a practice throw from a static hang point. Not only does this ensure the correct functioning of your deployment system it also allows you to become more familiar with the installation process. Double check that the handle and pin release easily and the threaded loops unfold themselves without restriction. If only one reserve is fitted, the reserve dummy reserve should be installed in the unused side, this will help to keep the shape and form of Now secure the right hand pod with the eyelet attached to blue line on the left hand pod through the the harness. Secure the dummy with the supplied spare reserve pin to reduce the chances of accidentally deploying (and thus losing) the blue loop on the left hand pod. spare reserve handle. Before your first flight, we recommend to suspend the harness from a suitably strong point to check that it fits you correctly and to become familiar with the features and adjustments. You can set the shoulder adjustment-straps to find the best fit, and adjust the lumber The shoulder strap retainer clip should now be fastened. support so that they leave you in a comfortably reclined position. WARNING: Ozone strongly recommends that the reserve parachute system is installed by a qualified professional. Always seek experienced advice if you have any doubts. -
Page 10: Adjustments
ADJUSTMENTS HANG POINT HEIGHT Before your first flight, we recommend to suspend the harness from a suitably strong point to check that it fits you correctly and to become The height of the hang points can be set on the ground with the adjustments made on the side of familiar with the features and adjustments. You can set the shoulder adjustment-straps to find the best fit, and adjust the lumber support so that they leave you in a comfortably reclined position. the structure directly underneath the hang points. Changes made here have a direct affect on the feel, roll stability and feedback of the harness so pay attention and only make incremental changes between flights. We recommend starting in the position shown and adjusting to your taste from SHOULDER STRAPS there. Lowering the hangpoint will make the harness more roll unstable whilst raising will increase The length of the Shoulder straps can be modified using the adjustment straps. Adjust the stability. -
Page 11: Features
CARE AND MAINTENANCE FEATURES COCKPIT The Exoceat will last many flights and many years if looked after correctly. To keep your harness clean and airworthy, please note the The flight deck has been positioned in the pilot’s line of sight. This is important for reading modern instruments easily in bright sunlight, following: as it ensures the minimum amount of glare and reflection. The cockpit floats in front of the pilot, even when loaded with ballast it does not rest on the pilot’s legs allowing freedom of movement and comfort during long flights. It features a removable Velcro instrument board • Avoid excessive exposure to UV, heat and humidity. and internal pockets for storing spare batteries etc. It comes with removable external straps that can to attached to the shoulder straps, • Pack the harness dry and store in a cool dry place. these are especially useful for smaller pilots who need to carry potentially heavy ballast to help support the cockpit and keep it away from • Never drag or land on your harness. the knees and interfering with the take off run. • Keep you harness clean of dirt, oils and any corrosive substance. • Use water and a cloth to clean if necessary. • Always check the reserve deployment system before each flight AIRTUBE INSPECTION In order for the rear section to remain well inflated, it is important to keep the tube free of obstructions and For safety, routine inspection of all of your equipment is vitally important. Ozone recommends a service interval of 12 months in addition to sure that it is not heavily kinked when packing the rear pocket with your bag etc. Position the end of the to the usual pre flight checks. Before each flight visually inspect the reserve deployment system, the Dyneema lines should be visually OK tube as shown. It can be ‘locked’ in place with the Velcro. without excessive fraying and there should be no obstructions within the trellis threads (twigs etc). For a periodic thorough inspection, visually check the stitching and general condition of the structural webbing. Look in the hard to reach and structurally important areas. Pay particular attention to the webbing around the hang point areas under the carabiners, this is where abrasion is most likely. HYDRATION ACCESS SYSTEM The Exoceat includes a hydration access system consisting of an inner pocket located in Thoroughly check the reserve deployment system. Remove the parachute(s) to inspect the Dyneema loops, they should be visually OK the rear storage pocket. Position the zips of the rear compartment so the drinking tube without excessive fraying or obvious signs of damage. can exit on the side of your choice. A few spare replacement loops are delivered with each harness: Type A are the most common, Type B are longer, these are used in the IMPORTANT: Make sure to route the drinking tube BELOW the reserve corners and Type C are the yellow loops to retain the reserve handle pin. If you need to change a loop, make sure to use the correct type. -
Page 12: Ozone Quality Guarantee
OZONE QUALITY GUARANTEE TECHNICAL SPECIFICATIONS SIZING At Ozone we take the quality of our products very seriously, all our harnesses are made to the highest standards in our own manufacturing facility. The harnesses is available in four different sizes; XS, S, M, and L. Every harness manufactured goes through a stringent series of quality control procedures and all the components used are traceable. We always welcome customer feedback and are committed to customer service. Ozone guarantees all of its products against manufacturer’s defects or faults. The harness structure remains the same for S, M, L sizes, changes being a shorter or longer pod sizes. The XS features a smaller harness structure and reduced length pod. Ozone will repair or replace any defective product free of charge. Ozone and its distributors provide the highest quality service and repair, any dam- age to products due to wear and tear will be repaired at a reasonable charge. If you are unable to contact your dealer then you can contact us directly at info@flyozone.com. 160-170 170-180 175-190 180-200 Pilot Height cm Summary Safety is paramount in our sport. To be safe, we must be trained, practised and alert to the dangers around us. To achieve this we must fly as Weight* regularly as we can, ground handle as much as possible and take a continuous interest in the weather. If you are lacking in any of these areas you Certified max load 125kg 125kg 125kg 125kg will be exposing yourself to more danger than is necessary. * Includes: carabiners, dummy rescue, cockpit, mousse bag. Excludes angled flight deck (130gr) Every year many pilots get hurt launching; don’t be one of them. Launching is the time that you are most exposed to danger so practice it lots. Some launch sites are small and difficult and conditions aren’t always perfect. If you’re good at ground handling you’ll be able to confidently and safely launch whilst others struggle...practice as much as you can. You’ll be less likely to get hurt and more likely to have a great day’s flying. MATERIALS Outer fabric (Cover) Main webbing Respect the environment and look after your flying sites. - Page 14 1258 Route de Grasse Le Bar sur Loup 06620 France...
Need help?
Do you have a question about the EXOCEAT and is the answer not in the manual?
Questions and answers