Table of Contents

Related Manuals for Nordmann Engineering MinAir


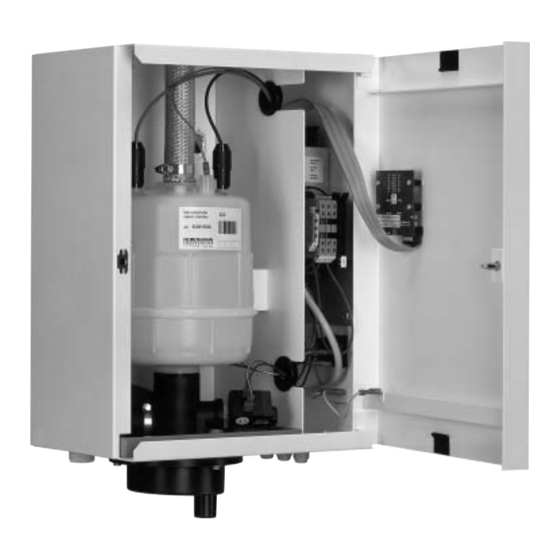
Summary of Contents for Nordmann Engineering MinAir
- Page 1 Betriebsanleitung Operating Instructions Mode d’emploi NORDMANN Dampfluftbefeuchter MinAir Steam Humidifier MinAir Humidificateur à vapeur MinAir E N G I N E E R I N G NORDMANN E N G I N E E R I N G...
-
Page 3: Table Of Contents
Inhalt Deutsch 1. Sicherheitshinweise ............... . 4 2. -
Page 4: Sicherheitshinweise
Es dürfen nur Original-Ersatzteile von NORDMANN verwendet werden. 2. Montage 2.1 Montage des Dampfluftbefeuchters Beachten Sie bei der Montage des MinAir die erforderlichen Minimalabstände gemäss Fig. 3. Es empfiehlt sich, den Dampfluftbefeuchter möglichst nahe bei dem Dampfverteiler-Rohr oder der Dampfverteiler-Düse zu montieren. 2.2 Montage der Dampfverteiler-Düse Die Montage der Dampfverteiler-Düse erfolgt gemäss Fig. -
Page 5: Wasseranschlüsse
2.5 Installation des Kondensatschlauches (siehe Fig. 6) Der Kondensatschlauch ist möglichst vertikal zu führen und das Kondensat direkt in einen offenen Ablauftrichter oder unterhalb des Siphons zu leiten. Bei Montage des Dampfverteilers oberhalb des Dampfluftbefeuchters kann das Kondensat auch direkt zum Gerät geführt werden. 3. -
Page 6: Inbetriebnahme
Ferner sind die im Normalbetrieb vorkommenden Leistungsschwankungen durch die automatischen Funktionen, Wassereinlass und -ablass, in einem optimalen Rahmen gehalten. Der integrierte Regler des MinAir arbeitet als P-Regler mit fest eingestelltem Proportionalband. Die Vorgabe des Sollwerts erfolgt über die Eingabetasten des MinAir. Die erzeugte Dampfmenge wird von der Steuerung optimal ausgeregelt. - Page 7 Zylinder seine Nennleistung erreicht hat. Durch zweimaliges Drücken von T1 kann geprüft werden, ob der Maximalfüllstand erreicht ist (siehe Punkt 5.2). 5.4 Wartungs- oder System-Meldungen Die Steuerelektronik mit Mikro Controller überwacht die Gerätefunktionen des MinAir kontinuierlich. Eventuelle Abweichungen vom Betriebszustand (U-Meldungen) werden auf dem Display angezeigt. Meldung Die Meldung U1 ist eine Wartungsmeldung.
-
Page 8: Instandhaltung
6. Instandhaltung Regelmässige Instandhaltung hält die Funktionstüchtigkeit des Gerätes aufrecht. Diese Arbeiten sind nur durch Fachpersonal durchzuführen. 6.1. Regelmässige Kontrollen • Dampfzylinder überprüfen: Sind Kalkrückstände im Zylinder? Ablass-Sieb entfernen und kräftig mit Leitungswasser durchspülen (ohne chemische Zusätze). Vor der Reinigung das Ablass-Sieb aus dem Zylinderfuss ziehen und nach der Reinigung unbedingt wieder einsetzen. -
Page 9: English
2.1 Fitting the humidifier When fitting the MinAir please note the necessary minimum clearances given in Fig. 3. It is advisable to install the steam humidifier as close as possible to the steam distribution pipe or the steam distribution nozzle. -
Page 10: Water Connections
2.5 Laying the condensate hose (see Fig. 6) The condensate hose has to be laid as near to the vertical as possible fed directly into an open funnel or below the siphon. When fitting the steam distribution pipe above the humidifier, the condensate can be fed directly to the unit by placing the end of the hose in the filling cup. -
Page 11: Putting Into Operation
The integrated humidity controller of the MinAir works as a P-Controller with a fixed proportional band. The default of the desired value is made by the input keys of the MinAir. The electronic controller optimally controls the steam produced. - Page 12 It can be examined by pressing button T1 twice at any time (see chapter 5.2) 5.4 Servicing and system messages The electronic control unit with microprocessor continuously monitors the operation of the MinAir. Eventually deviations from the operating condition (U-codes) will be shown on the display.
-
Page 13: Maintenance
6. Maintenance Regular servicing helps to maintain the operation of the humidifier. Only qualified personnel must carry out following work. 6.1. Regular Checks • Inspect the steam cylinder: Are there any deposits in the steam cylinder? Remove the drainage strainer and flush the cylinder thoroughly with tap water (without using chemical substances). -
Page 14: Français
2.1 Montage de l’humidificateur Lors du montage du MinAir, il est impératif de respecter les distances minimales conformément à la Fig. 3. Il est conseillé de monter l’humidificateur aussi près que possible de la rampe ou de la buse de distribution de vapeur. -
Page 15: Raccordement Hydraulique
2.5 Pose du tuyau condensat (cf. Fig. 6) Il est conseillé d’installer le tuyau condensat dans le sens vertical autant que possible et de le faire déboucher directe- ment en-dessous du siphon d’évacuation. Si la rampe de distribution vapeur est située au-dessus de l’humidificateur, on peut également faire écouler les condensats dans le godet de remplissage de l’appareil. -
Page 16: Mise En Service
Le contrôleur intégré du MinAir fonctionne en régulateur proportionnel avec bande proportionnelle fixe. La valeur de consigne est réglable grâce aux boutons poussoirs de l’humidificateur et la quantité de vapeur produite est donc automatiquement compensée. - Page 17 T1 (cf § 5.2). 5.4 Messages relatifs à l’entretien et au système La platine électronique à Micro-contrôleur gère en permanence le fonctionnement de l’humidificateur MinAir. Les déviations éventuelles des conditions de fonctionnement (code U) sont indiquées sur l’affichage digital.
-
Page 18: Entretien Régulier
6. Entretien régulier Un entretien régulier aide à maintenir le bon fonctionnement et la fiabilité de l’humidificateur. Ces interventions ne doivent être effectuées que par du personnel qualifié. 6.1 Contrôle régulier • Contrôler et nettoyer le cylindre à vapeur: s’il y a des dépôts dans le cylindre à vapeur Enlever le filtre de vidange, et rincer le cylindre abondamment à... -
Page 19: Technische Daten
7. Technische Daten 7. Technical Specifications 7. Données techniques Typenbezeichnung Model Désignation du modèle MinAir Spannung Voltage Tension 230V 1~ 50/60Hz Nennstrom Nominal current Courant nominal 6.5 A Nennleistung Nominal power Puissance nominale 1.5 kW Dampfleistung Steam output Débit de vapeur 0.4 - 2 kg/h... - Page 20 Hersteller/Manufacturer: Nordmann Engineering AG " Postfach, CH-4143 Dornach 1 / Schweiz " Bruggfeldweg 11, CH-4147 Aesch / Schweiz Tel. +41 61 467 76 66 Fax +41 61 467 76 77 E-mail: info@nordmann-engineering.com Internet: www.nordmann-engineering.com NORDMANN E N G I N E E R I N G...
Need help?
Do you have a question about the MinAir and is the answer not in the manual?
Questions and answers