Table of Contents
Advertisement
Quick Links
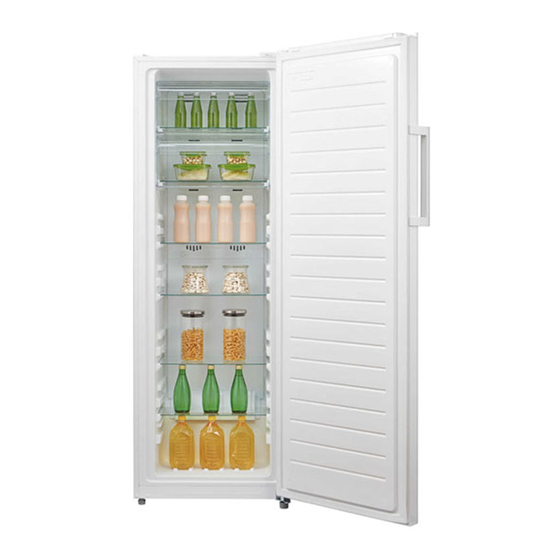
FREEZER or REFRIGERATOR
IMPORTANT NOTE:
Thank you for selecting a TECO quality HYBRID refrigerator / freezer.
Read this manual carefully before installing or operating your new unit.
Make sure to save this manual for future reference.
The design and specifications are subject to change without prior notice for
product improvement. Consult with the sales agency or manufacturer for
details.
THF268WNTAM
THF268SNTAM
Advertisement
Table of Contents

Subscribe to Our Youtube Channel
Related Manuals for TECO THF268WNTAM


Summary of Contents for TECO THF268WNTAM
- Page 1 THF268WNTAM THF268SNTAM IMPORTANT NOTE: Thank you for selecting a TECO quality HYBRID refrigerator / freezer. Read this manual carefully before installing or operating your new unit. Make sure to save this manual for future reference. The design and specifications are subject to change without prior notice for product improvement.
-
Page 2: Table Of Contents
CONTENTS 1 Safety warnings 1.1 Warning ··················································································1 1.2 Meanings of safety warning symbols ·············································2 1.3 Electricity related warnings ·························································2 1.4 Warnings for using ····································································3 1.5 Warnings for placement ·····························································3-4 1.6 Warnings for energy···································································4 1.7 Warnings for disposal·································································4 2 Proper use of the refrigerator 2.1 Placement···············································································5 2.2 Packing List·············································································6 2.3 Door handle installation ·····························································7... -
Page 3: Safety Warnings
1 Safety war nings 1 Safety warnings 1.1 War ning Warning risk of fire / flammable materials his appliance is not intended for use by persons (including children) with reduced physical, sensory or mental capabilities, or lack of experience and knowledge, unless they have been given supervision or instruction concerning use of the appliance by a person responsible for their safety. -
Page 4: Meanings Of Safety Warning Symbols
Meaning of safety warning symbols This is a prohibition symbol. Any incompliance with instructions marked with this symbol may result in damage to the product or endanger the personal safety of the user. Prohibition symbol This is a warning symbol. It is required to operate in strict observance of instructions marked with this symbol;... -
Page 5: Warnings For Using
1.4 War nings for using Do not arbitrarily disassemble or reconstruct the refrigerator, nor damage the refrigerant circuit; maintenance of the appliance must be conducted by a specialist Damaged power cord must be replaced by the manufacturer, its maintenance department or related professionals in order to avoid danger. -
Page 6: Warnings For Energy
Do not store beer, beverage or other fluid contained in bottles or Freezing chamber enclosed containers in the freezing chamber of the refrigerator; otherwise the bottles or enclosed containers may crack due to freezing to cause damages. 1.6 War nings for energy 1)Refrigerating appliances might not operate consistently (possibility of defrosting of contents or temperature becoming too warm in the frozen food compartment) when sited for an extended period of time below the cold end of the range of temperatures for which the refrigerating appliance is designed. -
Page 7: Placement
2 Proper use of refrigerators 2.1 Placement Before use, remove all packing materials, including bottom cushions, foam pads and tapes inside of the refrigerator; tear off the protective film on the doors and the refrigerator body. Keep away from heat and avoid direct sunlight. Do not place the freezer in moist or watery places to prevent rust or reduction of insulating effect. -
Page 8: Packing List
2.2 Packing list Check the packing list that all items have been included. Part No. Item Door handle Screw Left Hinge Cover Left Hinge Cover Left Door Stopper User’s Manual Note: The design and specifications are subject to change without prior notice for product improvement. -
Page 9: Door Handle Installation
2.3 Door handle installation precautions shall be taken to prevent fall of the handle from causing any personal injury. List of tools to be provided by the user Cross screwdriver ② Screw hole ① Screw hole cover ③ Screw ④ Screw cover (The picture above is only for reference. -
Page 10: Leveling Feet
2.4 Leveling feet Schematic diagram of the levelling feet (The picture above is only for reference. The actual configuration will depend on the physical product or statement by the distributor) Adjusting procedures: a. Turn the feet clockwise to raise the refrigerator; b. -
Page 11: Starting
2.5 Starting Before initial start, keep the refrigerator still for half an hour before connecting it to power supply. Before putting any fresh or frozen foods, the refrigerator shall have run for 2-3 hours, or for above 4 hours in summer when the ambient temperature is high. -
Page 12: Key Components
Key components Flip Cover Glass Shelf Drawer (The picture above is only for reference. The actual configuration will depend on the physical product or statement by the distributor) Refrigerator The refrigerator is suitable for storage of a variety of fruits, vegetables, beverages and other food consumed in the short term. -
Page 13: Functions
3.2 Functions ① ② ③ ④ ⑤ ⑥ (The picture above is only for reference. The actual configuration will depend on the physical product or statement by the distributor) 1) Key A.temperature setting button B.Fridge/Freezer switch button 2)Temperature icons Setting 1: the setting temperature is 8 or -16 ①... - Page 14 Display of normal running On the occurrence of a failure, the corresponding icons will give a combined blink: the error codes and types are shown as follows: Refrigerator: Error Code Error Description Display Temperature sensor of Refrigerator room fail Icon ” ”...
-
Page 15: Door Right-Left Change
Door Right-Left Change List of tools to be provided by the user Power off the refrigerator and Putty knife Cross screwdriver remove all objects before reversing thin-blade screwdriver the door to avoid personal injury or Warning damage to the product. ″... - Page 16 5) Reversing the handle a) Dismantle the screw cover, screws and handle. b) Remove screw hole cover from the other side and install handle to the position. (Please refer to chapter 2.3). c) Cover screw hole on the other side with screw hole cover. 6) Switching the bottom hinge (Fig.3) a) Remove the Bottom hinge from the right.
- Page 17 6) Remove the Hold cover from the top left and place to potion on the top right side. (Fig.4) 7) Place the door onto the bottom hinge. 8) Install the Left hinge (Fig.5) Hole cover a) Locate the Left hinge from the accessory bag and place into position.
-
Page 18: Overall Cleaning
5. Maintenance and care of the appliance 5.1 Overall cleaning Dusts behind the refrigerator and on the ground shall be timely cleaned to improve the cooling effect and energy saving. The interior of the refrigerator should be cleaned regularly to avoid odor. Soft towels or sponge dipped in water and non-corrosive neutral detergents are suggested for cleaning. -
Page 19: Troubleshooting
6 Trouble shooting 6.1 Trouble shooting You may try to solve the following simple problems by yourself. If them cannot be solved, please contact the after-sales department. Check whether the appliance is connected to power or whether the plug is in well contact Failed operation Check whether the voltage is too low Check whether there is a power failure or partial circuits have tripped... -
Page 20: Repairs Service And Warranty
If you have a problem, and the problem persists after you have made the checks mentioned in this manual, contact: TECO Australia’s Service on 1300 660 037 (8:30am-4pm Mon~Fri AEST) Service Email had.service@teco.com.au Spare Parts had.parts@teco.com.au For warranty details please visit www.teco.com.au... - Page 21 Did you know? TECO Australia’s product range also includes: Top Load Clothes Washers Front Load Clothes Washers Twin Tub Clothes Washers Auto Sensing Vented Clothes Dryers Refrigerators Chest and Vertical Freezers Bar Fridges ...
- Page 22 Teco's warranty information for the product purchased is available at www.teco. com. au. A copy of the warranty may also be obtained by contacting Teco's Warranty and Service Department on 1300 660 0 37 during business hours (Mon - Fri 8.30am - 4pm AEST).
Need help?
Do you have a question about the THF268WNTAM and is the answer not in the manual?
Questions and answers