
Related Manuals for KitchenAid KEBDS 90020


Summary of Contents for KitchenAid KEBDS 90020
- Page 1 Questo manuale d’istruzione è fornito da trovaprezzi.it. Scopri tutte le offerte per Kitchenaid KEBDS 90020 cerca il tuo prodotto tra le migliori offerte di Cappe da Cucina Instructions for use...
-
Page 3: Table Of Contents
These instruction shall be available on website www.kitchenaid.eu Important instructions for safety Installation Safeguarding the environment Troubleshooting guide After-Sales Service Cleaning Maintenance Material supplied Installation - preliminary assembly instructions Installation dimensions Installation - assembly instructions Description and use of hood... -
Page 4: Important Instructions For Safety
Important instructions for safety YOUR SAFETY AND THAT OF OTHERS IS involved. Children must not play with the HIGHLY IMPORTANT. appliance. Cleaning and maintenance must not This manual and the appliance itself provide be carried out by children, unless they are important safety warnings, to be read and supervised by adults. - Page 5 • The product is not suitable for outdoor use. Scrapping of household appliances • When the hob is in use, accessible parts of the • This appliance is manufactured with recyclable hood may become hot. or reusable materials. Dispose of it in •...
-
Page 6: Installation
Installation After unpacking the appliance, check for any This information may be found on the inside of the damage caused during transport. In case of hood, under the grease filter. problems, contact the dealer or the After-Sales Power cable replacement (type H05 VV-F 3 x 0.75 Service. -
Page 7: Troubleshooting Guide
Troubleshooting guide The hood does not work Make sure: • There is not a power failure. • A speed has actually been selected. • The front panel is correctly hooked. • The 9-pin connection is properly inserted. (Figure 1) • The red reset button on the electrical system box is pressed. (Figure 2) •... -
Page 8: After-Sales Service
After-Sales Service Before calling the After-Sales Service: • Your full address; 1. See if you can solve the problem yourself with • Your telephone number. the help of the suggestions given in the "Troubleshooting guide". 2. Switch the appliance off and back on again it to see if the fault persists. -
Page 9: Maintenance
Maintenance WARNING • Use protective gloves. • Disconnect the appliance from the power supply. IMPORTANT: After carrying out hood or filter cleaning, refit the front panel and filters, checking correct installation and hooking, otherwise the hood will not switch on. GREASE FILTER Its purpose is to retain the particles of grease produced by cooking. -
Page 10: Material Supplied
Material supplied Remove all the components from the packets. Check that all the components are included. (Figure 8) • Hood assembled with extraction unit, neon and grease filters installed • 2 Carbon filters • Instructions for assembly and use • Metal box containing the electronic components. •... -
Page 11: Installation - Preliminary Assembly Instructions
Installation - preliminary assembly instructions The hood is designed for installation and use in "Extractor Version" with extraction to the outside or in "Filter Version" with internal recirculation. Install the hood away from very dirty areas, windows, doors and heat sources. -
Page 12: Installation Dimensions
Installation dimensions The hood must be installed in a cabinet having the characteristics indicated in the figure. (Figure 12) IMPORTANT: The hood is designed and approved for use exclusively with KitchenAid gas, electric, vitroceramic, induction hobs. For gas hobs, the total max. power is 16.2 kW. -
Page 13: Installation - Assembly Instructions
Installation - assembly instructions The instructions given below in numerical order refer to the drawings in the "assembly instructions" manual, containing the respective numbering. 1. Make a 842x100 mm rectangular hole behind the hob, to enable insertion of the hood. IMPORTANT: Make sure the overall dimensions of the hood and hob are compatible with the cabinet and therefore that installation is feasible. -
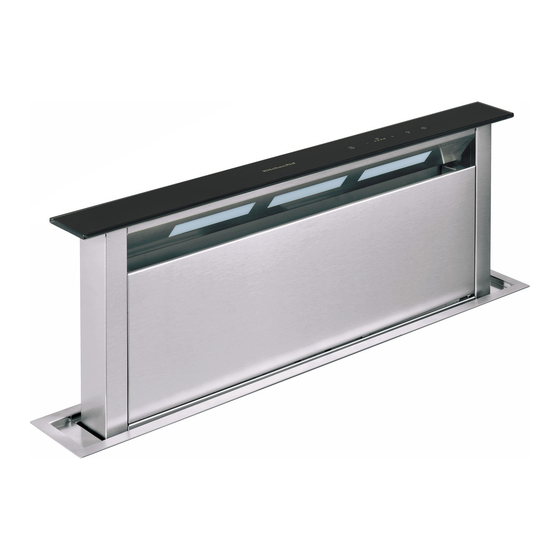
Page 14: Description And Use Of Hood
Description and use of hood (Figure 13) 1. Control panel 2. Front panel 3. Grease filters 4. Carbon filters (Filter Version only) 5. Lighting Fig. 13 CONTROL PANEL (Figure 14) The hood has a "TOUCH" device for control of lights and speed. For correct use, carefully read the instructions below. - Page 15 • Button T5: Opens (lifts) and closes (lowers) the extraction panel. With the hood off and panel closed, button T5 firstly opens the extraction panel and then sets the hood to extraction speed (power) 1. With the hood on (at any speed) and panel open, button T5 firstly switches the hood off (also switching off the lights, if on) and then closes the extraction panel.
- Page 16 Printed in Italy 04/15 400010790008...
Need help?
Do you have a question about the KEBDS 90020 and is the answer not in the manual?
Questions and answers