
Related Manuals for Klarstein CoolZone


Summary of Contents for Klarstein CoolZone
- Page 1 CoolZone Kühl-Gefrierkombination Freezer Refrigerator Frigorífico combi Combiné réfrigérateur congélateur Combinazione frigo e freezer 10033086...
-
Page 3: Table Of Contents
Sehr geehrter Kunde, wir gratulieren Ihnen zum Erwerb Ihres Gerätes. Lesen Sie die folgenden Hinweise sorgfältig durch und befolgen Sie diese, um möglichen Schäden vorzubeugen. Für Schäden, die durch Missachtung der Hinweise und unsachgemäßen Gebrauch entstehen, übernehmen wir keine Haftung. Scannen Sie den folgenden QR-Code, um Zugriff auf die aktuellste Bedienungsanleitung und weitere Informationen rund um das Produkt zu erhalten:... -
Page 4: Sicherheitshinweise
SICHERHEITSHINWEISE Allgemeine Hinweise • Kinder ab 8 Jahren, physisch und körperlich eingeschränkte Menschen dürfen das Gerät nur benutzen, wenn sie vorher von einer für Sie verantwortlichen Aufsichtsperson ausführlich mit den Funktionen und den Sicherheitsvorkehrungen vertraut gemacht wurden. • Achten Sie darauf, dass Kinder nicht mit dem Gerät spielen. •... - Page 5 • Schließen Sie das Gerät nicht an Verlängerungskabel an. • Verlegen Sie das Kabel so, dass es nicht gequatscht wird. Andernfalls kann es überhitzen und ein Feuer auslösen. • Achten Sie darauf, dass der Stecker immer frei zugänglich ist. • Ziehen sie den Stecker nicht am Kabel aus der Steckdose, sondern halten Sie ihn beim Abziehen mit der Hand fest.
- Page 6 Besondere Hinweise • Kinder im Alter von 3 bis 8 Jahren dürfen Kühlgeräte be- und entladen. Um eine Kontamination von Lebensmitteln zu vermeiden, beachten Sie bitte die folgenden Anweisungen: • Ein längeres Öffnen der Tür kann zu einem deutlichen Temperaturanstieg in den Fächern des Gerätes führen.
-
Page 7: Abmessungen Und Einbau
ABMESSUNGEN UND EINBAU Abmessungen... - Page 8 Einbau Abgewinkelte Ecke Haken am Kühlschrankfuß Schieben Sie den Kühlschrank in den Einbauschrank und stellen Sie ihn so ein, dass die abgewinkelte Kante oben am Kühlschrank den Einbauschranks berührt. Unten sollte der Haken am Kühlschrankfuß den unteren Rand des Einbauschranks berühren. Kappe Schraube Fixieren Sie die Kühlschrankfüße mit Schrauben und setzen Sie dann die...
- Page 9 Schraube Kappe Fixieren Sie die Oberkante des Kühlschranks mit Schrauben und setzen Sie dann die Abdeckkappen auf die Schrauben. Blockierung Öffnen Sie die untere Tür des Einbauschranks und die untere Tür des Kühlschranks so weit wie möglich. Verschieben Sie die Blockierung so, dass die Innenkante des Einbauschranks mit der unteren Türkante des Kühlschranks übereinstimmt.
- Page 10 Dichtung Nehmen Sie die Dichtung aus der Verpackung und drücken Sie sie in die Lücke zwischen Kühlschrank und Einbauschrank.
-
Page 11: Türanschlag Drehen 1
TÜRANSCHLAG DREHEN Benötigte Werkzeuge • Kreuzschlitzschraubenzieher • Flacher Schraubenzieher Schalten Sie das Gerät aus und nehmen Sie alle Anbauteile von den Türen ab. Entfernen Sie auf der rechten Seite die obere Aufhängung und an der linken Seite die Abdeckkappen. - Page 12 Entfernen Sie die Kühlschranktür. Nehmen Sie die linke Abdeckplatte und die rechte untere Aufhängung ab.
- Page 13 Drehen Sie die rechte obere Aufhängung um 180° und bringen Sie sie links unten an (1). Bringen Sie rechts die Abdeckkappen an. Drehen Sie die Kühlschranktür und setzen Sie sie links auf die untere Aufhängung (2). Drehen Sie die rechte untere Aufhängung um 180°...
- Page 14 Schrauben Sie die Blockierungen ab, drehen Sie sie um 180° und bringen Sie sie an der rechten Seite an.
- Page 15 Entfernen Sie die obere Aufhängung der Gefrierfachtür.
- Page 16 Nahmen Sie die Tür ab und entfernen Sie die untere Aufhängung. Setzen Sie rechts die Abdeckkappen ein.
- Page 17 Drehen Sie die rechte obere Aufhängung um 180° und bringen Sie sie links unten an (1). Bringen Sie rechts die Abdeckkappen an. Drehen Sie die Gefrierfachtür und setzen Sie sie links auf die untere Aufhängung (2). Drehen Sie die rechte untere Aufhängung um 180°...
- Page 18 Schrauben Sie die Blockierungen ab, drehen Sie sie um 180° und bringen Sie sie an der rechten Seite an. Befestigen Sie dann rechts die Abdeckplatte.
-
Page 19: Geräteübersicht
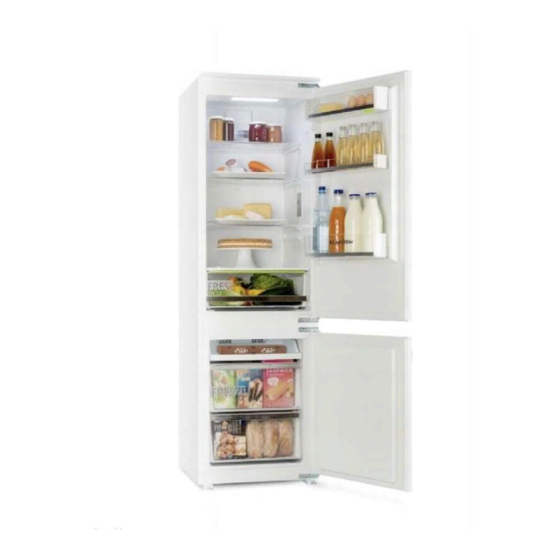
GERÄTEÜBERSICHT Licht Türfach Regal Bedienfeld Schublade Stauraum Schublade... -
Page 20: Vor Dem Ersten Betrieb
VOR DEM ERSTEN BETRIEB • Entfernen Sie vor der Benutzung zuerst alle Packmaterialien, einschließlich der Bodenpolsterung, Schaumstoffkissen und Klebstreifen im Inneren des Kühlschranks. • Reißen Sie die Schutzfolie auf der Kühlschranktür und auf dem Gehäuse ab. • Halten Sie das Gerät von Hitze und direktem Sonnenlicht fern. Stellen sie das Gefrierfach nicht an feuchten oder nassen Orten auf, um Rost zu vermeiden. -
Page 21: Inbetriebnahme Und Bedienung
INBETRIEBNAHME UND BEDIENUNG Bedienfeld Es gibt 4 Temperatureinstellungen für den Kühlschrank: (1) Einstellung 1: 8°C (2) Einstellung 2: 6°C (3) Einstellung 3: 4°C (4) Einstellung 4: 2°C Nach dem ersten Einschalten werden alle Anzeigen 3 Sekunden lang auf dem Display angezeigt. Danach läuft der Kühlschrank mit Einstellung 3. -
Page 22: Reinigung Und Pflege
REINIGUNG UND PFLEGE Abtauen • An der Innenseite des Gerätes kann sich Frost ansammeln, der während des Kompressorzyklus automatisch abtaut. • Das Wasser wird über die Ablauföffnung in die Auffangwanne oberhalb des Kompressors geleitet, wo es verdampft. • Stellen Sie sicher, dass das Ablaufloch regelmäßig gereinigt wird, damit das Wasser aus dem Staufach austreten kann. -
Page 23: Fehlerbehebung
FEHLERBEHEBUNG Problem Mögliche Ursache und Lösungsansatz Kühlschrank läuft nicht mehr Vergewissern Sie sich, ob das Gerät am Strom ist oder ob der Stecker fest in der Steckdose steckt. Stellen Sie fest, ob die Netzspannung zu niedrig ist. Stellen Sie fest, ob es einen Stromausfall oder Kurzschluss gibt. -
Page 24: Hinweise Zur Entsorgung
Problem Mögliche Ursache und Lösungsansatz Die Wasserwanne läuft über Es befindet sich zu viel Essen im Kühlschrank oder das Essen enthält zu viel Wasser, was in starker Abtauung resultiert. Die Türen sind nicht korrekt geschlossen, was zu Frostbildung führt durch die Zufuhr von Luft und mehr und mehr Wasser durch das Abtauen. - Page 25 Dear Customer, Congratulations on purchasing this equipment. Please read this manual carefully and take care of the following hints to avoid damages. Any failure caused by ignoring the items and cautions mentioned in the instruction manual is not covered by our warranty and any liability. Scan the QR code to get access to the latest user mannual and other information about the product CONTENT...
-
Page 26: Safety Instructions
SAFETY INSTRUCTIONS General Hints • This appliance can be used by children aged from 8 years and above and persons with reduced physical, sensory or mental capabilities or lack of experience and knowledge if they have been given super vision or instruction concerning use of the appliance in a safe way and understand the hazards involved. - Page 27 • Power cord must not be lengthened. • Make sure that the power plug is not squashed or damaged by the back of the appliance. A squashed or damaged power plug may overheat and cause a fire. • Make sure that you can come to the mains plug of the appliance. •...
- Page 28 Special Notes • Children between the ages of 3 and 8 are allowed to load and unload refrigerators. To avoid contamination of food, please follow the instructions below: • A prolonged opening of the door can lead to a significant rise in temperature in the compartments of the appliance.
-
Page 29: Dimsions And Installation
DIMSIONS AND INSTALLATION Dimensions... - Page 30 Installation Edgefold of top baffle Limit hook Push the refrigerator into the cabinet and adjust it to make sure the edgefold of top baffle completely touch the top edge of the cabinet, and the limit hook of supporting leg completely touch the bottom edge of the cabinet. Screw cap Screw Fix the supporting leg with screws, then install the screw caps.
- Page 31 Screw Screw cap Fix the top baffle to the top of the cabinet inner with screws, then install the screw caps. Block Open the lower door of cabinet the maximum angle, and open the lower door of the refrigerator to the corresponding position. Sliding the block to make sure inner edge align with the lower door edge of refrigerator, then fix the block to the door of cabinet with screw and install screw caps.
- Page 32 Sealing strip Take out the sealing strip from accessory bag, and press it in the gap between the cabinet and the refrigerator. Installation is completed.
-
Page 33: Door Right-Left Change
DOOR RIGHT-LEFT CHANGE Neded tools • Cross screwdriver • Flat screwdriver Remove the upper hinge and hole caps of refrigerator door. - Page 34 Remove the refrigerator door, the lower bottom hinge and the hole cover on the left side.
- Page 35 Turn the upper right suspension by 180° and attach it to the bottom left (1). Attach the cover caps on the right. Turn the refrigerator door and place it on the lower suspension (2) on the left. Turn the lower right suspension by 180° and attach it to the top left.
- Page 36 Remove the two fixed blocks of refrigerator door and rotate them for 180° and install them on other side of refrigerator door.
- Page 37 Remove the the upper hinge of freezer door.
- Page 38 Remove the freezer door, the bottom hinge and the hole caps.
- Page 39 Turn the upper right suspension by 180° and attach it to the bottom left (1). Attach the cover caps on the right. Turn the freezer door and place it on the lower suspension (2) on the left. Turn the lower right suspension by 180° and attach it to the top left.
- Page 40 Remove the two fixed blocks of freezer door and rotate them for 180° and install them on other side of freezer door.
-
Page 41: Product Overview
PRODUCT OVERVIEW Light Door tray Shelf Control panel Drawer Storage Drawer... -
Page 42: Before First Use
BEFORE FIRST USE • Before use, remove all packing materials, including bottom cushions, foam pads and tapes inside of the refrigerator; tear off the protective film on the doors and the refrigerator body. • Keep away from heat and avoid direct sunlight. Do not place the freezer in moist or watery places to prevent rust or reduction of insulating effect. -
Page 43: Operation
OPERATION Control Panel Temperature setting button of refrigerator compartment: (1) Setting 1: 8°C (2) Setting 2: 6°C (3) Setting 3: 4°C (4) Setting 4: 2°C Once initially powered on,the display screen is on full display for 3 seconds. and then the refrigerator runs according to setting 3. -
Page 44: Cleaning And Care
CLEANING AND CARE Defrosting • Frost can accumulate on the inside of the unit and defrost automatically during the compressor cycle. • The water is led through the outlet opening into the collecting tray above the compressor, where it evaporates. •... -
Page 45: Troubleshooting
TROUBLESHOOTING Problem Possible cause and suggested solution Failed operation. Check whether the appliance is connected to power or whether the plug is in well contact. Check whether the voltage is too low. Check whether there is a power failure or partial circuits have tripped. -
Page 46: Hints On Disposal
Problem Possible cause and suggested solution Water pan overflows. There is too much food in the chamber or food stored contains too much water,resulting in heavy defrosting. The doors are not closed properly, resulting in frosting due to entry of air and increased water due to defrosting. - Page 47 Estimado cliente: Le felicitamos por la adquisición de este producto. Lea atentamente el siguiente manual y siga cuidadosamente las instrucciones de uso con el fin de evitar posibles daños. La empresa no se responsabiliza de los daños ocasionados por un uso indebido del producto o por haber desatendido las indicaciones de seguridad.
-
Page 48: Indicaciones De Seguridad
INDICACIONES DE SEGURIDAD Indicaciones generales • Los niños mayores de 8 años y las personas con discapacidades físicas o psíquicas solamente podrán utilizar el aparato si han sido previamente instruidas sobre su uso y conocen las indicaciones de seguridad. • Asegúrese de que los niños no jueguen con el aparato. •... - Page 49 • No conecte el aparato a un cable alargador. • Coloque el cable de tal manera que no quede atrapado. De lo contrario, podría calentarse y provocar un incendio. • Asegúrese de que el enchufe no quede atrapado. • Para desconectar el aparato no tire del cable, sino del cuerpo del enchufe. •...
- Page 50 Notas especiales • Los niños de entre 3 y 8 años pueden cargar y descargar refrigeradores. Para evitar la contaminación de los alimentos, siga las siguientes instrucciones: • Una apertura prolongada de la puerta puede provocar un aumento significativo de la temperatura en los compartimentos del aparato. •...
-
Page 51: Dimensiones E Instalación
DIMENSIONES E INSTALACIÓN Dimensiones... - Page 52 Instalación Borde angular Ganchos en las patas del frigorífico Introduzca el frigorífico dentro del armario de modo que el borde angular en la parte superior toque el mueble y los ganchos en las patas del frigorífico, el borde inferior del mueble. Embellecedor Tornillo Monte las patas del frigorífico con la ayuda de los tornillos y, a continuación, fije los...
- Page 53 Tornillo Embellecedor Monte el borde superior del frigorífico con la ayuda de los tornillos y, a continuación, fije los embellecedores. Bloqueador Abra por completo la puerta inferior del armario y la puerta inferior del frigorífico. Desplace el bloqueador de tal manera que el borde interior del mueble coincida con el borde inferior de la puerta del frigorífico.
- Page 54 Junta Extraiga la junta del embalaje y selle el espacio que hay entre el frigorífico y el armario.
-
Page 55: Cambiar La Orientación De Abertura De La Puerta
CAMBIAR LA ORIENTACIÓN DE ABERTURA DE LA PUERTA Herramientas necesarias • Destornillador de estrella • Destornillador plano Apague el aparato y retire todas las piezas de montaje de la puerta. En la parte derecha, retire la bisagra superior y, en la parte izquierda, los embellecedores. - Page 56 Retire la puerta del frigorífico. Retire la placa de cubierta izquierda y la bisagra inferior derecha.
- Page 57 Gire la bisagra superior derecha 180° y fíjela en el lado inferior izquierdo (1). Monte la placa de cubierta en el lado derecho. Gire la puerta del frigorífico y fíjela a la bisagra inferior izquierda (2). Gire la bisagra inferior derecha 180° y fíjela en el lado superior izquierdo (1).
- Page 58 Desatornille los bloqueadores, gírelos 180° y vuela a montarlos en el lado derecho.
- Page 59 Retire la bisagra superior de la puerta del congelador.
- Page 60 Retire la puerta y desatornille la bisagra inferior. Desatornille las placas de cubierta derechas.
- Page 61 Gire la bisagra superior derecha 180° y fíjela en el lado inferior izquierdo (1). Monte la placa de cubierta en el lado derecho. Gire la puerta del congelador y fíjela a la bisagra inferior izquierda (2). Gire la bisagra inferior derecha 180° y fíjela en el lado superior izquierdo (1).
- Page 62 Desatornille los bloqueadores, gírelos 180° y vuela a montarlos en el lado derecho. Monte la placa de cubierta a la derecha.
-
Page 63: Vista General Del Aparato
VISTA GENERAL DEL APARATO Compartimento Balda de puerta Panel de control Cajón Compartimento de almacenaje Cajón... -
Page 64: Antes Del Primer Uso
ANTES DEL PRIMER USO • Antes de utilizar el aparato, retire todo el material de embalaje, incluida la espuma de soporte, las almohadillas de espuma y las tiras adhesivas del interior del frigorífico. • Rompa el plástico protector de la puerta del frigorífico y de la carcasa. •... -
Page 65: Puesta En Funcionamiento
PUESTA EN FUNCIONAMIENTO Panel de control Existen 4 niveles de temperatura para el frigorífico: (1) Nivel 1: 8 °C (2) Nivel 2: 6 °C (3) Nivel 3: 4 °C (4) Nivel 4: 2 °C Cuando encienda el aparato por primera vez, se iluminarán todos los indicadores en el display durante 3 segundos. -
Page 66: Limpieza Y Cuidado
LIMPIEZA Y CUIDADO Descongelación • Las heladas pueden acumularse en el interior de la unidad y descongelarse automáticamente durante el ciclo del compresor. • El agua es conducida a través de la abertura de salida a la bandeja colectora situada encima del compresor, donde se evapora. •... -
Page 67: Resolución De Problemas
RESOLUCIÓN DE PROBLEMAS Problema Posible causa y solución El frigorífico no funciona. Asegúrese de que el enchufe está conectado correctamente o que el aparato disponga de un suministro eléctrico. Asegúrese de que la tensión de red no sea demasiado baja. Asegúrese de que no exista un corte de luz o un cortocircuito. -
Page 68: Retirada Del Aparato
Problema Posible causa y solución La bandeja colectora rebosa Ha almacenado demasiados alimentos en el frigorífico o los alimentos contienen demasiada agua, algo que provoca una descongelación intensa. Las puertas no se han cerrado correctamente, lo que lleva a la formación de escarcha y el flujo de aire y cada vez más agua por la descongelación. - Page 69 Cher client, Toutes nos félicitations pour l’acquisition de ce nouvel appareil. Veuillez lire attentivement les instructions suivantes de branchement et d’utilisation afin d’éviter d’éventuels dommages. Le fabricant ne saurait être tenu pour responsable des dommages dus au non-respect des consignes de sécurité et à la mauvaise utilisation de l’appareil.
-
Page 70: Consignes De Sécurité
CONSIGNES DE SÉCURITÉ Consignes générales • Les enfants à partir de 8 ans ainsi que les personnes dont les capacités physiques, mentales ou sensorielles sont réduites, ou qui présentent une expérience et/ou des connaissances insuffisantes, peuvent utiliser l’appareil uniquement s’ils sont surveillés par la personne responsable de leur sécurité, ou s’ils ont assimilé... - Page 71 • Installez le câble de façon à ce qu’il ne soit pas pincé. Cela pourrait le faire surchauffer et provoquer un incendie. • Veillez à ce que la fiche de l’appareil soit toujours accessible. • Pour débrancher le câble, saisissez toujours le corps de la fiche. •...
- Page 72 Remarques particulières • Les enfants âgés de 3 à 8 ans sont autorisés à charger et décharger les réfrigérateurs. Pour éviter la contamination des aliments, veuillez suivre les instructions ci-dessous : • Une ouverture prolongée de la porte peut entraîner une augmentation significative de la température dans les compartiments de l‘appareil.
-
Page 73: Dimensions Et Encastrement
DIMENSIONS ET ENCASTREMENT Dimensions... - Page 74 Encastrement Coin incliné Crochet sur le pied du frigo Faites glisser le réfrigérateur dans la niche de coffrage et ajustez-le de manière à ce que le bord incliné sur le dessus du réfrigérateur touche la niche. En bas, le crochet situé...
- Page 75 cache Fixer le bord haut du réfrigérateur avec des vis puis placez les caches sur les vis. Bloc d‘arrêt Ouvrez autant que possible la porte inférieure de la niche et la porte inférieure du réfrigérateur. Déplacez le bloc d‘arrêt de sorte que le bord intérieur de la niche corresponde au bord inférieur du réfrigérateur.
- Page 76 Joint Retirez le joint de l‘emballage et poussez-le dans l‘espace entre le réfrigérateur et le placard intégré.
-
Page 77: Modification Du Sens D'ouverture
MODIFICATION DU SENS D‘OUVERTURE Outillage nécessaire • tournevis cruciforme • tournevis plat Éteignez l‘appareil et retirez toutes les éléments dans les portes. Retirez la suspension supérieure à droite et les caches à gauche. - Page 78 Retirez la porte du réfrigérateur. Retirez le cache gauche et la suspension inférieure droite.
- Page 79 Tournez la suspension supérieure droite de 180 ° et fixez-la en bas à gauche (1). Fixez les caches sur la droite. Tournez la porte du réfrigérateur et placez-la sur le côté gauche de la suspension inférieure (2). Faites pivoter la suspension inférieure droite de 180 °...
- Page 80 Dévisser les blocs, tournez-les à 180 ° et attachez-les côté droit.
- Page 81 Retirez la suspension supérieure de la porte du compartiment congélateur.
- Page 82 Retirez la porte et retirez la suspension inférieure. Placez les caches à droite.
- Page 83 Tournez la suspension supérieure droite à 180° et fixez-la en bas à gauche (1). Fixez les caches sur la droite. Tournez la porte du compartiment congélateur et placez-la sur le côté gauche de la suspension inférieure (2). Tournez la suspension du coin inférieur droit à...
- Page 84 Dévissez les blocs, tournez-les à 180° et fixez-les sur le côté droit. Fixez ensuite le panneau-cache à droite.
-
Page 85: Aperçu De L'appareil
APERÇU DE L‘APPAREIL Eclairage Compartiment Clayette de porte Panneau de commande Tiroir de commande Espace de rangement Tiroir... -
Page 86: Avant La Première Utilisation
AVANT LA PREMIÈRE UTILISATION • Avant l‘utilisation, retirez tous les matériaux d‘emballage, y compris le fond rembourré les coussins de mousse et les bandes autocollantes à l‘intérieur du réfrigérateur. • Déchirez les films de protection sur la porte du réfrigérateur et sur le corps de l‘appareil. -
Page 87: Mise En Marche Et Utilisation
MISE EN MARCHE ET UTILISATION Panneau de commande Le réfrigérateur dispose de 4 réglages de température : (1) réglage 1 : 8°C (2) réglage 2 : 6°C (3) réglage 3 : 4°C (4) réglage 4 : 2°C Au premier démarrage, tous les témoins s‘allument à... -
Page 88: Nettoyage Et Entretien
NETTOYAGE ET ENTRETIEN Décongélation • Le givre peut s‘accumuler à l‘intérieur de l‘appareil et dégivrer automatiquement pendant le cycle du compresseur. • L‘eau est conduite par l‘ouverture de sortie dans le bac collecteur au-dessus du compresseur, où elle s‘évapore. • Veillez à ce que le trou de vidange soit nettoyé régulièrement afin que l‘eau puisse s‘échapper du compartiment de stockage. -
Page 89: Résolution Des Problèmes
RÉSOLUTION DES PROBLÈMES Problème Cause possible et solution Réfrigérateur ne fonctionne plus Assurez-vous que l'appareil est bien branché et que la fiche est bien insérée dans la prise. Vérifiez que la tension du secteur n'est pas insuffisante. Vérifiez s'il s'agit d'une panne de courant ou d'un court-circuit. -
Page 90: Conseils Pour Le Recyclage
Problème Cause possible et solution Le récupérateur d'eau déborde Il y a trop de nourriture dans le réfrigérateur ou bien la nourriture contient trop d'eau, ce qui produit u décongélation importante. Les portes sont mal fermées, ce qui conduit à la formation de givre par 'apport en air, et plus d'eau de décongélation. - Page 91 Gentile cliente, La ringraziamo per aver acquistato il dispositivo. La preghiamo di leggere attentamente le seguenti istruzioni per l’uso e di seguirle per evitare possibili danni tecnici. Non ci assumiamo alcuna responsabilità per danni scaturiti da una mancata osservazione delle avvertenze di sicurezza e da un uso improprio del dispositivo.
-
Page 92: Avvertenze Di Sicurezza
AVVERTENZE DI SICUREZZA Avvertenze generali • I bambini a partire dagli 8 anni e le persone con capacità fisiche e mentali ridotte possono utilizzare il dispositivo solo se una persona responsabile della loro sicurezza ha prima spiegato loro le avvertenze di sicurezza e come utilizzare il dispositivo. - Page 93 • Non collegare il dispositivo ad una prolunga. • Sistemare il cavo di alimentazione in modo che non si pieghi. In caso contrario il cavo di alimentazione potrebbe surriscaldarsi e causare un incendio. • Assicurarsi che la spina sia sempre accessibile. •...
- Page 94 Note speciali • I bambini tra i 3 e gli 8 anni possono caricare e scaricare i frigoriferi. Per evitare la contaminazione degli alimenti, seguire le seguenti istruzioni: • Un‘apertura prolungata dello sportello può portare ad un significativo aumento della temperatura nei vani dell‘apparecchio. •...
-
Page 95: Dimensioni E Incasso
DIMENSIONI E INCASSO Dimensioni... - Page 96 Incasso Angolo inclinato Gancio sul basamento del frigo Inserire il frigorifero nel mobile per l’incasso e posizionarlo in modo che il bordo inclinato sulla parte superiore del frigorifero tocchi l’armadio. In basso, il gancio sul basamento del frigo deve toccare il bordo dell’armadio. Copertura Vite Fissare i piedi del frigorifero con le viti e posizionare la copertura sulle viti.
- Page 97 Vite Copertura Fissare il bordo superiore del frigorifero con le viti e mettere la copertura sulle viti. Blocco Aprire al massimo lo sportello inferiore dell’armadio per l’incasso e lo sportello inferiore del frigorifero. Spostare il blocco, in modo che il bordo interno dell’armadio sia in corrispondenza con il bordo inferiore dello sportello del frigo.
- Page 98 Guarnizione Togliere la guarnizione dall’imballaggio e premerla nello spazio tra frigo e armadio.
-
Page 99: Cambiare La Direzione Di Apertura Dello Sportello
CAMBIARE LA DIREZIONE DI APERTURA DELLO SPORTELLO Utensili necessari • Cacciavite a croce • Cacciavite a taglio Spegnere il dispositivo e rimuovere tutti i componenti strutturali dagli sportelli. Rimuovere il gancio superiore sul lato destro e le coperture sul lato sinistro. - Page 100 Rimuovere lo sportello del frigo. Togliere il pannello di copertura sinistro e il gancio inferiore destro.
- Page 101 Ruotare di 180° il gancio superiore destro e montarlo in basso a sinistra (1). Montare le coperture a destra. Ruotare lo sportello del frigo e metterlo sul gancio inferiore a sinistra (2). Ruotare di 180° il gancio inferiore destro e montarlo in alto a sinistra.
- Page 102 Svitare il blocco, ruotarlo di 180° e montarlo sul lato destro.
- Page 103 Togliere il gancio dello sportello del freezer.
- Page 104 Staccare lo sportello e rimuovere il gancio inferiore. Mettere le coperture a destra.
- Page 105 Ruotare il gancio superiore destro di 180° e montarlo in basso a sinistra (1). Montare le coperture a destra. Ruotare lo sportello del frigo e metterlo sul gancio inferiore a sinistra (2). Ruotare di 180° il gancio inferiore destro e montarlo in alto a sinistra.
- Page 106 Svitare il blocco, ruotarlo di 180° e montarlo sul lato destro. Fissare poi il pannello di copertura destro.
-
Page 107: Descrizione Del Dispositivo
DESCRIZIONE DEL DISPOSITIVO Luce Vano sullo Ripiano sportello Pannello di controllo Cassetto Vano Cassetto... -
Page 108: Avvertenze Per Il Primo Utilizzo
AVVERTENZE PER IL PRIMO UTILIZZO • Prima dell´uso rimuovere completamente il materiale di imballaggio, inclusa l´imbottitura, il cuscino in materiale espanso e il nastro adesivo all‘interno del frigorifero. • Rimuovere la pellicola protettiva sullo sportello del frigorifero e sull‘alloggiamento. • Non esporre il dispositivo al calore e alla luce diretta del sole. Non collocare il dispositivo in ambienti umidi o bagnati per evitare la formazione di ruggine e la perdita di isolamento. -
Page 109: Messa In Funzione E Utilizzo
MESSA IN FUNZIONE E UTILIZZO Ci sono 4 impostazioni di temperatura per il frigorifero: (1) Impostazione 1: 8 °C (2) Impostazione 2: 6 °C (3) Impostazione 3: 4 °C (4) Impostazione 4: 2 °C Dopo l’accensione, tutte le indicazioni vengono mostrate sul display per 3 secondi. -
Page 110: Pulizia E Manutenzione 1
PULIZIA E MANUTENZIONE Scongelamento • Il gelo può accumularsi all‘interno dell‘unità e sbrinarsi automaticamente durante il ciclo del compressore. • L‘acqua viene convogliata attraverso l‘apertura di uscita nel vassoio di raccolta sopra il compressore, dove evapora. • Assicurarsi che il foro di scarico venga pulito regolarmente, in modo che l‘acqua possa fuoriuscire dal vano di stivaggio. -
Page 111: Risoluzione Dei Problemi 1 1
RISOLUZIONE DEI PROBLEMI Problema Causa e soluzione possibile Il frigorifero non funziona. Accertarsi che il dispositivo sia collegato alla corrente e che la spina sia inserita correttamente nella presa. Controllare che la tensione non sia troppo bassa. Accertarsi che non ci sia mancanza di corrente o un corto circuito. -
Page 112: Smaltimento 1
Problema Causa e soluzione possibile La vaschetta dell´acqua Ci sono troppi alimenti nel frigorifero oppure gli trabocca. alimenti contengono troppa acqua. Gli sportelli non sono chiusi correttamente e ciò causa la formazione di ghiaccio. Le superfici sono calde. Dissipazione del calore del condensatore integrato attraverso le superfici, si tratta di un fenomeno normale.
Need help?
Do you have a question about the CoolZone and is the answer not in the manual?
Questions and answers