
Related Manuals for Klarstein COOLZONE 130


Summary of Contents for Klarstein COOLZONE 130
- Page 1 COOLZONE 130 Kühlschrank Fridge Frigorífico Réfrigérateur Frigorifero 10030104 www.klarstein.com...
-
Page 3: Table Of Contents
Sehr geehrter Kunde, wir gratulieren Ihnen zum Erwerb Ihres Gerätes. Lesen Sie die folgenden Hinweise sorgfältig durch und befolgen Sie diese, um möglichen Schäden vorzubeugen. Für Schäden, die durch Missachtung der Hinweise und unsachgemäßen Gebrauch entstehen, übernehmen wir keine Haftung. Scannen Sie den folgenden QR-Code, um Zugriff auf die aktuellste Bedienungsanleitung und weitere Informationen rund um das Produkt zu erhalten:... -
Page 4: Sicherheitshinweise
SICHERHEITSHINWEISE Hinweise zur Sicherheit von Kindern und gefährdeten Personen • Dieses Gerät kann von Kindern ab 8 Jahren und Personen mit eingeschränkten körperlichen, sensorischen oder geistigen Fähigkeiten oder fehlender Erfahrung und Kenntnissen verwendet werden, wenn sie bei der Benutzung beaufsichtigt werden oder eine Einweisung in die sichere Handhabung des Geräts erhalten haben und die damit verbundenen Gefahren verstehen. - Page 5 • Vermeiden Sie in der Nähe des Geräts offene Flammen und Zündquellen. • Lüften Sie den Raum, in dem sich das Gerät befindet, gründlich und regelmäßig. • Es ist gefährlich dieses Produkt in irgendeiner Weise zu modifizieren. Jede Beschädigung des Kabels kann einen Kurzschluss, Brand oder elektrischen Schlag verursachen.
- Page 6 Hinweise zum täglichen Gebrauch • Legen Sie keine heißen Lebensmittel in das Gerät. • Legen Sie die Lebensmittel nicht direkt an die Rückwand. • Tiefgefrorene Lebensmittel dürfen nach dem Auftauen nicht wieder eingefroren werden. • Lagern Sie verpackte Tiefkühlkost entsprechend den Anweisungen der Tiefkühlkosthersteller.
- Page 7 Hinweise zu Reinigung und Wartung • Schalten das Gerät vor der Reinigung und Wartung aus und ziehen Sie den Netzstecker aus der Steckdose. • Reinigen Sie das Gerät nicht mit Metallgegenständen. Verwenden Sie keine scharfen Gegenstände, um den Frost aus dem Gerät zu entfernen. Verwenden Sie einen Kunststoffschaber.
-
Page 8: Geräteübersicht
GERÄTEÜBERSICHT 1 Thermostat und Licht 2 Glasregale 3 Gemüsefach- Abdeckung 4 Gemüsefach 5 Türfächer TÜRANSCHLAG DREHEN Benötigte Werkzeuge: Kreuzschlitzschraubenzieher und flacher Schraubenzieher • Versichern Sie sich, dass das Gerät leer ist und ziehen Sie den Stecker aus der Steckdose. • Wenn Sie die Tür entfernen müssen Sie das Gerät zurückneigen. Lehnen Sie das Gerät an eine stabile Wand, von der es nicht wegrutschen kann. - Page 9 Schrauben Sie die obere Aufhängung ab. Schrauben Sie die untere Aufhängung ab. Heben Sie die Tür an und stellen Sie sie auf einen weichen Untergrund, um Krat- zer zu vermeiden. Schrauben Sie die obere und untere Lochabdeckung ab und befestigen Sie sie an den gegenüberliegenden Seiten.
- Page 10 Drehen Sie die obere Aufhängung um, Befestigen Sie die Tür wieder. Versichern und befestigen Sie sie unten auf der linken Sie sich, dass die Tür horizontal und ver- Seite. tikal richtig ausgerichtet ist, so dass die Dichtung an allen Seiten schließt. Drehen Sie dann die untere Aufhängung um und befestigen Sie sie links oben.
-
Page 11: Installation 1
INSTALLATION Mitgeliefertes Zubehör Führung 2x Abdeckung 2x Gleiter 2x Abdeckung 2x Schrauben 15x Dichtung 1x inkl. 2x Ersatz... - Page 12 Einbauanleitung Versichern Sie sich, dass der Einbauschrank groß genug ist und ausreichende Belüftung bietet.
- Page 13 Entfernen Sie die 4 Schrauben vorne an der Tür. Befestigen Sie dann die zwei Führungen mit den 4 Schrauben an der Tür. Schieben Sie das Gerät langsam und Öffnen Sie die Gerätetür und die Tür vorsichtig in den Schrank. Achten Sie des Einbauschranks um 90°.
- Page 14 Drehen Sie die Schieber, um sie aus der Befestigen Sie dann beide Schieber auf Führung zu bewegen und schließen Sie der linken Seite mit je einer Schraube die Gerätetür. an der markierten Stelle an der Tür des Einbauschranks. Ziehen Sie das Gerät ca. 150 mm aus dem Einbauschrank heraus. Öffnen Sie dann die Gerätetür und setzen Sie die Schieber in die Führungen ein, indem Sie das Gerät zurückschieben.
- Page 15 Prüfen Sie, ob sich die Tür leichtgängig Befestigen Sie die obere Halterung am öffnen und schließen lässt und das Gerät Einbauschrank. abdichtet. Wenn nicht, justieren Sie das Gerät leicht nach. Befestigen Sie dann die untere Halterung am Einbauschrank. Befestigen Sie zum Schluss die Gummidichtung im Spalt zwischen Gerät und Einbauschrank an der offenen Seite der Tür.
-
Page 16: Inbetriebnahme Und Bedienung
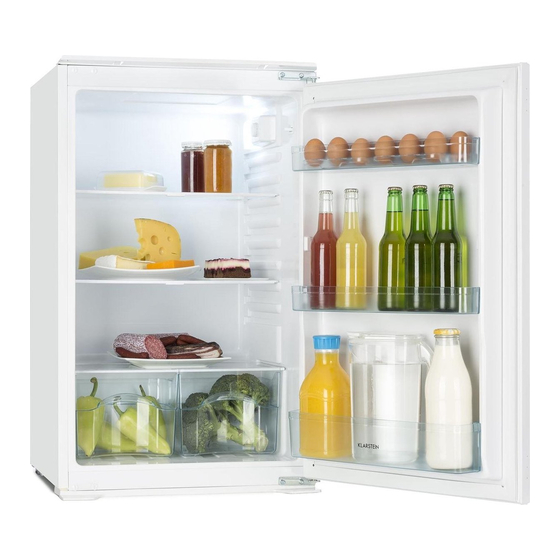
INBETRIEBNAHME UND BEDIENUNG Vor dem ersten Betrieb • Entfernen Sie vor der Benutzung zuerst alle Packmaterialien, einschließlich der Bodenpolsterung, Schaumstoffkissen und Klebstreifen im Inneren des Kühlschranks. • Reißen Sie die Schutzfolie auf der Kühlschranktür und auf dem Gehäuse ab. • Halten Sie das Gerät von Hitze und direktem Sonnenlicht fern. Stellen sie das Gerät nicht an feuchten oder nassen Orten auf, um Rost zu vermeiden. - Page 17 Empfohlene Temperatureinstellungen Umgebungstemperatur Gefrierfach Kühlschrank Sommer Übergangszeit Winter Täglicher Gebrauch Legen Sie unterschiedliche Lebensmittel in unterschiedliche Fächer, wie in der folgenden Tabelle beschrieben: Aufbewahrungsort Lebensmittelart Türfächer Lebensmittel mit natürlichen Konservierungsstoffen, wie Marmeladen oder Säfte, Getränke oder Gewürze Schublade Obst, Kräuter und Gemüse sollten separat in der Schublade gelagert werden Lagern Sie Bananen, Zwiebeln, Kartoffeln und Knoblauch nicht im Kühlschrank...
-
Page 18: Reinigung Und Pflege
REINIGUNG UND PFLEGE Abtauen • An der Innenseite des Gerätes kann sich Frost ansammeln, der während des Kompressorzyklus automatisch abtaut. • Das Wasser wird über die Ablauföffnung in die Auffangwanne oberhalb des Kompressors geleitet, wo es verdampft. • Stellen Sie sicher, dass das Ablaufloch regelmäßig gereinigt wird, damit das Wasser aus dem Staufach austreten kann. -
Page 19: Fehlerbehebung
FEHLERBEHEBUNG Problem Mögliche Ursache und Lösungsansatz Kühlschrank läuft nicht mehr Vergewissern Sie sich, ob das Gerät am Strom ist oder ob der Stecker fest in der Steckdose steckt. Stellen Sie fest, ob die Netzspannung zu niedrig ist. Stellen Sie fest, ob es einen Stromausfall oder Kurzschluss gibt. -
Page 20: Hinweise Zur Entsorgung
HINWEISE ZUR ENTSORGUNG Wenn es in Ihrem Land eine gesetzliche Regelung zur Entsorgung von elektrischen und elektronischen Geräten gibt, weist dieses Symbol auf dem Produkt oder auf der Verpackung darauf hin, dass dieses Produkt nicht im Hausmüll entsorgt werden darf. Stattdessen muss es zu einer Sammelstelle für das Recycling von elektrischen und elektronischen Geräten gebracht werden. - Page 21 Dear Customer, Congratulations on purchasing this equipment. Please read this manual carefully and take care of the following hints to avoid damages. Any failure caused by ignoring the items and cautions mentioned in the instruction manual is not covered by our warranty and any liability. Scan the QR code to get access to the latest user mannual and other information about the product CONTENT...
-
Page 22: Safety Instructions
SAFETY INSTRUCTIONS Information on the safety of children and persons at risk • This appliance may be used by children over 8 years of age and persons with reduced physical, sensory or mental capabilities or lack of experience and knowledge, provided they are supervised during use or have received instruction in the safe use of the appliance and understand the risks involved. - Page 23 • Avoid naked flames and sources of ignition near the unit. • Thoroughly and regularly ventilate the room in which the unit is located. • It is dangerous to modify this product in any way. Any damage to the cable may cause a short circuit, fire or electric shock.
- Page 24 Notes on daily use • Do not put hot food in the machine. • Do not place food directly against the rear panel. • Frozen food must not be refrozen after defrosting. • Store packaged frozen food according to the instructions of the frozen food manufacturer.
- Page 25 Notes on cleaning and maintenance • Before cleaning and maintenance, switch the machine off and unplug the power cord from the wall outlet. • Do not clean the machine with metal objects. Do not use sharp objects to remove frost from the machine. Use a plastic scraper. •...
-
Page 26: Product Overview
PRODUCT OVERVIEW 1 Thermostat and Light 2 Glass Shelves 3 Crisper Cover 4 Crisper 5 Balconies REVERSE DOOR Tool required: Philips screwdriver, Flat bladed screwdriver. • Ensure the unit is unplugged and empty. • To take the door off, it is necessary to tilt the unit backwards. You should rest the unit on something solid so that it will not slip during the door reversing process. - Page 27 Unscrew the top hinge. Then lift the door Unscrew bottom hinge. and place it on a padded surface to avoid scratching. Unscrew and move screw holes at top and bottom of cabinet from left to right.
- Page 28 Turn over the top hinge and install it at Place the door back on. Ensure the door bottom of left side. is aligned horizontally and vertically so that the seal are closed on all sides before finally tightening the hinge. Then turn over removed bottom hinge and inert it and screw it to the top front of the unit.
-
Page 29: Installation
INSTALLATION Kits for installation Guide 2x Cover 2x Slider 2x Cover 2x Screws 15x Rubber Seal 1x incl. 2 spare parts... - Page 30 Install the Appliance Ensure the size of cabinet and ventilation are enough.
- Page 31 Remove the 4 screws from the front of the door. Then attach the two guides to the door with the 4 screws. Slowly and carefully slide the unit into the Open the unit door and the door of the cabinet. Make sure that the opening side built-in cabinet by 90°.
- Page 32 Turn the slides to move them out of the Then fasten both sliders on the left side guide and close the unit door. with one screw each at the marked position on the door of the built-in cabinet. Pull the unit approx. 150 mm out of the built-in cabinet. Then open the unit door and insert the slides into the guides by pushing the unit back.
- Page 33 Check that the door opens and closes Attach the upper bracket to the built-in smoothly and that the unit seals. If not, cabinet. readjust the unit slightly. Then attach the lower bracket to the built-in cabinet. Finally, fix the rubber seal in the gap between the unit and the built-in cabinet on the open side of the door.
-
Page 34: Operation
OPERATION Before first Use • Before use, remove all packing materials, including bottom cushions, foam pads and tapes inside of the refrigerator; tear off the protective film on the doors and the refrigerator body. • Keep away from heat and avoid direct sunlight. Do not place the unit in moist or watery places to prevent rust or reduction of insulating effect. - Page 35 Recommended temperature settings Ambient temperature Freezer Fridge Summer Transitional period Winter Daily use Place different foods in different compartments, as described in the following table: Storage location Food type Door compartments Food with natural preservatives, such as jams or juices, drinks or spices.
-
Page 36: Care And Maintenance
CARE AND MAINTENANCE Defrosting • Frost may accumulate on the inside of the unit and defrost automatically during the compressor cycle. • The water is led through the drain opening into the collecting tray above the compressor where it evaporates. •... -
Page 37: Troubleshooting
TROUBLESHOOTING Problem Possible cause and suggested solution Failed operation. Check whether the appliance is connected to power or whether the plug is in well contact. Check whether the voltage is too low. Check whether there is a power failure or partial circuits have tripped. -
Page 38: Disposal Considerations
DISPOSAL CONSIDERATIONS If there is a legal regulation for the disposal of electrical and electronic devices in your country, this symbol on the product or on the packaging indicates that this product must not be disposed of with household waste. Instead, it must be taken to a collection point for the recycling of electrical and electronic equipment. - Page 39 Estimado cliente: Le felicitamos por la adquisición de este producto. Lea atentamente el siguiente manual y siga cuidadosamente las instrucciones de uso con el fin de evitar posibles daños. La empresa no se responsabiliza de los daños ocasionados por un uso indebido del producto o por haber desatendido las indicaciones de seguridad.
-
Page 40: Indicaciones De Seguridad
INDICACIONES DE SEGURIDAD Indicaciones para la seguridad de los niños y personas desvalidas • Los niños mayores de 8 años y las personas con discapacidades físicas, psíquicas o sensoriales o carentes de la experiencia y conocimiento necesarios no podrán utilizar el aparato salvo que estén bajo supervisión o hayan sido previamente instruidas sobre su utilización y las indicaciones de seguridad y se hayan familiarizado con sus funciones y con los riesgos relacionados. - Page 41 • Evite las llamas abiertas y las fuentes de ignición cerca del aparato. • Ventile la estancia donde se encuentre el aparato a fondo y periódicamente. • Es peligroso modificar este producto de cualquier modo. Cualquier daño del cable puede provocar un cortocircuito, un incendio o una descarga eléctrica. •...
- Page 42 Indicaciones para el uso diario • No introduzca alimentos calientes dentro del aparato. • No coloque los alimentos directamente pegados a la pared trasera. • Los alimentos congelados no deben volver a congelarse después de su descongelación. • Conserve los alimentos congelados envasados siguiendo las instrucciones del productor del alimento.
- Page 43 Indicaciones de limpieza y mantenimiento • Apague el aparato antes de la limpieza y mantenimiento y desconecte el enchufe de la toma de corriente. • No limpie el aparato con objetos metálicos. No utilice objetos afi lados para retirar la escarcha del aparato. Utilice una rasqueta. •...
-
Page 44: Descripción Del Dispositivo
DESCRIPCIÓN DEL DISPOSITIVO Termostato y luz Estantes de cristal Tapa del compartimento para verduras Compartimento para verduras Compartimentos de puerta GIRAR EL TOPE DE LA PUERTA Herramientas necesarias: destornillador Phillips y destornillador plano. • Asegúrese de que el aparato está vacío y retire el enchufe de la toma de corriente. •... - Page 45 Desenrosque la suspensión superior. Le- Desenrosque la suspensión inferior vante la puerta y colóquela sobre una superficie blanda para evitar arañazos. Desenrosque las tapas de los agujeros superior e inferior y colóquelas en los lados opuestos.
- Page 46 Déle la vuelta a la suspensión superior, y Vuelva a colocar la puerta. Asegúrese fíjelo en la parte inferior del lado izquier- de que está bien alineada horizontal y verticalmente para que la junta cierre por todos los lados. Luego, gire la suspensión inferior y adjúntelo en la parte superior izquierda.
-
Page 47: Instalación
INSTALACIÓN Accesorios incluidos Guiador 2x Cubierta 2x Planeador 2x Tapa 2x Tornillos 15x incl. 2 Junta 1x repuestos... - Page 48 Instrucciones de instalación Asegúrese de que el armario empotrado es lo suficientemente grande y proporciona una ventilación adecuada.
- Page 49 Retire los 4 tornillos de la parte delantera de la puerta. A continuación, fije las dos guías a la puerta con los 4 tornillos. Deslice el aparato lentamente y Abra la puerta del aparato y la puerta cuidadosamente en el armario. del armario empotrado en 90°.
- Page 50 Gire los controles deslizantes para A continuación, fije las dos guías en el sacarlo fuera de la guía y cierre la lado izquierdo con un tornillo cada uno puerta del aparato. en la posición marcada en la puerta del armario empotrado. Extraiga el aparato unos 150 mm del armario empotrado.
- Page 51 Compruebe que la puerta se abre y Fije el soporte superior al armario se cierra suavemente y que el aparato empotrado. queda bien sellado. Si no es así, ajuste ligeramente el aparato. A continuación, adjunte el soporte inferior al armario empotrado.
-
Page 52: Puesta En Marcha Y Funcionamiento
PUESTA EN MARCHA Y FUNCIONAMIENTO Antes del primer uso • Antes de utilizar el aparato, retire todo el material de embalaje, incluida la espuma de soporte, las almohadillas de espuma y las tiras adhesivas del interior del frigorífico. • Rompa el plástico protector de la puerta del frigorífico y de la carcasa. •... - Page 53 Recomendaciones sobre la temperatura Temperatura Congelador Frigorífico Verano Entretiempo Invierno Uso diario Coloque los distintos alimentos en distintas superficies, como se describe en la siguiente tabla: Tipo de Tipo de alimento almacenamiento Compartimentos de la Alimentos con conservantes naturales, como mermelada, puerta zumo, bebidas o especias.
-
Page 54: Limpieza Y Cuidado
LIMPIEZA Y CUIDADO Descongelación • Las heladas pueden acumularse en el interior de la unidad y descongelarse automáticamente durante el ciclo del compresor. • El agua es conducida a través de la abertura de salida a la bandeja colectora situada encima del compresor, donde se evapora. •... -
Page 55: Resolución De Problemas
RESOLUCIÓN DE PROBLEMAS Problema Posible causa y solución El frigorífico no funciona. Asegúrese de que el enchufe esté conectado correctamente o que el aparato disponga de un suministro eléctrico. Asegúrese de que la tensión de red no sea demasiado baja. Asegúrese de que no exista un corte de luz o un cortocircuito. -
Page 56: Indicaciones Sobre La Retirada Del Aparato
INDICACIONES SOBRE LA RETIRADA DEL APARATO Si en su país existe una disposición legal relativa a la eliminación de aparatos eléctricos y electrónicos, este símbolo estampado en el producto o en el embalaje advierte que no debe eliminarse como residuo doméstico. En lugar de ello, debe depositarse en un punto de recogida de reciclaje de aparatos eléctricos y electrónicos. - Page 57 Cher client, Toutes nos félicitations pour l’acquisition de ce nouvel appareil. Veuillez lire attentivement les instructions suivantes de branchement et d’utilisation afin d’éviter d’éventuels dommages. Le fabricant ne saurait être tenu pour responsable des dommages dus au non-respect des consignes de sécurité et à la mauvaise utilisation de l’appareil.
-
Page 58: Consignes De Sécurité
CONSIGNES DE SÉCURITÉ Consignes pour la sécurité des enfants et des personnes vulnérables • Cet appareil peut être utilisé par des enfants à partir de 8 ans et des personnes ayant des capacités physiques, sensorielles ou mentales limitées ou dénuées d‘expérience et de connaissances, à... - Page 59 • Évitez les flammes nues et les sources d‘inflammation à proximité de l‘appareil. • Aérez soigneusement et régulièrement la pièce dans laquelle se trouve l‘appareil. • Il est dangereux de modifier ce produit de quelque manière que ce soit. Tout dommage au câble peut entraîner un court-circuit, un incendie ou un choc électrique.
- Page 60 Consignes d‘utilisation quotidienne • Ne mettez pas d‘aliments chauds dans l‘appareil. • Ne placez pas les aliments directement contre la paroi arrière. • Les aliments surgelés ne doivent pas être recongelés après décongélation. • Conservez les aliments surgelés emballés conformément aux instructions de leur fabricant.
- Page 61 Consignes de nettoyage et d‘entretien • Avant de nettoyer et de réparer l‘appareil, éteignez-le et débranchez la fi che de la prise. • Ne nettoyez pas l‘appareil avec des objets métalliques. N‘utilisez pas d‘objets pointus pour éliminer le givre de l‘appareil. Utilisez un grattoir en plastique. •...
-
Page 62: Aperçu De L'appareil
APERÇU DE L‘APPAREIL 1 Thermostat et éclairage 2 Clayettes en verre 4 Couvercle du bac à légumes 5 Bac à légumes 6 Compartiments de porte MODIFICATION DU SENS DE FERMETURE DE LA PORTE Outillage nécessaire : tournevis cruciforme et tournevis plat •... - Page 63 Dévissez la suspension supérieure. Soule- Dévissez la suspension inférieure. vez la porte et placez-la sur une surface douce pour éviter les rayures. Dévissez les caches des trous supérieurs et inférieurs et fixez-les sur les côtés opposés.
- Page 64 Retournez la suspension supérieure et Remettez la porte en place. Assurez-vous fixez-la sur le côté inférieur gauche. que la porte est correctement alignée ho- rizontalement et verticalement afin que le joint se ferme de tous les côtés. Puis re- tournez le support inférieur et fixez-le en haut à...
-
Page 65: Installation
INSTALLATION Accessoires fournis Guides 2x Caches 2x Glissière 2x Cache 2x Vis 15x dont 2x de Joint 1x rechange... - Page 66 Notice d‘encastrement Assurez-vous que le placard d‘encastrement est suffisamment grand et dispose d‘une ventilation adéquate.
- Page 67 Retirez les 4 vis à l‘avant de la porte. Fixez ensuite les deux guides à la porte avec les 4 vis. Faites glisser lentement et prudemment Ouvrez la porte de l'appareil et la porte l'appareil dans l'armoire. Assurez-vous de l'armoire encastrée de 90°. Placez que l'ouverture est aussi proche que la glissière en haut et en bas dans les possible de la paroi de l'armoire et...
- Page 68 Faites pivoter les glissières pour les sortir Ensuite, fixez les deux glissières sur le du guide et fermez la porte de l'appareil. côté gauche avec une vis à chaque emplacement marqué sur la porte de l'armoire encastrée. Retirez l‘appareil d‘environ 150 mm de l‘armoire encastrée. Ouvrez ensuite la porte de l‘appareil et insérez les glissières dans les guides en faisant glisser l‘appareil vers l‘arrière.
- Page 69 Vérifiez que la porte peut s'ouvrir et se Fixez le support supérieur à l'armoire. fermer facilement et que l'appareil est étanche. Sinon, réajustez légèrement l'appareil. Ensuite, fixez le support inférieur à l'armoire. Enfin, fixez le joint en caoutchouc dans l‘espace entre l‘appareil et l‘armoire intégrée sur le côté...
-
Page 70: Mise En Service Et Fonctionnement
MISE EN SERVICE ET FONCTIONNEMENT Avant la première utilisation • Avant l‘utilisation, retirez tous les matériaux d‘emballage, y compris le fond rembourré les coussins de mousse et les bandes autocollantes à l‘intérieur du réfrigérateur. • Déchirez les films de protection sur la porte du réfrigérateur et sur le corps de l‘appareil. - Page 71 Réglages de températures recommandés Température ambiante Congélateur Réfrigérateur Été Mi-saison Hiver Utilisation quotidienne Mettez les aliments dans différents compartiments comme décrit dans le tableau suivant: Lieu de conservation Type d'aliment Compartiments de Aliments contenant des conservateurs naturels, tels que des porte confitures ou des jus de fruits, des boissons ou des épices.
-
Page 72: Nettoyage Et Entreten
NETTOYAGE ET ENTRETIEN Décongélation • Le givre peut s‘accumuler à l‘intérieur de l‘appareil et dégivrer automatiquement pendant le cycle du compresseur. • L‘eau est conduite par l‘ouverture de sortie dans le bac collecteur au-dessus du compresseur, où elle s‘évapore. • Veillez à ce que le trou de vidange soit nettoyé régulièrement afin que l‘eau puisse s‘échapper du compartiment de stockage. -
Page 73: Résolution Des Problèmes
RÉSOLUTION DES PROBLÈMES Problème Cause possible et solution Le réfrigérateur ne fonctionne Vérifiez que l'appareil est bien branché ou que la plus fiche est fermement insérée dans la prise. Vérifiez que la tension utilisée est suffisante. Vérifiez qu'il n'y a pas de panne de courant ou de court-circuit. -
Page 74: Informations Sur Le Recyclage
INFORMATIONS SUR LE RECYCLAGE S‘il existe une réglementation pour l‘élimination ou le recyclage des appareils électriques et électroniques dans votre pays, ce symbole sur le produit ou sur l‘emballage indique que cet appareil ne doit pas être jeté avec les ordures ménagères. - Page 75 Gentile cliente, La ringraziamo per aver acquistato il dispositivo. La preghiamo di leggere attentamente le seguenti istruzioni per l’uso e di seguirle per evitare possibili danni tecnici. Non ci assumiamo alcuna responsabilità per danni scaturiti da una mancata osservazione delle avvertenze di sicurezza e da un uso improprio del dispositivo.
-
Page 76: Avvertenze Di Sicurezza
AVVERTENZE DI SICUREZZA Avvertenze per la sicurezza di bambini e persone che necessitano di tutela • Bambini a partire da 8 anni e persone con limitate capacità fisiche e psichiche possono utilizzare il dispositivo solo se sono stati istruiti in modo esaustivo da una persona responsabile del loro controllo sulle funzioni e sulle procedure di sicurezza e hanno compreso i rischi connessi. - Page 77 • Evitare fiamme libere e fonti di ignizione nelle vicinanze del dispositivo. • Areare per bene e con regolarità la stanza in cui si trova il dispositivo. • Modificare in qualunque modo il dispositivo può essere pericoloso. Ogni danno al cavo può...
- Page 78 Informazioni sull’uso quotidiano • Non mettere alimenti bollenti nel dispositivo. • Non poggiare gli alimenti alla parete posteriore interna. • Alimenti che sono stati scongelati non possono essere surgelati nuovamente. • Conservare gli alimenti surgelati imballati seguendo le indicazioni del produttore. •...
- Page 79 Avvertenze su pulizia e manutenzione • Spegnere il dispositivo e staccare la spina prima di pulizia e manutenzione. • Non pulire il dispositivo con oggetti in metallo. Non utilizzare oggetti affi lati per rimuovere il ghiaccio dal dispositivo. Utilizzare raschietti di plastica. •...
-
Page 80: Descrizione Del Dispositivo
DESCRIZIONE DEL DISPOSITIVO 1. Termostato e luce 2. Ripiani in vetro 3. Copertura del vano per le verdure 4. Vano per le verdure 5. Vani sullo sportello CAMBIARE DIREZIONE DI APERTURA DELLO SPORTELLO Attrezzi necessari: cacciaviti a croce e a taglio. •... - Page 81 Svitare il gancio superiore. Sollevare lo Svitare il gancio inferiore. sportello e poggiarlo su un fondo morbi- do per evitare graffi. Svitare le coperture dei fori in alto e in basso e fissarle sul lato opposto.
- Page 82 Ruotare il gancio superiore e fissarlo sul Fissare nuovamente lo sportello. Assi- lato inferiore sinistro. curarsi che lo sportello sia posizionato correttamente in verticale e orizzontale, in modo che la guarnizione chiuda su tutti i lati. Ruotare poi il gancio inferiore e fis- sarlo sul lato superiore sinistro.
-
Page 83: Installazione
INSTALLAZIONE Accessori inclusi Guida 2x Copertura 2x Cursore 2x Copertura 2x Viti 15x incl. 2x ricambio Guarnizione 1x... - Page 84 Istruzioni di montaggio Assicurarsi che il mobile per l’incasso sia sufficientemente spazioso e che offra una ventilazione adeguata.
- Page 85 Rimuovere le 4 viti sul lato anteriore dello sportello. Fissare poi le due guide allo sportello con le 4 viti. Spingere lentamente e con cura il Aprire lo sportello del dispositivo e l’anta dispositivo nel mobile. Assicurarsi dell’armadio di 90°. Inserire i cursori che il lato di apertura sia il più...
- Page 86 Ruotare i cursori per tirarli fuori dalla Fissare poi entrambi i cursori sul lato guida e chiudere lo sportello. sinistro del mobile per l’incasso nelle posizioni segnate con una vite ciascuno. Tirare fuori il dispositivo dal mobile per l’incasso di circa 150 mm. Aprire poi lo sportello del dispositivo e inserire i cursori nelle guide, spingendo indietro il dispositivo.
- Page 87 Controllare che lo sportello possa essere Fissare il supporto superiore all’armadio chiuso e aperto in modo scorrevole e che per l’incasso. le guarnizioni tengano. Se non è così, regolare la posizione del dispositivo. Fissare poi il sostegno inferiore all’armadio per l’incasso. Fissare infine la guarnizione di gomma nella fessura tra dispositivo e armadio, sul lato aperto dello sportello.
-
Page 88: Messa In Funzione E Funzionamento
MESSA IN FUNZIONE E FUNZIONAMENTO Avvertenze per il primo utilizzo • Prima dell´uso rimuovere completamente il materiale di imballaggio, inclusa l´imbottitura, il cuscino in materiale espanso e il nastro adesivo all‘interno del frigorifero. • Rimuovere la pellicola protettiva sullo sportello del frigorifero e sull‘alloggiamento. •... - Page 89 Impostazioni della temperatura consigliate Temperatura ambiente Vano freezer Frigorifero Estate Mezza stagione Inverno Utilizzo quotidiano Posizionare diversi alimenti nei diversi vani, come descritto nella tabella seguente: Luogo di Alimenti conservazione Vani sullo sportello Alimenti con conservanti naturali, come marmellate, succhi, bibite o spezie.
-
Page 90: Pulizia E Manutenzione
PULIZIA E MANUTENZIONE Scongelamento • Il gelo può accumularsi all‘interno dell‘unità e sbrinarsi automaticamente durante il ciclo del compressore. • L‘acqua viene convogliata attraverso l‘apertura di uscita nel vassoio di raccolta sopra il compressore, dove evapora. • Assicurarsi che il foro di scarico venga pulito regolarmente, in modo che l‘acqua possa fuoriuscire dal vano di stivaggio. -
Page 91: Correzione Degli Errori
CORREZIONE DEGLI ERRORI Problema Possibile causa e soluzioni Il frigorifero non funziona più. Assicurarsi che il dispositivo sia collegato correttamente a una presa funzionante. Controllare se la tensione nominale è troppo bassa. Controllare se c’è un blackout o un cortocircuito. Odore spiacevole. -
Page 92: Avviso Di Smaltimento
AVVISO DI SMALTIMENTO Se nel proprio paese si applicano le regolamentazioni inerenti lo smaltimento di dispositivi elettrici ed elettronici, questo simbolo sul prodotto o sulla confezione segnala che questi prodotti non possono essere smaltiti con i rifiuti normali e devono essere portati a un punto di raccolta di dispositivi elettrici ed elettronici.