
Subscribe to Our Youtube Channel
Related Manuals for autosen AC005


Summary of Contents for autosen AC005
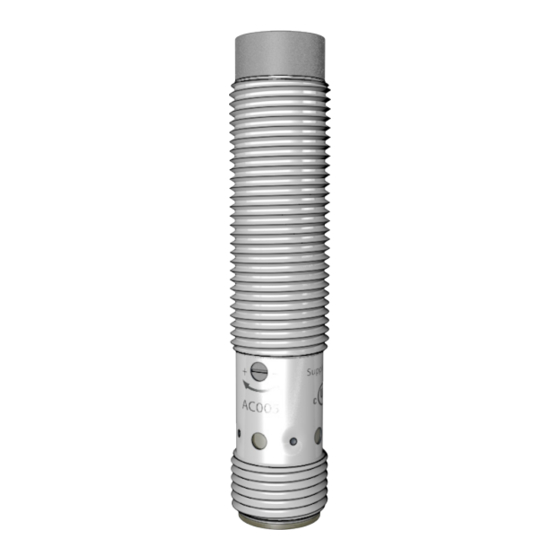
- Page 1 Bedienungsanleitung Kapazitive Sensoren Operating instructions Capacitive sensors Notice d‘utilisation Détecteurs capacitifs AC005...
-
Page 2: Table Of Contents
Inhalt 1 Vorbemerkung �����������������������������������������������������������������������������������������������������3 1�1 Hinweise zu diesem Dokument ���������������������������������������������������������������������3 1�2 Verwendete Symbole �������������������������������������������������������������������������������������3 2 Bestimmungsgemäße Verwendung ���������������������������������������������������������������������3 3 Montage ���������������������������������������������������������������������������������������������������������������4 4 Elektrischer Anschluss �����������������������������������������������������������������������������������������4 4�1 Anschlussbelegung ����������������������������������������������������������������������������������������5 5 Bedien- und Anzeigeelemente �����������������������������������������������������������������������������5 6 Betriebsarten �������������������������������������������������������������������������������������������������������6 6�1 Einstellung / Justierung ���������������������������������������������������������������������������������6 6�2 Betrieb �����������������������������������������������������������������������������������������������������������6 7 Technische Daten ������������������������������������������������������������������������������������������������6 7�1 Datenblätter ���������������������������������������������������������������������������������������������������6... -
Page 3: Vorbemerkung
1 Vorbemerkung 1.1 Hinweise zu diesem Dokument Es ist Bestandteil des Gerätes und enthält Angaben zum korrekten Umgang mit dem Produkt� Dieses Dokument richtet sich an Elektrofachkräfte� Dabei handelt es sich um Personen, die aufgrund ihrer Ausbildung und ihrer Erfahrung befähigt sind, mög- liche Gefährdungen zu erkennen und zu vermeiden, die der Einsatz des Gerätes verursachen kann�... -
Page 4: Montage
3 Montage 3.1 Hinweise für den bündigen und nichtbündigen Einbau Beim bündigen Einbau nichtbündiger Geräte verändern sich die Sensoreigen- schaften bis hin zum Durchschalten (Funktionsverlust)� ► Gerät mit den mitgelieferten Muttern montieren� Freiräume an der aktiven Fläche Mindestabstände bei Montage mehrerer Schalter gleichen Typs 3x S 4 Elektrischer Anschluss Das Gerät darf nur von einer Elektrofachkraft installiert werden�... -
Page 5: 4�1 Anschlussbelegung
4.1 Anschlussbelegung p-schaltend BN braun / BK schwarz / BU blau 5 Bedien- und Anzeigeelemente 1: LED 2: Potentiometer... -
Page 6: Betriebsarten
LED gelb aus: Schaltausgang gesperrt LED gelb ein: Schaltausgang leitend Geräte mit hoher Nahfeldstärke (z� B� Sprechfunkgeräte) nicht in unmittelbarer Nähe des Gerätes betreiben� 7 Technische Daten 7.1 Datenblätter Datenblätter sind abrufbar unter: www�autosen�com 8 Zulassungen/Normen EG-Konformitätserklärung und Zulassungen sind abrufbar unter: www�autosen�com... -
Page 7: Wartung, Instandsetzung Und Entsorgung
9 Wartung, Instandsetzung und Entsorgung Der Betrieb des Gerätes ist wartungsfrei� Für einwandfreies Funktionieren ist zu beachten: ► Die aktive Fläche und ggf� ein Freiraum von Ablagerungen und Fremdkörpern frei halten� Nach einem Ausbau des Gerätes oder bei einem Wechsel des Füllgutes kann ein erneuter Abgleich erforderlich werden�... - Page 8 Contents 1 Preliminary note ���������������������������������������������������������������������������������������������������9 1�1 Notes on this document ���������������������������������������������������������������������������������9 1�2 Symbols used ������������������������������������������������������������������������������������������������9 2 Functions and features ����������������������������������������������������������������������������������������9 3 Installation����������������������������������������������������������������������������������������������������������10 4 Electrical connection ������������������������������������������������������������������������������������������10 4�1 Wiring����������������������������������������������������������������������������������������������������������� 11 5 Operating and display elements ������������������������������������������������������������������������ 11 6 Operating modes �����������������������������������������������������������������������������������������������12 6�1 Adjustment ���������������������������������������������������������������������������������������������������12 7 Operation �����������������������������������������������������������������������������������������������������������12 8 Technical data ����������������������������������������������������������������������������������������������������12...
-
Page 9: Preliminary Note
1 Preliminary note 1.1 Notes on this document It is part of the device and contains information about the correct handling of the product� This document is intended for qualified electricians� These specialists are people who are qualified by their training and their experience to see and to avoid possible hazards that may be caused during operation of the device�... -
Page 10: Installation
3 Installation Notes on flush and non-flush installation For flush installation of non-flush units the sensor properties change and the sensor can remain permanently switched (loss of function)� Free space around the sensing face Minimum distances when mounting several switches of the same type 3x S 4 Electrical connection The unit must be connected by a qualified electrician�... -
Page 11: 4�1 Wiring
4.1 Wiring positive switching BN brown / BK black / BU blue 5 Operating and display elements 1: LED 2: potentiometer... -
Page 12: Operating Modes
Do not operate units with high field intensity (e�g� walkie-talkies) at close range to the sensor� 8 Technical data 8.1 Data sheets Data sheets can be found at:www�autosen�com 9 Approvals/standards The EC declaration of conformity and approvals can be found at: www�autosen�com... -
Page 13: Maintenance, Repair And Disposal
10 Maintenance, repair and disposal The operation of the unit is maintenance-free� To ensure a correct function: • Keep the sensing face and a clear space, if any, free from deposits and foreign bodies� When removing the unit or changing the medium, a new adjustment might be necessary�... - Page 14 Contenu 1 Remarque préliminaire ��������������������������������������������������������������������������������������15 1�1 Remarques sur ce document ����������������������������������������������������������������������15 1�2 Symboles utilisés �����������������������������������������������������������������������������������������15 2 Fonctionnement et caractéristiques �������������������������������������������������������������������15 3 Montage �������������������������������������������������������������������������������������������������������������16 4 Raccordement électrique �����������������������������������������������������������������������������������16 4�1 Schéma de branchement ����������������������������������������������������������������������������17 5 Eléments de service et d‘indication �������������������������������������������������������������������17 6 Modes de fonctionnement ���������������������������������������������������������������������������������18 6�1 Réglage �������������������������������������������������������������������������������������������������������18 7 Fonctionnement �������������������������������������������������������������������������������������������������18 8 Données techniques ������������������������������������������������������������������������������������������18...
-
Page 15: Remarque Préliminaire
1 Remarque préliminaire 1.1 Remarques sur ce document Il fait partie de l‘appareil et fournit des informations sur l‘utilisation correcte du produit� Ce document s‘adresse à des électriciens qualifiés� Ce sont des personnes qui sont capables - grâce à leur formation et expérience – de percevoir et d‘éviter des dangers potentiels qui pourraient être causés par l‘emploi de l‘appareil�... -
Page 16: Montage
3 Montage Remarques sur le montage encastré ou non encastré Si des appareils non encastrables sont montés de façon encastrée, la portée diminue jusqu‘à ce que l‘appareil commute (perte de fonctionnement)� Zone de dégagement autour de la face active Distances minimales lorsque plusieurs détecteurs de la même version sont montés 3x S 4 Raccordement électrique... -
Page 17: 4�1 Schéma De Branchement
4.1 Schéma de branchement à commutation positive BN brun / BK noir / BU bleu 5 Eléments de service et d‘indication 1: LED 2: potentiomètre... -
Page 18: Modes De Fonctionnement
Ne pas faire fonctionner des appareils à champ de grande intensité (par ex� talkie- walkies) à proximité immédiate du détecteur� 8 Données techniques 8.1 Fiches techniques Des fiches techniques sont disponibles à :www�autosen�com 9 Homologations/normes La Déclaration de Conformité CE et les homologations sont disponibles à : www�autosen�com... -
Page 19: Entretien, Réparation Et Élimination
10 Entretien, réparation et élimination Cet appareil ne nécessite aucun entretien� Pour un bon fonctionnement, il faut respecter les indications suivantes : • La face active et l‘espace libre doivent être dégagés de toute présence de dépôts et de corps étrangers� Après le démontage de l‘appareil ou lors d‘un échange du fluide, un nouveau réglage peut être nécessaire�... - Page 20 Technische Daten und weitere Informationen unter: Données techniques et informations supplémentaires sur notre site web à: Technical data and further information at: www.autosen.com...
Need help?
Do you have a question about the AC005 and is the answer not in the manual?
Questions and answers