Table of Contents
Advertisement
Quick Links
Advertisement
Table of Contents

Related Manuals for NIVELCO MicroTREK HT


Summary of Contents for NIVELCO MicroTREK HT
- Page 1 htk4014a0600p_04 1/68...
- Page 2 APPROVALS Reference document number BKI ATEX, Certificate No.: BKI16ATEX0018X htk4014m0600p_03 BKI IECEx, Certificate No.: IECEx BKI 09.0001 issue No:1 htk4014a0600p_01 INMETRO, Certificate No.: DNV 14.0169 X Rev. 01 htk4014p0600p_03 Ex Russia, Certificate No.: RU C-HU.MЮ62.B.04400 htk4014o0600p_02 htk4014a0600p_04 2 / 68...
- Page 3 GUIDED MICROWAVE LEVEL MEASUREMENT htk4014a0600p_04 3 / 68...
-
Page 4: Table Of Contents
C O N T E N T S INTRODUCTION ..................6 PROGRAMMING ..................26 ORDER CODE ..................7 5.1. Programming with EView2 software ..........26 3. TECHNICAL DATA ................... 8 5.1.1. EView2 software installation and execution......26 ... - Page 5 htk4014a600p_04 5/68...
-
Page 6: Introduction
Thank you for choosing a NIVELCO instrument. We are sure that you will be satisfied with our product! 1. INTRODUCTION Application The MicroTREK 2-wire level gauge uses the Time Domain Reflectometry (TDR) measuring principle and two-wire technology for level measurement. -
Page 7: Order Code
2. ORDER CODE MicroTREK H 2-wire guided microwave level transmitter Insertion Insertion Type Probe / Proc. conn. Housing Output / Ex Code Code Code Code Code Code length length Transmitter Coaxial / 1" BSP Aluminium 4 – 20 mA + HART / Coaxial, Rod, Coaxial, Rod, Normal... -
Page 8: Technical Data
3. TECHNICAL DATA ENERAL Plastic Housing Aluminium Housing Stainless Steel Housing Type H–5–4 H–4–4, –5, –6, –8 H–6–4, –5, –6, –8 Measured values Between the reference point of the unit and reflection pane (material surface), distance, level and volume Input data Measuring range Depends on the type of the probe and the properties of the measured medium (see: Technical data on the “probes”... - Page 9 ECHNICAL DATA OF THE PROBES HK, HL, HA, HB, HR, HP HS, HZ HN, HJ HT, HU HD, HE Type HV, HW HC, HH –– –– –– –– –– –– –– 4 mm cable 8 mm cable 4 mm twin cable Description Twin rod Coaxial...
- Page 10 ECHNICAL DATA OF THE COATED PROBES HF, HG Type HTX–– HTY–– HTM–– HTQ–– HTI–– –– 4 mm (0.15 inch) Fully PFA coated Fully PP coated Description 4 mm (0.15 inch) FEP coated cable fully FEP coated cable Max. measuring distance 24 m (80 ft) 3 m (10 ft) Min.
- Page 11 IMENSIONS HTK, HTL, HTV, HTR, HTP HTS, HTZ HTN, HTJ HTT, HTU HTD, HTE HA, HB, HC, HH HTW–– –– –– –– –– –– –– HTF, HTG HTX–– HTY–– HTM–– HTQ–– HTI–– –– htk4014a600p_04 11/68...
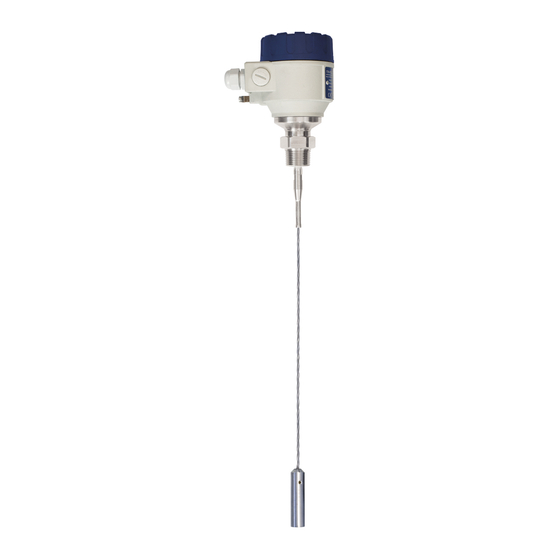
- Page 12 1 Housing 2 Cable gland 3 High temp. connection 4 Mono cable probe 5 Weight 6 Twin cable probe 7 Twin cable separator 8 Twin rod separator 9 Twin rod probe 10 Mono rod probe 11 Grounding screw 12 Process connection 13 Coaxial probe ...
-
Page 13: Explosion Protection, Ex Markings, Ex Limit Data
3.1. E XPLOSION PROTECTION EX MARKINGS EX LIMIT DATA 3.1.1. ATEX Approval No.: BKI16ATEX0018X For intrinsically safe [Ex ia] protection modes Metal housing Metal housing High temperature version with metal High temperature version with metal with SAP display Type without SAP display housing with SAP display housing without SAP display HB––6, –8Ex... - Page 14 3.1.3. INMETRO Approval No.: DNV 14.0169 X – Rev. 01. For intrinsically safe [Ex ia] protection modes Metal housing Metal housing High temperature version with metal High temperature version with metal with SAP display Type without SAP display housing with SAP display housing without SAP display HB––6, –8Ex HT––6, –8Ex...
- Page 15 3.1.5. Temperature data for ex certified models Temperature limit data for ATEX and IECEx approvals Explosive gas atmosphere Explosive dust atmosphere Aluminium and stainless-steel housing Aluminium and stainless-steel housing H––8Ex H––5, –6Ex High temperature High temperature Temperature data HH––8Ex HH––6Ex HP––8Ex HP––6Ex Ex ia IIC, Ex ia IIB...
-
Page 16: Accessories
3.2. A CCESSORIES Warranty Card 2 pcs M20x1.5 cable glands User’s and Programming Manual SAP-300 display module (option) EU declaration of Conformity Flat seal (where justified) EView2 software CD 3.3. S PECIAL CONDITIONS OF SAFE USE The device with SAP display must not be operated in Ex ia IIC environment! Transmitters with spark-free mode should be connected exclusively to a certified circuit with [Ex ia Ga] IIC or [Ex ia Ga] IIB safety mode, applying maximum values detailed in the 3.1 section. -
Page 17: Mechanical Installation
4. MECHANICAL INSTALLATION 4.1. H ANDLING AND STORAGE When manually carrying, hold it with both hands, or when powerlifted, pay attention to Avoiding blows – avoid hard blows, jolts, impacts, etc. handle the device with care, lifting it by the converter housing. If necessary, use lifting Caution: fragile electronics gear. -
Page 18: Mounting On The Tank
1" (1½") BSP or 1" (1½") NPT threaded connection. h ≤ Ød, where = nozzle height and Ød = nozzle diameter Contact NIVELCO if this relationship is not feasible. Caution: Do not use nozzles that penetrate into the tank. This will disturb the emitted pulse. ... - Page 19 Installation of two devices Process connection and entry pipe Stilling wells If two devices to be used on the same Tanks with floating roofs for petrochemical applications: Caution: Do not put the nozzle close to the entry tank, these should be mounted at a Use a stilling well.
- Page 20 Probes: entanglement, straightness and tank bottom clearance Agitator in the tank Cable probes must be straight once inserted into the tank. No electromagnetic field outside the reference chamber. They must also be far from other objects (e.g. mixers) to avoid When measuring liquids, the use of a stilling well or reference chamber is favourable entanglement.
-
Page 21: Specific Installation Instructions: Gauge - Solid Applications
Mounting the probe to the bottom of the tank. Flexible probes can be fastened with a chuck (ring), turnbuckle or similar fastening device to the bottom of the tank. Shortening cable probes If required, the cable probe can be shortened, but this applies only when used in liquids. -
Page 22: Wiring
Traction load is depending on the height and shape of the tank, medium Probe Length particle size & density, and the rate at which the tank is emptied. The Probe type Material 12 m 24 m following chart provides the tensile load values true for the different (20 ft) (40 ft) (80 ft) - Page 23 Connection to the EP network (grounding). Electrostatic discharge (E.S.D.) A screw-mounted grounding cable connection with max. 4 mm² MicroTREK 2-wire non-Ex and Ex gauge (AWG 11) cross-section through EP terminals is available on the electronics are shielded up to 4 kV against E.S.D. side of the housing.
- Page 24 minimum suppl voltage , , for a loop supply voltage drop resistance, R of 250 Ω (measured at loo p over 250 the terminals of the power supply) Ω resistance at 4 mA voltage drop over 250 Ω minimum input voltage V resistance at inp ut (measured at MicroTREK terminals)
-
Page 25: Bus (Hart ® ) Communication
Hazardous-duty version Connect the wires of the current loop to terminals 2 and 3 (any polarity). The device is certified to be intrinsically safe may only be used in conjunction with another intrinsically safe certified equipment. All the allowed electrical safety data indicated on the nameplate must be observed. An ’Ex’... -
Page 26: Power-On And Start-Up
4.4. P OWER ON AND START The MicroTREK 2-wire is pre-configured in accordance with the customer order specifications and ready for use immediately. Attention! A start-up time of less than 60 seconds should be allowed once the unit is connected and the power is turned on. If the probe length has been shortened, please refer to the following sections: 3.3.1: Summary of User Functions, user function 1.1.6: Probe length to modify configured probe length. -
Page 27: Device Programming, Configuration With Eview2
5.1.2. Device programming, configuration with EView2 Select between the detected devices you want to configure or to program and open the "DEVICE SETTINGS" window (for further details see chapter 4.4 and 4.5 of the EView2 User’s Manual). Using EView2, all necessary device parametrization and device settings can be made. The table below summarizes the configuration parameters and their location and path (Table 1). - Page 28 Function, Parameter name Input Range Description Warning: The dead zone is the minimum measuring distance from the process connection (reference Critical Parameter! point) to the surface of the medium. So as not to impair measurement accuracy, the minimum values given in Section 3 should be adhered to. The current output can’t go inside the dead zone.
- Page 29 Function, Parameter name Input Range Description Calculation system (P00) Select: The units of measurement (length and volume) are shorten according to the unit system set here. When setting / changing units of measurement, you must first select the Calculation Metric (EU), Imperial (US) and system and then select the unit of measurement to use.
- Page 30 Function, Parameter name Input Range Description m³ The unit selected here is also valid for the following functions, if “Volume” or "Ullage Volume" mode selected in the Current generator mode - P11, current output function parameter: Assignment of 4 mA – P16, Assignment of 20 mA –...
- Page 31 Function, Parameter name Input Range Description Hold – last measured value: 4 – 20 mA (retains the last measured value in the event of an error) 22 mA: 4 – 20 mA (in case of error 22 mA fault current) Hold –...
- Page 32 Function, Parameter name Input Range Description (Checksum) Read-only This value is used for identification of the device software version. The checksum is tested when starting. This helps to detect any problems with the microcontroller. (Serial number) This parameter serves to identify the respective measuring device. This number cannot be Read-only changed and sets the address for use with HART ®...
- Page 33 5.1.2.2 Setup and uploading of VMT (Linearization curve – VMT) This function is required to prepare a conversation chart between level and volume, with max. 20 points. Each provided value must be higher than the previous one. Units of length and volume might be altered without the necessity to modify the data (Length unit, Volume unit) in the chart. The 2 units of measurement on the left and right sides of the chart inherit the unit settings of length and volume.
- Page 34 5.1.2.4 Oscilloscope device diagram (oscilloscope function) In order for the oscilloscope diagram of the device to appear, please open the “programming window” (as described at the parameters settings in chapter 4.4 and 4.5 of the owner’s manual of EView2). Then press the „Oscilloscope” button on the opening configuration window in the bottom row, left to the “Refresh” button. Upon these actions, the „Oscilloscope diagram”...
- Page 35 5.1.2.4.1 “Cursor On” mode: The oscilloscope diagram window gives the opportunity also to perform measures on the reflection curve made by the readouts. The cursor-driven measurement can be turned on by clicking on the „Cursor On” check-box and ticking it. (please find it on the below figure, marked in red). Activating this function, the cursor switches to a little cross-hair.
- Page 36 The level threshold value („Threshold”) can also be modified in the oscilloscope diagram window. This is required when the device fails to detect a level signal (eg. when the value of the level threshold is set to too high or too small with the amplification is at the maximum) To adjust „Threshold”...
-
Page 37: Quick Configuration: Configuration Examples
5.1.3. Quick Configuration: configuration examples The minimum functions (fct.) to be configured for a simple measurement are listed below: Functions Definition EView2 HART ® P5 parameter set 2.1.1.1 Tank Height P6 parameter set 2.1.1.4 Dead zone P11, P12, P16, P17 parameters 2.1.3.1 …... - Page 38 Typical gauge used for quick configuration examples: Probe type twin Ø4 mm or 0.15" cable probe Measured medium Water (dielectric constant, = 80) Tank height 10000 mm (33 ft) Dead zone 150 mm (0.5 ft) (see “Technical data of the probes” table in section 3. Technical data) Probe length L 9000 mm (30 ft) (do not modify unless advised to do so) Tank height: configuration of user menu EView2 (HART...
- Page 39 Example procedure 1 (using EView2): To change true tank height (10.000 mm [33 ft]) to the factory configured probe length L (9000 mm [29½ ft]), and to save the new parameter (see section 5. figure Figure 2.). Step Action Data entered / value set Open the “DEVICE SETTINGS”...
- Page 40 Dead zone: configuration of user menu EView2 – Dead zone (P06) This is illustrated below – the value in the box is the displayed value: parameter function (HART® Fct. 2.1.1.4) Level reflection outside dead zone The top dead zone is the minimum measuring distance between the surface of the gauge flange (the reference point) and the measured medium.
- Page 41 Scaling the analogue current output This set of functions allows users to set up a scale. The minimum (4 mA) and maximum (20 mA) values of an analogue current output should ideally lay within the device’s active measuring zone, as the device will freeze when the signal is lost. Refer to the measurement limits chart for each probe type in the introduction.
- Page 42 Setting up a volume table – (EView2 Linearization curve (VMT) – VMT (HART Fct 2.1.7) ® To be able to measure the volume, a conversion table (strapping table) will need to be created using the EView2 program or the HART communicator.
- Page 43 Table 2. (Input table) Point Level (Source column) Volume (Output column) 0.0 m (0.0 ft) 0.0 m³ (0.0 ft³) 0.20 m (0.66 ft) 0.5 m³ (17.65 ft³) 0.75 m (2.5 ft) 1.0 m³ (35 ft³) 1.00 m (3.3 ft) 1.5 m³ (52.97 ft³) *Max.
-
Page 44: Programming With Sap-300 Display Unit
PBT fiberglass, plastic (DuPont SAP-300 is an universal plug-in LCD display and programming module, which is compatible with other NIVELCO devices, if the device software supports SAP-300 module. Warning! The d isplay of the SAP-300 is based on LCD technology, do not expose the SAP-300 continuously to direct sunlight to avoid display damage. -
Page 45: Microtrek's Behaviour In Manual Programming Mode
5.2.2. MicroTREK’s behaviour in manual programming mode After power-up MicroTREK shows the measured value on the SAP-300 display (referred as “display”). REMOTE MODE: If the instrument senses external HART communication it changes its display mode and shows a "REMOTE MODE" message in the bottom of the display. ... -
Page 46: Manual Programming
5.2.3. Manual programming Main menu Sub-menu BASIC SETUP TANK HEIGHT DEAD ZONE CLOSE-END BLOCKING DAMPING TIME PROBE LENGTH OUTPUT SETUP CURRENT MODE FAILURE CURRENT CURRENT MIN CURRENT MAX ERROR DELAY APPLICATION APPLICATION TYPE Changing parameters can be done by selecting a sub-menu and pressing button in two ways. -
Page 47: Programming With Hart ® Handheld (Hhc) Communicator
5.3. P HART (HHC) C ® ROGRAMMING WITH HANDHELD OMMUNICATOR Displaying of the data and configuration can also be carried out with a HART communicator. ® Communicator layout Two-pin jack for loop connectors Function keys (F1 … F4) Action keys On/off Arrow LEFT... - Page 48 Displaying readings Use the UP and DOWN arrows to move to the correct line and then finish the selection with the RIGHT Arrow. HART Communicator Online Offline 1 → <Process Var.> 2 → Online <Config./Test> Frequency Device <Access/Rights> Utility <Watch status> <HART Variables>...
- Page 49 Configuration: summary of user functions via HART Communicator HC 275 (Version 1.00) ® “Reset default” values are in bold type in the “Input Range” column. Refer to the HART ® HC275 Communicator operating instructions for further operating details. Function (Fct.) Input Range Description 1.0 PROCESS VAR.
- Page 50 Function (Fct.) Input Range Description 2.1.1.5 SENSOR INFO 2.1.1.5.1 Sensor upper limit = Probe length Read-only Menu. Upper sensor limit 2.1.1.5.2 Sensor lower limit Read-only Menu. Lower sensor limit 2.1.1.5.3 Sensor min. span = 1 mm (3.3 ft) Read-only Menu. Sensor minimum span. 2.1.2.0 DISPLAY 2.1.2.1...
- Page 51 Function (Fct.) Input Range Description 2.1.3.2 RANGE I Select a 4 – 20 mA Current output range 4 02 – ؘmA (1st choice). or 4 – 20 mA + 22 mA if error When the MicroTREK 2-wire is in error mode, the current output is frozen except if the second choice is selected and then the current output is fixed 4 –...
- Page 52 Function (Fct.) Input Range Description 2.1.4.5 PROBE TYPE Rod, Twin Rod, Cable, Cable +counterweight, Read-only menu. Cable without counterweight, Twin Cable, The type of the Probe attached to the flange. Twin Cable + counterweight, Coax, Special 1, Special 2, Special 3 As per order 2.1.4.5 CHECKSUM...
- Page 53 Enter 9-character code if “YES”. The password must contain exactly 9 characters. E, R or U are used only. The password is displayed in a scrambled format. It allows NIVELCO to decode the password in case it was forgotten. SPECIALIST PSW Contact a specialist for Service Parameters.
- Page 54 Function (Fct.) Input Range Description Visit NIVELCO Service centre or MicroTREK 2-wire Service Manual for code. WATCH STATUS This function displays the status of the device. HART ® VARIABLES MANUFACTURER Read-only menu NIVELCO MODEL Read-only menu FLD DEV REV Field device revision.
-
Page 55: Characters Available For Alpha-Numerical Data Functions
5.3.1. Characters available for alpha-numerical data functions in PCSTAR2 and on the HART console ® PCSTAR 2 fct. 12.6.1: Unit name, fct. 1.4.4: Device number, fct. 1.4.8: Option HART console (HHC) fct. 5.7 Message, fct. 5.8 Descriptor, fct. 5.11 Tag ®... - Page 56 The configurations described below are illustrated in the above diagram: The “current output” range is smaller than the max. possible measuring range. The “current output” range is equal to the measuring range: Scale min.: 4 mA (P16) = tank height – probe length + H Scale max.: 20 mA (P17) = tank height –...
-
Page 57: Gauge Operating Logic When The Reflection Is Lost
5.4.1. Gauge operating logic when the reflection is lost The medium reflection pulse is usually lost when the level is at the top dead zone or near the bottom of the tank. The diagram below shows the action taken by the gauge depending on where the reflection was lost the last time. -
Page 58: Gain And Voltage Amplitude
5.4.2. Gain and voltage amplitude As explained amongst the measuring principles in the introduction, the level of a medium is converted from a return signal (the medium reflection) received by the gauge: this signal takes a certain amount of time to return to get to the gauge and it has a certain strength / size measured in milli-volts (dependant on the dielectric ... - Page 59 Level measurement – Level pulse amplitude and threshold After connecting to a power supply, MicroTREK 2-wire will: 1. Measure reflection pulses in terms of voltage amplitude by cycling through a set of gains. 2. Identify the highest amplitude which corresponds to the level of the medium. This screenshot taken of the EView2, oscilloscope function while measuring while a typical single-medium measurement: The function analyses the following data: Initial pulse...
- Page 60 The level signal can be optimized upon two factors: Amplification factor The amplitude of the signals is proportional to the dielectric constant of the medium. At low amplitudes the signal should be amplified. The amplification factor is depend on the dielectric constant and on the probe type.
- Page 61 Initial pulse Flange reflection Level signal Interference signal Threshold In the diagram above the inconstancy of the threshold level is visible: 400 mV at 1 m (3.3 ft), and only 250 mV at 10 m (33 ft). No attenuation is required at a probe length ≤ 3 m (10 ft). The form of the threshold is depending on the attenuation and is automatically adjusted by the device over the measured length.
-
Page 62: Typical Signal Trends
Should the fault persist, please send an evidence (screen shots with F10) to your NIVELCO Service Centre. Procedure (example where the level measured is too low compared to true level): Read off displayed peak amplitude using the oscilloscope function –... - Page 63 Refresh the oscilloscope diagram (F4 key) If the value is still too low, try to reduce threshold again in small steps. If this does not resolve the problem, contact the NIVELCO Service Centre. Note: the threshold drops every 2 m (6.5 ft).
-
Page 64: Level Measurement Where There Are Multiple Phases Or Layers In The Tank
5.4.5. Level measurement where there are multiple phases or layers in the tank Level can be measured even with more than one phase in the tank. This requires setting the parameters in the EView2 “Device settings” window “Application” tab to the following measurement mode: Operating mode: 2 liquids, 1 level for measuring level with two or more phases... -
Page 65: Troubleshooting
“Reference not found” status reading remains frozen then the signal converter may have been damaged markers on*, reading frozen by ESD and may need replacing. Please contact NIVELCO. “Flange not found” status The signal converter has been incorrectly configured Contact NIVELCO for the corrective procedure. - Page 66 “2 liquids, 1 level”. Check also if there is a layer of at least 100 mm in the tank. i.e. it is measuring the layer interface (4 inch) on the top level of the medium. instead of the level. Contact NIVELCO for the corrective procedure or refer to the Service Manual. htk4014a600p_04 66/68...
- Page 67 Check the power supply! Connection of the device is incorrect. Check the connection between the device and the power supply. The calibration of the current output Execute the calibration if you have authorized access, otherwise contact NIVELCO is improper. Service centre.
- Page 68 February 2020 NIVELCO reserves the right to change technical data without notice! htk4014a600p_04 68/68...
Need help?
Do you have a question about the MicroTREK HT and is the answer not in the manual?
Questions and answers