
Related Manuals for Planet WBS-202N


Summary of Contents for Planet WBS-202N
- Page 1 User’s Manual 802.11n 300Mbps Outdoor Wireless CPE WBS-202N/WBS-502N www.PLANET.com.tw...
- Page 2 Copyright Copyright 2020 by PLANET Technology Corp. All rights reserved. No part of this publication may be reproduced, transmitted, transcribed, stored in a retrieval system, or translated into any language or computer language, in any form or by any means, electronic, mechanical, magnetic, optical, chemical, manual or otherwise, without the prior written permission of PLANET.
- Page 3 FCC Radiation Exposure Statement This equipment complies with FCC radiation exposure limits set forth for an unc ontrolled environment. This equipment should be installed and operated with minimum distance 26cm between the radiator & your body. CE Compliance Statement This device meets the RED 2014/53/EU requirements on the limitation of exposure of the general public to electromagnetic fields by way of health protection.
- Page 4 Revision User Manual of PLANET 802.11n 300Mbps Outdoor Wireless CPE Model: WBS-202N / WBS-502N Rev: 3.0 (July, 2020) Part No. EM-WBS-202N_WBS-502N _v3.0...
-
Page 5: Table Of Contents
CONTENTS Chapter 1.Product Introduction ......................1 Package Contents ....................... 1 Product Description ......................2 Product Features ......................... 5 Product Specifications ....................... 6 Chapter 2.Hardware Installation ......................9 Product Outlook ........................9 Port and Button ........................11 Hardware Description ......................11 Chapter 3.Connecting to the CPE ..................... - Page 6 Windows 7 (WLAN AutoConfig) ..................67 Mac OS X 10.x ........................70 iPhone/iPod Touch/iPad ....................74 Appendix A: Planet Smart Discovery Utility ..................77 Appendix B: FAQs ..........................78 Q1: How to set up the AP Client Connection ................78 Q2: How to set up the WDS Connection ..................
- Page 7 FIGURE 2-1 WBS-202N/502N F ......................9 IGURE RONT 2-2 WBS-202N/502N R ......................9 IGURE 2-3 WBS-202N R ........................10 IGURE IGHT 2-4 WBS-502N R ........................10 IGURE IGHT 2-5 WBS-202N/WBS-502N I ....................11 IGURE NTERFACE 3-1 C ......................12 IGURE...
- Page 8 6-16 S ..................... 73 IGURE ELECTING THE IRELESS ETWORK 6-17 – S ......................... 74 IGURE HONE ETTINGS ICON 6-18 W ..........................74 IGURE ETTING 6-19 W – N ....................75 IGURE ETTING ONNECTED 6-20 T .......................... 75 IGURE URNING ON 6-21 -- E ....................
-
Page 9: Chapter 1.Product Introduction
User Manual of WBS-202N/WBS-502N Chapter 1. Product Introduction Package Contents Thank you for choosing PLANET WBS-202N or WBS-502N Wireless AP. Please verify the contents inside the package box. Package Contents of WBS-202N/WBS-502N WBS-202N / WBS-502N Quick Guide Ethernet Cable Mounting Strap... -
Page 10: Product Description
Product Description Flexible and Reliable Outdoor Characteristics With the standard IEEE 802.3at Power over Ethernet (PoE) design, the WBS-202N and WBS-502N (outdoor wireless CPE) can be easily installed in the areas where power outlets are not available. The outdoor wireless CPE is definitely suitable for wireless IP surveillance, and br idge link of building to building and backbone of public service. - Page 11 Without needing to enter the Web interface for configuration, the outdoor wireless CPE needs three simple steps to establish the WDS PtP connection without any difficulty. By just clicking the Pair button on the WBS-202N and within 2 minutes, you can connect two WBS-202Ns without complicated configuration.
- Page 12 CPE is easier for the administrator to deploy and manage without on-site maintenance. Moreover, you can simply use PLANET AP controller and SAPC (Smart AP Control), to deliver wireless profiles to multiple APs simultaneously, thus making the central management...
-
Page 13: Product Features
Bandwidth control per IP address to increase network stability Easy Installation and Management 3 simple steps to establish WDS connection easily Supports PLANET AP Controllers in AP mode Easy discovery by PLANET Smart Discovery Self-healing mechanism through system auto reboot setting ... -
Page 14: Product Specifications
User Manual of WBS-202N/WBS-502N Product Specifications Model Name WBS-202N WBS-502N WBS-202N: 2.4GHz 802.11n 300Mbps Outdoor Wireless CPE Description WBS-502N: 5GHz 802.11n 300Mbps Outdoor Wireless CPE Hardware Features Wireless IEEE802.11b/g/n, 2T2R Wireless IEEE 802.11a/n, 2T2R Interfaces PoE: 1 x 10/100BASE-TX, auto-MDI/MDIX, 802.3at PoE In... - Page 15 User Manual of WBS-202N/WBS-502N 11Mbps 6Mbps 6Mbps 802.11g 802.11a 54Mbps 54Mbps MCS0/MCS MCS0/MC 802.11n 802.11n HT20 HT20 MCS7/MCS MCS7/MC -72/-68 MCS0/MCS MCS0/MC 802.11n 802.11n HT40 MCS7/MCS HT40 MCS7/MC -72/-68 Environment & Certification Operating Temperature -20 ~ 70 degrees C Operating Humidity...
- Page 16 IEEE 802.1Q VLAN (VID: 3~4094) VLAN SSID-to-VLAN mapping up to 4 SSIDs Self-healing Supports auto reboot settings per day/hour Remote management through PLANET DDNS/ Easy DDNS Configuration backup and restore Supports UPnP Management Supports IGMP Proxy Supports PPTP/L2TP/IPSec VPN Pass-through...
-
Page 17: Chapter 2.Hardware Installation
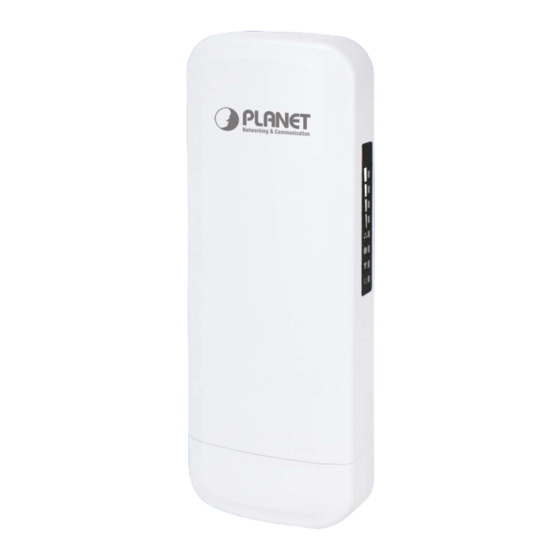
User Manual of WBS-202N/WBS-502N Chapter 2. Hardware Installation Product Outlook WBS-202N/502N Dimensions: 87 x 38 x 260mm Front Side Figure 2-1 WBS-202N/502N Front Side Rear Side Figure 2-2 WBS-202N/502N Rear Side... - Page 18 User Manual of WBS-202N/WBS-502N Right Side Figure 2-3 WBS-202N Right Side Figure 2-4 WBS-502N Right Side LED Definition State Meaning The device is powered on Power The device is powered off Port linked WAN Port Blinking Data is transmitting or receiving data...
-
Page 19: Port And Button
User Manual of WBS-202N/WBS-502N Port and Button It provides a simple interface monitoring the AP. Figure 2-5 shows the hardware interface of the WBS-202N/502N. WBS-202N/502N Hardware Interface: Figure 2-5 WBS-202N/WBS-502N Interface Hardware Description Hardware Interface Definition Object Description PoE LAN Port... -
Page 20: Chapter 3.Connecting To The Cpe
PCs running Windows 98/ME, NT4.0, 2000/XP, Windows Vista / Win 7, MAC OS 9 or later, Linux, UNIX or other platforms compatible with TCP/IP protocols 1. The CPE in the following instructions refers to PLANET WBS-202N/WBS-502N. 2. It is recommended to use Internet Explorer 11, Firefox or Chrome to access the CPE. Installing the CPE Before installing the CPE, make sure your PoE switch is connected to the Internet through the broadband service successfully at this moment. - Page 21 User Manual of WBS-202N/WBS-502N Step 2. Plug the RJ45 Ethernet cable into the PoE port of the Outdoor Wireless CPE. Then, slide back the cover to finish the installation. Figure 3-2 Connecting the Ethernet cable Step 3. Place the mounting strap through the slot on the back of the Outdoor Wireless CPE and then around the pole.
-
Page 22: Chapter 4.Quick Installation Guide
255.255.255.0. These values can be changed as you want. In this guide, we use all the default values for description. Connect the WBS-202N/WBS-502N with your PC by an Ethernet cable plugging in LAN port on one side and in LAN port of PC on the other side. Please power on the WBS-202N/WBS-502N by PoE switch through the PoE port. - Page 23 User Manual of WBS-202N/WBS-502N Figure 4-1 TCP/IP Setting Now click OK to save your settings. Now, you can run the ping command in the command prompt to verify the network connection between your PC and the AP. The following example is in Windows 10 OS. Please follow the steps below: Click on Start >...
- Page 24 User Manual of WBS-202N/WBS-502N Figure 4-2 Windows Start Menu Open a command prompt, type ping 192.168.1.253 and then press Enter. If the result displayed is similar to Figure 4-3, it means the connection between your PC and the AP has been established well.
- Page 25 User Manual of WBS-202N/WBS-502N Figure 4-4, it means the connection between your PC and the AP If the result displayed is similar to has failed. Figure 4-4 Failed Result of Ping Command If the address is 0.0.0.0, check your adapter installation, security settings, and the settings on your AP. Some firewall software programs may block a DHCP request on newly installed adapters.
-
Page 26: Starting Setup In The Web Ui
User Manual of WBS-202N/WBS-502N Starting Setup in the Web UI It is easy to configure and manage the CPE with the web browser. Step 1. To access the configuration utility, open a web-browser and enter the default IP address http://192.168.1.253 in the web address field of the browser. -
Page 27: Chapter 5.Configuring The Cpe
Chapter 5. Configuring the CPE This chapter delivers a detailed presentation of CPE’s functionalities and features 3 main items below, allowing you to manage the CPE with ease. The screen shots use the WBS-202N as an example. Figure 5-1 Main Menu... -
Page 28: Wizard
User Manual of WBS-202N/WBS-502N Wizard The Wizard guides you to configuring the WBS-202N/WBS-502N in a different mode, including Gateway, Super WDS, WISP, and AP (repeater) mode. Figure 5-2 Operation Mode The default operation mode is AP mode. Change the PtP switch to optional AP/repeater mode. -
Page 29: Wan Settings
User Manual of WBS-202N/WBS-502N WAN Settings Static IP If your ISP offers you static IP Internet connection type, select “Static IP" and then enter IP address, subnet mask, default gateway and primary DNS information provided by your ISP in the corresponding fields. - Page 30 User Manual of WBS-202N/WBS-502N Figure 5-5 Gateway – PPPoE (ADSL) The page includes the following fields: Object Description Username Enter the PPPoE User Name provided by your ISP Password Enter the PPPoE password provided by your ISP Server Name Enter the server name by your ISP, or not...
-
Page 31: Wireless
User Manual of WBS-202N/WBS-502N DHCP Choose “DHCP” and the router will automatically obtain IP addresses, subnet masks and gateway addresses from your ISP. Figure 5-6 Gateway – DHCP Wireless Figure 5-7 Gateway – Wireless The page includes the following fields:... -
Page 32: Super Wds Mode
User Manual of WBS-202N/WBS-502N range will be changed by selecting a different domain. Encryption Select the wireless encryption. The default is None Timing Set time to restart for clock Super WDS Mode Figure 5-8 Super WDS Mode The page includes the following fields:... - Page 33 User Manual of WBS-202N/WBS-502N Figure 5-9 Super WDS Mode The page includes the following fields: Object Description Wi-Fi Status Select ON (Green) or OFF (Gray) to enable or disable wireless LAN SSID wireless network name. default SSID “PLANET_2.4G_WDS” or “Wireless5G_WDS”...
- Page 34 User Manual of WBS-202N/WBS-502N Figure 5-10 Super WDS Mode The page includes the following fields: Object Description IP Mode Select “Static IP” or “DHCP Client” for setting up device IP Timing Set time to restart AP1 – Enter the WDS SSID and encrypt password.
- Page 35 User Manual of WBS-202N/WBS-502N AP2 -- Press the “Scan” button to find AP1 BSSID and choose it to connect. Enter the encrypt password. Figure 5-12 Super WDS Mode – AP2 -27-...
-
Page 36: Wisp Mode
User Manual of WBS-202N/WBS-502N WISP Mode Click “Wizard” “WISP Mode” and the following page will be displayed. This section allows you to configure the WISP mode. Figure 5-8 WISP Mode The page includes the following fields: Object Description Repeater SSID Enter the root AP’s SSID or press “Scan”... - Page 37 User Manual of WBS-202N/WBS-502N Figure 5-14 WISP Mode – Select Internet Mode (Set up WAN type) Figure 5-15 WISP Mode – Setting up Wi-Fi -29-...
-
Page 38: Ap Mode
User Manual of WBS-202N/WBS-502N AP Mode Click “Wizard” “AP Mode” and the following page will be displayed. This section allows you to configure the AP mode. Figure 5-9 AP Mode The page includes the following fields: Object Description IP Mode Select “Static IP”... - Page 39 User Manual of WBS-202N/WBS-502N Figure 5-17 AP Mode – Set up Wi-Fi The page includes the following fields: Object Description Wi-Fi Status Select ON (Green) or OFF (Gray) to enable or disable wireless LAN SSID It is the wireless network name. The default SSID is “PLANET_2.4G”...
-
Page 40: Repeater Mode
User Manual of WBS-202N/WBS-502N Repeater Mode Click “Wizard” “Repeater Mode” and the following page will be displayed. This section allows you to configure the Repeater mode. Figure 5-18 Repeater Mode The page includes the following fields: Object Description Repeater SSID Enter the root AP’s SSID or press “Scan”... - Page 41 User Manual of WBS-202N/WBS-502N Press the “Scan” button to find the root AP that you need to repeat and press Choice to select the AP. Figure 5-19 Repeater Mode -- Scan AP Set up the repeater wireless network Figure 5-20 Repeater Mode – Setting up Wi-Fi...
- Page 42 User Manual of WBS-202N/WBS-502N Object Description Wi-Fi Status Select ON (Green) or OFF (Gray) to enable or disable wireless LAN SSID It is the wireless network name. The default SSID is “PLANET_2.4G” or “PLANET_5G” Hide your SSID? Select ON (Green) or OFF (Gray) to hide wireless LAN or not Encryption Select the wireless encryption.
-
Page 43: Wi-Fi
User Manual of WBS-202N/WBS-502N Wi-Fi 2.4G/5G Wi-Fi 5.7.1.1. Basic Figure 5-22 Basic The page includes the following fields: Object Description Wi-Fi Status Select ON (Green) or OFF (Gray) to enable or disable wireless LAN SSID It is the wireless network name. The default SSID is “PLANET_2.4G”... - Page 44 User Manual of WBS-202N/WBS-502N 5.7.1.2. Figure 5-23 VAP Select VAP1~VAP3 to enable virtual AP The page includes the following fields: Object Description Select ON (Green) or OFF (Gray) to enable or disable virtual wireless Wi-Fi Status SSID It is the wireless network name. The default SSID is “PLANET_2.4G _1”...
-
Page 45: Mac Acl
User Manual of WBS-202N/WBS-502N MAC ACL 5.7.1.3. MAC ACL Figure 5-104 MAC ACL The page includes the following fields: Object Description Press the “Add” button to add end-device that is scanned from wireless network and mark them Delete Press the “Delete” button to delete device from list Apply Press the “Apply”... -
Page 46: Wi-Fi Timer Off
User Manual of WBS-202N/WBS-502N Wi-Fi Timer Off 5.7.1.4. Wi-Fi Timer Off Figure 5-26 Wi-Fi Timer Off The page includes the following fields: Object Description Wi-Fi Timer Off Select ON (Green) or OFF (Gray) to enable or disable timer Time Frame... -
Page 47: Advanced
User Manual of WBS-202N/WBS-502N Advanced 5.7.1.5. Advanced Figure 5-27 Advanced The page includes the following fields: Object Description 2.4G/5G Mode Select 802.11A or 802.11AN or 802.11AC in CPE Maximum 2.4G/5G per AP The maximum users are 64 per radio 2.4G/5G WLAN Partition Enable it to isolate each connected wireless client so that they cannot access mutually. - Page 48 User Manual of WBS-202N/WBS-502N send an RTS frame to the destination wireless node, and the latter will reply with a CTS frame, and thus they are ready to communicate. The default value is 2346 RTS Threshold Enable or Disable RTS/CTS protocol. It can be used in the following scenarios and used by Stations or Wireless AP.
-
Page 49: Network
User Manual of WBS-202N/WBS-502N Network 5.8.1.1. LAN Settings Figure 5-28 LAN Settings The page includes the following fields: Object Description IP Mode Select “Static IP” or “DHCP Client” for setting up device IP LAN IP Enter the AP static IP address... - Page 50 User Manual of WBS-202N/WBS-502N The page includes the following fields: Object Description Read Community Enter the read community, default is public Write Community Enter the write community, default is private Trap Destination Address Enter the SNMP trap IP address, default is 192.168.1.100 5.8.1.3.
- Page 51 User Manual of WBS-202N/WBS-502N Figure 5-31 Static IP The page includes the following fields: Object Description Enter the WAN IP address provided by your ISP. Enquire your ISP if you IP Address are not clear Subnet Enter WAN Subnet Mask provided by your ISP...
- Page 52 User Manual of WBS-202N/WBS-502N Figure 5-32 PPPoE (ADSL) The page includes the following fields: Object Description Username Enter the PPPoE User Name provided by your ISP Password Enter the PPPoE password provided by your ISP Set DNS Manually Enable/Disable DNS Manually...
- Page 53 User Manual of WBS-202N/WBS-502N Figure 5-12 DHCP The page includes the following fields: Object Description Maximum Transmission Unit. Default is 1452 Set DNS Manually Enable/Disable DNS Manually Primary DNS Enter the necessary DNS address provided by your ISP Secondary DNS...
- Page 54 User Manual of WBS-202N/WBS-502N The page includes the following fields: Object Description Enable web server access on Enable to access from WAN, default port is 8080 WAN port MAC clone Enable and scan to clone the MAC address Enable Ping Access on WAN...
-
Page 55: Security
User Manual of WBS-202N/WBS-502N Security 5.9.1.1. URL Filtering Figure 5-35 URL Filtering The page includes the following fields: Object Description Press the “Add” button to add the rule Delete Press the “Delete” button to delete the rule -47-... - Page 56 User Manual of WBS-202N/WBS-502N Apply Press the “Apply” button to enable/disable the rule Status Select ON (Green) or OFF (Gray) to enable or disable Rule Name Enter the rule name, e.g. Black list Time Group Select Any or Customer to set up time range and work data.
- Page 57 User Manual of WBS-202N/WBS-502N The page includes the following fields: Object Description Press the “Add” button to add the rule in the black or white list Delete Press the “Delete” button to delete the rule Apply Press the “Apply” button to enable/disable the rule...
- Page 58 User Manual of WBS-202N/WBS-502N 5.9.1.3. MAC Filtering Figure 5-39 MAC Filtering -50-...
- Page 59 User Manual of WBS-202N/WBS-502N The page includes the following fields: Object Description Press the “Add” button to add the rule in the black or white list Delete Press the “Delete” button to delete the rule Apply Press the “Apply” button to enable/disable the rule...
- Page 60 User Manual of WBS-202N/WBS-502N 5.9.1.4. Security (Port Mapping/Port Forwarding) Figure 5-41 Port Mapping The page includes the following fields: Object Description Press the “Add” button to add the rule in the black or white list Delete Press the “Delete” button to delete the rule Apply Press the “Apply”...
- Page 61 User Manual of WBS-202N/WBS-502N Enable/disable Port Mapping function Figure 5-42 Port Mapping 5.9.1.5. Figure 5-43 DMZ The page includes the following fields: Object Description Enable DMZ Select Enable DMZ Host or Disable DMZ Host IP Enter the DMZ LAN IP...
-
Page 62: Manage
Press the “Restore” button to reload the configuration file from your computer Reset Default Press the “Reset Default” button to do factory default, be careful. (Enabling Telnet could be hacked,Use it carefully!) Only for PLANET Telnet support team using. -54-... - Page 63 User Manual of WBS-202N/WBS-502N 5.10.1.2. Reboot Figure 5-45 Reboot The page includes the following fields: Object Description Reboot Press the “Reboot” button to restart system Timed Reboot Select ON (Green) or OFF (Gray) to enable or disable schedule reboot Reboot Time Option “Reboot Time”...
- Page 64 User Manual of WBS-202N/WBS-502N 5.10.1.4. Upgrade Figure 5-47 Upgrade The page includes the following fields: Object Description Select file Press the “Select file” button to reload the firmware file from your computer Be careful, choose the wrong file will crash the database...
- Page 65 User Manual of WBS-202N/WBS-502N NTP Enable Select ON (Green) or OFF (Gray) to enable or disable NTP Time Zone Select Select the time zone for GMT Select ON (Green) or OFF (Gray) to enable or disable manual IP Manual IP settings...
- Page 66 User Manual of WBS-202N/WBS-502N 5.10.1.7. Flow Control Figure 5-50 Setup Flow Control The page includes the following fields: Object Description Press the “Add” button to add the rule in the control list Delete Press the “Delete” button to delete the rule Apply Press the “Apply”...
- Page 67 User Manual of WBS-202N/WBS-502N Figure 5-52 Add rule of flow control(Speed Limit) The page includes the following fields: Object Description Status Select enable or disable flow control rule IP Group Select custom or Add an IP group IP Address Enter an IP address range or use scan to select...
- Page 68 User Manual of WBS-202N/WBS-502N 5.10.1.8. IP Group Figure 5-53 IP Group The page includes the following fields: Object Description Press the “Add” button to add IP group in list Delete Press the “Delete” button to delete the group Figure 5-54 Add IP Group...
- Page 69 User Manual of WBS-202N/WBS-502N The page includes the following fields: Object Description Group Name Enter an IP group description IP Address Enter an IP address range or use scan to select Mark Enter the mark string, or not 5.10.1.9. Time Group...
- Page 70 User Manual of WBS-202N/WBS-502N Figure 5-56 Add Time Group The page includes the following fields: Object Description Time Group Enter an time group description Time Range Select start time and end time for time range Work Date Select work day by option table...
- Page 71 DDNS Option Select PLANET DDNS or Easy DDNS function User Name Enter user account for PLANET DDNS. If you use Easy DDNS it was not necessary. Password Enter password for PLANET DDNS. If you use Easy DDNS it was not necessary.
- Page 72 User Manual of WBS-202N/WBS-502N Figure 5-58 PLANET EasyDDNS -64-...
-
Page 73: Chapter 6.Quick Connection To A Wireless Network
User Manual of WBS-202N/WBS-502N Chapter 6. Quick Connection to a Wireless Network In the following sections, the default SSID of the WBS-202N/WBS-502N is configured to “default”. Windows XP (Wireless Zero Configuration) Step 1: Right-click on the wireless network icon displayed in the system tray Figure 6-1 System Tray –... - Page 74 User Manual of WBS-202N/WBS-502N Step 4: Enter the encryption key of the wireless AP (1) The Wireless Network Connection box will appear (2) Enter the encryption key that is configured in section 5.7.2.1 (3) Click the [Connect] button Figure 6-3 Entering the Network Key Step 5: Check if “Connected”...
- Page 75 User Manual of WBS-202N/WBS-502N Some laptops are equipped with a “Wireless ON/OFF” switch for the internal wireless LAN. Make sure the hardware wireless switch is switched to “ON” position. Windows 7 (WLAN AutoConfig) WLAN AutoConfig service is built-in in Windows 7 that can be used to detect and connect to wireless network.
- Page 76 User Manual of WBS-202N/WBS-502N If you will be connecting to this Wireless AP in the future, check [Connect automatically]. Step 4: Enter the encryption key of the wireless AP (1) The Connect to a Network box will appear (2) Enter the encryption key that is configured in section 5.7.2.1...
- Page 77 User Manual of WBS-202N/WBS-502N Step 5: Check if “Connected” is displayed Figure 6-9 Connected to a Network -69-...
- Page 78 User Manual of WBS-202N/WBS-502N Mac OS X 10.x In the following sections, the default SSID of the WBS-202N/WBS-502N is configured to “default”. Step 1: Right-click on the network icon displayed in the system tray The AirPort Network Connection menu will appear Figure 6-10 Mac OS –...
- Page 79 User Manual of WBS-202N/WBS-502N Figure 6-12 Enter the Password If you will be connecting to this Wireless AP in the future, check [Remember this network]. Step 5: Check if the AirPort is connected to the selected wireless network. If “Yes”, then there will be a “check” symbol in front of the SSID.
- Page 80 User Manual of WBS-202N/WBS-502N There is another way to configure the MAC OS X wireless settings: Step 1: Click and open the [System Preferences] by going to Apple > System Preference or Applications Figure 6-14 System Preferences Step 2: Open Network Preference by clicking on the [Network] icon...
- Page 81 User Manual of WBS-202N/WBS-502N Step 3: Check Wi-Fi setting and select the available wireless network (1) Choose the AirPort on the left-menu (make sure it is ON) (2) Select Network Name [default] here If this is the first time to connect to the Wireless AP, it should show “Not network selected”.
- Page 82 User Manual of WBS-202N/WBS-502N iPhone/iPod Touch/iPad In the following sections, the default SSID of the WBS-202N/WBS-502N is configured to “default”. Step 1: Tap the [Settings] icon displayed in the home screen Figure 6-17 iPhone – Settings icon Step 2: Check Wi-Fi setting and select the available wireless network...
- Page 83 User Manual of WBS-202N/WBS-502N Figure 6-19 Wi-Fi Setting – Not Connected Step 3: Tap the target wireless network (SSID) in “Choose a Network…” (1) Turn on Wi-Fi by tapping “Wi-Fi” (2) Select SSID [default] Figure 6-20 Turning on Wi-Fi Step 4: Enter the encryption key of the Wireless AP...
- Page 84 User Manual of WBS-202N/WBS-502N Figure 6-21 iPhone -- Entering the Password Step 5: Check if the device is connected to the selected wireless network. If “Yes”, then there will be a “check” symbol in front of the SSID. Figure 6-22 iPhone -- Connected to the Network...
- Page 85 User Manual of WBS-202N/WBS-502N Appendix A: Planet Smart Discovery Utility To easily list the WBS-202N/WBS-502N in your Ethernet environment, the Planet Smart Discovery Utility is an ideal solution. The following installation instructions guide you to running the Planet Smart Discovery Utility.
- Page 86 User Manual of WBS-202N/WBS-502N Appendix B: FAQs Q1: How to set up the AP Client Connection Topology: Step1. Use static IP in the PCs that are connected with AP-1(Site-1) and AP-2(Site-2). In this case, Site-1 is “192.168.1.101”, and Site-2 is “192.168.1.200”.
- Page 87 User Manual of WBS-202N/WBS-502N Step2. In AP-2, change the PtP switch to slave, the default IP is 192.168.1.100. Step 3. In AP-1, go to “Wizard” to configure it to AP Mode. In AP-2, configure it to Repeater Mode. AP-1 AP-2 Step 4.
- Page 88 User Manual of WBS-202N/WBS-502N Step 5. Click “Next” to finish the setting. ( The default Password is ”qj6x962k6” ) Step 6. Click “Device Status” to check connection status. -80-...
- Page 89 User Manual of WBS-202N/WBS-502N Step 7. Use command line tool to ping each other to ensure the link is successfully established. From Site-1, ping 192.168.1.200; and in Site-2, ping 192.168.1.101. Step 8. Configure the TCP/IP settings of Site-2 to “Obtain an IP address automatically”.
- Page 90 User Manual of WBS-202N/WBS-502N Step 9. Use command line tool to ping the DNS (e.g., Google) to ensure Site-2 can access internet through the wireless connection. The following hints should be noted: The encryption method must be the same as that of both sites if configured.
- Page 91 User Manual of WBS-202N/WBS-502N Q2: How to set up the WDS Connection Topology: Step 1. Use static IP in the PCs that are connected with AP-1 (Site-1) and AP-2 (Site-2). In this case, Site-1 is “192.168.1.100”, and Site-2 is “192.168.1.200”.
- Page 92 User Manual of WBS-202N/WBS-502N Step 2. In AP-2, change the default IP to the same IP range but different from AP-1. In this case, the IP is changed to 192.168.1.252. Step 3. In both APs, go to “Wizard” to configure it in Super WDS Mode.
- Page 93 User Manual of WBS-202N/WBS-502N Step 5. Finish the 2.4G/5G Wi-Fi and LAN setting. Step 6. Click “Home” to check WDS status. Step 7. In AP2 scan AP1 WDS SSID, for example WDS-1. Select Encrypt for WEP and enter password. -85-...
- Page 94 User Manual of WBS-202N/WBS-502N Step 8. Confirm SSID and MAC. Select Encrypt for WEP and enter password. Step 9. Finish the 2.4G/5G Wi-Fi and LAN setting. Step 10. Go to “WDS Information” to check connection status. -86-...
- Page 95 User Manual of WBS-202N/WBS-502N Step 11. Use command line tool to ping each other to ensure the link is successfully established. From Site-1, ping 192.168.1.200; and in Site-2, ping 192.168.1.100. The following hints should be noted: The encryption method must be the same as that of both sites if configured.
- Page 96 User Manual of WBS-202N/WBS-502N Appendix C: Troubleshooting If you find the AP is working improperly or stop responding to you, please read this troubleshooting first before contacting the dealer for help. Some problems can be solved by yourself within a very short time.
- Page 97 User Manual of WBS-202N/WBS-502N Try to use IP address instead of host name. If you can use IP address to communicate with a remote server, but can’t use host name, please check DNS setting. a. ‘Broadcast ESSID’ set to off? I can’t locate my AP by my...
- Page 98 User Manual of WBS-202N/WBS-502N Appendix D: Glossary 802.11ac wireless networking 802.11 under the - 802.11ac is a standard in the family (which is marketed brand name Wi-Fi), developed in the IEEE Standards Association process, providing high-throughput wireless local area networks...
- Page 99 User Manual of WBS-202N/WBS-502N MTU (Maximum Transmission Unit) - The size in bytes of the largest packet that can be transmitted. NAT (Network Address Translation) - NAT technology translates IP addresses of a local area network to a different IP address for the Internet.
- Page 100 CPEΣΥΜΜΟΡΦΩΝΕΤΑΙ ΠΡΟΣ ΤΙΣ ΟΥΣΙΩΔΕΙΣ disposições da Directiva 2014/53/EU. ΑΠΑΙΤΗΣΕΙΣ ΚΑΙ ΤΙΣ ΛΟΙΠΕΣ ΣΧΕΤΙΚΕΣ ΔΙΑΤΑΞΕΙΣ ΤΗΣ ΟΔΗΓΙΑΣ 2014/53/EU Por medio de la presente, PLANET Technology Výrobca PLANET Technology Corporation, týmto Español Slovensky Corporation, declara que 300Mbps 802.11n deklaruje, že táto 300Mbps 802.11n Wireless...
Need help?
Do you have a question about the WBS-202N and is the answer not in the manual?
Questions and answers