
Subscribe to Our Youtube Channel
Related Manuals for 1010music Toolbox


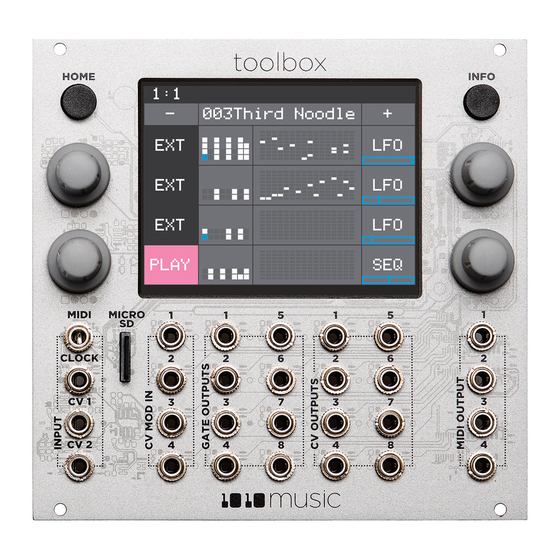
Summary of Contents for 1010music Toolbox
- Page 1 Toolbox User Manual Toolbox User Manual P. 1 11/23/17 10:32 AM Copyright 1010music LLC 2017...
-
Page 2: Table Of Contents
Front Panel Overview ................................4 Main Screen Overview ................................5 Series Compatibility ................................5 Setup Toolbox ................................... 6 Rack Installation ..................................6 Connect a Gate Output to a Sound Generating Module ....................6 Connect a MIDI Controller Input ............................6 Play Settings ................................... -
Page 3: Welcome
Finally, we will go into more depth about preset management tasks and discuss how to upgrade your firmware. If you would rather get a quick overview of how to use the module, see the Toolbox Quick Start Guide that came with the module and that is also available online at https://1010music.com/toolbox-documentation-software. -
Page 4: Overview
Toolbox User Manual Overview Toolbox is a musically intelligent control module capable of driving a rack full of gear. It features both MIDI and Control Voltage interconnects for interfacing with all kinds of different hardware. Toolbox takes full advantage of the integrated 3.5″... -
Page 5: Main Screen Overview
Touch an LFO or SEQ button to configure the parameters. Series Compatibility Toolbox is not part of the Series 1 group of modules from 1010music. It uses a different hardware platform that is more focused on providing outputs. Therefore, toolbox cannot run the firmware for Series 1 modules. -
Page 6: Setup Toolbox
In order to hear an example of the output of toolbox, connect a patch cord between Gate Sequencer output jacks 1, 2, 3 or 4, and an external module. -
Page 7: Manage Playback
Press HOME when done to return to the main screen. Note: If the Main screen is in Mute mode when you press INFO, toolbox will first turn off Mute mode and • stay on the Main screen. Press INFO again to display the Global Settings screen. -
Page 8: Start Playback Of The Sequencers And Function Generators
Gate Sequencer output jack 4 when using these presets as they were originally configured.) Toolbox allows you to switch presets in real time to switch all patterns at once. If you switch presets during playback, the change will take effect at the beginning of the next bar. This change is quantized to measure to give you smooth transitions. -
Page 9: Use The Note Sequencer
Toolbox User Manual Toolbox has four gate sequencers that generate a sequence of gate signals to Gate Outputs 1 through 4. Each Gate Sequencer on the touchscreen maps to one Gate Output jack. You configure the steps in the sequence by using the control knobs and touch screen to control which steps in the sequence are ON or OFF. - Page 10 MIDI output will include gate, pitch and velocity information. Notes that are placed manually via the touchscreen will include only gate and pitch information in the MIDI output. The Note Sequencer is the only element of toolbox that sends a signal to the MIDI output. Follow these steps to create a Note Sequence: From the Main screen, touch one of the Note Sequencers in column 3 to display the Note Sequencer screen.
-
Page 11: Use The Lfo Function Generators
Use the LFO Function Generators Toolbox can generate three low frequency oscillation (LFO) signals. These outputs play out the Function Generator Output Jacks 5 through 7. The output range for these signals is -5V to +5V. To configure an LFO: From the Main screen, touch one of the LFO buttons in the right column to display the LFO Parameters screen. -
Page 12: Use The Control Voltage Sequencer
Use the Control Voltage Sequencer Toolbox can generate one control voltage sequencer (SEQ) signal. This signal plays out the Control Voltage Output Jack 8. The output range for this signal is 0V to +5V. To configure the SEQ: From the Main screen, touch the SEQ button in the lower right corner to display the CV Sequencer screen. -
Page 13: Apply Modulation
Toolbox is designed to work together with other modules. It can follow an external clock input and then use that to control the CV and MIDI outputs to other modules. The toolbox clock can be driven by three sources, and will use the highest priority clock signal available. -
Page 14: Preset Management
Toolbox can also drive a clock signal to other modules in a few different ways. You can use the four MIDI outputs to output the MIDI clock to other modules. You can also use a Gate Sequencer to configure your own custom clock signal that will go out the corresponding Gate output jack. -
Page 15: Delete A Preset
Update Firmware and Manage Preset Files Toolbox owners can update the module’s firmware to get the latest features and other updates. Toolbox is not cross compatible with the Series 1 Modules, bitbox, fxbox and synthbox. The firmware can be updated with the factory image, which includes the original presets, or just the firmware itself. -
Page 16: Technical Specs
Mini TRS Audio Jacks for MIDI Connections Compatibility Guide at: https://1010music.com/stereo-minijacks-midi-connections-compatibility-guide Learn More Download the Toolbox User Manual or watch toolbox videos on our website at https://1010music.com/toolbox-support. Join the conversation with other toolbox owners at https://forum.1010music.com. P. 16 11/23/17 10:32 AM Copyright 1010music LLC 2017 Digital Heart –...
Need help?
Do you have a question about the Toolbox and is the answer not in the manual?
Questions and answers