
Related Manuals for Klarstein Vinamour 45 Duo


Summary of Contents for Klarstein Vinamour 45 Duo
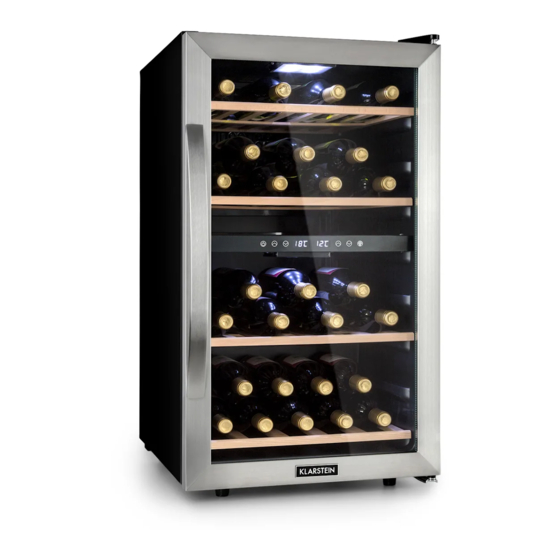
- Page 1 Vinamour 45 Duo Weinkühlschrank Wine Cooler Vinoteca Cave à vin Frigorifero per vino 10034216...
-
Page 3: Table Of Contents
Sehr geehrter Kunde, wir gratulieren Ihnen zum Erwerb Ihres Gerätes. Lesen Sie die folgenden Hinweise sorgfältig durch und befolgen Sie diese, um möglichen Schäden vorzubeugen. Für Schäden, die durch Missachtung der Hinweise und unsachgemäßen Gebrauch entstehen, übernehmen wir keine Haftung. Scannen Sie den folgenden QR-Code, um Zugriff auf die aktuellste Bedienungsanleitung und weitere Informationen rund um das Produkt zu erhalten. -
Page 4: Sicherheitshinweise
SICHERHEITSHINWEISE • Prüfen Sie vor der Benutzung die Spannung auf der Geräteplakette. Schließen Sie das Gerät nur an Steckdosen an, die der Spannung des Geräts entsprechen. • Kinder ab 8 Jahren, psychisch, sensorisch und körperlich eingeschränkte Menschen dürfen das Gerät nur benutzen, wenn sie vorher von einer für sie verantwortlichen Aufsichtsperson ausführlich mit den Funktionen und den Sicherheitsvorkehrungen vertraut gemacht wurden und die damit verbundenen Risiken verstehen. - Page 5 Dieses Gerät enthält das Kältemittel Isobutan (R600a), ein Naturgas mit hoher Umweltverträglichkeit, aber brennbar. Obwohl es brennbar ist, schädigt es nicht die Ozonschicht und verstärkt nicht den Treibhauseffekt. Die Verwendung dieses Kältemittels führt zu einer etwas höheren Geräuschentwicklung des Gerätes. Zusätzlich zum Kompressorgeräusch können Sie den Fluss des Kältemittels hören.
-
Page 6: Geräteübersicht
GERÄTEÜBERSICHT Obere Abdeckung Füße Lüfter Unteres Scharnier LED Licht Griff Regal Tür Bedienfeld Türdichtung Kühlelektroniksensor Oberes Scharnier Hinweis: Der Temperaturbereich der obere Zone liegt zwischen 5-12 °C, der Temperaturbereich der untere Zone zwischen 12-18 °C. - Page 7 • Installieren Sie dieses Gerät an einem Ort, an dem die Umgebungstemperatur der auf dem Typenschild des Geräts angegebenen Klimaklasse entspricht: Dieses Kühlgerät ist für den Einsatz bei Niedrig Umgebungstemperaturen von 10-32 °C vorgesehen. Dieses Kühlgerät ist für den Einsatz bei Gemäßigt Umgebungstemperaturen von 16-32 °C vorgesehen.
-
Page 8: Inbetriebnahme Und Bedienung
INBETRIEBNAHME UND BEDIENUNG Vor dem ersten Betrieb • Entfernen Sie vor der Benutzung zuerst alle Packmaterialien, einschließlich der Bodenpolsterung, Schaumstoffkissen und Klebstreifen im Inneren des Kühlschranks. • Reißen Sie die Schutzfolie auf der Kühlschranktür und auf dem Gehäuse ab. • Halten Sie das Gerät von Hitze und direktem Sonnenlicht fern. Stellen sie das Gerät nicht an feuchten oder nassen Orten auf, um Rost zu vermeiden. -
Page 9: Türanschlag Drehen
TÜRANSCHLAG DREHEN Schließen Sie die Tür. Entfernen Sie die obere Abdeckung (1) und die Schrauben (2). Nehmen Sie das obere Scharnier (3) ab und entfernen Sie die Abdeckung auf der linken Seite (4). Entfernen Sie die Tür, Entfernen Sie das untere Heben Sie die Tür leicht indem Sie sie leicht öffnen rechte Scharnier und... -
Page 10: Inbetriebnahme
Befestigen Sie das obere Scharnier auf der linken Seite und Setzen Sie die Abdeckung wieder auf. Setzen Sie die andre Abdeckung auf der rechten Seite ein. INBETRIEBNAHME Stecken Sie den Stecker in die Steckdose und schalten Sie das Gerät ein, indem sie die POWER-Taste einige Sekunden gedrückt halten. - Page 11 Beladung • Falls Sie etwas größere Flaschen haben oder die Füllmenge erhöhen möchten, können Sie auch einzelne oder alle Ablagen aus dem Kühlschrank entfernen. • Lassen Sie Platz zwischen Weinflasche und Seitenwänden, damit die Luft im Kühlschrank ungehindert zirkulieren kann und sich die kühle Luft im ganzen Kühlschrank verteilt. •...
-
Page 12: Reinigung Und Pflege 1
REINIGUNG UND PFLEGE Reinigung des Gerätes • Schalten Sie das Gerät erst aus und ziehen Sie den Netzstecker aus der Steckdose. • Entfernen Sie den gesamten Inhalt. • Wischen Sie das Innere mit einem feuchten Tuch ab, das in lauwarmes Wasser mit etwas Spülmittel getaucht wurde. -
Page 13: Fehlerbehebung
FEHLERBEHEBUNG Problem Mögliche Ursache und Lösungsansatz Das Gerät Es ist nicht eingesteckt. läuft nicht. Es ist ausgeschaltet. Die Sicherung ist raus oder kaputt. Das Gerät Überprüfen Sie die Temperatureinstellungen. ist nicht kalt Die Umgebung erfordert eine niedrigere Einstellung. genug. Die Tür wurde zu oft geöffnet. Die Tür ist nicht richtig zu. -
Page 14: Hinweise Zur Entsorgung
HINWEISE ZUR ENTSORGUNG Befindet sich die linke Abbildung (durchgestrichene Mülltonne auf Rädern) auf dem Produkt, gilt die Europäische Richtlinie 2012/19/EU. Diese Produkte dürfen nicht mit dem normalen Hausmüll entsorgt werden. Informieren Sie sich über die örtlichen Regelungen zur getrennten Sammlung elektrischer und elektronischer Gerätschaften. - Page 15 Dear Customer, Congratulations on purchasing this equipment. Please read this manual carefully and take care of the following hints to avoid damages. Any failure caused by ignoring the items and cautions mentioned in the instruction manual is not covered by our warranty and any liability. Scan the QR code to get access to the latest user manual and other information about the product.
-
Page 16: Safety Instructions
SAFETY INSTRUCTIONS • Check that the voltage of the power supply in your home is the same as the voltage shown on the rating label of this product. • This device may be only used by children 8 years old or older and persons with limited physical, sensory and mental capabilities and / or lack of experience and knowledge, provided that they have been instructed in use of the device by a responsible person who understands the associated risks. - Page 17 This appliance contains the coolant isobutane (R600a), a natural gas which is environmentally friendly. Although it is fl ammable, it does not damage the ozone layer and does not increase the greenhouse effect. The use of this coolant has,however,led to a slight increase in the noise level of the appliance. In addition to the noise of the compressor,you might be able to hear the coolant fl owing around the system.
-
Page 18: Product Overview
PRODUCT OVERVIEW Upper hinge cover Feet Fan mask Lower hinge LED light Handle Shelf Door Control panel Door seal NTC probe cover Upper hinge Note: The temperature range of the upper zone is between 5-12 °C, the temperature range of the lower zone between 12-18 °C. - Page 19 • Install this unit in a location where the ambient temperature corresponds to the climate class indicated on the unit‘s nameplate: This cooling unit is designed for use at ambient temperatures of 10-32 °C. This cooling unit is intended for use at ambient Moderate temperatures of 16-32 °C.
-
Page 20: Start-Up And Operation
START-UP AND OPERATION Before first Use • Before use, remove all packing materials, including bottom cushions, foam pads and tapes inside of the refrigerator; tear off the protective film on the doors and the refrigerator body. • Keep away from heat and avoid direct sunlight. Do not place the unit in moist or watery places to prevent rust or reduction of insulating effect. -
Page 21: Door Reverse
DOOR REVERSE Close the door. Remove the top cover (1) and the screws (2). Remove the top hinge (3) and remove the cover on the left side (4). Remove the door by Entfernen Sie das untere Lift the door slightly, move opening and lifting it rechte Scharnier und it downwards until it fits on... -
Page 22: Getting Started
Fasten the upper hinge on the left side and replace the cover. Insert the other cover on the right side. GETTING STARTED Plug in and switch on the cellar by pressing on the power button for a few seconds. When you use the wine cellar for the first time (or restart the wine cellar after having it shut off for a long time), there will be a few degrees variance between the temperature you have selected and the one indicated on the LED readout. - Page 23 Loading the Wine Cellar • Do remove or relocate adjustable wooden shelves to accommodate larger type of bottles or increase the capacity of the cellar by stacking the bottles up when necessary. (See removing shelves) • Keep smalls gap between the walls and the bottles to allow air circulation. Like an underground cellar air circulation is important to prevent mould and for a better homogeneous temperature within the cellar.
-
Page 24: Cleaning And Care
CLEANING AND CARE Cleaning the Unit • First switch off the unit and disconnect the power plug from the socket. Remove the entire contents. • Wash the interior with a damp cloth dipped in lukewarm water with a little detergent. •... -
Page 25: Troubleshooting
TROUBLESHOOTING Problem Possible Cause and Suggested Solution Wine cellar Not plugged in. does not The appliance is turned off. operate. The circuit breaker tripped or the fuse is broken. Wine cellar Check the temperature control setting. is not cold External environment may require a higher setting. enough. -
Page 26: Hints On Disposal
HINTS ON DISPOSAL According to the European waste regulation 2012/19/EU this symbol on the product or on its packaging indicates that this product may not be treated as household waste. Instead it should be taken to the appropriate collection point for the recycling of electrical and electronic equipment. - Page 27 Estimado cliente: Le felicitamos por la adquisición de este producto. Lea atentamente el siguiente manual y siga cuidadosamente las instrucciones de uso con el fin de evitar posibles daños. La empresa no se responsabiliza de los daños ocasionados por un uso indebido del producto o por haber desatendido las indicaciones de seguridad.
-
Page 28: Indicaciones De Seguridad
INDICACIONES DE SEGURIDAD • Antes de utilizar el aparato, compruebe la tensión en la placa técnica del mismo. Conecte el aparato solamente a tomas de corriente que se adecuen a la tensión del mismo. • Este aparato puede ser utilizado por niños mayores de 8 años y personas con discapacidades físicas, sensoriales y mentales y/o con falta de experiencia y conocimientos, siempre y cuando hayan sido instruidos sobre el uso del aparato y comprendan los peligros y riesgos asociados. - Page 29 Este aparato contiene refrigerante isobutano (R600a), un gas natural que no es nocivo para el medioambiente pero sí infl amable. Aunque sea infl amable, no es perjudicial para la capa de ozono ni aumenta el efecto invernadero. La utilización de este refrigerante provoca un aumento de ruido del aparato. Además del ruido del compresor, podrá...
-
Page 30: Vista General Del Aparato
VISTA GENERAL DEL APARATO Tapa superior Patas Ventilador Bisagra inferior Luz led Empuñadura Balda Puerta Panel de control Junta de la puerta Sensor electrónico de Bisagra superior refrigeración Atención: El rango de temperatura del compartimento superior oscila entre 5 y 12 °C y el rango de temperatura del compartimento inferior oscila entre 12 y 18 °C. - Page 31 • Instale el aparato en un sitio que coincida con la temperatura ambiente de la clase climática indicada en la placa de características del aparato: Este refrigerador está concebido para un uso a Bajo temperaturas ambiente de 10-32 °C. Este refrigerador está concebido para un uso a Cálida temperaturas ambiente de 16-32 °C.
-
Page 32: Puesta En Funcionamiento
PUESTA EN FUNCIONAMIENTO Antes del primer uso • Antes de utilizar el aparato, retire todo el material de embalaje, incluida la espuma de soporte, las almohadillas de espuma y las tiras adhesivas del interior del frigorífico. • Rompa el plástico protector de la puerta del frigorífico y de la carcasa. •... -
Page 33: Cambiar La Orientación De Abertura De La Puerta
CAMBIAR LA ORIENTACIÓN DE ABERTURA DE LA PUERTA Cierre la puerta. Desmonte la tapa superior (1) y los tornillos (2). Desmonte la bisagra superior (3) y la tapa en la parte izquierda (4). Retire la puerta. Para Desmonte la bisagra Levante ligeramente la ello, ábrala ligeramente y inferior derecha y móntela... -
Page 34: Puesta En Marcha
Monte la bisagra superior en la parte izquierda y coloque la tapa. Coloque la otra tapa en la parte derecha. PUESTA EN MARCHA Conecte el enchufe en la toma de corriente y encienda el aparato pulsando el botón POWER algunos segundos. Si utiliza el aparato por primera vez (o lo utiliza después de un periodo prolongado de tiempo), existe una diferencia entre la temperatura que ha seleccionado y la temperatura que aparece en el display. - Page 35 Carga • Si tiene botellas de un tamaño mayor o desea aumentar la cantidad de botellas, también puede retirar algunas baldas de la vinoteca. • Deje espacio entre las botellas de vino o las paredes laterales para que el aire pueda circular correctamente y el aire frío se distribuya en toda la vinoteca.
-
Page 36: Limpieza Y Cuidado
LIMPIEZA Y CUIDADO Limpieza del aparato • Apague el aparato y desconecte el enchufe de la toma de corriente. • Retire todo el contenido. • Lave el interior con un paño húmedo humedecido en agua tibia con un poco de detergente. -
Page 37: Resolución De Problemas
RESOLUCIÓN DE PROBLEMAS Problema Posible causa y solución El aparato no No está enchufado. funciona. Está apagado. El fusible se ha extraído o está averiado. El aparato Compruebe los ajustes de temperatura. no enfría lo El entorno requiere un ajuste menor de temperatura. suficiente. -
Page 38: Retirada Del Aparato
RETIRADA DEL APARATO Si el aparato lleva adherida la ilustración de la izquierda (el contenedor de basura tachado) entonces rige la normativa europea, directiva 2012/19/UE. Este producto no debe arrojarse a un contenedor de basura común. Infórmese sobre las leyes territoriales que regulan la recogida separada de aparatos eléctricos y electrónicos. - Page 39 Cher client, Toutes nos félicitations pour l’acquisition de ce nouvel appareil. Veuillez lire attentivement les instructions suivantes de branchement et d’utilisation afin d’éviter d’éventuels dommages. Le fabricant ne saurait être tenu pour responsable des dommages dus au non-respect des consignes de sécurité et à la mauvaise utilisation de l’appareil.
-
Page 40: Consignes De Sécurité
CONSIGNES DE SÉCURITÉ • Avant d‘utiliser l‘appareil vérifiez la tension sur la plaque signalétique. Branchez l‘appareil sur des prises de tension correspondante uniquement. • Cet appareil peut être utilisé par des enfants de 8 ans ou plus et des personnes ayant des capacités physiques, sensorielles et mentales limitées et / ou dénuées d‘expérience et de connaissances, à... - Page 41 Cet appareil contient du liquide réfrigérant Isobutane (R600a), un gaz naturel très respectueux de l’environnement mais infl ammable. Bien qu’il soit infl ammable, il ne détruit pas la couche d’ozone et ne renforce pas l’effet de serre. L’utilisation de ce liquide réfrigérant provoque toutefois un niveau sonore de l’appareil légèrement plus élevé.
-
Page 42: Aperçu De L'appareil
APERÇU DE L‘APPAREIL Cache supérieur Pieds Ventilateur Charnière inférieure Eclairage LED Poignée Clayette Porte Panneau de commande Joint de porte Capteur électronique de Charnière supérieure refroidissement Remarque : La plage de température de la zone supérieure est comprise entre 5 et 12 °... - Page 43 • Installez cet appareil dans un endroit où la température ambiante Ce réfrigérateur est destiné à être utilisé à des basses températures ambiantes de 10 à 32 ° C. Ce réfrigérateur est destiné à être utilisé à des modérées températures ambiantes de 16-32 °C. Ce réfrigérateur est destiné...
-
Page 44: Mise En Marche Et Utilisation
MISE EN MARCHE ET UTILISATION Avant la première utilisation • Avant d‘utiliser l‘appareil, retirez les matériaux d‘emballage, y compris le rembourrage de fond, les coussinets en mousse et le ruban adhésif à l‘intérieur du réfrigérateur. • Retirez le film protecteur sur la porte du réfrigérateur et sur le boîtier. •... -
Page 45: Modification Du Sens De Porte
MODIFICATION DU SENS DE PORTE Fermez la porte. Retirez le cache supérieur (1) et les vis (2). Retirez la charnière supérieure (3) et retirez le cache du côté gauche (4). Retirez la porte en Retirez la charnière Soulevez légèrement l'ouvrant légèrement et en inférieure droite et la porte et abaissez-la la soulevant. -
Page 46: Mise En Service
Fixez la charnière supérieure du côté gauche et replacez le cache. Insérez l‘autre cache sur le côté droit. MISE EN SERVICE Branchez la fiche dans la prise et allumez l’appareil en maintenant quelques secondes la touche POWER. Si vous utilisez l’appareil pour la première fois (ou après une longue période de non-utilisation), il peut y avoir un écart entre la température demandée et celle qui s’affiche à... - Page 47 Chargement de l’appareil • Si vous avez des bouteilles un peu plus grandes ou que vous voulez augmenter le volume de remplissage, vous pouvez aussi retirer de la cave à vin les étagères simples voire toutes les étagères. • Laissez un espace entre les bouteilles et les parois latérales pour que l’air puisse circuler librement dans la cave à...
-
Page 48: Nettoyage Et Entretien
NETTOYAGE ET ENTRETIEN Nettoyage de l’appareil • Éteindre tout d’abord l’appareil et le débrancher de la prise. • Sortir tout ce que l’appareil contient. • Laver l‘intérieur avec un chiffon humide trempé dans de l‘eau tiède avec un peu de détergent. -
Page 49: Résolution Des Problèmes
RÉSOLUTION DES PROBLÈMES Problème Cause possible et solution L’appareil ne Il n’est pas branché. fonctionne Il est éteint. pas. Le fusible est manquant ou défectueux. L’appareil ne Contrôlez les réglages de températures. refroidit pas L’environnement nécessite un réglage de température plus bas. assez. -
Page 50: Conseils Pour Le Recyclage
CONSEILS POUR LE RECYCLAGE Le pictogramme ci-contre apposé sur le produit signifie que la directive européenne 2012/19/UE s‘applique (poubelle à roues barrée d’une croix). Ces produits ne peuvent être jetés dans les poubelles domestiques courantes. Renseignez- vous concernant les règles appliquées pour la collecte d’appareils électriques et électroniques. - Page 51 Gentile cliente, La ringraziamo per aver acquistato il dispositivo. La preghiamo di leggere attentamente le seguenti istruzioni per l’uso e di seguirle per evitare possibili danni tecnici. Non ci assumiamo alcuna responsabilità per danni scaturiti da una mancata osservazione delle avvertenze di sicurezza e da un uso improprio del dispositivo.
-
Page 52: Avvertenze Di Sicurezza
AVVERTENZE DI SICUREZZA • Prima dell‘uso, controllare la tensione sulla targhetta del dispositivo. Collegare il dispositivo solo ad una presa che corrisponde alla tensione indicata. • Questo dispositivo può essere utilizzato da bambini a partire da 8 anni e da persone con limitate capacità... - Page 53 Questo dispositivo contiene il refrigerante isobutano (R600a), un gas naturale ecocompatibile ma infi ammabile. Anche se è infi ammabile, non danneggia lo strato di ozono e non aumenta l´effetto serra. Tenere presente che l´utilizzo di questo refrigerante comporta rumori del dispositivo. Oltre al rumore del compressore si può sentire anche il fl usso del liquido refrigerante.
-
Page 54: Panoramica Del Prodotto
PANORAMICA DEL PRODOTTO Copertura superiore Piedini Ventola Cerniera inferiore Luce a LED Maniglia Ripiano Sportello Pannello comandi Guarnizione sportello Sensore elettrico di Cerniera superiore raffreddamento Nota: l’intervallo di temperatura della zona superiore è tra i 5-12 °C, quello della zona inferiore è tra 12-18 °C. - Page 55 • Installare il dispositivo in un luogo con temperatura ambiente corrispondente alla classe climatica indicata sulla targhetta: Questo dispositivo è adatto all’uso a temperature Bassa ambiente di 10-32 °C. Questo dispositivo è adatto all’uso a temperature Temperata ambiente di 16-32 °C. Questo dispositivo è...
-
Page 56: Messa In Funzione E Utilizzo
MESSA IN FUNZIONE E UTILIZZO Primo utilizzo • Prima dell’utilizzo, rimuovere il materiale di imballaggio, compreso il rivestimento inferiore, la gomma piuma e il nastro adesivo nella parte interna del frigorifero. • Rimuovere la pellicola protettiva dallo sportello e dalla struttura del frigorifero. •... -
Page 57: Inversione Dello Sportello
INVERSIONE DELLO SPORTELLO Chiudere lo sportello. Rimuovere la copertura superiore (1) e le viti (2). Smontare la cerniera superiore (3) e rimuovere la copertura dalla parte sinistra (4). Rimuovere lo sportello, Rimuovere la cerniera Sollevare leggermente lo aprendolo leggermente inferiore destra e montarla sportello spostarlo verso il e sollevandolo. -
Page 58: Messa In Funzione
Fissare la cerniera superiore sul lato sinistro, quindi rimontare la copertura. Inserire l’altra copertura sul lato destro. MESSA IN FUNZIONE Inserire la spina nella presa e accendere il dispositivo tenendo premuto il tasto POWER per alcuni secondi. Se si utilizza il dispositivo per la prima volta (o dopo un periodo di inutilizzo prolungato), c‘è... - Page 59 Introdurre le bottiglie • Se le bottiglie sono di grandi dimensioni oppure se si desidera aumentare la capacità del dispositivo, rimuovere uno o tutti i ripiani dal frigorifero. • Lasciare spazio libero tra le bottiglie di vino e le pareti laterali del frigorifero in modo che l‘aria possa circolare liberamente e che l‘aria fresca possa diffondersi in tutto il frigorifero.
-
Page 60: Pulizia E Manutenzione
PULIZIA E MANUTENZIONE Pulizia del dispositivo • Spegnere prima il dispositivo e staccare la spina dalla presa. • Rimuovere le bottiglie all’interno. • Lavare l‘interno con un panno umido immerso in acqua tiepida con un po‘ di detersivo. • Pulire regolarmente la guarnizione in gomma dello sportello per garantire il corretto funzionamento del •... -
Page 61: Risoluzione Dei Problemi
RISOLUZIONE DEI PROBLEMI Problema Causa possibile e risoluzione dei problemi Il dispositivo Il dispositivo non è collegato alla corrente. non funziona. Il dispositivo è spento. Il fusibile è bruciato. Il dispositivo Verificare le impostazioni della temperatura. non raffredda E´ necessario impostare una temperatura ambiente inferiore. abbastanza. -
Page 62: Smaltimento
SMALTIMENTO Se sul prodotto è presente la figura a sinistra (il cassonetto dei rifiuti mobile sbarrato), si applica la direttiva europea 2012/19/UE. Questi prodotti non possono essere smaltiti con i rifiuti normali. Informarsi sulle disposizioni vigenti in merito alla raccolta separata di dispositivi elettrici ed elettronici. Non smaltire i vecchi dispositivi con i rifiuti domestici.
Need help?
Do you have a question about the Vinamour 45 Duo and is the answer not in the manual?
Questions and answers