
Related Manuals for Klarstein Vinamour


Summary of Contents for Klarstein Vinamour
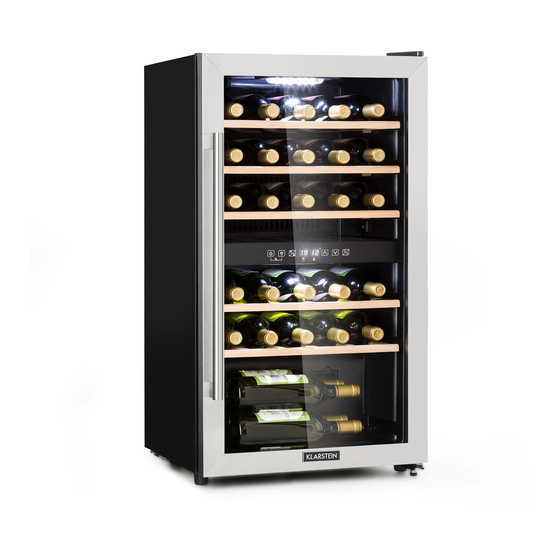
- Page 1 Vinamour Weinkühlschrank Wine Cooler Vinoteca Cave à vin Frigorifero per vino 10033083...
-
Page 3: Table Of Contents
Sehr geehrter Kunde, wir gratulieren Ihnen zum Erwerb Ihres Gerätes. Lesen Sie die folgenden Hinweise sorgfältig durch und befolgen Sie diese, um möglichen Schäden vorzubeugen. Für Schäden, die durch Missachtung der Hinweise und unsachgemäßen Gebrauch entstehen, übernehmen wir keine Haftung. Scannen Sie den folgenden QR-Code, um Zugriff auf die aktuellste Bedienungsanleitung und weitere Informationen rund um das Produkt zu erhalten. - Page 4 SICHERHEITSHINWEISE • Verändern Sie das Gerät nicht und versuchen Sie es nicht selbst zu reparieren. Für Schäden, die durch Missachtung der Hinweise und unsachgemäßen Gebrauch entstehen, übernehmen wir keine Haftung. • Überprüfen Sie nach dem Auspacken das Gerät auf eventuelle Transportschäden. Wenn Sie Beschädigungen bemerken, schließen Sie das Gerät nicht an den Stromkreis an, sondern wenden Sie sich an Ihren Händler.
-
Page 5: Technische Daten
GERÄTEÜBERSICHT 10. Oberes Scharnier 1. Gehäuse 9. Türdichtung 2. Ablagebrett 8. Griff 3. Bedienfeld 4. Abdeckung 7. Tür 5. Höhen- verstellbarer Fuß 6. Unteres Scharnier Hinweis: Ablagebretter, Türrahmen, Griff und andere Zubehörteile können je nach Modell und Zusammenstellung abweichen. Die Abbildungen in dieser Anleitung dienen lediglich der Veranschaulichung. Das von Ihnen erworbene Gerät entspricht gegebenenfalls nicht exakt dem hier abgebildeten Modell. -
Page 6: Zusammenbau
ZUSAMMENBAU Montage des Türgriffs und Wechseln des Türanschlags 1. Bringen Sie den Griff am Türrahmen des Geräts an. Der Griff wird separat verpackt, zusammen mit den passenden Schrauben geliefert. (1) Legen Sie die zwei kleinen Löcher auf der Innenseite des Türrahmens frei, indem Sie die Abdichtung behutsam herausziehen. - Page 7 Montieren Sie das untere Türscharnier an der linken unteren Ecke. Drehen Sie Tür um 180°. Legen Sie die Tür über das untere Scharnier und führen Sie sie ein. Montieren Sie das Türscharnier an der linken oberen Ecke und schrauben Sie die Flanschschrauben fest.
-
Page 8: Installation
INSTALLATION Standort • Neigen Sie das Gerät beim Aufstellen nicht um mehr als 45°. • Das Gerät ist auf eine ebene, feste und trockene Oberfläche oder eine vergleichbare nicht brennbare Unterlage zu platzieren. Verwenden Sie nicht die Schaumpolsterung aus der Verpackung. •... -
Page 9: Bedienfeld
BEDIENFELD Hinweis: Die Tasten funktionieren nicht, wenn sie gesperrt sind. Stellen Sie sicher, dass sie entsperrt sind. AN/AUS: 1. Halten Sie die Taste drei Sekunden lang gedrückt und das Gerät schaltet ab in den Standby-Betrieb. 2. Halten Sie die Taste weitere drei Sekunden lang gedrückt und das Gerät schaltet sich erneut ein. - Page 10 Kindersicherung (Tastenkombination): Sperren: Halten Sie zum Sperren beide Tasten gleichzeitig drei Sekunden lang gedrückt. Entsperren: Halten Sie zum Entsperren beide Tasten gleichzeitig drei Sekunden lang gedrückt. Anzeigewechsel Fahrenheit/Celsius: Durch Drücken dieser Taste wechselt die Temperaturanzeige zwischen Fahrenheit und Celsius. Hinweis: Sowohl für die untere als auch für die obere Zone kann die Kühltemperatur auf Werte zwischen 5 und 22°C eingestellt werden.
- Page 11 • Die Ablagebretter sind darauf ausgelegt, eine oder zwei Lagen von Flaschen zu tragen. Es wird nicht empfohlen, mehr als zwei Lagen Flaschen auf einem Brett unterzubringen. • Bretter mit Rollschienen können teilweise ausgezogen werden, um die Handhabung zu erleichtern. •...
-
Page 12: Fehlerbehebung
Ausfall der Stromversorgung • Die meisten Stromausfälle lassen sich innerhalb kurzer Zeit beheben. Um Ihre Weine bei Stromausfall zu schützen, vermeiden Sie möglichst das Öffnen der Tür. Bei längerem Ausfall der Stromversorgung ergreifen Sie die notwendigen Maßnahmen zum Schutz Ihrer Weine. Außerbetriebnahme •... - Page 13 Problem Mögliche Ursache und Lösungsansatz Der Kompressor arbeitet Wenn das Gerät nicht erwartungsgemäß kühlt, ununterbrochen. wenden Sie sich an den Kundendienst. Nach längerer Verwendung kann die Türdichtung verhärtet und teilweise verzogen sein. Die Tür dichtet nicht vollständig Erwärmen Sie die Türdichtung mit einem Föhn oder heißen Handtuch.
-
Page 14: Hinweise Zur Entsorgung
HINWEISE ZUR ENTSORGUNG Befindet sich die linke Abbildung (durchgestrichene Mülltonne auf Rädern) auf dem Produkt, gilt die Europäische Richtlinie 2012/19/EU. Diese Produkte dürfen nicht mit dem normalen Hausmüll entsorgt werden. Informieren Sie sich über die örtlichen Regelungen zur getrennten Sammlung elektrischer und elektronischer Gerätschaften. - Page 15 Dear Customer, Congratulations on purchasing this device. Please read the following instructions carefully and follow them to prevent possible damages. We assume no liability for damage caused by disregard of the instructions and improper use. Scan the QR code to get access to the latest user manual and more product information.
-
Page 16: Safety Instructions
SAFETY INSTRUCTIONS • Do not disassemble, modify or any other way alter the device. Any of the aforementioned actions shall be construed as an alteration as set forth herein. • After unpacking, check the device for possible damage incurred during transport. If you notice any damage, do not connect the device to the circuit, but contact your dealer. -
Page 17: Device Description
DEVICE DESCRIPTION 10. Upper hinge 1. Housing 9. Door seal 2. Shelf 8. Handle 3. Display panel 4. Cover board 7. Door 5. Adjustable foot 6. Lower hinge Note: Shelves, door frame, handle and other accessories could be different according to different models and configuration. All photos in this manual are for reference. The appliance you buy might not be exactly the same as shown here. Please refer to the actual product. -
Page 18: Assembly
ASSEMBLY Fixing the handle and reversing the door of the wine cooler 1. Install handle to the door frame of the appliance. The handle is delivered in a separated package along with the required screws. (1) Reveal two small holes on the inner side of the door frame by lightly pulling the door seal out. - Page 19 Fit the lower door hinge to the down left corner. Reverse the door by 180°. Put the door above the lower hinge and insert in. Fit the door hinge to the up left corner and screw the flange screws. Put on the door hinge cover.
-
Page 20: Installation
INSTALLATION Position • Do not turn the appliance more than 45°when moving it into position. • The appliance must be put on a flat, firm & dry floor or similar noncombustible pad; do not use the foam pad used in the packaging. •... -
Page 21: Control Panel
CONTROL PANEL Note: No buttons will work when locked. Make sure to unlock them first. ON/OFF: 1. Hold down the button for 3 seconds and it will power down and go into stand-by mode. 2. Hold down the button for another 3 seconds to switch the appliance back on. - Page 22 Child Lock (Combination key): Lock: hold both buttons down at the same time for 3 seconds to lock. Unlock: hold both buttons down at the same time for 3 seconds to unlock. Fahrenheit/Celsius display interchange: Switch the temperature display between Fahrenheit and Celsius by pressing the button.
-
Page 23: Maintenance And Cleaning
• Each shelf is designed to hold 1 or 2 layers of wine bottles. Placing more than 2 layers of bottles on one shelf is not recommended. • Each shelf with a sliding roller can partly pull out to easily store wine bottles. •... -
Page 24: Troubleshooting
Power cut • Most power cuts can be resolved within a short time. To protect your wines during a power cut, avoid opening the door as much as possible. During longer power cuts, take the necessary measures to protect your wine. Out of service for long time •... - Page 25 Problem Possible cause and suggested solution After extended use, the door seal might become stiff and partially distorted. Heat the door seal with a hair dryer or The door does not seal tightly. a hot towel. The door seal will soften and the door can be closed.
-
Page 26: Hints On Disposal
HINTS ON DISPOSAL According to the European waste regulation 2012/19/EU this symbol on the product or on its packaging indicates that this product may not be treated as household waste. Instead it should be taken to the appropriate collection point for the recycling of electrical and electronic equipment. - Page 27 Chère cliente, cher client, Toutes nos félicitations pour l’acquisition de ce nouvel appareil. Veuillez lire attentivement et respecter les instructions de ce mode d’emploi afin d’éviter d’éventuels dommages. Nous ne saurions être tenus pour responsables des dommages dus au non-respect des consignes et à...
-
Page 28: Consignes De Sécurité
CONSIGNES DE SÉCURITÉ • Ne modifi ez pas l’appareil et n’essayez pas de le réparer vous-même. Le fabricant ne saurait être tenu pour responsable des dommages dus au non-respect des consignes de sécurité et à la mauvaise utilisation de l’appareil. •... -
Page 29: Aperçu De L'appareil
APERÇU DE L’ APPAREIL 10. Charnière supérieure 1. Boîtier 9. Joint de porte 2. Plateau 3. Panneau de 8. Poignée commande 4. Cache 5. Pied 7. Porte réglables en hauteur 6. Charnière inférieure Remarque : les plateaux supports, cadres de porte, poignée et autres accessoires peuvent varier en fonction des modèles. Les illustrations de ce mode d‘emploi sont à titre indicatif seulement. -
Page 30: Assemblage
ASSEMBLAGE Montage de la poignée de porte et modification du sens d‘ouverture 1. Fixez la poignée au cadre de la porte de l‘appareil. La poignée est emballée séparément, fournie avec les vis adaptées. (1) Découvrez les deux petits trous à l‘intérieur du cadre de la porte en tirant doucement sur le joint. - Page 31 Montez la charnière inférieure de la porte dans le coin inférieur gauche. Tournez la porte de 180 degrés. Placez la porte sur la charnière inférieure et insérez-la. Montez la charnière de la porte dans le coin supérieur gauche et serrez les vis de la bride.
-
Page 32: Installation
INSTALLATION Emplacement • N‘inclinez pas l‘appareil à plus de 45° lors de la mise en place. • L‘appareil doit être placé sur une surface plane, ferme et sèche ou sur une surface ininflammable équivalente. N‘utilisez pas le rembourrage en mousse de l‘emballage. -
Page 33: Panneau De Commande
PANNEAU DE COMMANDE Remarque : les touches ne peuvent pas fonctionner lorsqu‘elles sont verrouillées. Vérifiez qu‘elles sont déverrouillées. MARCHE/ARRÊT : 1. Appuyez sur le bouton pendant trois secondes, l‘appareil passe en mode veille. 2. Appuyez sur le bouton et maintenez-le pendant 3 secondes pour rallumer l‘appareil. - Page 34 Verrouillage parental (combinaison de touches) : Verrouillage : Pour verrouiller, appuyez simultanément sur les deux boutons pendant trois secondes. Déverrouillage : Pour déverrouiller, appuyez simultanément sur les deux boutons pendant trois secondes. Modification d‘affichage Fahrenheit/Celsius : Appuyez sur ce bouton pour changer l’unité d‘affichage de la température entre Fahrenheit et Celsius.
-
Page 35: Maintenance Et Nettoyage
• Les plateaux de stockage sont conçus pour supporter une ou deux rangées de bouteilles. Il n‘est pas recommandé de placer plus de deux rangées de bouteilles sur un plateau. • Les plateaux avec glissières peuvent être partiellement retirés pour faciliter la manipulation. -
Page 36: Résolution Des Problèmes
Coupure de courant • La plupart des pannes de courant sont résolues rapidement. Pour protéger vos vins en cas de panne de courant, évitez d‘ouvrir la porte si possible. En cas de panne de courant prolongée, prenez les mesures nécessaires pour protéger vos vins. Mise hors tension •... - Page 37 Problème Cause possible et solution Après une utilisation prolongée, il se peut que le joint de la porte soit durci et partiellement déformé. La porte n'est pas parfaitement étanche. Chauffez le joint de la porte avec un sèche-cheveux ou une serviette chaude. Le joint se ramollit et la porte se ferme.
-
Page 38: Informations Sur Le Recyclage
INFORMATIONS SUR LE RECYCLAGE Vous trouverez sur le produit l’image ci-contre (une poubelle sur roues, barrée d‘une croix), ce qui indique que le produit se trouve soumis à la directive européenne 2012/19/UE. Renseignez- vous sur les dispositions en vigueur dans votre région concernant la collecte séparée des appareils électriques et électroniques. - Page 39 Estimado cliente: Le felicitamos por la adquisición de este producto. Lea atentamente las siguientes instrucciones y sígalas para evitar posibles daños. No asumimos ninguna responsabilidad por los daños causados por el incumplimiento de las instrucciones y el uso inadecuado. Escanee el siguiente código QR para obtener acceso a la última guía del usuario y más información sobre el producto.
-
Page 40: Instrucciones De Seguridad
INSTRUCCIONES DE SEGURIDAD • No modifi que ni intente reparar el dispositivo usted mismo. No asumimos ninguna responsabilidad por los daños que resulten del incumplimiento de las instrucciones y del uso inadecuado. • Después de desembalar el aparato, compruebe si se han producido daños durante el transporte. -
Page 41: Descripción General Del Dispositivo
DESCRIPCIÓN GENERAL DEL DISPOSITIVO 10. Bisagra superior 1. Carcasa 9. Burlete para puertas 2. Bandeja 3. Panel de 8. Mango control 4. Cubierta 7. Puerta 5. Pies regulables 6. Bisagra inferior Nota: Las bandejas, el marco de la puerta, el mango y otros accesorios pueden variar según el modelo y la configuración. Las ilustraciones de este manual son sólo para fines ilustrativos. -
Page 42: Montaje
MONTAJE Montaje de la manija de la puerta y cambio de la bisagra de la puerta 1. Fije la manija al marco de la puerta de la unidad El mango es empaquetado por separado y se suministra con los tornillos apropiados. Pone al descubierto los dos orificios pequeños en el interior del marco de la puerta tirando suavemente de la junta. - Page 43 Monte la bisagra inferior de la puerta en la esquina inferior izquierda. Gire la puerta 180 grados. Coloque la puerta sobre la bisagra inferior e insértela. Monte la bisagra de la puerta en la esquina superior izquierda y atornille la bisagra de la puerta.
-
Page 44: Instalación
INSTALACIÓN Emplazamiento • No incline la unidad más de 45° cuando la situe. • El dispositivo debe ser puesto sobre una superficie plana, firme y seca o una base no inflamable comparable. No utilice el acolchado de espuma del embalaje. •... -
Page 45: Panel De Control
PANEL DE CONTROL Nota: Las teclas no funcionan si están bloqueadas. Asegúrese de que estén desbloqueados. ON/OFF: 1. Mantenga pulsado el botón durante tres segundos y la unidad cambiará al modo de espera. 2. Mantenga pulsado el botón durante otros tres segundos y la unidad volverá... - Page 46 Control parental (combinación de teclas): Bloqueo: Mantenga pulsados ambos botones simultáneamente durante tres segundos para bloquear. Desbloquear: Mantenga pulsados ambos botones simultáneamente durante tres segundos para desbloquear. Cambiar la visualización Fahrenheit/Celsius: Presionando esta tecla se cambia la visualización de la temperatura entre Fahrenheit y Celsius.
-
Page 47: Mantenimiento Y Limpieza
• Los estantes están diseñados para almacenar una o dos capas de botellas. No se recomienda colocar más de dos capas de botellas en una sola bandeja. • Las bandejas sobre correderas de rodillos pueden ser extraídas parcialmente para facilitar su manejo. •... - Page 48 Corte eléctrico • La mayoría de los cortes de energía pueden ser reparados en poco tiempo. Para proteger sus vinos en caso de un corte de energía, evite abrir la puerta si es posible. En caso de un corte de corriente prolongado, tome las medidas necesarias para proteger sus vinos.
- Page 49 Problema Posibles causas y soluciones Después de un uso largo, la junta de la puerta puede estar endurecida y parcialmente deformada. La puerta no sella completamente. Caliente el sello de la puerta con un secador de pelo o una toalla caliente. La junta se vuelve más blanda y la puerta cierra bien.
-
Page 50: Retirada Del Aparato
RETIRADA DEL APARATO Si el aparato lleva adherida la ilustración de la izquierda (el contenedor de basura tachado) entonces rige la normativa europea, directiva 2012/19/UE. Este producto no debe arrojarse a un contenedor de basura común. Infórmese sobre las leyes territoriales que regulan la recogida separada de aparatos eléctricos y electrónicos. - Page 51 Gentile cliente, La ringraziamo per aver acquistato il dispositivo. La preghiamo di leggere attentamente le seguenti istruzioni per l’uso e di seguirle per evitare possibili danni. Non ci assumiamo alcuna responsabilità per danni scaturiti da una mancata osservazione delle avvertenze di sicurezza e da un uso improprio del dispositivo.
-
Page 52: Avvertenze Di Sicurezza
AVVERTENZE DI SICUREZZA • Non modifi care il dispositivo e non cercare di ripararlo autonomamente. Non ci assumiamo alcuna responsabilità per danni causati dall‘inosservanza delle istruzioni e dall‘uso improprio. • Dopo aver disimballato, verifi care se ci sono stati danni al dispositivo durante il trasporto. -
Page 53: Panoramica Del Dispositivo
PANORAMICA DEL DISPOSITIVO 10. Cerniera superiore 1. Alloggiamento 9. Guarnizione sportello 2. Ripiano 3. Pannello di 8. Impugnatura controllo 4. Coperchio 7. Sportello 5. Piede regolabile 6. Cerniera inferiore Nota: i ripiani, i telai, le maniglie e altri accessori possono variare in base al modello e alla composizione. Le illustrazioni in questo manuale sono solo a scopo illustrativo. -
Page 54: Montaggio
MONTAGGIO Montare l´impugnatura e cambiare il lato di apertura dello sportello 1. Assemblare l´impugnatura al telaio dello sportello. La impugnatura è imballata separatamente, le viti appropriate sono fornite in dotazione. Scoprire i due piccoli fori all‘interno del telaio dello sportello tirando delicatamente la guarnizione. - Page 55 Montare la cerniera dello sportello inferiore nell‘angolo in basso a sinistra. Ruotare lo sportello di 180 gradi. Posizionare lo sportello sopra la cerniera inferiore e inserirlo. Montare la cerniera dello sportello nell‘angolo superiore sinistro e avvitare la cerniera dello sportello. Serrare bene le viti a flangia. Inserire il coperchio della cerniera dello sportello.
-
Page 56: Installazione
INSTALLAZIONE Posizione • Non inclinare il dispositivo più di 45 ° quando lo si installa. • Il dispositivo deve essere posizionato su una superficie piana, solida e asciutta o su una superficie non infiammabile comparabile. Non utilizzare l‘imbottitura in schiuma dalla confezione. •... -
Page 57: Pannello Di Controllo
PANNELLO DI CONTROLLO Nota: i pulsanti non funzionano se bloccati. Assicurarsi che siano sbloccati. ON / OFF: 1. Tenere premuto il pulsante per tre secondi e l‘unità passerà in modalità standby. 2. Premere e tenere premuto il pulsante per altri 3 secondi e l‘unità si accenderà... - Page 58 Blocco bambini (combinazione di tasti): Bloccare: tenere premuti entrambi i tasti contemporaneamente per tre secondi per bloccarli. Sbloccare: per sbloccare, premere entrambi i pulsanti contemporaneamente per tre secondi. Cambio di visualizzazione Fahrenheit / Celsius: Premendo questo pulsante si modifica la visualizzazione della temperatura tra Fahrenheit e Celsius.
-
Page 59: Pulizia E Manutenzione
• I ripiani sono progettati per reggere uno o due strati di bottiglie. Non è consigliabile posizionare più di due strati di bottiglie su un ripiano. • I ripiani con le guide possono essere parzialmente estratti per maneggiarli facilmente. • Aprire completamente lo sportello prima di estrarre i ripiani. •... - Page 60 Guasto dell‘alimentazione elettrica • La maggior parte dei guasti di alimentazione può essere risolta in breve tempo. Per proteggere i tuoi vini in caso di interruzione di corrente, evitare di aprire lo sportello, se possibile. In caso di interruzione prolungata dell‘alimentazione, adottare le misure necessarie per proteggere i propri vini.
- Page 61 Problema Possibile causa e soluzione Dopo un uso prolungato, la guarnizione dello sportello potrebbe essere indurita e parzialmente distorta. Lo sportello non si chiude Riscaldare la guarnizione dello sportello completamente. con un asciugacapelli o un asciugamano caldo. La guarnizione si ammorbidisce e lo sportello si chiude.
-
Page 62: Smaltimento
SMALTIMENTO Se sul prodotto è presente la figura a sinistra (il cassonetto mobile sbarrato), si applica la direttiva europea 2012/19/UE. Questi prodotti non possono essere smaltiti con i rifiuti normali. Informarsi sulle disposizioni vigenti sulla raccolta separata di dispositivi elettrici ed elettronici. Non smaltire i vecchi dispositivi con i rifiuti domestici.
Need help?
Do you have a question about the Vinamour and is the answer not in the manual?
Questions and answers