Table of Contents
Advertisement
Quick Links
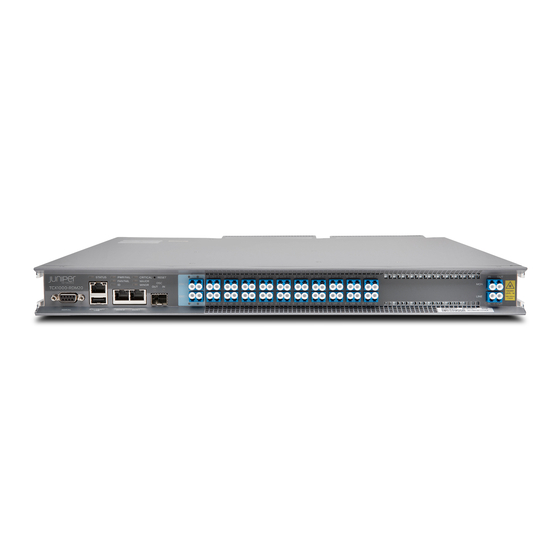
TCX1000 Programmable ROADM
Quick Start Guide
December 2018
Part Number: 530-077883
Revision 03
Contents
Copyright © 2018, Juniper Networks, Inc.
This document describes how to install and connect the Juniper Networks
Programmable reconfigurable optical add/drop multiplexer (ROADM).
About This Quick Start Guide . . . . . . . . . . . . . . . . . . . . . . . . . . . . . . . . . . . . . . . . . . 2
Step 1: Prepare Your Site for the TCX1000-RDM20 . . . . . . . . . . . . . . . . . . . . . . . . . 2
Step 2: Unpack the TCX1000-RDM20 . . . . . . . . . . . . . . . . . . . . . . . . . . . . . . . . . . . 3
Step 3: Mount the TCX1000-RDM20 . . . . . . . . . . . . . . . . . . . . . . . . . . . . . . . . . . . . 3
Step 4: Connect the TCX1000-RDM20 Grounding Cable . . . . . . . . . . . . . . . . . . . . 5
Step 5: Connect the TCX1000-RDM20 to a Management Console . . . . . . . . . . . . 6
Step 6: Power On the TCX1000-RDM20 . . . . . . . . . . . . . . . . . . . . . . . . . . . . . . . . . . 7
Connecting AC Power to the TCX1000-RDM20 . . . . . . . . . . . . . . . . . . . . . . . . 8
Connecting DC Power to the TCX1000-RDM20 . . . . . . . . . . . . . . . . . . . . . . . . 9
Step 7: Install the OSC SFP . . . . . . . . . . . . . . . . . . . . . . . . . . . . . . . . . . . . . . . . . . . . 12
Step 8 Making a Craft Ethernet Port CLI Connection . . . . . . . . . . . . . . . . . . . . . . . 14
Step 9: Perform the Initial Configuration . . . . . . . . . . . . . . . . . . . . . . . . . . . . . . . . . 15
Step 10: Enabling OSC Forwarding on the TCX1000-RDM20 . . . . . . . . . . . . . . . . 18
Safety Warnings Summary . . . . . . . . . . . . . . . . . . . . . . . . . . . . . . . . . . . . . . . . . . . 20
Power Cable Warning (Japanese) . . . . . . . . . . . . . . . . . . . . . . . . . . . . . . . . . . . . . . 21
TCX1000 Programmable ROADM Compliance Statements for NEBS . . . . . . . . . . 21
Compliance Statements for EMC Requirements . . . . . . . . . . . . . . . . . . . . . . . . . . 22
Canada . . . . . . . . . . . . . . . . . . . . . . . . . . . . . . . . . . . . . . . . . . . . . . . . . . . . . . . 22
European Community . . . . . . . . . . . . . . . . . . . . . . . . . . . . . . . . . . . . . . . . . . . . 22
Israel . . . . . . . . . . . . . . . . . . . . . . . . . . . . . . . . . . . . . . . . . . . . . . . . . . . . . . . . . 22
Japan . . . . . . . . . . . . . . . . . . . . . . . . . . . . . . . . . . . . . . . . . . . . . . . . . . . . . . . . . 22
United States . . . . . . . . . . . . . . . . . . . . . . . . . . . . . . . . . . . . . . . . . . . . . . . . . . . 22
TCX1000 Documentation and Release Notes . . . . . . . . . . . . . . . . . . . . . . . . . . . . 23
Requesting Technical Support . . . . . . . . . . . . . . . . . . . . . . . . . . . . . . . . . . . . . . . . . 23
Self-Help Online Tools and Resources . . . . . . . . . . . . . . . . . . . . . . . . . . . . . . . 23
Opening a Case with JTAC . . . . . . . . . . . . . . . . . . . . . . . . . . . . . . . . . . . . . . . . 24
Revision History . . . . . . . . . . . . . . . . . . . . . . . . . . . . . . . . . . . . . . . . . . . . . . . . . . . . 25
®
TCX1000
1
Advertisement
Table of Contents

Subscribe to Our Youtube Channel
Related Manuals for Juniper TCX1000 Series


Summary of Contents for Juniper TCX1000 Series
-
Page 1: Table Of Contents
December 2018 Part Number: 530-077883 Revision 03 ® This document describes how to install and connect the Juniper Networks TCX1000 Programmable reconfigurable optical add/drop multiplexer (ROADM). Contents About This Quick Start Guide ......... . 2 Step 1: Prepare Your Site for the TCX1000-RDM20 . -
Page 2: About This Quick Start Guide
TCX1000 Programmable ROADM Quick Start Guide About This Quick Start Guide This Quick Start Guide contains information you need to install and set up the Juniper Networks TCX1000-RDM20 Programmable ROADM. For complete installation instructions, see the TCX1000 Programmable ROADM Hardware Guide at https://www.juniper.net/documentation/... -
Page 3: Step 2: Unpack The Tcx1000-Rdm20
Position the TCX1000-RDM20 so the FRUs are next to the hot aisle. Have one person grasp both sides of the chassis, lift it, and position it in the rack so that the front bracket is aligned with the rack holes. Copyright © 2018, Juniper Networks, Inc. - Page 4 Install the fiber management clip on the front of the chassis, on the right or left hand side, as required. See Figure 2 on page Figure 2: Installing the Fiber Management Clip on the TCX1000-RDM20 Copyright © 2018, Juniper Networks, Inc.
-
Page 5: Step 4: Connect The Tcx1000-Rdm20 Grounding Cable
Electrostatic discharge (ESD) grounding wrist strap (not provided). You ground the TCX1000-RDM20 by attaching a grounding cable to the chassis. See the TCX1000-RDM20 Chassis Grounding Cable and Lug Specifications in the TCX1000 Programmable ROADM Hardware Guide. Copyright © 2018, Juniper Networks, Inc. -
Page 6: Step 5: Connect The Tcx1000-Rdm20 To A Management Console
The TCX1000-RDM20 has a console port (labeled ) with a DB-9 connector. SERIAL Ensure that you have an RJ-45 to DB-9 rollover cable available. Copyright © 2018, Juniper Networks, Inc. -
Page 7: Step 6: Power On The Tcx1000-Rdm20
We recommend the fuse or circuit protector value rated at 10 A for both the TCX1000-RDM20-AC and the TCX1000-RDM20-DC. Connecting AC Power to the TCX1000-RDM20 on page 8 Connecting DC Power to the TCX1000-RDM20 on page 9 Copyright © 2018, Juniper Networks, Inc. -
Page 8: Connecting Ac Power To The Tcx1000-Rdm20
Do not remove the power supply until you have a replacement power supply ready; power supplies must be installed in the TCX1000-RDM20 to ensure proper airflow. CAUTION: Replace a failed power supply with a new power supply within five minutes of removal to prevent chassis overheating. Copyright © 2018, Juniper Networks, Inc. -
Page 9: Connecting Dc Power To The Tcx1000-Rdm20
DC power source at your site determines the color coding for the leads on the power cables that attach to the terminals on each power supply. Ensure that you have the following parts and tools available: ESD grounding strap. Copyright © 2018, Juniper Networks, Inc. - Page 10 DC connector after installation. The cable must be terminated with the supplied ring lug (Panduit PN14-8R-C). Insert the lug into the terminal block. See Figure 7 on page Figure 7: Attaching the Lug and Cable Copyright © 2018, Juniper Networks, Inc.
- Page 11 (see Removing a Power Supply from a TCX1000-RDM20 in the TCX1000 Programmable ROADM Hardware Guide). Do not remove the power supply until you have a replacement power supply ready; the power supplies must be installed in the TCX1000-RDM20 to ensure proper airflow. Copyright © 2018, Juniper Networks, Inc.
-
Page 12: Step 7: Install The Osc Sfp
Do not look directly into a fiber-optic connector or into the ends of fiber-optic cables. Fiber-optic transceivers and fiber-optic cables connected to transceivers emit laser light that can damage your eyes. Remove the rubber safety cap from the transceiver. Copyright © 2018, Juniper Networks, Inc. - Page 13 LC duplex fiber patch cord to connect SFP Rx port to the OSC 0 OUT port and the SFP Tx port to the OSC 0 IN port. See Figure 11 on page Figure 11: Connecting the Ports Copyright © 2018, Juniper Networks, Inc.
-
Page 14: Step 8 Making A Craft Ethernet Port Cli Connection
Select SSH as the connection type. Click Open. Enter a valid user ID and password. A connection with the node is established. NOTE: The default user ID is superuser and the default password is Sup%9User. Copyright © 2018, Juniper Networks, Inc. -
Page 15: Step 9: Perform The Initial Configuration
Once you have connected to the serial port (see Connect the TCX1000-RDM20 to a Management Console), enter these commands from the CLI to configure the IP address for the DCN 0 and DCN 1 ports: Enter the user ID: superuser Enter the password: <password> Copyright © 2018, Juniper Networks, Inc. - Page 16 64 address: :: prefix: 0 gateway: :: enabled: true STATUS 0 OK Enter the command to disable DHCP (if ip-service config ipv4 enable-dhcp false currently enabled). user@host# ip-service config ipv4 enable-dhcp false Copyright © 2018, Juniper Networks, Inc.
- Page 17 CMD_RESPONSE 2 A restart is required for IP configuration changes to take effect. STATUS 0 OK Enter the restart warm command to apply the changes by initiating a warm restart of the TCX1000-RDM20. user@host#restart warm Copyright © 2018, Juniper Networks, Inc.
-
Page 18: Step 10: Enabling Osc Forwarding On The Tcx1000-Rdm20
TCX1000-RDM20 that is on a different IP subnet. The TCX1000-RDM20 line port is connected to a TCX1000-RDM20 without DCN access. To enable OSC forwarding on the TCX1000-RDM20 from the CLI: Enter the user ID:superuser. Enter the password: <password>. Copyright © 2018, Juniper Networks, Inc. - Page 19 TCX1000-RDM20. user@host#restart warm CMD_STATUS 0 OK CMD_RESPONSE 1 STATUS 0 OK CRestartMgrIf::command3RestartRequestType - rBankSelected=0, rType=2, rReason=2 CMD_RESPONSE 1 STATUS 0 OK Copyright © 2018, Juniper Networks, Inc.
-
Page 20: Safety Warnings Summary
Permit only trained and qualified personnel to install or replace TCX1000-RDM20 components. Perform only the procedures described in this Quick Start Guide and the TCX1000 documentation. Other services must be performed only by authorized service personnel. Copyright © 2018, Juniper Networks, Inc. -
Page 21: Power Cable Warning (Japanese)
Power Cable Warning (Japanese) The attached power cable is only for this product. Do not use this cable for another product. Contacting Juniper Networks For technical support, see https://www.juniper.net/support/requesting-support.html TCX1000 Programmable ROADM Compliance Statements for NEBS The equipment is suitable for installation as part of the Common Bonding Network (CBN). -
Page 22: Compliance Statements For Emc Requirements
A digital device, pursuant to Part 15 of the FCC Rules. These limits are designed to provide reasonable protection against harmful interference when the equipment is operated in a commercial environment. This equipment generates, uses, and can radiate radio Copyright © 2018, Juniper Networks, Inc. -
Page 23: Tcx1000 Documentation And Release Notes
TCX1000 Documentation and Release Notes For a list of the complete TCX1000 series documentation including the release notes, https://www.juniper.net/documentation/ ®... -
Page 24: Opening A Case With Jtac
Use the Case Management tool in the CSC at https://www.juniper.net/cm/ Call 1-888-314-JTAC (1-888-314-5822 toll-free in the USA, Canada, and Mexico). For international or direct-dial options in countries without toll-free numbers, visit us at https://www.juniper.net/support/requesting-support.html Copyright © 2018, Juniper Networks, Inc. -
Page 25: Revision History
Copyright © 2018, Juniper Networks, Inc. All rights reserved. Juniper Networks, the Juniper Networks logo, Juniper, and Junos are registered trademarks of Juniper Networks, Inc. and/or its affiliates in the United States and other countries. All other trademarks may be property of their respective owners.
Need help?
Do you have a question about the TCX1000 Series and is the answer not in the manual?
Questions and answers