
Subscribe to Our Youtube Channel
Related Manuals for Honic HN-SD500


Summary of Contents for Honic HN-SD500
- Page 1 USER MANUAL HN-SD500 5MP AHD/TVI, 4MP CVI, 960H Hybrid Waterproof Camera Customer Service: s e r v i c e @ h o n i c t e c h . c o m Tech Support: s u p p o r t @ h o n i c t e c h . c o m...
-
Page 2: Important Notes
Important Notes If there is ANY QUESTION of the camera, please contact us, EACH camera has been tested before shipping. Power supply, coaxial video cable and DVR are NOT INCLUDED but REQUIRED. Default mode: 960H (CVBS) video format. Firstly confirm what resolution and frame rate your DVR support, for example, if your DVR support max 5MP TVI 12.5fps, then press OSD joystick, the monitor will show On... -
Page 3: Product Description
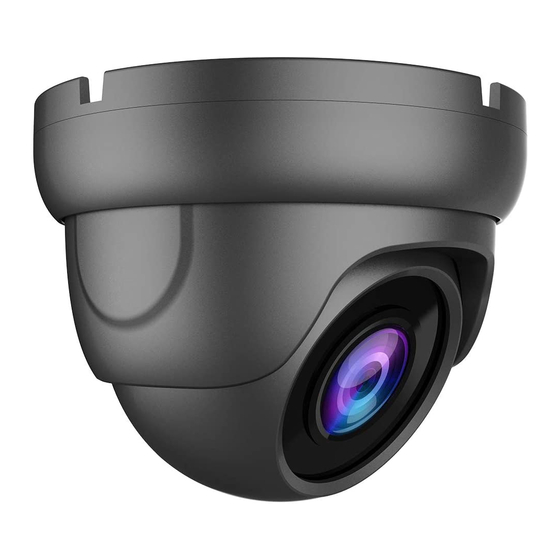
Please read this user manual carefully to ensure proper use of the product. Product Description The HN-SD500 is a high-definition camera designed around a 1/2.5" Color 5 megapixel CMOS image sensor, 14µ x 18pcs IR LEDs providing infrared capability up to 65 feet, and a 2.8mm... -
Page 4: Notice Before Using
Notice Before Using Default Mode: 960H CVBS Video Output. Make sure the camera, DVR, monitor are all well connected. Power on all the device. joystick, then on screen menu will show on monitor, Press OSD control the joystick to go to VIDEO SETTING. - Page 5 to go to the sub menu of Press OSD joystick down again VIDEO SETTING. the video mode your DVR support. Switch to the resolution and frame rate your DVR support. Choose APPLY&REBOOT. Then NOTE: If you accidentally choose the wrong video mode or frame rates, there may be no signal shows on monitor, please power off and power on the camera again, hold OSD joystick left for 5 seconds, then the camera will be switched...
- Page 6 Ensure that all accessories are removed from the container before discarding packing material. Package includes 1x dome camera 4x mounting screws 4x screw anchors 1x user manual 1x drill template 1x Allen wrench Mechanical Inspection Inspect the front and rear of the equipment for shipping damage.
- Page 7 (ii) To help ensure the camera's life and proper operation do not point the camera towards the sun or strong light. (iii) Do not install the camera in an environment where the temperature is too high or too low, recommended operating temperature is 14F ~ 122F.
- Page 8 Camera dimensions (mm) Wiring Connections Connect the power supply's DC plug to the camera's power outlet. (ii) Connect the camera to the DVR with a 75Ω coaxial video cable. (iii) Connect power supply's AC plug to a suitable AC power outlet.
- Page 9 Before connecting the power supply, please check its Note: output voltage (12V).
- Page 10 Installation...
- Page 11 Setup OSD Menu Press the OSD joystick to start the OSD menu in any video output mode, OSD menu will show on display as following: MAIN MENU DAY NIGHT IMAGE ENHANCE VIDEO SETTING LANGUAGE VERSION RESET SAVE-EXIT EXIT OSD Functions and Options MAIN MENU BRIGHTNESS GLOBE...
- Page 12 RETURN PRO (ATW) MODE Gray World RETURN AUTO Day/Night Switch Sensitivity DAY- MODE COLOR NIGHT RETURN CONTRAST AUTO/MANUAL SHARPNESS AUTO/MANUAL IMAGE SATURATE AUTO/MANUAL ENHANC 3DNR AUTO/MANUAL 2DNR AUTO/MANUAL RETURN AHD/CVI/TVI/CVBS...
- Page 13 HD: TVI 8MP 15fps; 8MP 12.5fps; 5MP 20fps; 5MP 12.5fps; 4MP 30fps; 4MP 25fps; 1080P 30fps; 1080P 25fps. HD: AHD 8MP 15fps; 8MP 12.5fps; 5MP VIDEO STANDARD 20fps; 5MP 12.5fps; 4MP SETTING 30fps; 4MP 25fps; 1080P 30fps; 1080P 25fps. HD: CVI 8MP 15fps;...
- Page 14 RETURN ENGLISH, CHINESE, KOREAN, RUSSIAN, etc LANGUA CAMEAR FIRMWARE VERSION VERSION RESET SAVE-EXIT EXIT (Back Light Compensation): In images where a bright light source is behind the subject of interest, the subject would normally appear in silhouette. BLC allows the camera to adjust the exposure of the entire image to properly expose the subject in the foreground.
- Page 15 GAIN NIGHT/DAY: Sensitivity from low to high. Color: Provide color image both at daytime and nighttime. B/W: Provide black and white image both at daytime and nighttime. Contrast is defined as the separation between the Contrast: darkest and brightest areas of the image. Increase contrast and you increase the separation between dark and bright, making shadows darker and highlights brighter.
- Page 16 images and makes images clearer. This type of filter is sometimes confused by motion, resulting in blur trails. Standard: CVBS: PAL and NTSC, its NTSC in USA. HD modes: Choose the right resolution (e.g. 5MP) and frame rates (e.g. 12.5fps) based on what your DVR support.
-
Page 17: Specifications
2. OSD menu—video setting—increase DNR value Side effect: Lower gain value make the image a little darker. High DNR may cause motion blur. Specifications Model No. HN-SD500 Video Output Mode AHD/CVI/TVI/CVBS Camera Image Sensor 1/2.5" CMOS Image Sensor Image Resolution... - Page 18 IR Power On AGC Auto Control Camera Features Day/Night OSD Menu Language White Balance AUTO / MANUAL Gain Control AUTO Noise Reduction Picture Adjustment OSD Support (HD Mode Only) General Housing Metal, IP66 Bracket IR Cut Filter Operation Temperature 14F ~ 122F RH95% Max Storage Temperature -4F ~ 140F RH95% Max Power Source...
-
Page 19: Troubleshooting
*Stated maximum IR range is based on ideal conditions in typical outdoor environment. Actual range and image clarity depends on installation location, viewing area and light reflection / absorption level of object. Trouble Shooting a. Night vision image is very foggy Please check if you have peeled off all the films on lens and panel glass. - Page 20 Check to see if the power supply is experiencing AC ripple, if so a filter may be required. (ii) Determine if the monitor is faulty. (iii) Determine if other peripheral equipment is causing ripple and if so make the necessary adjustments. d.
- Page 21 Q: Will the OSD switch stay in same mode if camera is powered off, or do you have to reset mode each time you power it back up? A: It will stay in the same output mode, do not need to reset each time.
-
Page 22: Warranty And Customer Service
60 days of purchase to receive a FULL REFUND for any reason. 24-Month Warranty for Quality-Related Issues Honic warrants this product against defects in workmanship and material for a period of 2 years from its original purchase date. The warranty does not cover any incidental, accidental or consequential damages arising from the use of or the inability to use this product.
Need help?
Do you have a question about the HN-SD500 and is the answer not in the manual?
Questions and answers