Table of Contents
Advertisement
Quick Links
PUN M
NDX Manual Finger Punch
™
Safety and Operation Manual
For punching thermoplastic belting with and without aramid cords.
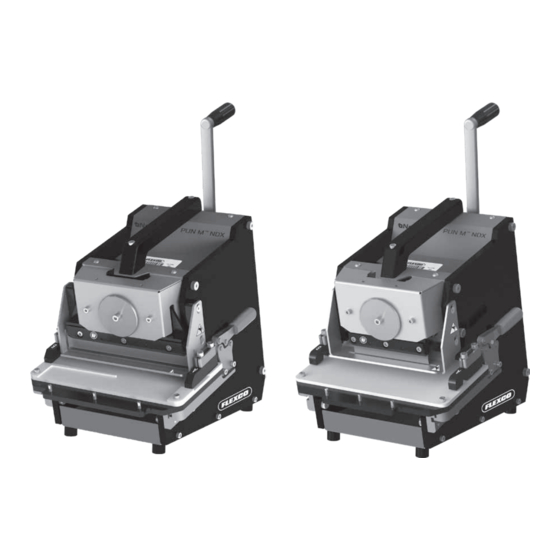
PUN M
NDX 200
PUN M
NDX 114
™
™
WARNING
IMPROPER OR UNSAFE use of this tool can result in serious bodily injury! This manual contains important information
about product function and safety. Please read and understand this manual BEFORE operating the tool. Please keep this
manual available for other users and owners before they use the tool. This manual should be stored in a safe place.
Patent Pending
www.flexco.com
Advertisement
Table of Contents

Related Manuals for Flexco Novitool PUN M NDX Series


Summary of Contents for Flexco Novitool PUN M NDX Series
- Page 1 Please read and understand this manual BEFORE operating the tool. Please keep this manual available for other users and owners before they use the tool. This manual should be stored in a safe place. Patent Pending www.flexco.com...
-
Page 2: Table Of Contents
Table of Contents Main Components ..................3 Description ..................... 3 Tool Specifications ..................4 General Safety Rules ..................5 Operation ....................... 7 Blade Height Adjustment ................14 Guard Height Adjustment ................16 Blade Replacement ..................17 Troubleshooting Guide ................23 Replacement Parts ..................24 www.flexco.com —2—... -
Page 3: Main Components
• Belt clamps are available for various profiled belts (contact Flexco at www.flexco.com for additional belt clamp options.) Single blade: • A single blade punches fingers Guard height plate: •... -
Page 4: Tool Specifications
PUN M NDX REPLACEMENT ™ PARTS AND ACCESSORIES Ordering Item Code Number 114MM-BLADES-3PK 09665 200MM-BLADES-3PK 09666 NYLON-PUNCH-PAD-114MM 09667 NYLON-PUNCH-PAD-200MM 09668 CLAMP-BAR-7MMBLT-SMOOTH-VGD 09701 NOTE: The blade kits (09665 and 09666) include cut-resistance gloves and hex wrenches for blade replacement. www.flexco.com —4—... -
Page 5: General Safety Rules
Finger Punch Series Pun M™ NDX General Safety Rules –Save These Instructions– Stay alert, watch what you are doing, and use Signal words: common sense when operating this punch. Do not use punch while tired or under influence of drugs, “DANGER”... - Page 6 Do not allow others to assist the operator with the machine during use. Always wear cut-resistant safety gloves and safety Do not use anything other than the Flexco glasses when replacing the blade. The blade is razor provided crank handle to drive the punch.
-
Page 7: Operation
Pun M™ NDX Operation: Step 1: Ensure the belt support table is all the way in the forward or rear position. Best practice is to start with table in rear position. Step 1a Table Rear Step 1b Table Front Step 2: Position crank handle in the up position. Pull and twist to engage locking pin in secured position. Step 2a Locking Pin Out Step 2b Locking Pin Secure —7—... - Page 8 When punching a 77 mm wide belt with notched v-guide, clamp B clamp first into last notch of the belt end prior to clamping A clamp. Step 3a Belt Flush to Clamp B Edge Step 3b 45mm Belt Step 3c 77 mm Belt Clamped Into Last Notch Step 3d 77mm Belt www.flexco.com —8—...
- Page 9 Pun M NDX Operation ™ Step 4: Unlock the crank handle by pulling and twisting the locking pin into self-retain position so the crank handle rotates continuously. Step 4a Locking Pin Out Step 4b Locking Pin Self-Retain Position Step 5: Place one hand on the carrying Step 6: If the table is in the rear position, turn the crank handle to hold the punch in position and handle clockwise rotating the crank handle until the belt is...
- Page 10 Step 7: Crank handle should be in the up position. Pull and twist to engage locking pin in secured position. Step 7a Locking Pin Out Step 7b Locking Pin Secure Step 8: Release belt clamps and remove belt. Step 8 Punched Belt Fingers www.flexco.com —10—...
- Page 11 Pun M NDX Operation ™ Step 9: Repeat process loading second belt fabric side up/bottom side up/guided side up from clamp B side to clamp A side of table with belt flush to edge. Once belt is in position clamp both B and A clamps on both sides of support table to secure belt in place.
- Page 12 NOTE: Do not reverse the cranking direction without removing the belt sample as this may cause inconsistent geometry from double punches. Step 11a Belt Flush to Clamp A Edge Step 11b Belt Punched www.flexco.com —12—...
- Page 13 Pun M NDX Operation ™ Step 12: After punch is complete, position crank handle in the up position. Pull and twist to engage locking pin in secured position. Step 12a Locking Pin Out Step 12b Locking Pin Secure Step 13: Release belt clamps and remove belt. NOTE: Periodically inspect punch pad for excessive wear as this can affect punch quality.
-
Page 14: Blade Height Adjustment
Step 1: Position crank handle in the up position. Pull and twist to engage locking pin in secured position. Step 1a Locking Pin Out Step 1b Locking Pin Secure Step 2: With 4 mm hex wrench loosen three screws on front of blade holder. Step 2 Loosen Screws www.flexco.com —14—... - Page 15 Pun M™ NDX Blade Height Adjustments: Step 3: With 3 mm hex wrench adjust two screws on top cover of blade holder. Clockwise rotation lowers the blade to increase cutting force. Counterclockwise raises the blade to decrease cutting force. Start with one flat turn of the hex wrench adjusting both ends equally.
-
Page 16: Guard Height Adjustment
Step 2: With 3 mm hex wrench, loosen the two screws on guard height plates on both sides of frame. Adjust the plates to be at equal height either raising or lowering the guard. Tighten screws when located in desired position. Step 2 Guard Height Plate www.flexco.com —16—... -
Page 17: Blade Replacement
Pun M™ NDX Blade Replacement: WARNING Use safety equipment. Always wear eye protection, cut-resistance gloves during maintenance, non- skid safety shoes, and adhere to other safety standards of the facility where operating the punch. Step 1: Ensure belt support table is positioned so there is sufficient access to the three blade pins at front of table. - Page 18 Step 3: With a 4 mm hex wrench loosen and remove the three screws holding the blade holder to the punch. Step 3 Loosen Screws Step 4: Remove the blade holder with the blade from the punch. Step 4 Remove Blade Holder www.flexco.com —18—...
- Page 19 Pun M NDX Blade Replacement ™ Step 5: Place blade and blade holder upside down over pins on the front of the belt support table. Step 5 Blade Holder on Pins Step 6: Loosen two red thumbscrews on rear of blade. Step 6 Loosen Thumbscrews —19—...
- Page 20 Pun M NDX Blade Replacement ™ Step 7: Carefully remove the old blade. Step 7 Remove Blade Step 8: Insert new blade up against the ridge centering the blade on the blade holder. Step 8 Insert Blade www.flexco.com —20—...
- Page 21 Pun M NDX Blade Replacement ™ Step 9: Tighten two red thumbscrews on rear of blade. Step 9 Tighten Thumbscrews Step 10: Remove protective blade cover. Step 10 Remove Protective Cover —21—...
- Page 22 Step 11: Position blade holder against shelf. With 4 mm hex wrench, secure blade holder to punch with three screws. NOTE: Ensure blade lies even across punch pad. NOTE: Ensure blade screws are tight as loose screws may cause blade to pull out from tool during use. Step 11a Postion Blade Holder Step 11b Tighten Screws www.flexco.com —22—...
-
Page 23: Troubleshooting Guide
Troubleshooting Guide Problem Issue Possible Solution Belt not taut Ensure belt is flat and taut Punching fabric/bottom side down Punch fabric/bottom side up Belt not clamped well Ensure both clamps are secure Inconsistent finger geometry Belt guard height not correct Properly adjust belt guard height Blade may be worn Replace blade... -
Page 24: Replacement Parts
NOTE: The blade kits (09665 and 09666) include cut-resistance gloves and hex wrenches for blade replacement. 09665 Blade Kit, 114 mm 09666 Blade Kit, 200 mm 09667 Nylon Punch Pad, 114 mm 09668 Nylon Punch Pad, 200 mm Patent Pending www.flexco.com —24—... - Page 28 2525 Wisconsin Avenue • Downers Grove, IL 60515-4200 • USA Tel: (630) 971-0150 • Fax: (630) 971-1180 • E-mail: info@flexco.com Visit www.flexco.0com for other Flexco locations and products. ©2020 Flexible Steel Lacing Company. 08/25/20. For reorder: X6223...
Need help?
Do you have a question about the Novitool PUN M NDX Series and is the answer not in the manual?
Questions and answers