Table of Contents
Advertisement
Quick Links
Advertisement
Table of Contents

Related Manuals for dallmeier SMatrix DMX2400


Summary of Contents for dallmeier SMatrix DMX2400
- Page 1 Service English Hybrid VideoIP-Appliance DMX 2400 Rev. 1.0.1 / 2012-01-19...
- Page 2 Third-party trademarks are named for information purposes only. Dallmeier electronic respects the intellectual property of third parties and always attempts to ensure the complete identification of third-party trademarks and indication of the respective holder of rights. In case that protected rights are not indicated separately, this circumstance is no reason to assume that the respective trademark is unprotected.
-
Page 3: Table Of Contents
Information Dialogue ..................17 7.1.2 Display ......................18 Procedure .....................18 7.2.1 With RAID-System ..................19 7.2.2 Without RAID System ...................20 Exchange ......................21 Power Supply Modules................24 Identification ....................24 8.1.1 Display ......................24 8.1.2 Information Dialogue ..................24 8.1.3 Status LED ....................25 Deactivation ....................26 Exchange ......................26 Cleaning .......................28 www.dallmeier.com... -
Page 4: Introduction
Various warning words and symbols indicate potential sources of danger. DANGER DANGER indicates a hazardous situation which, if not avoided, will result in death or serious injury. WARNING WARNING indicates a hazardous situation which, if not avoided, could re- sult in death or serious injury. www.dallmeier.com... - Page 5 This arrow indicates an instruction. Expressions in bold and italics indicate a control element on the device (switches or la- bels) or on its user interface (buttons, menu entries). Paragraphs in italics contain information on basic principles, special features and efficient procedure. www.dallmeier.com...
-
Page 6: Safety Instructions
System Components Only use internal components that have been tested and approved by Dallmeier. Inappro- priate internal components can cause malfunctions, damages and data loss and can result in loss of warranty. - Page 7 Opening The housing of the unit may only be opened by qualified personnel for inspection, mainte- nance and repair. Disposal Disconnect the unit from the power supply. Remove all connected devices. Return the unit to your respective sales partner. www.dallmeier.com...
-
Page 8: Login
After the start (up to about 5 minutes) the recorder is ready for the local login. The back- ground image of the configuration screen is displayed. Fig. 3-1 Left-click the background. The Recorder login dialogue is displayed. Enter the Username. Enter the Password. Click the OK button. www.dallmeier.com... -
Page 9: Remote Login
Start the NetConfig2 software. The NetConfig Login dialogue is displayed. Fig. 3-3 Set the required Mode. Enter the required IP address. Enter the required Password. Confirm with Login. The connection to the recorder is established. www.dallmeier.com... - Page 10 DMX 2400 The graphical configuration interface of the recorder is displayed. Fig. 3-4 Make the required settings (see below). www.dallmeier.com...
-
Page 11: Licenses
After the activation of additional features and functions the recorder requires a restart. The restart is usually automatic. If this is not the case, restart the recorder manually. Open the Licences dialogue via System > Info > Licences. Fig. 4-2 www.dallmeier.com... - Page 12 DMX 2400 Make sure that the property or function is marked as active. Check the operation of the property or function. Note that further adjustments may be required. www.dallmeier.com...
-
Page 13: Update
Open the Software Update dialogue via System > Service > Software Update. Fig. 5-1 Select the storage device as Source. Click Load. Select the relevant Update File. Confirm with OK. Follow the instructions of the subsequent dialogues. www.dallmeier.com... -
Page 14: System Parameters
Select the relevant track mode. Confirm with OK. Parameters Export The system parameters can be stored and adopted to special requirements after an export. Open the Save Configuration dialogue via System > System Parameters > Save Configuration. www.dallmeier.com... -
Page 15: Parameters Import
NOTICE Improper or faulty modified system parameters can lead to a loss of the recordings and to a permanent disruption of the device. Open the Restore Configuration dialogue via System > System Parameters > Re- store Configuration. www.dallmeier.com... - Page 16 DMX 2400 Fig. 6-3 Observe the detailed explanations in the dialogue. Select the storage medium as Source. Select the relevant import option. Confirm with OK. www.dallmeier.com...
-
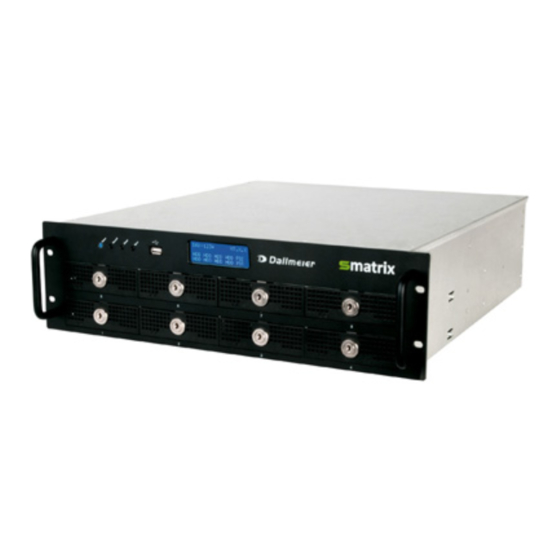
Page 17: Hard Disk Drives
• Defective HDDs are displayed in red. • Spare HDDs are displayed in yellow. • HDDs in the recovery process are displayed in orange. Check the status of the hard disk drives. Identify the defective hard disk drive. www.dallmeier.com... -
Page 18: Display
XXX = Defective HDD ooo = HDD in recovery process Check the status of the hard disk drives. Identify the defective hard disk drive. Procedure The procedure of a hard disk exchande differs for devices with or without RAID system. www.dallmeier.com... -
Page 19: With Raid-System
Proceed as described below, to ensure the highest possible data security: Note that • new HDDs must be tested and released for mounting by Dallmeier (HDD whitelist in the Partner Forum). • new HDDs may not be formatted or partitioned. -
Page 20: Without Raid System
The settings of the device are completely preserved. Note that • new HDDs must be tested and released for the installation by Dallmeier (HDD-Whitelist in the partner forum). • new HDDs should not be formatted and not be partitioned. -
Page 21: Exchange
NOTICE In order to prevent data loss and damage to property observe the procedu- re described above. Identify the defective hard disk drive as described above. Fig. 7-8 Unlock the hard disk drive holder with the key. www.dallmeier.com... - Page 22 Make sure that the connections of the hard disk drive are positioned on the back of the hard disk drive holder. Mount the hard disk drive with the 4 screws. Fig. 7-11 Insert the hard disk drive holder into the guide rail. www.dallmeier.com...
- Page 23 Do not use any force. Fig. 7-13 Make sure the hard disk drive holder and the housing are flush. Lock the hard disk drive holder with the key. The new hard disk drive is initialized as described above. www.dallmeier.com...
-
Page 24: Power Supply Modules
The status of the power supply modules is displayed in the info dialogue on the Power supply tab. Open the Info dialogue via System > Info. Select the Power supply tab. The Power supply tab is displayed. www.dallmeier.com... -
Page 25: Status Led
The status of the power supply modules is also indicated by the green LED on the front of the module. Fig. 8-3 Green LED lights = Power supply module switched on and OK Green LED not lit = Power supply module switched off or defective www.dallmeier.com... -
Page 26: Deactivation
If the device is powered by two redundant power supply modules, one can be exchanged during operation. Turn off the defective power supply module with the appropriate power switch. Remove the power cable. Loose the screws at the top of the power supply module. Fig. 8-5 www.dallmeier.com... - Page 27 Connect the power cable. Turn on the new power supply module with the appropriate power switch. The power supply module is put into operation automatically. The device is powered from the redundant power supply modules with equal parts of tension. www.dallmeier.com...
-
Page 28: Cleaning
Do not use cleaning materials that contain solvents because they can damage the device. Clean the housing (outside) with a soft, dry and anti-static dust cloth. Remove dust deposits on the vent openings by gentle suction, if required. www.dallmeier.com...
Need help?
Do you have a question about the SMatrix DMX2400 and is the answer not in the manual?
Questions and answers