Leica Geosystems DISTO S910 Manual
The original laser distance meter
Hide thumbs
Also See for DISTO S910:
- Quick start (2 pages) ,
- Quick start (2 pages) ,
- Quick start (2 pages)

Related Manuals for Leica Geosystems DISTO S910


Summary of Contents for Leica Geosystems DISTO S910
- Page 1 Leica DISTO S910 Leica DISTO S910 The original laser distance meter The original laser distance meter 1.800.561.8187 information@itm.com www. .com...
-
Page 2: Table Of Contents
Table of Contents - - - - - - - - - - - - - - - - - - - - - - - - - - 24 Instrument Set-up - - - - - - - - - - - - - - - - - - - - - - - - - - - - - - - 2 Smart Angle measurement - - - - - - - - - - - - - - - - - - - - - - - - - - - - - - - - - - - - 2 Level... -
Page 3: Instrument Set-Up
Instrument Set-up Introduction Overview The safety instructions and the user manual should be read through carefully before the product is used for the first time. The person responsible for the product must ensure that all users understand these directions and adhere to them. Display The symbols used have the following meanings: WARNING... -
Page 4: Basic Measuring Screen
Instrument Set-up Basic measuring screen Selection screen Status bar FUNC Function / Settings Main line Active function Tap here to start ON/DIST in a dis- tance function Settings Help function Favorites Leica DISTO S910 808167a 1.800.561.8187 information@itm.com www. .com... -
Page 5: Pointfinder (Viewscreen)
Instrument Set-up Pointfinder (Viewscreen) Icons on Status bar Zoom stage Scroll up and down for further results Battery power ® Bluetooth is switched on ® Bluetooth connection established Illumination adjustment Device is not leveled Crosshair with navigation Device is leveled keys left and right Device was moved after leveling - affects measuring accuracy... -
Page 6: Charging The Li-Ion Battery Via Usb
Instrument Set-up Charging the Li-Ion battery via USB Charge the battery before using it for the first time. Use the Charge batteries when battery symbol is flashing. provided cable to charge the battery. While charging, the device may heat up. This is normal and should not affect the device’s lifespan or performance. -
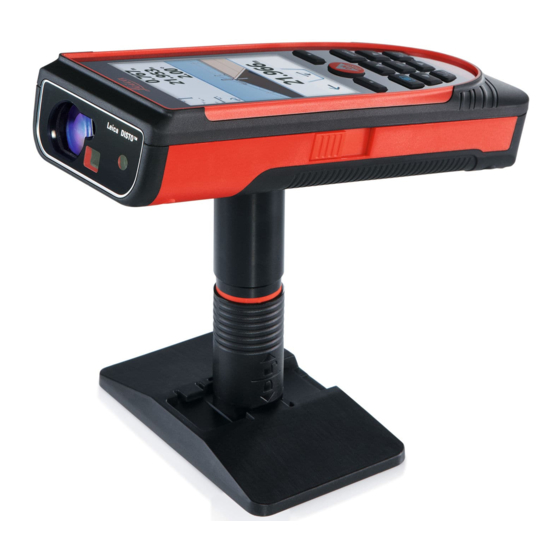
Page 7: Using The Smart Base
Instrument Set-up Using the Smart Base Fold out Smart Base. Tripod or Use it as mini tripod. Adapter thread Unlock Lock Using the Smart Base Extension The Smart Base Extension allows for stable targeting without unintentionally tilt- ing the device.. Do not move or tilt the Smartbase during measuring. -
Page 8: Operations
Operations Operations Using the Touch Screen Use only fingers to use the touch screen. Do not allow the touch screen to come into contact with other elec- trical devices. Electrostatic discharges can cause the touch screen to malfunction. Do not allow the touch screen to contact water. The touch screen may malfunction in humid conditions or when exposed to water. -
Page 9: Switching On/Off
Operations Switching ON/OFF Clear Message Codes If no key is If the info icon appears with a pressed for 180 number, observe the instructions in sec, the device section "Message Codes". switches off au- Example: tomatically. 2 sec Leave actual func- Device is turned Undo last action. -
Page 10: Pointfinder (Viewscreen)
Operations Pointfinder (Viewscreen) 0.00 Exit pointfinder (viewscreen). 0.00 This is a great help for outdoor measuring. The integrated pointfinder (viewscreen) shows the target on the display. The device measures in the middle of the cross hair, even if the laser dot is not visible. Parallax errors occur when the pointfinder camera is used on close targets, with the effect that the laser appears dis- placed in the crosshair. -
Page 11: Memory
Operations Memory Pointfinder needs to be switched off. Delete memory. Use Up/Down Use Left/Right navigation keys to navigation keys to 8.449 m 8.449 m show more detailed switch between Take over value for results of the speci- measurements. further actions. fic measurement. -
Page 12: Settings
Settings Overview Tilt units Move Alert ® WLAN / Bluetooth Digital level Keypad lock Illumination Tilt calibration Favorites Compass adjustment Touch screen Date and Time Distance units Offset Reset Information/Software Update Beep Tilt units Switch between the following units: Exit settings. Confirm setting. -
Page 13: Move Alert Of Levelling
Settings Move Alert of Levelling Choose the sensitivity of the levelling, which is needed for some measuring functions. FINE means, that the levelling of the device is sen- sitive to any small vibrations. Choose ROUGH when working in harsh con- struction environment with many shocks and vi- brations. -
Page 14: Distance Units
Settings Distance units Art. No. 805080: US-Model Art. No. 808183: 0.00 m 0.00 ft 0.00 m 0 in 1/16 0.000 m 0.00 in 0.000 m 0 ' 00 " 1/16 0.0000 m 0 in 1/32 0 in 1/8 0.0000 m 0.0 mm 0'00"... -
Page 15: Beep On/Off
Settings Beep ON/OFF Exit settings. To switch ON, repeat procedure. Digital level ON/OFF The digital level is displayed in the status bar. To switch ON, Exit settings. repeat procedure. De-/Activate keylock Switch on with keylock To deactivate, repeat procedure. The keylock is active if device is switched off. -
Page 16: Bluetooth ® /Wlan
Settings Bluetooth /WLAN ® ® Bluetooth /WLAN is switched ® on and black Bluetooth /WLAN icon is displayed in status bar. Explanation see If connection is established the info box below. color of the icon changes to blue. Exit settings. Special Settings for data transfer. - Page 17 Settings ® Bluetooth data transfer WLAN data transfer Connect the device with your smart phone, tablet, laptop,… Only data from the function Point Data transmission can be The actual measurement is transferred automatically if Blue- transferred with WLAN. A corresponding program is need- ®...
-
Page 18: Calibration Of Tilt Sensor (Tilt Calibration)
Settings Calibration of tilt sensor (Tilt Calibration) 180° Place device on absolutely flat surface. 180° Turn the device horizontally by 180° Place device on absolutely flat surface. and place it again on absolutely flat surface. After 2 sec the device 180°... -
Page 19: Personalized Favorites
Settings Personalized favorites Favorite Select your favorite functions for quick access. Short cut: Press selection Press 2 sec on a selection-key in key left or right. the measuring mode. Select your Function is set as Select favorite favorite function and press again favorite above the function. -
Page 20: Date And Time
Settings Date and Time Exit settings. 00 : 00 2013-0 4-08 Set time Set date (hh:mm) (yyyy-mm-dd) Compass Adjustment Adjusting the magnetic declination Depending on your geographic location, the angle of declination may vary from other locations, as the geographic and magnetic poles are aligned. However, if the reference location is not selected, the difference in declination between the poles can differ greatly. -
Page 21: Offset
Settings Offset 1.012 m 1.012 m Approve Select digit. Adjust digit. value. An offset adds or subtracts a specified value automatically to or from all measurements. This func- tion allows tolerances to be taken into account. The offset icon is Exit settings. -
Page 22: Information/Software Update
Settings Information/Software Update Connect the Software updates with corre- device with spondent instructions can be USB to your found on our homepage computer. www.disto.com. Make sure that you use always the newest soft- ware version. Leica DISTO S910 808167a 1.800.561.8187 information@itm.com www. -
Page 23: Functions
Functions Overview Measuring on sloped objects Calculator Smart Horizontal Mode Width Smart Angle measurement Timer DXF Folder Triangular area Level Height-profile Measurement Diameter Single Distance measurement Adjusting measuring reference Point to point measurements Pythagoras (2-point) DXF data capture Photo Height Tracking Volume Area from Photo Smart Area measurement... -
Page 24: Calculator
Functions Calculator The measurement result from the Select key on main line is taken over to the calcula- display. tor and can be used for further calcu- lations. Ft/in fractions are converted into ft/in decimal. Confirm every To take over a result from the calcu- key. -
Page 25: Smart Angle Measurement
Functions Smart Angle measurement Aim laser at corner. Aim laser at point on first wall. 1.246 5.269 Continues distance and angle measurement. 89.56 ° Aim laser at point on second wall. Level Displays inclinations of 360° with a 0.3° transverse inclination of +/- 10°. In- strument beeps at 0°... -
Page 26: Measuring Single Distance
Functions Measuring single distance Target surfaces: Measuring errors can occur when measuring to colourless liquids, glass, styrofoam or semi-permea- ble surfaces or when aiming at high gloss surfaces. Against dark 8.532 m surfaces the measuring time in- Aim active laser at target. creases. -
Page 27: Point To Point Measurements
Functions Point to point measurements Initialize device for vertical and horizontal values. See "Level- ling". Aim laser at second Aim laser at first target. target. Level the device and further -1.697 values are 2.419 displayed ! 35.06° Do not move Smart Base 13.207 2.995... -
Page 28: Dxf Data Capture
Functions DXF data capture Rotate the device Levelling is man- Check two times clockwise datory! status ±5° 90°. Follow the in- -1.697 For levelling, line: 90° structions on the dis- Smart Base has to be folded out play. Levelling is indicates proper levelling and device finished when OK... -
Page 29: Photo
Functions Photo Take photo. Exit. Tap on the camera icon in the mid- dle of the bottom line to take a pho- For screenshots, press camera key for 2 sec. * OV = Overview Leica DISTO S910 808167a 1.800.561.8187 information@itm.com www. -
Page 30: Volume
Functions Volume Aim laser at first Aim laser at sec- Aim laser at third target point. ond target point. target point. Use Up/Down 5.744 m 13.430 m First distance Ceiling/floor area navigation keys to show more re- 2.338 m 39.300 m Second distance Wall areas sults. -
Page 31: Smart Area Measurement
Functions Smart Area measurement 5.873 Aim at first point. Point to Point distance between the last two measured points 2.075 84.6 75 Aim at additional points (max. 30) Leica DISTO S910 808167a 1.800.561.8187 information@itm.com www. .com... -
Page 32: Wlan Data Transmission
Functions WLAN data transmission Rotate the device For levelling, Check two times clockwise Smart Base has status ±5° -1.697 90°. Follow the in- to be folded out line: 90° structions on the dis- and device indicates proper levelling play. Levelling is needs to be in an inclination finished when OK... -
Page 33: Gallery
Functions Gallery Exit. 2013 - 07 - 03_13:25 13 - 07 - 03_13:25 _13:25 _13:25 7 2013 - 07 - 03_13:25 0 3 - 07 - 03_13: 2013 - 07 - 03_13:25 If the device is connected to the computer via USB cable, you can download or delete the gallery. -
Page 34: Area
Functions Area Aim laser at first Aim laser at sec- target point. ond target point. The result is shown in the main line and the 6.228 m First distance measured value above. Partial Measurements / Painter function: 3.9I0 m Second distance Press + or - before starting the first measure- ment. -
Page 35: Sloped Objects
Functions Sloped objects Aim laser at upper Aim laser at lower target point. target point. P2 angle Use Up/Down 11.00 ° navigation keys to show more re- 30.367 m Included angle be- 39.10 ° P2 distance sults. tween both points -3.440 m -4.230 m Horizontal distance... -
Page 36: Width
Functions Width It is absolutely necessary to aim with the laser per- pendicular to the object. -.--- m Select arrows with the cursor keys or by tapping If necessary, use the on the display and adjust Zoom for precise with softkeys. Corre- Confirm aiming. -
Page 37: Timer
Functions Timer The self release starts if ON/Measure key is pressed. 30 sec Confirm setting. 10 sec Select release 5 sec time. 2 sec Leica DISTO S910 808167a 1.800.561.8187 information@itm.com www. .com... -
Page 38: Triangular Area
Functions Triangular area Aim laser at sec- Aim laser at third Aim laser at first ond target point. target point. target point. Angle between first Use Up/Down 4.248 m First distance and second navigation keys to show more re- measurement 33.60°... -
Page 39: Height-Profile Measurement
Functions Height-profile measurement Aim at reference point (REF). Aim at additional points 1-x. Ideal for measuring of height differences to a reference point. Can be also used to meas- ure profiles and terrain sections. After meas- uring the reference point, the horizontal Horizontal distance to distance and height is displayed for each fol- 2.042 m... -
Page 40: Diameter
Functions Diameter Aim laser perpendicular to the middle of the round object. -.--- m Select arrows with the cursor keys or by tapping If necessary, use the on the display and adjust Zoom for precise with softkeys. Corre- aiming. sponding diameter is cal- culated. -
Page 41: Adjusting Measuring Reference
Functions Adjusting measuring reference The orienta- Distance is measured tion of the from the rear of the de- Smart Base is vice (standard setting). automatically detected and the zero point is accordingly adjusted. Distance is measured from the front of the de- vice (lock symbol = per- manently). -
Page 42: Pythagoras (2-Point)
Functions Pythagoras (2-point) Aim laser at second Aim laser at first target. target. The result is shown in the main line. Pressing the measuring key for 2 sec in the function ac- 25.133 m tivates automatically Minimum or Maximum measure- ment. -
Page 43: Height Tracking
Functions Height tracking Aim laser at upper points and angle/ Aim laser at lower point. height tracking starts automatically. -10.55 ° -10.55 ° 6.271 m 6.271 m 29.89 ° 44.80 ° Stops height = Tracking angle if device is tracking. turned on tripod 3.47 5 m 8.47 8 m... -
Page 44: Area From Photo
Functions Area from Photo Aim perpendicular to the horizontal center line of the ar- ea. This area must be perfectly flat on the vertical plane. -.--- m 2.015m Select arrows with the cursor keys or by tapping If necessary, use the on the display and adjust Zoom for precise with softkeys. -
Page 45: Compass
Functions Compass Calibrate The arrow always Compass? points to true north. Refuse Confirm Exit. 0.0° N At the following places the compass If an error message occurs, the probably does not work correctly: device is tilted too much (>20° over the front / > 10° side- wise). -
Page 46: Pythagoras (3-Point)
Functions Pythagoras (3-point) Aim laser at sec- Aim laser at Aim laser at first ond target. third target. target. 24.298 m The result is shown in the main line. Pressing the measuring key for 2 sec in the function 21.264 m activates automatically Minimum or Maximum meas- urement. -
Page 47: Trapezium
Functions Trapezium Aim laser at upper point. Aim laser at 2nd point. 13.459 m 16.440 m 70.80° 5.79 0 m Use Up/Down navigation keys to show more re- 78.383 m Trapezium area sults. 20.9 ° Leica DISTO S910 808167a 1.800.561.8187 information@itm.com www. -
Page 48: Stake Out
Functions Stake out Two different a = b a = b distances (a and b) can be entered to mark off de- fined measured lengths. 1.012 m 1.012 m Approve Adjust Select digit. Adjust digit. value "a". value "b". 0.240 m is Move device When approaching a stake Next stake... -
Page 49: Technical Data
Technical Data * favourable conditions are: white and diffuse reflecting Distance measurement (ISO 163331-1) General target (white painted wall), low background illumination and Accuracy with favourable ± 1.0 mm / 0.04 in *** Laser class moderate temperatures. conditions * Laser type 635 nm, <... -
Page 50: Message Codes
Message Codes If the message Error does not disappear Functions Cause Correction after switching on the device repeatedly, Distance measuring Measurement outside Correct range. Min/Max measuring contact the dealer. of measuring range Permanent measuring If the message InFo appears with a number, Laser beam inter- Repeat measurement. -
Page 51: Warranty
Responsibilities of the manufacturer Prohibited use of the product under PROTECT according of the original equipment: to Leica Geosystems International Limited • Using the product without instruction Leica Geosystems AG Warranty and PROTECT General Terms & • Using outside the stated limits Heinrich-Wild-Strasse Conditions set out under www.leica-geosys-... -
Page 52: Limits Of Use
Safety Instructions Disposal FCC statement (applicable in WARNING U.S.) Watch out for erroneous measurements if CAUTION This equipment has been tested and found to the instrument is defective or if it has been Flat batteries must not be disposed of with comply with the limits for a Class B digital dropped or has been misused or modified. -
Page 53: Déclaration Fcc, Applicable Aux Etats-Unis
Safety Instructions This device complies with part 15 of the FCC Rules. Operation is subject to the following two conditions: • This device may not cause harmful interfer- ence, and • this device must accept any interference received, including interference that may cause undesired operation. -
Page 54: Use Of The Product With Bluetooth
Safety Instructions Use of the product with Blue- The device produces visible laser beams, Labelling which are emitted from the instrument: tooth ® It is a Class 2 laser product in accordance with: WARNING Electromagnetic radiation can cause distur- • IEC60825-1 : 2014 „Radiation safety of bances in other equipment, in installations laser products“... - Page 55 Leica Geosystems AG, Heerbrugg, Switzerland has been certified as being equipped with a quality system which meets the International Standards of Quality Management and Quality Systems (ISO standard 9001) and Environ- mental Management Systems (ISO standard 14001). Copyright Leica Geosystems AG, Heerbrugg,...
Need help?
Do you have a question about the DISTO S910 and is the answer not in the manual?
Questions and answers