Table of Contents
Advertisement
Advertisement
Table of Contents

Related Manuals for Dell EMC PowerProtect DD9400


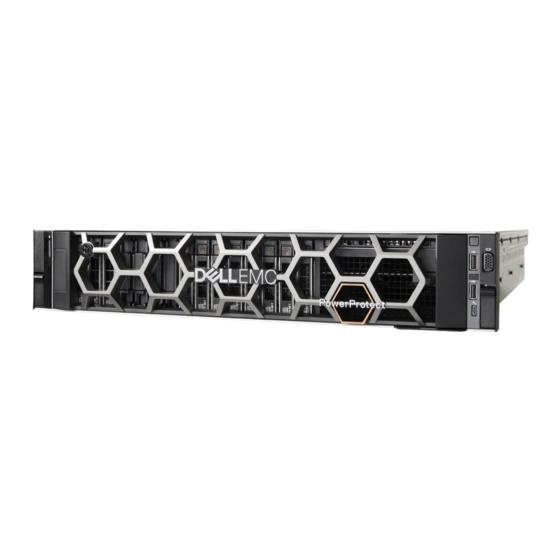
Summary of Contents for Dell EMC PowerProtect DD9400
- Page 1 Dell EMC PowerProtect DD9400 System Installation Guide September 2020 Rev. 03...
- Page 2 Notes, cautions, and warnings NOTE: A NOTE indicates important information that helps you make better use of your product. CAUTION: A CAUTION indicates either potential damage to hardware or loss of data and tells you how to avoid the problem. WARNING: A WARNING indicates a potential for property damage, personal injury, or death.
-
Page 3: Table Of Contents
Contents Figures............................5 Tables............................7 Chapter 1: Introduction and Preparation..................8 Document purpose................................8 DD9400 system features..............................8 Product serial number tag (PSNT)..........................9 Required tools and supplies .............................11 Safety considerations................................ 11 Working with a portable lift............................. 12 Adjusting the arms for a frontal lift..........................12 Reconfiguring the lift with the Voyager kit......................13 Chapter 2: Install the System in the Rack.................. - Page 4 Routing the cables through the CMA.......................... 62 Chapter 5: Configure System for Use..................64 Configure iDRAC................................64 Configure serial over LAN (SOL)..........................66 Change the iDRAC network port...........................66 Enable administrative communication.......................... 67 Run the configuration wizard............................68 Configuring the network............................69 Configuring additional system parameters......................
-
Page 5: Figures
Figures Rear tag..................................10 Front tag..................................10 Serial number for initial password........................10 Adjusting the lift arm bar to just under 17 inches..................... 13 Reconfiguring the portable lift with the Voyager conversion kit..............14 Sliding rail assembly - 2U systems........................16 CMA brackets................................ - Page 6 Spring clips—push up to release tray.........................40 Opening the cable chain lids..........................40 Cable positioning in cable chains......................... 40 1-Inch graduation label.............................41 Attaching cable chains to tray..........................41 Installing the chassis bracket into the shelf....................... 41 Installing the chassis bracket..........................42 Installing the bezel..............................42 Screw and nut placements............................
-
Page 7: Tables
Tables DD9400 system features............................8 DD9400 system with DS60 racking locations....................16 DD9400 system with ES40 racking locations....................16 Pins for third-party racks............................29 Truss head screws..............................35 Pins for third-party racks............................45 Parts list..................................46 Parts list..................................48 List of parts used in nutbar installation illustration..................49 DD9400 with DS60 cabling instructions: Single node or HA primary node..........55 DD9400 with DS60 cabling instructions: HA standby node (HA only)............55 DD9400 with DS60 cabling instructions: DS60 to DS60................55... -
Page 8: Chapter 1: Introduction And Preparation
(factory-racked) or as separate components to install in an existing rack at the site (field-installed). This guide provides instructions for both types of installation. This document is intended for customers or Dell EMC Support personnel who are qualified to install PowerProtect systems. Field-installed systems To install PowerProtect systems in an existing rack at the customer site, follow all the instructions in this document to rack, cable, and configure the system. -
Page 9: Product Serial Number Tag (Psnt)
Table 1. DD9400 system features (continued) Features Base Expanded Supported Capacity Active Tier 192 <-> 768 TBu Cloud Tier 1536 TBu Disk Groups Active Tier 4 <-> 10 (8 TB) Cloud Tier (4 TB) SSDs for OS in 2.5" bays in head 4, 1.92 TB, 1 WPD Stream Count 800 Wr, 220 Rd... -
Page 10: Rear Tag
Figure 1. Rear tag ● A larger tag recessed into the front of the chassis on the right-hand side Figure 2. Front tag There are two labels on each tag: ● The top label is blue and contains the serial number for the system top level assembly (TLA). ●... -
Page 11: Required Tools And Supplies
Review and follow these important safety recommendations: ● For ESD protection, Dell EMC recommends that you wear a suitable antistatic wrist or ankle strap. Observe all conventional ESD precautions when handling plug-in modules and components. -
Page 12: Working With A Portable Lift
● The main way to disconnect power from the system is to unplug the power supply cord. ● The system includes two power supplies. To completely remove system power, you must disconnect both power supplies. ● Always disconnect the power connections before moving the system. ●... -
Page 13: Reconfiguring The Lift With The Voyager Kit
<17” CL4900 Figure 4. Adjusting the lift arm bar to just under 17 inches Reconfiguring the lift with the Voyager kit About this task If you are using the Alum-A-Lift to install or remove components above 49 inches (28U) from the floor, use the single (lower) mast configuration with the Voyager conversion kit and support table. -
Page 14: Reconfiguring The Portable Lift With The Voyager Conversion Kit
CL5422 Figure 5. Reconfiguring the portable lift with the Voyager conversion kit Introduction and Preparation... -
Page 15: Chapter 2: Install The System In The Rack
Install the System in the Rack Topics: • Remove filler panels • Recommended rack locations for the system • Identifying the rail kit components • Remove the original CMA brackets • Attach the new CMA brackets • Install the rails •... -
Page 16: Identifying The Rail Kit Components
Table 2. DD9400 system with DS60 racking locations Component Configuration Rack location Controller location with DS60 Single node or HA primary node U12-U13 shelves HA standby node U15-U16 FS25 location with DS60 shelves U28-U29 DS60 locations Single node or HA U02-U11, U18-U27 Table 3. -
Page 17: Remove The Original Cma Brackets
The rail kit also includes a unique cable management arm (CMA) bracket assembly that consists of inner and outer brackets, and screws to attach the brackets to the rails. Figure 7. CMA brackets The CMA assembly consists of two articulated arms, and two separators. Figure 8. -
Page 18: Attach The New Cma Brackets
Steps 1. Remove the two screws holding the CMA bracket to the rail. Figure 9. Remove the original CMA bracket 2. Repeat the previous step for the second rail. Attach the new CMA brackets About this task The brackets are labeled left and right, and cannot be interchanged. The top of each bracket is labeled Up. Steps 1. -
Page 19: Attach Outer Cma Bracket To The Rails
Figure 10. Attach outer CMA bracket to the rails 2. Align the hole of the inner bracket and push down to attach it to the rail. NOTE: Some pressure is required to push the inner bracket down and secure it. The bracket clicks when it locks in place. -
Page 20: Install The Rails
Figure 11. Attach inner CMA bracket to the rails 3. Repeat the preceding steps to attach the outer and inner brackets to the other rail. Install the rails About this task The rails are labeled left and right, and cannot be interchanged. The front side of each rail is labeled Left Front or Right Front when viewed from the cabinet front. -
Page 21: Secure The Rail Assemblies To The Cabinet
Figure 12. Installing the rear end of the rail 5. For the front end piece, rotate the latch outward and pull the rail forward until the pins slide into the flange, and release the latch to secure the rail in place. Figure 13. -
Page 22: Install The System In The Cabinet
2. Insert and tighten the two screws using the Phillips #2 screwdriver. Figure 14. Installing screws Install the system in the cabinet This procedure is used to install the system in the cabinet. About this task WARNING: The system is heavy and should be installed in a cabinet by two people. To avoid personal injury and/or damage to the equipment, do not attempt to install the system in a cabinet without a mechanical lift and/or help from another person. -
Page 23: Install The System In The Rails
Figure 16. Install the system in the rails 4. Push the system inward until the lock levers click into place. 5. Pull the blue slide release lock tabs forward on both rails and slide the system into the cabinet. The slam latches will engage to secure the system in the cabinet. -
Page 24: Install The Front Bezel
Install the front bezel The procedure to install the front bezel with the LCD panel and the front bezel without the LCD panel is the same. Steps 1. Align and insert the right end of the bezel onto the system. 2. -
Page 25: Install The First Separator
Figure 19. Install the first separator 2. Install the first arm on the right side of the chassis, on top of the separator with the open side up. NOTE: The arms are reversible. Figure 20. Install the first arm Install the System in the Rack... -
Page 26: Close The First Arm
3. Close the first arm by connecting it to the bracket on the left side of the chassis. Figure 21. Close the first arm 4. Install the second separator on top of the first arm . Figure 22. Install the second separator 5. -
Page 27: Install The Second Arm
Figure 23. Install the second arm 6. Close the first arm by connecting it to the bracket on the right side of the chassis. Figure 24. Close the second arm Install the System in the Rack... -
Page 28: Chapter 3: Install The Disk Shelves In The Rack
Install the Disk Shelves in the Rack Topics: • Remove filler panels • Install a DS60 shelf into the rack • Install an FS25 shelf into the rack Remove filler panels The front space into which you will install the shelf is usually covered by a filler panel. If one or more filler panels cover the space where you want to install the shelf, use this procedure to remove each panel. -
Page 29: Pins For Third-Party Racks
1. Locate the 4U high cabinet space designated for the shelf. 2. Adjust rail length if required. 3. The rails are shipped with M5 adapters, which fit into the Dell EMC NEMA channels. For Dell EMC racks, proceed to step 4. For third-party racks, proceed as follows: a. -
Page 30: Rail Installation
Figure 25. Rail installation a. Align the right rail with the lower U of the allotted 4U space. NOTE: Each of the rail alignment pins must be located in the middle holes of the bottom two U spaces of the 4U space. -
Page 31: Installing The Right Rail To The Rear Channel
7. On both left and right rail assemblies, install a single long screw between the rail posts in the upper screw hole to secure the rails as follows: a. For Dell EMC racks or racks that do not have threaded holes, insert a single M5 screw into the larger of the two screw holes. -
Page 32: Installing The Shelf Onto The Rails
Installing the shelf onto the rails Prerequisites If you are installing an empty shelf (all FRUs removed), you can install the chassis without using a lift. If the shelf is populated with FRUs before installation, you must use a portable lift. Working with a portable lift on page 12 provides more information. -
Page 33: Sliding The Shelf Chassis Into The Rails
CL5431 Figure 28. Sliding the shelf chassis into the rails NOTE: You might need to release sagging tension on the shelf by pulling the lift arms and tray up slightly. 4. Unlock the casters by lifting the locking tabs, as shown in the following figure, and carefully slide the shelf into the cabinet as far as the lift allows. -
Page 34: Inserting And Securing The Top Cover And Shelf
CL5423 Figure 30. Locking the casters 6. Remove the securing strap by pulling up on the retaining key and pull the ratchet handle upwards as needed, as shown in the following figure. CL5430 Figure 31. Removing the straps 7. Carefully push the shelf off the lift arms/tray and into the cabinet. CAUTION: Make sure to leave the lift under the chassis until the shelf is safely balanced and secured within the cabinet. -
Page 35: Inserting And Securing The Shelf To The Cabinet (Shoulder Screw Configuration)
Steps 1. For Dell EMC racks, use the orange shelf latch handles to push the shelf completely into the cabinet. Align the two semi- captive M5 shoulder screws on each side with the mounting holes on the cabinet. Thread the shoulder screws into the mounting holes and finger-tighten the shoulder screws. -
Page 36: Removing Semi-Captive Screws
If the shelf is being installed into a Dell EMC rack, secure the top cover to the rack using M5 truss head screws from the kit. Tighten the screws until they are finger tight. -
Page 37: Cable Management Tray Installation (Underneath)
3. To secure the top cover using a top cover with semi-captive screws, do the following: ● For a Dell EMC rack, align the semi-captive screws with the mounting hole in the cabinet and thread the screw into the mounting hole. -
Page 38: Blue Tab On Rail Must Be Pushed In
NOTE: This procedure describes the installation of the 1U cable management tray into a standard Dell EMC rack. For third- party racks, use the additional hardware that comes with the 1U cable management arm to install the rails as necessary. -
Page 39: Installing And Securing The Rails-Front
CL5495 Figure 38. Installing and securing the rails—front CL5518 Figure 39. Installing and securing the rails—rear 2. Align the flanges on the inside the mounting holes of the rack. Adjust the rails to the fit the rack you are using. Insert the two adapters on the rail into the mounting holes, in both the front and the rear of the rails. -
Page 40: Spring Clips-Push Up To Release Tray
3. Orient the tray so that the UP arrow is pointed up and the end of the tray that is labeled FRONT is to the front of the rack. Slide the tray into the rails until it locks into place with an audible click. To release the tray, press the spring clips up and pull the tray towards the front of the rack. -
Page 41: Attaching Cable Chains To Tray
outside cable runs connect to the rack, while the two inside cable runs connect to the shelf. Once the cables are installed, close the lids, making sure that they are snapped shut. CL5522 Figure 44. 1-Inch graduation label 6. Align the lids of the cable chains so the lids are facing up and the hinges are all facing each other. Arrange the two cable chains so that they form a "U"... -
Page 42: Installing The Chassis Bracket
CL5499 Figure 47. Installing the chassis bracket 9. Place the chassis bracket over the center rail of the cable tray. Clip the free end of the cable chains to the center flange on the chassis bracket. Figure 48. Installing the bezel 10. -
Page 43: Screw And Nut Placements
Third-party rack installation Follow these best practice guidelines to ensure an orderly installation: ● Third-party racks might have PDUs which face into the rack. This can cause interference between the shelf and/or rear CMAs. Carefully plan and route cables to minimize any interference. It might be necessary to use a type of PDU that is mounted in the main rack area. - Page 44 4. Move to the front of the rail and align the mounting slots with the mounting holes near the front of the rail. CL5501 Figure 50. 18"-22" marking 5. Slide the inner rail mechanism to the front of the rail until the 18"-22" mark is visible. If the inner mechanism is locked, depress the leaf spring and press the rail locking mechanism to free it.
- Page 45 Installing the rails in a third-party rack The rails are shipped with 6.8 mm adapters that are designed to fit into the NEMA channels of the Dell EMC rack. For third- party racks, the 6.8 mm adapters must be removed and replaced with rail pins that fit the hole-types in the third-party rack.
-
Page 46: Rail Installation
Table 7. Parts list Image # Description Part number Shelf rail location in 4U space Universal Rail Pins (see previous table for Part of PN 106-569-300 and 106-529-209 details) Shelf rails (2 each/kit) for each node PN 106-569-300 and 106-529-209 Figure 53. -
Page 47: Removing Shipping Tape
Steps 1. Remove the 6.8 mm adapters and replace them with the appropriate hardware from the kit: a. Using a flat-bladed screwdriver, remove the two 6.8 mm adapters from the adapter mounting block on the rails. b. Select the correct adapters from the hardware kit and install the adapters into the adapter mounting block. 2. -
Page 48: Securing A Rail With A Single Screw
CL5376 Figure 55. Securing a rail with a single screw ● If you are installing the rails in a rack that has threaded holes, insert an M4 screw into the smaller of the two center screw holes at both the front and the rear of the rail. The screw is smaller and will pass through the threaded hole in the NEMA racks. -
Page 49: Nutbar Installation (Left Nutbar Shown)
Table 9. List of parts used in nutbar installation illustration Image # Description Part number Nutbar location in 4U space 1 ea Nutbars: (Left: 051-000-357), (Right: 051-000-356) Rail location in the 4U space Rail bracket alignment pins Nutbar alignment pins Part of PN 051-000-357 and PN 051-000-356 Nutbar M5 securing screws, black PN 036-709-013... -
Page 50: Install An Fs25 Shelf Into The Rack
Steps 1. At the front of the rack, align and install the left nutbar (051-000-357) directly above the rail assembly. 2. Secure the nutbar with two M5 securing screws, one above the top alignment pin and one below the lower alignment pin. 3. -
Page 51: Installing The Shelf On The Rails
Figure 59. Installing the M5 Screw 5. Working from the front of the cabinet, align the adapter with the mounting hole on the front of the rack as shown in the following figure. Figure 60. Securing rail to front channel CAUTION: To ensure proper alignment of the rails, check that: ●... -
Page 52: Sliding The Shelf Onto The Rails
CAUTION: Ensure that the rear rail screws on the shelf are installed and fully tightened. If the screws are not installed and tightened, the rails could rotate out of position, possibly causing the shelf to fall, resulting in damage to the equipment and possible injury to personnel. Steps 1. -
Page 53: Installing The Front Bezel
Figure 63. Securing the front of the shelf Installing the front bezel Prerequisites CAUTION: If the protective plastic strip is present on the front of the bezel, remove it before placing the system into operation. Failure to remove the protective plastic strip will cause the system to overheat. About this task Refer to Installing the bezel... -
Page 54: Chapter 4: Connect Cables And Power On
Connect Cables and Power On Topics: • Connecting DS60 shelves • Connecting the HA interconnect • Connecting data cables • Connecting disk shelf power cables • Connecting controller power cables and powering on • Routing the cables through the CMA Connect Cables and Power On... -
Page 55: Connecting Ds60 Shelves
3C (HA only) LCC A, port A of shelf V3.1 (FS25) Cable lengths shown are designed for Dell EMC racks. Longer cables (up to 5M) can be used. Table 11. DD9400 with DS60 cabling instructions: HA standby node (HA only) - Page 56 Table 12. DD9400 with DS60 cabling instructions: DS60 to DS60 (continued) String First Shelf Port Second Shelf Port Cable Color in Cabling Diagram LCC B, port 0 of LCC B, port 2 of shelf V1.2 shelf V1.1 LCC A, port 2 of LCC A, port 0 of shelf V2.2 shelf V2.1 LCC B, port 0 of...
-
Page 57: Single Node Dd9400 With Ds60 Shelves
Figure 65. Single node DD9400 with DS60 shelves Connect Cables and Power On... -
Page 58: Ha Dd9400 With Ds60 Shelves
Figure 66. HA DD9400 with DS60 shelves Connect Cables and Power On... -
Page 59: Connecting The Ha Interconnect
Connecting the HA interconnect About this task Cable the HA interconnect to provide communication between the two nodes of the HA pair. The physical labeling on the network daughter card ports is different from how the ports are identified in the DD OS software. The following table lists the physical and software identifiers for each port. -
Page 60: Slot Numbering
Figure 68. Slot numbering Port numbers The following port numbering guidelines apply to all I/O modules except the network daughter card: ● The physical interface name format for the remaining I/O module slots is ethXy, where X is the slot number and y is an alphanumeric character. -
Page 61: Connecting Disk Shelf Power Cables
Table 15. Maximum FC cable lengths (continued) Data rate OM1 maximum length OM2 maximum length OM3 maximum length 16 Gbps 100m Connecting disk shelf power cables Prerequisites Each disk shelf has two power supplies. Connect each power supply to redundant AC power sources, so the loss of one power supply does not cause the shelf to power off. -
Page 62: Routing The Cables Through The Cma
Figure 70. Three phase delta power ● Three phase Wye power Figure 71. Three phase Wye power 2. Connect the power supply units to the rack. CAUTION: Connect each PSU to a redundant AC power source. Redundant power sources allow one AC source to fail or be serviced without impacting system operation. -
Page 63: Routing Cables Through The Cma Brackets
Figure 72. Routing cables through the CMA brackets Connect Cables and Power On... -
Page 64: Chapter 5: Configure System For Use
Configure System for Use Topics: • Configure iDRAC • Configure serial over LAN (SOL) • Change the iDRAC network port • Enable administrative communication • Run the configuration wizard • Configuring the system with the configuration wizard • Selecting and configuring Secure Remote Services delivery •... -
Page 65: Idrac Settings > Network
Figure 73. iDRAC Settings > Network 7. Press Esc to return to the previous menu. 8. Select User Configuration. a. Enable the root user. b. Change the root user password. NOTE: The default password is the system serial number. The system serial number is always on the service tag at the front of the system, and on the PSNT tag attached to the rear handle of the chassis if the system has a rear- mounted PSNT tag. -
Page 66: Configure Serial Over Lan (Sol)
Configure serial over LAN (SOL) About this task The PowerProtect system provides the ability to access the serial console through the iDRAC interface. Configuring SOL is optional. If SOL is already enabled on the system, no further action is required. CAUTION: Do not use iDRAC to change the storage configuration, system settings, or BIOS settings, as making changes will impact system functionality. -
Page 67: Enable Administrative Communication
CAUTION: Do not configure iDRAC to use network daughter card ports 3 and 4, as they are reserved for the HA interconnect. Steps 1. Connect to the system serial console or connect KVM to the system. 2. Reboot the system. 3. -
Page 68: Run The Configuration Wizard
Establish a serial connection 1. Connect the DB-9 cable to the serial port on the back panel of the system (#2 in the figure above). 2. Launch a terminal emulation program from your computer and configure the following communication settings: NOTE: Set the baud rate to 115200 for the system to work correctly;... -
Page 69: Configuring The Network
DD System Manager configuration wizard DD System Manager provides a single, consolidated management interface that allows for configuration and monitoring of many system features and system settings. For more information about using the DD System Manager configuration wizard, see the section on Configuring the system with the DD System Manager GUI interface configuration wizard. -
Page 70: Configuring Additional System Parameters
DNS Servers Enter the DNS Server list (zero, one, two or three IP addresses): 192.168.10.1 9. A summary of the network settings is displayed. You can accept the settings (Save), reject the settings and exit to the CLI (Cancel), or return to the beginning of the current section and change the settings (Retry). Entering Retry displays your previous responses for each prompt. -
Page 71: Configuring The System With The Configuration Wizard
# config set location "Dallas Regional Data Center Lab, 5000 Apple Drive Suite #130, Dallas, Tx" The System Location is: Dallas Regional Data Center Lab, 5000 Apple Drive Suite #130, Dallas, Tx 3. To add one or more time servers, enter: # ntp add timeserver 192.168.101.1 Remote Time Servers: 192.168.10.1 4. -
Page 72: License Page
License page The License page displays all installed licenses. Click Yes to add, modify, or delete a license, or click No to skip license installation. License Configuration The Licenses Configuration section enables you add, modify, or delete licenses from a license file. DD OS 6.0 and later supports licensing via the Electronic License Management System (ELMS), which enables you to include multiple features in a single license file upload. -
Page 73: File System
Network Interfaces page The Interfaces page enables you to configure network settings that define how each interface participates in an IP network. To Configure these network settings outside of the configuration wizard, select Hardware > Ethernet > Interfaces. Table 20. Interfaces page settings Item Description Interface... -
Page 74: Addable Storage
Anytime you display the File System section when the File System has not been created, the system displays an error message. Continue with the procedure to create the file system. Configure storage tier pages The configure storage tier pages enable you to configure storage for each licensed tier on the system, Active Tier, Cache Tier, and Cloud Tier. -
Page 75: Cache Tier Values
Table 23. Active Tier values (continued) Item Description ● The enclosure and disk number (in the form Enclosure Slot, or Enclosure Pack for DS60 shelves). This does not apply to DDVE instances. ● A device number for a logical device such as those used by DD VTL and vDisk ●... -
Page 76: Cloud Tier Values
Table 25. Cache Tier values (continued) The DD OS convention for computing disk space defines one gibibyte as 2 bytes, giving a different disk capacity than the manufacturer’s rating. Configure Cloud Tier The Configure Cloud Tier section allows you to configure the Cloud Storage Tier devices. To add storage to the Cloud Tier, select one or more devices and add them to the tier. -
Page 77: System Settings
System Settings Email/Location page The Email/Location page enables you to configure the mail server name, control what system information is sent to Dell EMC, and specify a location name to identify your system. -
Page 78: Dd Boost Protocol
Description Send Vendor Support Notification Emails Check to configure DD System Manager to send vendor support notification emails to Dell EMC to Dell EMC. Location Use this optional attribute to record the location of your system. If you specify a location, this information is stored as the SNMP system location. -
Page 79: Cifs Protocol
Table 31. Fibre Channel page settings (continued) Item Description Devices The devices to be used are listed. They are available on all endpoints. An endpoint is the logical target on the Data Domain or PowerProtect system to which the initiator connects. CIFS protocol The CIFS Protocol settings section enables you to configure the CIFS protocol settings. -
Page 80: Dd Vtl Protocol
NFS Protocol Export page The Export page enables you to configure an NFS protocol export directory path, network clients, and NFSv4 referrals. To configure these settings outside of the configuration wizard, select Protocols > NFS > Create. Table 34. Export page settings Item Description Directory Path... -
Page 81: Selecting And Configuring Secure Remote Services Delivery
1. Select Maintenance > Support > Autosupport. 2. Click Configure in the Channel row in the Support area. The Configure Dell EMC Support Delivery dialog box appears. The delivery method is displayed after the Channel label in the Support area. -
Page 82: Cli Equivalent
CLI equivalent Steps 1. To set up the administrator email, enter: # config set admin-email dd_admin1@emc.com The Admin Email is: dd_admin1@emc.com 2. To register the system to the gateway (Secure Remote Support), enter: # support connectemc device register ipaddr esrs-gateway [host-list] [ha-peer ipaddr] CAUTION: When configuring Secure Remove Services delivery on an HA pair: ●... - Page 83 there is a need to access either node before the HA configuration is complete, use the serial number of each node as the password. Steps 1. Verify the certificate subject name on the primary node. Run the following command: adminaccess certficate show sysadmin@dd9900-ha3a# adminaccess certificate show Subject Type...
- Page 84 NOTE: If no value is specified for the optional ha-name parameter, the ha create command promotes the primary node hostname to be the HA system name. ha create peer mysystem-p1.emc.com This command: ● Reboots both nodes, and completes the HA pairing when the nodes come back online. ●...
Need help?
Do you have a question about the PowerProtect DD9400 and is the answer not in the manual?
Questions and answers