Table of Contents
Advertisement
Quick Links
Advertisement
Table of Contents

Related Manuals for Yamaha MM8


Summary of Contents for Yamaha MM8
- Page 1 Owner’s Manual...
-
Page 2: Special Message Section
Yamaha. This product should be used only with the components supplied or; a cart, rack, or stand that is recommended by Yamaha. If a cart, etc., is used, please observe all safety markings and instructions that accom- pany the accessory product. - Page 3 Compliance with FCC regulations does * This applies only to products distributed by YAMAHA CORPORATION OF AMERICA. OBSERVERA! Apparaten kopplas inte ur växelströmskällan (nätet) så länge som den ar ansluten till vägguttaget, även om själva apparaten har stängts av.
- Page 4 • Use the specified adaptor (PA-5D, PA-150 or an equivalent recommended by Yamaha) only. Using the wrong adaptor can result in damage to the instrument or overheating. • Check the electric plug periodically and remove any dirt or dust which may have accumulated on it.
- Page 5 Yamaha cannot be held responsible for damage caused by improper use or modifications to the instrument, or data that is lost or destroyed. Always turn the power off when the instrument is not in use.
- Page 6 This product incorporates and bundles computer programs and contents in which Yamaha owns copyrights or with respect to which it has license to use others’ copyrights. Such copyrighted materials include, without limitation, all computer software, style files, MIDI files, WAVE data, musical scores and sound recordings. Any unauthorized use of such programs and contents outside of personal use is not permitted under relevant laws.
-
Page 7: Accessories
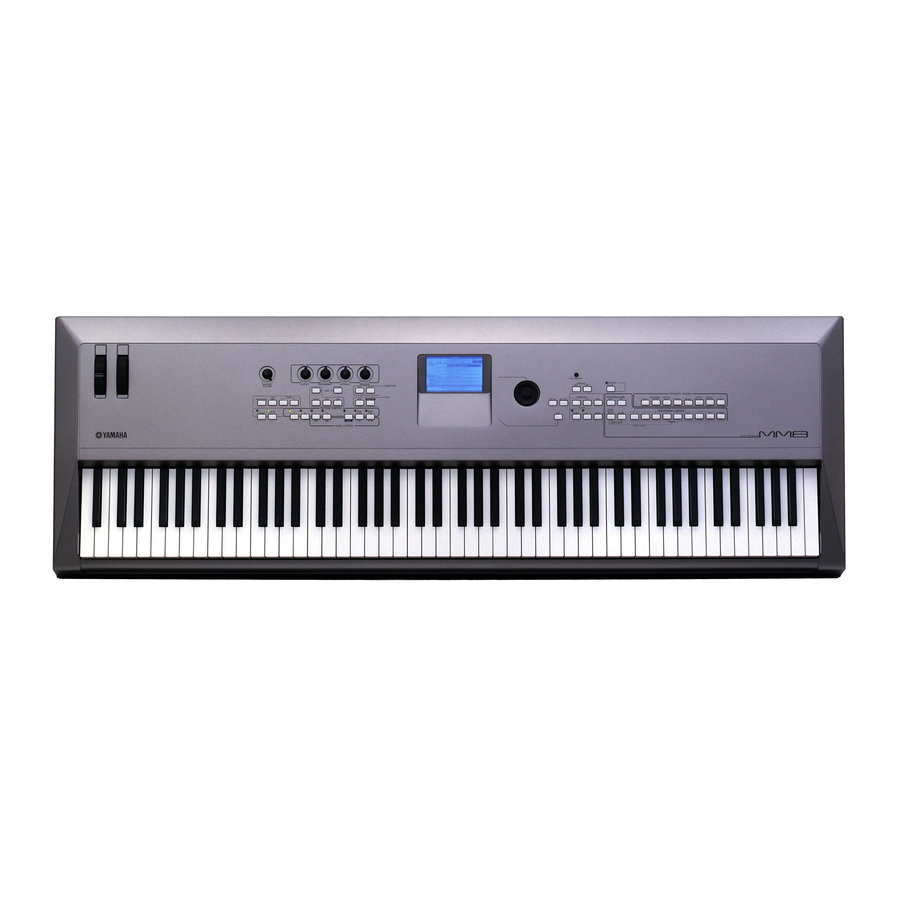
• AC Power Adaptor (May not be included depending on the region in which you purchased the product. Please check with your Yamaha dealer.) Since the MM6 and MM8 have the same control layout and input/output configuration, the MM6 will be used for example illustrations throughout this manual. -
Page 8: Main Features
■ Play the Keyboard Along with a Pattern The patterns in the MM6/MM8 were created to give you a wide range of different musical genres simply by playing back the pattern tracks. Moreover, you can easily record chord changes to both the patterns and your real time keyboard performance in the Song mode. -
Page 9: Table Of Contents
Performance List ... 96 Pattern List ... 98 Master EQ List ... 99 Effect Type List ... 100 Arpeggio Type List... 104 MIDI Implementation Chart... 106 MIDI Data Format ... 108 Specifications ... 109 Index ... 110 MM6/MM8 Owner’s Manual... -
Page 10: Setting Up
Make all necessary connections, as described below, BEFORE turning the power Using Headphones Since the MM6/MM8 has no built-in speakers, it must be connected to an external amplifier and speakers, headphones, or other sound output device. • Do not use headphones at a high volume for an extended period of time. -
Page 11: Turning The Power On
Doing so can damage the flash memory and result in a loss of data. Adjust Volume and Display Contrast Set the MM6/MM8 and external playback equipment volume controls to appropriate levels. If necessary, adjust the legibility of the LCD display by using the LCD Contrast Control. -
Page 12: Panel Controls And Terminals
...page 22 !0 FUNCTION [EDIT], [UTILITY] buttons ...pages 62, 64 !1 FILE [MENU], [EXECUTE] buttons...pages 67, 68 MM6/MM8 Owner’s Manual !2 PATTERN CONTROL [FINGER] button ... page 23 [AUTO FILL IN] button... page 51 ...pages 14, 36 [A]–[D] buttons ... page 51 [SYNC START] button ...pages 23, 51... -
Page 13: Rear Panel
#9 Cable clip ...page 15 Panel Controls and Terminals Rear Panel ... page 14 ... page 10 ... page 10 ... page 73 ... page 41 ... page 41 ... page 73 ... page 73 ... page 10 MM6/MM8 Owner’s Manual... -
Page 14: Quick Guide
The Demo Song will play again from the beginning when the end is reached. Press the [START/STOP] button to stop Demo playback. The Main display will reappear. MM6/MM8 Owner’s Manual VOICE name PATTERN name SONG name ARPEGGIO name NOTE •... -
Page 15: Play The Instrument
Try selecting and playing a variety of Voices. Press the [EXIT] button to return to the MAIN display. NOTE • To change the Voice category, press another CATEGORY SEARCH button. MAIN VOICE selection display CATEGORY name Current selected Voice MM6/MM8 Owner’s Manual... -
Page 16: Combining Voices-Dual
Hold for longer than a second Select and press the desired category button in the CATE- GORY SEARCH section. MM6/MM8 Owner’s Manual Two voices will sound at the same time. Dual Voice selection display The currently selected category The currently selected Dual Voice NOTE •... -
Page 17: Split The Keyboard
“split voice”. The split point setting can be changed as required (page 52). Split point Split Voice Press the [SPLIT] button. The currently selected split voice will sound to the left of the keyboard split point. Main Voice and Dual Voice MM6/MM8 Owner’s Manual Play the Instrument... - Page 18 For this example try selecting the “002 Symphony Strings”. Play the keyboard. Try playing the selected Split Voice. Press the [EXIT] button to return to the MAIN display. MM6/MM8 Owner’s Manual Split Voice selection display The currently selected category The currently selected Split Voice NOTE •...
-
Page 19: Selecting A Drum Voice
The DRUM Kit category will appear in the display. Use the dial to select the Drum Kit you want to play (001– 023). Play each key and enjoy the Drum Kit. Play the Instrument NOTE • See the Drum Kit List on page MM6/MM8 Owner’s Manual... -
Page 20: Using The Arpeggio Function
Arpeggio type. When you have finished using with the arpeggio function, press the [ARPEGGIO ON/OFF] button to turn it off. MM6/MM8 Owner’s Manual NOTE • The Arpeggio function can only be applied to the main and dual voices. -
Page 21: Changing The Arpeggio Type
(page 59). You can also record your performance (page 29). ● ● ● ● ● ● ● ● ● ● ● ● ● ● ● ● ● ● ● Arpeggio type Play the Instrument MM6/MM8 Owner’s Manual... -
Page 22: Playing Patterns
Refer to the Pattern list on page 98. Press the [START/STOP] button. The pattern rhythm will start playing. To stop playback, press the [START/STOP] button again. MM6/MM8 Owner’s Manual NOTE • To change the pattern category, use the CATEGORY [DEC]/ [INC] buttons. -
Page 23: Play Along With A Pattern
Press the button a second time to turn the sync start function off. Split point (54/F#2) The indicator will flash when Sync Start is on. Playing Patterns NOTE • The keyboard split point can be changed as required, as described on page 52. MM6/MM8 Owner’s Manual... - Page 24 Auto-accompani- ment Range Press the [START/STOP] button to stop pattern playback when you’re done. You can switch pattern “sections” to add variety to the accompaniment. Refer to “Pattern Variations (Sections)” on page 51. MM6/MM8 Owner’s Manual Split Point Split Point...
-
Page 25: Playing Auto-Accompaniment Chords
7aug Notes enclosed in parentheses will be recognized without them. Playing Patterns ● ● ● ● ● ● ● ● ● ● ● ● ● add9 sus4 M7aug m add9 dim7 7sus4 sus2 are optional; the chords MM6/MM8 Owner’s Manual... -
Page 26: Using Songs
PRESET Internal songs (three songs) USER User songs (songs you have recorded yourself; page 29) Songs stored on a USB storage device connected to the instrument (page 67) MM6/MM8 Owner’s Manual SONG SELECT Display Currently Selected Song NOTE • User songs (songs you’ve... -
Page 27: Song Fast Forward, Fast Reverse, And Pause
Song start [f] Fast Forward Press the fast forward button to rapidly skip ahead to a later point in the song. Using Songs ] Pause Press the pause button to pause playback. MM6/MM8 Owner’s Manual... -
Page 28: Types Of Songs
The chart below shows the basic flow for using the preset songs, user songs, and USB songs from storage to playback. Song Storage location Preset Songs (001–003) The three songs built into the instru- ment. PRESET MM6/MM8 Owner’s Manual USB Storage Device Your Own Performance Record (page 29) User Songs (001–005) Songs SMF conversion... -
Page 29: Recording Your Own Performance
This instrument allows you to choose whether recorded tracks will play back while you are recording or playing back other tracks (page 58). Melody or Other Keyboard Parts Track Track Track Track Track Track Track Chord Parts Specify Track(s) and Record Pattern Track Track MM6/MM8 Owner’s Manual... -
Page 30: Recording Procedure
[TRACK SELECT/MUTE] button. The selected track will flash in the display. Press and Hold Track 1 will be highlighted. MM6/MM8 Owner’s Manual CAUTION • If you record to a track that contains previously-recorded data the previous data will be overwritten and lost. - Page 31 Use the song clear or track clear func- tion (page 33) to delete unwanted data and make more room available for recording, then do the recording again. MM6/MM8 Owner’s Manual...
- Page 32 The following data is recorded before the beginning of the Song. Even if you change the data while recording is in progress, the data is not recorded. • Reverb type, Chorus type, Time signature, Pattern number, Pattern volume MM6/MM8 Owner’s Manual...
-
Page 33: Song Clear-Deleting User Songs
Track Clear function. Hold for Longer than a Second NOTE • To execute the Song Clear func- tion, press the [INC/YES] but- ton. Press [DEC/NO] button to cancel the Song Clear opera- tion. MM6/MM8 Owner’s Manual... -
Page 34: Track Clear-Deleting A Specified Track From A User Song
To execute the Track Clear function press the [INC/YES] button. The clear-in-progress message will appear briefly on the display while the track is being cleared. MM6/MM8 Owner’s Manual Hold for Longer than a Second NOTE • To execute the Track Clear func- tion, press the [INC/YES] but- ton. -
Page 35: Backup And Initialization
To clear the backed up data, turn the power on by pressing the [STANDBY/ ON] switch while holding the highest white key on the keyboard. The backed up data will be erased and the default values restored. MM6/MM8 Owner’s Manual... -
Page 36: Basic Operation And Displays
Basic Operation and Displays Basic Operation Overall MM6/MM8 control is based on the following simple operations. Press a button to select a basic function. Use the dial to select an item. Start/Stop a function. Song Category ● Volume Adjustment Adjust the volume of the sound heard from... - Page 37 Press this button after selecting a song or pattern to start song or pattern (rhythm) playback. Press the button a second time to stop playback. Basic Operation and Displays Next Category Currently Selected Category Name Currently Selected Item Press Briefly to Increment MM6/MM8 Owner’s Manual...
-
Page 38: The Displays
Press the CATEGORY [DEC]/[INC] button(s) as many times as necessary until the required function appears. You can then use the dial or [INC/YES] or [DEC/NO] buttons to adjust the value of the function as required. MM6/MM8 Owner’s Manual Title Most basic operations are carried out from the instrument’s MAIN display. -
Page 39: Main Display Items
Main Voice (page 15) Dual Voice (page 16) Split Voice (page 17) Pattern (page 22) Song (page 26) Arpeggio (page 20) USB status “CONNECT” appears when it is possible to access the USB TO DEVICE terminal (page 67). MM6/MM8 Owner’s Manual... -
Page 40: Using The Controllers
This controller is used to apply vibrato to the keyboard sound. The more you move this wheel up, the greater the effect that is applied to the sound. Try out the Modulation wheel with various Preset Voices while playing the keyboard. MM6/MM8 Owner’s Manual Knobs Maximum... -
Page 41: External Controllers
You can connect an optional Foot Controller (FC7) to the FOOT CONTROLLER jack on the rear panel. The ability to control volume with your foot can be an advantage during live performance. Increase value. FC4 or FC5 Using the Controllers MM6/MM8 Owner’s Manual... -
Page 42: Enhancing The Sound With Reverb, Chorus, And Dsp Effects
Reverb Type item. The currently selected reverb type will be dis- played. Reverb Type Item MM6/MM8 Owner’s Manual Use the dial to select a reverb type. You can check how the selected reverb type sounds by playing on the keyboard. -
Page 43: Selecting A Chorus Type
Refer to the Effect Type List on page 100 for information about the available chorus types. ● Adjusting the Chorus Send Level You can individually adjust the amount of chorus that is applied to the main, dual, and split voices. (page 63) The Selected Chorus Type MM6/MM8 Owner’s Manual... -
Page 44: Applying Dsp Effects
DSP ON/OFF item. DSP On/Off Item Use the dial to set the DSP ON or OFF as required. MM6/MM8 Owner’s Manual ■Changing the DSP type Press the [UTILITY] button to go to the UTILITY display. Use the CATEGORY [DEC] / [INC] but- tons to select the DSP Type item. -
Page 45: Handy Performance Features
Press the [EXIT] button to return to the original display. Press the TEMPO [+] or [-] button as many times as necessary to set the desired tempo. You can also hold either of the TEMPO buttons to continuously change the tempo value over large ranges. MM6/MM8 Owner’s Manual... -
Page 46: Adjusting The Metronome Volume
Press the category [INC] button once to display “Time Signature – Denominator”. MM6/MM8 Owner’s Manual Use the dial to select a beat length. Select the required length for each beat: 2,4,8 or 16 (half note, quarter note, eight note, or 16th note). -
Page 47: Adjusting The Tempo
When touch sensitivity is set to 4 (Off), all notes will be played at the same volume no matter how hard or softly you play the keys. NOTE • The initial default touch sensitivity setting is “2”. MM6/MM8 Owner’s Manual... -
Page 48: Select A Master Eq Setting For The Best Sound
Arpeggio Velocity item. The currently selected arpeggio velocity is dis- played. MM6/MM8 Owner’s Manual The Currently Selected Master EQ Type Use the dial to select the desired Master EQ setting. Five settings are available:1 through 5. -
Page 49: Transpose The Keyboard
Use the dial to set the tuning value between 415.3 and 466.2Hz as required. NOTE • This setting does not affect Drum Kit Voices. NOTE • Press the [INC/YES][DEC/NO] buttons simultaneously to instantly reset to the default setting. MM6/MM8 Owner’s Manual... -
Page 50: Shifting Keyboard Pitch In Octaves
[DOWN] buttons (both indicators go out). Octave Display ● OCTAVE +1 ● OCTAVE -1 One octave up One octave down NOTE • When a Drum Kit is selected, the percussion voices assigned to the keyboard are shifted in location but not pitch. MM6/MM8 Owner’s Manual... -
Page 51: Pattern Functions
The indicator will light when the Sync Start function is engaged. ● Sync Start When the Sync Start standby mode is engaged, pattern playback will begin as soon as you play a chord in the accompaniment range of the keyboard. MM6/MM8 Owner’s Manual... -
Page 52: Setting The Split Point
Press the [UTILITY] button to go to the UTILITY display. Use the CATEGORY [DEC] / [INC] but- tons to select the Split Point item. MM6/MM8 Owner’s Manual Split Point Accompaniment Range Press any of the main section buttons, [A]–[D], as required. -
Page 53: Play A Pattern With Chords But No Rhythm (Stop Accompaniment)
This is “Stop Accompa- niment”, and any of the chord fingerings recognized by the instrument can be used. The MM6/MM8 recognizes keys played in the auto accompaniment section of the keyboard as chords (page 25). -
Page 54: Chord Basics
flatted seventh, what alterations or tensions it uses ... all at a glance. ● Some Chord Types (These are just some of the “Standard” chord types recognized by the MM6/MM8. Suspended 4 sus4... - Page 55 (e.g. some minor chords followed by the minor seventh). • Two-note fingerings will produce a chord based on the previously played chord. • Some chords may not be recognized depending on the selected pat- tern. Pattern Functions add9 MM6/MM8 Owner’s Manual...
-
Page 56: Specify Chords Over The Entire Keyboard Range
In this mode only chords played in the normal way (page 25) can be detected. Press and hold the [FINGER] button for longer than a second so that the Chord Fingering item appears. Hold for Longer than a Second Use the dial to select 2 (FullKeyboard). MM6/MM8 Owner’s Manual... -
Page 57: Song Settings
Pressing and holding either button continuously increases or decreases the tempo. Song Volume Set from 000 to 127 Use the dial to set the Song volume as required. NOTE • Song volume can be adjusted while a song is selected. MM6/MM8 Owner’s Manual... -
Page 58: Track Mute
To mute a track, press the appropriate track button (TRACK [1]–[8], [PATTERN]) while holding the [TRACK SELECT/MUTE] button. Press the same button a second time to disengage track muting. MM6/MM8 Owner’s Manual No track number ... No data. Track number without frame ... Track contains data but is muted. -
Page 59: Memorize Your Favorite Panel Settings
CAUTION • Do not turn off the power while saving settings to the Perfor- mance Memory, otherwise the data may be damaged or lost. Memory 8 MM6/MM8 Owner’s Manual... -
Page 60: Recalling Settings From The Performance Memory
Press the PERFORMANCE MEMORY button, [1]–[8], containing the settings you want to recall. The panel controls will be instantly set accord- ingly. MM6/MM8 Owner’s Manual ● Settings That Can be Saved to the Performance Memory • Pattern settings Pattern number, FINGER ON/OFF, Split... -
Page 61: Erase A Performance Memory
Press [DEC/NO] if you want to cancel the operation. To execute the Performance Memory erase function press the [INC/YES] but- ton. The clear-in-progress message will appear briefly on the display while the data is being erased. MM6/MM8 Owner’s Manual... -
Page 62: Voice Editing
EDIT group Previous item Next item Currently selected item Parameters MM6/MM8 Owner’s Manual Use the dial or [DEC/NO] and [INC/YES] buttons to set the value. Press the [INC/YES][DEC/NO] buttons simul- taneously to instantly reset to the default set- ting. -
Page 63: Edit Display List
Chorus effect. 000–127 Determines how much of the Split Voice signal is sent to the DSP effect. 000–127 Determines how much of the unprocessed Split Voice signal is heard (without Reverb, Chorus or DSP effect processing). MM6/MM8 Owner’s Manual Voice Editing... -
Page 64: Utility Settings
UTILITY group Previous item Next item Currently selected item Parameter MM6/MM8 Owner’s Manual Use the dial or [DEC/NO] and [INC/YES] buttons to set the value. On/off type settings can be turned ON by pressing the [INC/YES] button, and OFF by pressing the [DEC/NO] button. -
Page 65: Utility Display List
2, 4, 8,16 Sets the length of each metronome beat. 000–127 Determines the volume of the metronome. ON/OFF When ON, demo playback will not start even if the [SONG] and [PATTERN] buttons are pressed simulta- neously. MM6/MM8 Owner’s Manual Utility Settings... -
Page 66: Storing/Saving Data
Yamaha cannot guarantee operation of USB storage devices that you pur- chase. Before purchasing a USB storage device, please consult your Yamaha dealer, or an authorized Yamaha distributor (see list at end the Owner’s Manual) for advice. ● To protect your data (write-protect switch) Some USB storage devices are equipped with a write-protect switch. -
Page 67: Using A Usb Storage Device
file functions will be active. NOTE • The FILE CONTROL display will not appear in any of the following cases: • During pattern or song playback • While data is being loaded from a USB storage device Storing/Saving Data CONNECT Page MM6/MM8 Owner’s Manual... -
Page 68: Formatting A Usb Storage Device
• If the Load item appears in step 2, press the CATEGORY [INC] / [DEC] buttons as many times as necessary until the Format item appears. MM6/MM8 Owner’s Manual Press [EXECUTE] button and a confir- mation message will appear. You can press the [DEC/NO] button at this point to cancel the operation. -
Page 69: Saving Data
Press [EXECUTE] or [INC/YES] if it is OK to overwrite the file, or [DEC/NO] to cancel. • The amount of time it will take to perform the save operation depends on the particular USB storage device you are using. MM6/MM8 Owner’s Manual Select characters l m n... -
Page 70: Convert A User Song To Smf Format And Save
The DESTINATION FILE will be highlighted, and a default name will appear for the con- verted song file. MM6/MM8 Owner’s Manual ● To Overwrite an Existing File If you want to overwrite a file that already exists on the USB storage device, use the dial or the [INC/YES] and [DEC/NO] buttons to select the file, then skip ahead to step 8. -
Page 71: Loading User Files And Pattern Files
• Pattern files created on other Yamaha keyboards (“sty” file exten- sion only) can be loaded into MM6/MM8 User Pattern No. 169. Pat- tern files cannot be created using the MM6/MM8. With the USB storage device containing the file you want to load connected to... -
Page 72: Deleting Data From A Usb Storage Device
USB TO DEVICE terminal, and that “CONNECT” is showing in the MAIN display. Press the [USB] button. MM6/MM8 Owner’s Manual Select the file you want to delete. You can press the [INC/YES] and [DEC/NO] buttons simultaneously to select the first song or user file on the USB storage device. -
Page 73: Connections
MIDI IN and OUT terminals The MIDI IN connector receives MIDI mes- sages from external MIDI devices. This can be used to control the MM6/MM8 or play it’s tone-generator from an external MIDI device. The performance data and control data gener- ated when it’s controllers and knobs are oper-... -
Page 74: Connecting To External Audio Equipment
Connections Connecting to External Audio Equipment Since the MM6/MM8 has no built-in speakers, it must be connected to an external amplifier and speakers, headphones, or other sound output device. ■Connecting to Powered Speakers or Monitor Speakers. For optimum, accurate reproduction of the instrument’s rich sounds with effects and full stereo imaging, use a pair of powered speakers. -
Page 75: Connecting A Usb Storage Device
• USB storage devices (flash memory, floppy disk drive, hard disk drive, etc.) The instrument does not necessarily support all commer- cially available USB devices. Yamaha cannot guarantee operation of USB devices that you purchase. Before pur- chasing a USB device for use with this instrument, please visit the following web page: http://www.yamahasynth.com/... - Page 76 Backing up data to a computer and organizing files/folders. USB Terminal Computer MM6/MM8 Owner’s Manual Copying files from a computer hard disk to a USB storage device, and then playing back the songs on the instrument. Files on a computer’s hard disk can be transferred to the instrument by first copying them to a USB...
-
Page 77: Connecting To A Personal Computer
USB cable. • Directly connect the instrument to the computer using a single USB cable. Do not use a hub. Connections ● ● ● ● ● ● ● ● ● ● ● ● ● MM6/MM8 Owner’s Manual... -
Page 78: Transferring Performance Data To And From A Computer
• If External Clock is ON and no clock signal is being received from an external device, the song, pattern, and metronome functions will not start. Press the [UTILITY] button to go to the UTILITY display. MM6/MM8 Owner’s Manual USB TO HOST Terminal USB Cable Description Use the CATEGORY [DEC] and [INC] buttons to select the item you want to set. -
Page 79: Initial Setup
Use the dial to select ON or OFF. Press [INC/YES] to send. NOTE • Initial Setup Data consists of 16 MIDI channels. Record the data for each channel on a separate track when recording to an external sequencer. Connections MM6/MM8 Owner’s Manual... -
Page 80: About The Supplied Disk
• Yamaha makes no representations or warranties with regard to the use of the software and documentation and cannot be held responsible for the results of the use of this manual and the software. - Page 81 SOFTWARE is recorded will be free from defects in mate- rials and workmanship under normal use for a period of fourteen (14) days from the date of receipt, as evidenced by a copy of the receipt. Yamaha’s entire About the Supplied Disk...
-
Page 82: Troubleshooting
The “OverCurrent” is shown in the upper-right area of the MAIN display and the USB device does not respond. MM6/MM8 Owner’s Manual Possible Cause and Solution This is normal, and is caused by the brief current surge produced when the device is turned on or off. Be sure to turn the volume down when turning the device on or off. -
Page 83: Messages
Set the write-protect switch to the “overwrite” position before use. Indicates that data cannot be saved because the total number of files exceeds the maximum capacity. Indicates that the designated function is not available because the instrument is executing another job. MM6/MM8 Owner’s Manual... -
Page 84: Voice List
Reso Clavi Wah Clavi Petit Clean Tiny MM6/MM8 Owner’s Manual NOTE • The Voice List includes MIDI program change numbers for each voice. Use these program change numbers when playing the instrument via MIDI from an external device. • Program Numbers 001 to 128 directly relate to MIDI Pro- gram Change Numbers 000 to 127. - Page 85 GM Overdriven Gt GM Distortion Gt GM Gt Harmonics GM Acoustic Bass GM Finger Bass GM Pick Bass GM Fretless Bass GM Slap Bass 1 GM Slap Bass 2 GM Synth Bass 1 GM Synth Bass 2 MM6/MM8 Owner’s Manual...
- Page 86 Ober Horns Big Squish After 1984 Timeless Kustom 80's Brass Techno Brass Synth Brass Hard Saw Brass Syn Saw Brass Sweet! Trumpet Trumpet MM6/MM8 Owner’s Manual Bank Select Voice Order in Voice Name category (0–127) MIDI Program Voice Name Change (0–127) (1–128)
- Page 87 Poly Master Trancy Silk Road Rezz Punch Sine Comp Amb Sine Clack Bell Pulse Stop Mystery Sine Stroll FM Metal FS Buzz Digi Osc Bleep Twist Landscape Meow Pad Mind Bell Rebirth '70 GM Rain GM Sound Track MM6/MM8 Owner’s Manual...
- Page 88 Brush Kit Symphony Kit SFX Kit 1 SFX Kit 2 Under Street Perc Loop Ghost Haunted Volcano Laser Beam Lo-Fi Looper U.F.O. Takeoff MM6/MM8 Owner’s Manual Bank Select Voice Order in Voice Name category (0–127) MIDI Program Voice Name Change (0–127) (1–128)
- Page 89 Yang Qin Jing Hu Ban Hu Zheng Sheng Suo Na Banjo Asian Bell Bonang Thai Bells Detuned Sitar GM Sitar GM Banjo GM Shamisen GM Koto GM Kalimba GM Bagpipe GM Fiddle GM Shanai Voice Name Voice List MM6/MM8 Owner’s Manual...
-
Page 90: Drum Kit List
4 Triangle Open A# 5 4 Shaker 4 Jingle Bells 5 Bell Tree C# 6 C# 5 D# 6 D# 5 F# 6 MM6/MM8 Owner’s Manual 127/000/081 127/000/082 Alternate Standard Kit Analog T8 Kit Group Group Surdo Mute Surdo Open... - Page 91 Conga Analog L Guiro Long Tambourine Maracas 2 Maracas Shaker Cabasa Cuica Mute Claves 2 Cuica Open Dance Percussion 3 Dance Percussion 4 Dance Breath 1 Dance Breath 2 Triangle Mute Triangle Open Bell Tree MM6/MM8 Owner’s Manual Alternate Group...
- Page 92 4 Triangle Open A# 5 4 Shaker 4 Jingle Bells 5 Bell Tree C# 6 C# 5 D# 6 D# 5 F# 6 MM6/MM8 Owner’s Manual 126/000/037 126/000/040 Alternate Arab.Kit Indian Kit Group Group Zarb Back mf Zarb Tom f...
- Page 93 Crash Analog Tom Electro 6 Tom Analog 6 Cowbell Analog Conga Analog H Conga Analog M Conga Analog L Maracas 2 Claves 2 Scratch H 2 Scratch H 2 Scratch L 2 Scratch L 3 MM6/MM8 Owner’s Manual Alternate Group...
- Page 94 4 Triangle Open A# 5 4 Shaker 4 Jingle Bells 5 Bell Tree C# 6 C# 5 D# 6 D# 5 F# 6 MM6/MM8 Owner’s Manual 127/000/113 127/000/033 Alternate Dance Kit2 Jazz Kit Group Group Reverse Cymbal Hi Q 2...
- Page 95 Scratch H 3 Wind Chime Telephone Ring Car Engine Ignition Car Tires Squeal Car Passing Car Crash Siren Train Jet Plane Starship Burst Roller Coaster Submarine Laugh Scream Punch Heartbeat Footsteps Machine Gun Laser Gun Explosion Firework MM6/MM8 Owner’s Manual...
-
Page 96: Performance List
TurkishDance D,B Underground D Perfor- Bank Genre Bank mance HipHop R&B/Jazz 2–8 2–8 Rock MM6/MM8 Owner’s Manual Main Voice Dual Voice Split Voice Power Grand Sweetness Mega Steel Guitar Da Pad After 1984 Rock Percussive Over The Top Dancy Hook... - Page 97 Multi Finger Multi Finger Multi Finger Multi Finger Multi Finger Full Keyboard Multi Finger Multi Finger Multi Finger Multi Finger Multi Finger Multi Finger Multi Finger Multi Finger Multi Finger Multi Finger Multi Finger Multi Finger Multi Finger MM6/MM8 Owner’s Manual...
-
Page 98: Pattern List
NOTE • Patterns 57–112 play on the drum and bass parts from patterns 1–56, while patterns 113–168 play only the drum parts. “D” in a pattern name means “Drums,” and “B” means “Bass.” MM6/MM8 Owner’s Manual Pattern No. Pattern Name... -
Page 99: Master Eq List
Hard The bass is boosted for extra punch. Retro The reproduction range is reduced to produce an AM radio type sound. High Pass The low and mid frequencies are reduced so that the highs are prominent. Description MM6/MM8 Owner’s Manual... -
Page 100: Effect Type List
Cyclically modulates the phase to add modulation to the sound. EP PHASER2 EP PHASER3 ENS DETUNE Chorus effect without modulation, created by adding a slightly pitch-shifted sound. ROTARY SP5 Simulates a rotary speaker. NO EFFECT No effect. MM6/MM8 Owner’s Manual Description Description... - Page 101 Produces two delayed sounds: L and R. Two feedback delays are provided. ECHO Two delayed sounds (L and R), and independent feedback delays for L and R. CROSS DELAY The feedback of the two delayed sounds is crossed. DIST HEAVY Heavy distortion. Description MM6/MM8 Owner’s Manual Effect Type List...
- Page 102 Controls the level of a specified frequency band of the input signal. PHASER1 PHASER2 EP PHASER1 Cyclically modulates the phase to add modulation to the sound. EP PHASER2 EP PHASER3 DYN PHASER PITCH CHG1 PITCH CHG2 Changes the pitch of the input signal. PITCH CHG3 MM6/MM8 Owner’s Manual Description...
- Page 103 EP TC WAH EP Touch Wah EP TC WAH2 WH+DST+DLY1 Wah, Distortion and Delay are connected in series. WH+DST+DLY2 WH+OD+DLY1 Wah, Overdrive and Delay are connected in series. WH+OD+DLY2 NO EFFECT No effect. Description MM6/MM8 Owner’s Manual Effect Type List...
-
Page 104: Arpeggio Type List
4 / 4 Pf Arp1 4 / 4 Pf Arp2 4 / 4 Pf Arp3 4 / 4 Pf Arp4 4 / 4 MM6/MM8 Owner’s Manual Arpeggio Voice Type Type Pf Arp5 Synth Lead Pf Arp6 Synth Lead Pf Arp7... - Page 105 4 / 4 Arab. Kit 4 / 4 Indian Kit 4 / 4 Indian Kit 4 / 4 Chinese kit 4 / 4 Afro Cuban Kit 4 / 4 Afro Cuban Kit 4 / 4 Pop Latin Kit MM6/MM8 Owner’s Manual...
-
Page 106: Midi Implementation Chart
MIDI Implementation Chart MM6/MM8 Owner’s Manual... - Page 107 MIDI Implementation Chart MM6/MM8 Owner’s Manual...
-
Page 108: Midi Data Format
When accompaniment is stopped, an FCH message is transmitted. When the clock is set to External, both FAH (accompaniment start) and FCH (accompaniment stop) are recognized. 4 Local ON/OFF <Local ON> Bn, 7A, 7F <Local OFF> Bn, 7A, 00 Value for “n” is ignored. MM6/MM8 Owner’s Manual... -
Page 109: Specifications
Accessories * Specifications and descriptions in this owner's manual are for information purposes only. Yamaha Corp. reserves the right to change or modify prod- ucts or specifications at any time without prior notice. Since specifications, equipment or options may not be the same in every locale, please check with your Yamaha dealer. -
Page 110: Index
Drum Kit List ... 90 [DRUM/PERC/SE] button ... 19 DSP ... 44 DSP On/Off ... 65 DSP Type ... 44, 65 MM6/MM8 Owner’s Manual DSP Type List...101 Dual...16 [DUAL] button ...13, 16 Dual Voice ...16 Dual Voice Chorus Level ...63 Dual Voice Dry Level...63... - Page 111 USB Storage Device ...66, 75 USB TO DEVICE terminal ...13, 73 USB TO HOST terminal...13, 73 USB-MIDI Driver...77 [USER] button ...12, 26, 30 User Pattern...71 User Song...28, 29 [UTILITY] button...12, 64 UTILITY display ...38 Voice...15 Voice List...84 Index MM6/MM8 Owner’s Manual...
-
Page 112: Limited Warranty
If during the first 90 days that immediately follows the purchase date, your new Yamaha product covered by this warranty is found to have a defect in material and/or workmanship, Yamaha and/or its authorized representative will repair such defect without charge for parts or labor. - Page 113 For details of products, please contact your nearest Yamaha representative or the authorized distributor listed below. Pour plus de détails sur les produits, veuillez-vous adresser à Yamaha ou au distributeur le plus proche de vous figurant dans la liste suivante.
- Page 114 Yamaha Web Site (English only) http://www.yamahasynth.com/ Yamaha Manual Library http://www.yamaha.co.jp/manual/ U.R.G., Pro Audio & Digital Musical Instrument Division, Yamaha Corporation © 2008 Yamaha Corporation WM52900 803POTYX.X-01A1 Printed in China...