Table of Contents
Advertisement
Quick Links
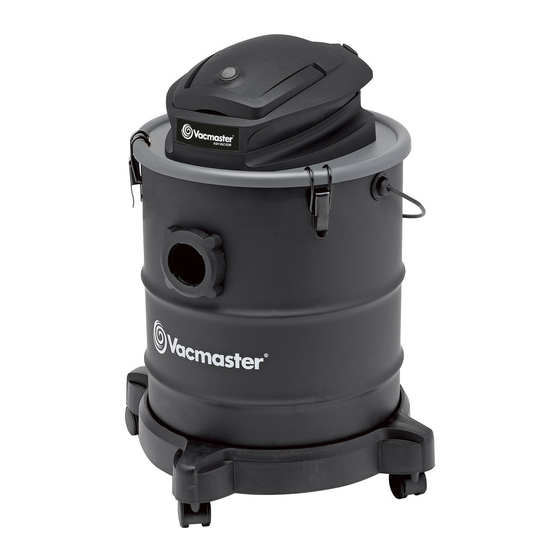
Ash Vacuum
Operator's Manual
6 Gallon
Model No.
EATC608S
FOR YOUR SAFETY
Read and understand this manual before use.
Keep this manual for future reference.
Distributed By
Replacement Filters &
Cleva North America, Inc.
Accessories available at:
601 Regent Park Court
Vacmaster.com
Greenville, SC 29607
Advertisement
Table of Contents

Related Manuals for Vacmaster EATC608S


Summary of Contents for Vacmaster EATC608S
- Page 1 Ash Vacuum Operator’s Manual 6 Gallon Model No. EATC608S FOR YOUR SAFETY Read and understand this manual before use. Keep this manual for future reference. Distributed By Replacement Filters & Cleva North America, Inc. Accessories available at: 601 Regent Park Court Vacmaster.com...
-
Page 2: Table Of Contents
FOR YOUR SAFETY: CAREFULLY READ AND UNDERSTAND ALL INSTRUCTIONS. WARRANTY ® We take pride in producing a high quality, durable product. This Vacmaster product carries a limited two (2) year warranty against defects in workmanship and materials from date of purchase under normal household use. -
Page 3: Important Safety Instructions
IMPORTANT SAFETY INSTRUCTIONS READ AND UNDERSTAND ALL INSTRUCTIONS BEFORE USING THIS VACUUM Read and understand this operator’s manual and all labels on the Ash Vacuum cleaner before operating. Safety is a combination of common sense, staying alert and knowing how your vacuum works. - Page 4 • Turn off all controls before unplugging. • Do not put any object into openings. Do not use with any opening blocked; keep free of dust, lint, hair, and anything that may reduce air flow. • Keep hair, loose clothing, fingers, and all parts of body away from openings and moving parts. •...
-
Page 5: Double Insulation Instructions
DOUBLE INSULATION INSTRUCTIONS This Ash Vacuum is double-insulated, eliminating the need for a separate grounding system. Use only identical replacement parts. Read the instructions for Servicing Double-Insulated Ash Vacuum before servicing. Use this Ash Vacuum as described in this manual. Observe the following warnings that appear on the motor housing of your Ash Vac. -
Page 6: Extension Cords
EXTENSION CORDS When using an extension cord with your Ash Vacuum refer to the following table to determine the required A.W.G. wire size. Before using the cleaner make sure the power cord and extension cord are in good working condition. Make repairs or replacements before using the vacuum cleaner. Only use extension cords that are rated for outdoor use. -
Page 7: Getting To Know Your Ash Vacuum
GETTING TO KNOW YOUR ASH VACUUM Remove all contents from the box. Remove the power head and take out any contents inside the collection tank. Check each item against the carton contents list. Description ......Qty Power Head .......1 Ash Filter........1 Collection Tank ......1 Aluminum Wand......1 Aluminum Hose......1... -
Page 8: General Assembly Instructions
GENERAL ASSEMBLY INSTRUCTIONS WARNING : DO NOT PLUG POWER CORD INTO POWER OUTLET. MAKE SURE PLUG IS DISCONNECTED BEFORE ASSEMBLING THE ASH VACUUM. TO REDUCE THE RISK OF ELECTRIC SHOCK, DO NOT EXPOSE TO RAIN. 1. Remove the Ash Vacuum from the package. 2. -
Page 9: Led Work Light Use
LED WORK LIGHT USE When vacuuming in a dark room or in the corner of a fireplace or stove, the LED Work Light can help shed some light on the work area. Attach the LED Work Light to the crevice tool or wand with the included hook and loop strap, and switch it on when you need more light (Fig. -
Page 10: Ash Vacuum Operation
ASH VACUUM OPERATION 1. Make sure all parts are in place. Never use ash vacuum without the filter in place. Never use ash vacuum without the metal nozzle or crevice tool in place. 2. Make sure the on/off switch is in the "O" (OFF) position (Fig. 1). 3. -
Page 11: Blower Operation
BLOWER OPERATION This ash vacuum has blowing capabilities. To use the blower feature follow the instructions listed. 1. Insert the large end of the hose into the blower connection in the top of the motor housing (Fig. 1). 2. Ensure the on/off switch is turned to the "O" (OFF) position, then plug the power cord into the electrical outlet (Fig. -
Page 12: Maintenance
MAINTENANCE WARNING: ALWAYS DISCONNECT THE PLUG FROM THE POWER OUTLET BEFORE REMOVING THE POWER HEAD FROM COLLECTION TANK. REMOVING AND CLEANING THE FILTER 1. Verify that the power cord is disconnected from the outlet (Fig. 1). 2. Remove the power head (Fig. 2). 3. -
Page 13: Troubleshooting
TROUBLESHOOTING WARNING: TO REDUCE THE RISK OF ELECTRIC SHOCK-UNPLUG BEFORE TROUBLE SHOOTING. Problem Possible Cause Solution Check power supply-cord, No power supply. breakers, fuses. Check the filter assembly and The filter is not installed Vacuum will not operate. make sure it is against the correctly onto the micro-switch. -
Page 14: Exploded View
EXPLODED VIEW... -
Page 15: Parts List
PARTS LIST Part Part Number Description Quantity Power Head Assembly AVPF3 Ash Filter Assembly Collection Tank 551163107 Vacuum Port Assembly 551038112 Base 551021122 Caster 551166105 Aluminum Hose 551104116 Aluminum Wand 551166106 Aluminum Crevice Tool VLED LED Work Light...
Need help?
Do you have a question about the EATC608S and is the answer not in the manual?
Questions and answers