Table of Contents
Advertisement
Available languages
Available languages
Quick Links
Advertisement
Chapters
Table of Contents

Related Manuals for KitchenAid KXA42


Summary of Contents for KitchenAid KXA42
- Page 1 Brasil KXA42 W11032845A_EN_Final.indd 1 2/17/17 2:37 PM...
- Page 2 W11032845A_EN_Final.indd 2 2/17/17 2:37 PM...
-
Page 3: Table Of Contents
TABLE OF CONTENTS COFFEE MAKER SAFETY �������������������������������������������������������������������������������������4 Important safeguards �������������������������������������������������������������������������������������4 Electrical requirements �����������������������������������������������������������������������������������6 PARTS AND FEATURES �����������������������������������������������������������������������������������������7 Parts and accessories ��������������������������������������������������������������������������������������7 Display and control panel features �����������������������������������������������������������������8 OPERATING THE COFFEE MAKER ���������������������������������������������������������������������9 Installing the water filter ���������������������������������������������������������������������������������9 Setting the clock �������������������������������������������������������������������������������������������11 Setting brew strength �����������������������������������������������������������������������������������11 Filling the Coffee Maker with water for brewing �����������������������������������������12 Pause and pour feature ��������������������������������������������������������������������������������12... -
Page 4: Coffee Maker Safety
COFFEE MAKER SAFETY IMPORTANT SAFEGUARDS When using electrical appliances, basic safety precautions should always be followed, including the following: 1. Read all instructions. Misuse of appliance may result in personal injury. 2. The heating element surface is subject to residual heat after use. - Page 5 COFFEE MAKER SAFETY 5. Keep the appliance and its cord out of reach of children under 8 years of age. 6. Unplug Coffee Maker from outlet when not in use and before cleaning. Allow to cool before putting on or taking off parts and before cleaning the appliance.
-
Page 6: Electrical Requirements
COFFEE MAKER SAFETY ELECTRICAL REQUIREMENTS NOTE: This Coffee Maker has a grounded plug� To reduce the risk of electrical shock, this plug will fit in an outlet only one way� If the plug does not fit in the outlet, contact a qualified electrician� Do not modify the plug in any way�... -
Page 7: Parts And Features
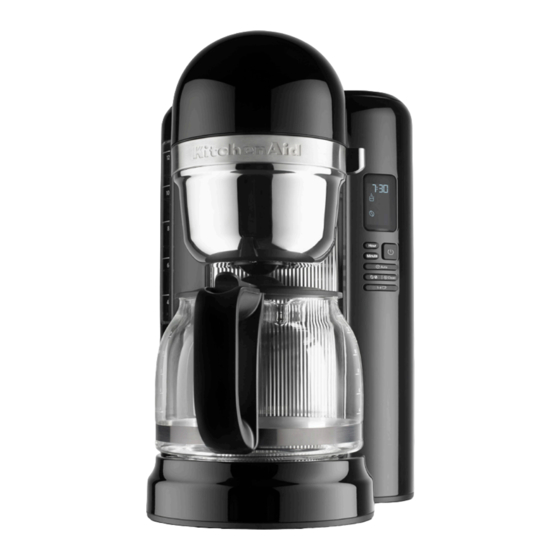
PARTS AND FEATURES PARTS AND ACCESSORIES Water tank lid Gold Tone permanent filter Programmable display Water tank Brew head Filter basket Brew basket Water tank window Carafe lid Glass carafe Cord storage in base Warming plate (not shown) Filter assembly Charcoal filter PARTS AND FEATURES | 7 W11032845A_EN_Final.indd 7... -
Page 8: Display And Control Panel Features
PARTS AND FEATURES DISPLAY AND CONTROL PANEL FEATURES Programmable display Clock Brewing status icon Warming status icon Auto indicator Regular strength indicator Bold strength indicator Small batch indicator Clean indicator Control panel 8 | PARTS AND FEATURES W11032845A_EN_Final.indd 8 2/17/17 2:37 PM... -
Page 9: Operating The Coffee Maker
OPERATING THE COFFEE MAKER INSTALLING THE WATER FILTER Before first use Wash the Gold Tone permanent filter, filter basket, and carafe in hot, soapy water; then rinse with clean water and dry� Do not use abrasive cleansers or scouring pads� NOTE: These parts can also be washed in the top rack of the dishwasher�... - Page 10 OPERATING THE COFFEE MAKER Place the filter assembly in the well at the bottom of the water reservoir� Push the filter assembly slightly to make sure it fits snugly� Cord is stored in base� If needed, gently pull cord outwards until fully extended or just long enough to reach the outlet�...
-
Page 11: Setting The Clock
OPERATING THE COFFEE MAKER SETTING THE CLOCK NOTE: When the Coffee Maker is first plugged in or when power is restored after an interruption, the display will initially show 12:00� To set the minutes: Press MINUTE� The Hour setting will switch to a solid display and the Minute setting To set the hour: Press HOUR�... -
Page 12: Filling The Coffee Maker With Water For Brewing
OPERATING THE COFFEE MAKER FILLING THE COFFEE MAKER WITH WATER FOR BREWING TIP: Brew two pots of fresh, cool water and discard before brewing the first pot of coffee� Lift the water tank lid and fill Place the carafe in the Coffee Maker� with enough fresh, cool water to Make sure the bottom of the carafe make the desired amount of coffee�... -
Page 13: Filling The Filter Basket
OPERATING THE COFFEE MAKER FILLING THE FILTER BASKET NOTE: Do not operate the Coffee Maker without the filter basket in place� NOTE: If you do not wish to use the Gold Tone permanent filter, you may use a flat bottom paper coffee filter instead;... -
Page 14: Coffee Dosage Guide
OPERATING THE COFFEE MAKER COFFEE DOSAGE GUIDE For best results, use a kitchen scale and the chart below when filling the filter basket with coffee grounds� As a baseline, use medium ground coffee (see picture to the left)� Alter grind and/or dosage to taste�... -
Page 15: Programming The Auto Feature
OPERATING THE COFFEE MAKER PROGRAMMING THE AUTO FEATURE To set the time the Coffee Maker should begin brewing: Press HOUR� The hour digits will change with To program the Coffee Maker to each press; or press and hold to brew coffee at a preset time: Press scroll rapidly�... -
Page 16: Using The Previously Programmed Auto Time
OPERATING THE COFFEE MAKER USING THE PREVIOUSLY PROGRAMMED AUTO TIME These steps can be followed to save the Auto time after following the steps in the “Programming the Auto feature” section� To save the current displayed time and exit Auto: Wait for 10 seconds, or press any button ( Press �... -
Page 17: Brewing Coffee
OPERATING THE COFFEE MAKER BREWING COFFEE TIP: Brew two pots of fresh, cool water and discard before brewing the first pot of coffee� Press to begin brewing coffee� The Coffee Maker will beep The Coffee Maker will beep once, three times when the Brew cycle and the “Brew”... -
Page 18: Care And Cleaning
CARE AND CLEANING CLEANING THE COFFEE MAKER Calcium deposits (scale) from water will build up in the Coffee Maker over time and impair brewing efficiency and coffee quality� If you notice that it takes longer than usual to brew or that the Coffee Maker is making unusual noises, then it is time to descale�... - Page 19 CARE AND CLEANING When the “Clean” indicator begins to flash on the display, run a clean cycle: Press � The “Clean” indicator will stop flashing� Then press the BREW button to Run at least two water-only cycles begin the Clean cycle� after the Clean cycle is complete�...
-
Page 20: Troubleshooting
TROUBLESHOOTING 3� If you hear three rapid tones: • There is no water in the water tank� The Coffee Maker will not brew� Fill the water tank with fresh, cool water and continue with the brewing cycle as described in the “Brewing coffee” section�... - Page 21 ÍNDICE AVISOS DE SEGURANÇA �����������������������������������������������������������������������������������22 Instruções importantes de segurança ����������������������������������������������������������22 Condições elétricas ��������������������������������������������������������������������������������������24 POR ONDE COMEÇO? ���������������������������������������������������������������������������������������25 PEÇAS E CARACTERÍSTICAS������������������������������������������������������������������������������26 Peças e acessórios ����������������������������������������������������������������������������������������26 Display e características do painel de controle ��������������������������������������������27 MONTANDO A CAFETEIRA �������������������������������������������������������������������������������28 Instalando o filtro de água ����������������������������������������������������������������������������28 Configurando o relógio ��������������������������������������������������������������������������������30 Definindo a intensidade do café...
-
Page 22: Avisos De Segurança
AVISOS DE SEGURANÇA A sua segurança e a de terceiros é muito importante. Este manual e o seu produto têm muitas mensagens importantes de segurança. Sempre leia e siga as mensagens de segurança. Este é o símbolo de alerta de segurança. Este símbolo alerta sobre situações que podem trazer risco a sua vida, ferimentos a você... - Page 23 7. O uso de acessórios não recomendados ou não vendidos pela KitchenAid pode causar incêndio, choque elétrico ou ferimentos. 8. Não use o produto em ambientes externos.
-
Page 24: Condições Elétricas
AVISOS DE SEGURANÇA 16. Nunca utilize produtos tóxicos (amoníaco, álcool, removedores, etc.) e nem esponja de aço ou escovas, na limpeza da sua cafeteira. Estes produtos podem danificar e deixar odores desagradáveis no interior da sua cafeteira. Evite também o contato destes produtos com a sua cafeteira, pois poderão danificá-la. -
Page 25: Por Onde Começo
POR ONDE COMEÇO? POR ONDE COMEÇO? Conexão à tomada POR ONDE COMEÇO? O plugue do cabo de alimentação da Conexão à tomada sua cafeteira é de 3 pinos em formato Conexão à tomada O plugue do cabo de alimentação da ADVERTÊNCIA sextavado, conforme ABNT (NBR-14136). -
Page 26: Peças E Características
PEÇAS E CARACTERÍSTICAS PEÇAS E ACESSÓRIOS Tampa do reservatório Filtro permanente de água Gold Tone Display programável Reservatório de água Cabeça de preparo Porta-filtro Suporte de preparação Visor do reservatório de água Tampa da jarra Jarra de vidro Armazenamento do Base de aquecimento cabo de alimentação na base (não mostrado) -
Page 27: Display E Características Do Painel De Controle
PEÇAS E CARACTERÍSTICAS DISPLAY E CARACTERÍSTICAS DO PAINEL DE CONTROLE Display programável Relógio Ícone status do Ícone status de “Preparo” “Aquecimento” Indicador de automático Indicador de intensidade Indicador de intensidade “Regular” “Forte” (Bold) Indicador de “Pouca Indicador de Quantidade” “Limpeza” Painel de controle PEÇAS E CARACTERÍSTICAS | 27 W11032845A_PT_Final.indd 27... -
Page 28: Montando A Cafeteira
MONTANDO A CAFETEIRA INSTALANDO O FILTRO DE ÁGUA Antes do primeiro uso Antes de usar a cafeteira lave o portafiltro, o filtro permanente Gold Tone e a jarra com água quente e sabão neutro� Depois enxágue e seque com um pano macio, limpo e seco�... - Page 29 MONTANDO A CAFETEIRA ADVERTÊNCIA Risco de Choque Elétrico Conecte o plugue do produto a uma Coloque o conjunto do filtro no tomada adequada. fundo do reservatório de água� Empurre o conjunto do filtro Conecte o aterramento do produto levemente para verificar se está a um terra efetivo.
-
Page 30: Configurando O Relógio
MONTANDO A CAFETEIRA CONFIGURANDO O RELÓGIO NOTA: Quando a cafeteira for conectada pela primeira vez ou quando a energia for restaurada depois de uma interrupção, o display exibirá 12:00� Para configurar os minutos, pressione o botão “Minutos”� A configuração de minutos começará a piscar� Os dígitos de minutos serão alterados Para configurar a hora, pressione o a cada toque ou pressione e... -
Page 31: Enchendo A Cafeteira Com Água Para O Preparo
MONTANDO A CAFETEIRA ENCHENDO A CAFETEIRA COM ÁGUA PARA O PREPARO DICA: Prepare 2 jarras de água limpa e fresca, execute o ciclo de preparo da cafeteira e descarte antes de preparar a primeira jarra de café (somente ao usar pela primeira vez)�... -
Page 32: Enchendo O Porta-Filtro
MONTANDO A CAFETEIRA ENCHENDO O PORTA-FILTRO NOTA: Não opere a cafeteira sem o porta-filtro� NOTA: Se você não deseja utilizar o filtro permanente Gold Tone, você pode utilizar um filtro de papel de fundo plano� Não use os dois tipos de filtros ao mesmo tempo, pois pode causar vazamento de água e café... -
Page 33: Guia De Dosagem De Café
MONTANDO A CAFETEIRA GUIA DE DOSAGEM DE CAFÉ Para melhores resultados, use uma balança de cozinha e o guia a seguir ao encher a cafeteira com café� Utilize café naturalmente moído (veja imagem ilustrativa)� Alterar moagem e / ou dosagem a gosto� XÍCARAS (*) ÁGUA (LITROS) CAFÉ... -
Page 34: Configurando A Função "Preparo Automático
MONTANDO A CAFETEIRA CONFIGURANDO A FUNÇÃO “PREPARO AUTOMÁTICO” A cafeteira pode ser programada para preparar café em um horário pré-programado, possibilitando acordar com um café fresco toda manhã� Para programar e ativar o temporizador de preparo automático: Pressione o botão “Hora” para selecionar o horário que deseja que a cafeteira inicie o preparo�... -
Page 35: Usando Configurações De
MONTANDO A CAFETEIRA USANDO CONFIGURAÇÕES DE “PREPARO AUTOMÁTICO” PRÉ-PROGRAMADAS Estes passos também podem ser seguidos para salvar o horário de Preparo Automático, depois de executar os passos do item “Configurando a função Preparo Automático”� Para salvar a hora selecionada no display e sair do modo Automático, aguarde 10 segundos ou pressione Pressione (... -
Page 36: Preparando O Café
MONTANDO A CAFETEIRA PREPARANDO O CAFÉ DICA: Prepare 2 jarras de água limpa e fresca, execute o ciclo de preparo da cafeteira e descarte antes de preparar a primeira jarra de café (somente ao usar pela primeira vez)� Pressione ( ) para iniciar o preparo do café�... -
Page 37: Cuidados E Limpeza
CUIDADOS E LIMPEZA REMOÇÃO DE RESÍDUOS DA CAFETEIRA Ao longo do tempo serão formados ADVERTÊNCIA depósitos de cálcio (crosta) provenientes da água, na bomba de calor, que poderão prejudicar a eficiência da sua cafeteira, tanto no preparo e como na qualidade do café�... - Page 38 CUIDADOS E LIMPEZA CUIDADOS E LIMPEZA Quando o indicador “Limpar” começar a piscar inicie o ciclo de limpeza pressionando o botão ( )� O indicador vai parar de piscar� Então Realize pelo menos 2 ciclos pressione o botão “Preparo” para completos de preparo, usando iniciar o ciclo de limpeza�...
-
Page 39: Soluções De Problemas | 39
Se o problema persistir entre em contato com a Central de Relacionamento Se o problema persistir entre em contato com a Central de Relacionamento KitchenAid. Não retorne a cafeteira ao revendedor� KitchenAid. Não retorne a cafeteira ao revendedor. Os revendedores não oferecem estes serviços�... -
Page 40: Dados Técnicos
Peso líquido (kg) Peso bruto (kg) QUESTÕES AMBIENTAIS 1. Embalagem 2. Produto A KitchenAid procura usar embalagens Este produto foi construído com materiais cujas partes sejam de fácil separação, bem que podem ser reciclados e/ou reutilizados� como de materiais recicláveis� Portanto, as Então, ao se desfazer deste produto,... -
Page 41: Assistência Técnica Ou De Manutenção
ASSISTÊNCIA TÉCNICA OU DE MANUTENÇÃO Em caso de dúvidas ou de problemas no Entre em contato com a Central de produto, entre em contato com a Central Relacionamento KitchenAid através dos de Relacionamento KitchenAid. números de telefone abaixo ou acesse o nosso site�... - Page 42 W11032845A_PT_Final.indd 42 2/17/17 2:55 PM...
- Page 43 W11032845A_PT_Final.indd 43 2/17/17 2:55 PM...
- Page 44 Whirlpool S.A. Unidade de Eletrodomésticos Atendimento ao Consumidor Rua Olympia Semeraro nº 675 Jardim Santa Emília CEP 04183-901 São Paulo - SP - Caixa postal 5171 Capitais e regiões metropolitanas: 4004 1759 Demais localidades: 0800 722 1759 ©2017� All rights reserved�...
Need help?
Do you have a question about the KXA42 and is the answer not in the manual?
Questions and answers