KitchenAid JavaStudio KCM511 Instruction Manual
Kitchenaid javastudiotm collection coffee makers with glass carafe instructions manual kcm511 kcm534
Hide thumbs
Also See for JavaStudio KCM511:
- Instructions manual (24 pages) ,
- Instructions manual (23 pages)
Table of Contents
Advertisement
Available languages
Available languages
JAVASTUDIO
COLLECTION
COFFEE MAKERS
WITH GLASS CARAFE
INSTRUCTIONS
CAFETIÈRES
COLLECTION
JAVASTUDIO
AVEC CARAFE EN VERRE
INSTRUCTIONS
COLECCIÓN
JAVASTUDIO
CAFETERAS
ELÉCTRICAS
CON GARAFFA
DE VIDRIO
INSTRUCCIONES
KCM511, KCM534
USA: 1-800-541-6390
Canada: 1-800-807-6777
™
™
™
KitchenAid.com
KitchenAid.ca
Advertisement
Chapters
Table of Contents

Subscribe to Our Youtube Channel
Related Manuals for KitchenAid JavaStudio KCM511


Summary of Contents for KitchenAid JavaStudio KCM511
- Page 1 JAVASTUDIO COLLECTION COFFEE MAKERS WITH GLASS CARAFE INSTRUCTIONS CAFETIÈRES COLLECTION JAVASTUDIO AVEC CARAFE EN VERRE INSTRUCTIONS COLECCIÓN JAVASTUDIO CAFETERAS ELÉCTRICAS CON GARAFFA DE VIDRIO INSTRUCCIONES KCM511, KCM534 USA: 1-800-541-6390 Canada: 1-800-807-6777 ™ ™ ™ KitchenAid.com KitchenAid.ca...
-
Page 2: Proof Of Purchase & Product Registration
Proof of Purchase & Product Registration Always keep a copy of the sales receipt showing the date of purchase of your Coffee Maker. Proof of purchase will assure you of in-warranty service. Before you use your Coffee Maker, please fill out and mail your product registration card packed with the unit. -
Page 3: Table Of Contents
Cleaning the Coffee Maker ...12 Descaling the Coffee Maker ...12 Troubleshooting ...13 WARRANTY AND SERVICE INFORMATION KitchenAid Coffee Maker Warranty ...14 ® Hassle-Free Replacement Warranty – 50 United States and District of Columbia ...15 Hassle-Free Replacement Warranty – Canada ...15 How to Arrange for Warranty Service in Puerto Rico ...15... -
Page 4: Coffee Maker Safety
Coffee Maker Safety Your safety and the safety of others are very important. We have provided many important safety messages in this manual and on your appliance. Always read and obey all safety messages. This is the safety alert symbol. This symbol alerts you to potential hazards that can kill or hurt you and others. -
Page 5: Electrical Requirements
12. Do not use appliance without lid properly placed on container (carafe). 13. The container (carafe) is designed for use with this appliance. It must never be used on a range top. 14. Do not set a hot container (carafe) on a wet or cold surface. 15. -
Page 6: Coffee Maker General Features
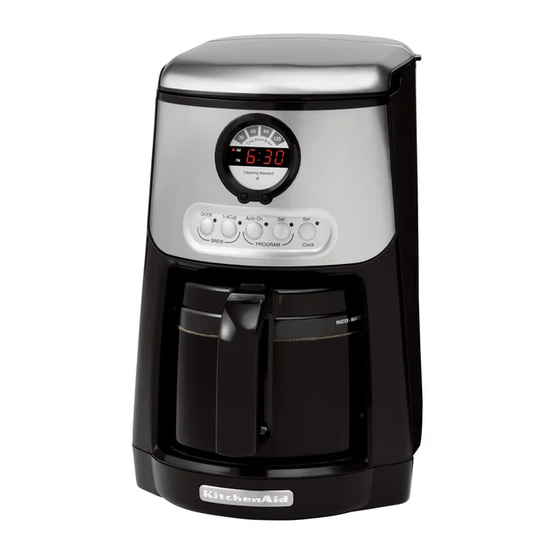
Coffee Maker General Features Split-Lid Wrap-Around Housing Glass Carafe Coffee Scoop JavaSpa™ Showerhead Brew Basket Gold Tone Permanent Filter Reservoir Fill-Channel “Time Since Brew” Display Brew Timer Display Clean Touch™ Control Pad... - Page 7 Coffee Maker General Features JavaSpa™ Showerhead Extra-wide showerhead sprays the brew basket evenly with hot water, ensuring even coffee extraction and outstanding flavor. 1100-Watt Heat Pump (not shown) Powerful heat pump brews rich, flavorful coffee. Electronic Temperature Control Fully electronic control directly monitors the temperature of the heat pump to brew - and keep - coffee at optimal temperatures.
-
Page 8: Display And Control Pad Features
Display and Control Pad Features “Time Since Brew” Display Brew Timer Display On/Off 1-4 Cup DISPLAY FEATURES: Brew Timer Display Shows the time-of-day. Small lights indicate whether the time is AM or PM. “Time Since Brew” Display Display shows the time elapsed since the completion of the brewing cycle. -
Page 9: Preparing Your Coffee Maker For Use
Preparing Your Coffee Maker for Use Pre-Use Cleaning Wash the brew basket, gold tone permanent filter, and carafe in hot, soapy water, then rinse with clean water and dry. Do not use abrasive cleansers or scouring pads. Installing the Ion-Exchange Water Filter Use of the ion-exchange water filter is strongly recommended. -
Page 10: Operating Your Coffee Maker
Preparing Your Coffee Maker for Use 4. Press the “H” (hour) and “M” (minute) Buttons below the brew timer display to set the hour and minutes. If a “H” or “M” Button is pressed and held, the digits will scroll rapidly. The AM and PM indicator lights on the brew timer display will change when the hour digits roll past “12”. -
Page 11: The Pause And Pour Feature
Operating Your Coffee Maker 4. Remove the brew basket from the top of the Coffee Maker by grasping the finger loop on the front of the basket. 5. Insert a 10-12 cup flat-bottom paper filter or the gold tone permanent filter into the brew basket. -
Page 12: Using The Automatic Brew Timer
Operating Your Coffee Maker USING THE AUTOMATIC BREW TIMER The Coffee Maker can be programmed to brew coffee at a preset time, making it easy to wake up to fresh coffee every morning. To program and activate the automatic brew timer: 1. -
Page 13: Coffee Brewing Suggestions: Advice For Great Taste
The Right Grind The best cup of coffee comes from coffee beans that are properly ground just before brewing. Grinders like the KitchenAid Blade Coffee Grinder, PRO ® LINE Series Burr Coffee Mill, or the ®... -
Page 14: Care And Cleaning
Care and Cleaning Cleaning the Coffee Maker 1. Remove the brew basket and carafe from the Coffee Maker. 2. Wash the brew basket and gold tone permanent filter in hot, soapy water and rinse with hot water. Do not use abrasive cleansers or scouring pads. -
Page 15: Troubleshooting
• If the brew timer display is not illuminated: Check to see if the Coffee Maker is plugged into a grounded 3 prong outlet. If it is, check the fuse or circuit breaker on the electrical circuit the Coffee Maker is connected to and make sure the circuit is closed. -
Page 16: Kitchenaid ® Coffee Maker Warranty
IF THIS PRODUCT FAILS TO WORK AS WARRANTED, CUSTOMER’S SOLE AND EXCLUSIVE REMEDY SHALL BE REPAIR OR REPLACEMENT ACCORDING TO THE TERMS OF THIS LIMITED WARRANTY. KITCHENAID AND KITCHENAID CANADA DO NOT ASSUME ANY RESPONSIBILITY FOR INCIDENTAL OR CONSEQUENTIAL DAMAGES. This warranty gives you specific legal rights and you may also have other rights which vary from state to state or province to province. -
Page 17: Hassle-Free Replacement Warranty - 50 United States And District Of Columbia
Hassle-Free Replacement Warranty – Canada We’re so confident the quality of our products meets the exacting standards of the KitchenAid brand that, if your Coffee Maker should fail within the first year of ownership, KitchenAid Canada will replace your Coffee Maker with an identical or comparable replacement. -
Page 18: How To Arrange For Service After The Warranty Expires - All Locations
Or contact an Authorized Service Center near you. How to Arrange for Service Outside these Locations Consult your local KitchenAid dealer or the store where you purchased the Coffee Maker for information on how to obtain service. How to Order Accessories... - Page 19 Détartrer la cafetière ...28 Dépannage ...29 INFORMATION SUR LA GARANTIE ET LES RÉPARATIONS Garantie Cafetière KitchenAid Garantie de satisfaction totale et de remplacement – 50 États des États-Unis, district fédéral de Columbia..31 Garantie de satisfaction totale et de remplacement – Canada ...31 Comment obtenir une réparation sous garantie à...
-
Page 20: Sécurité De La Cafetière
Sécurité de la cafetière Votre sécurité et celle des autres est très importante. Nous donnons de nombreux messages de sécurité importants dans ce manuel et sur votre appareil ménager. Assurez-vous de toujours lire tous les messages de sécurité et de vous y conformer. Voici le symbole d’alerte de sécurité. -
Page 21: Conservez Ces Instructions
10. Ne pas placer près d’une plaque électrique chaude, d’un brûleur allumé ou dans un four chaud. 11. Ne pas utiliser cet appareil à une fin autre que celle pour laquelle il a été conçu. 12. N’utiliser cet appareil que si le couvercle est correctement placé sur la carafe. 13. -
Page 22: Caractéristiques Générales De La Cafetière
Caractéristiques générales de la cafetière Couvercle articulé Boîtier enveloppant Carafe en verre Mesure Pomme d'arrosoir JavaSpa™ Panier-filtre Filtre permanent Gold Tone Réservoir Canal de remplissage Affichage « temps écoulé » Affichage minuterie Clavier de commande Clean Touch™... - Page 23 Caractéristiques générales de la cafetière Pomme d'arrosoir JavaSpa™ La pomme très large arrose le panier d’eau chaude de façon uniforme, garantissant une extraction régulière du café et un goût extraordinaire. Pompe à chaleur de 1100 watts (non illustré) La pompe à chaleur puissante permet de faire un café...
-
Page 24: Caractéristiques De L'affichage Et Des Touches De Commande
Caractéristiques de l’affichage et des touches de commande Affichage « temps écoulé » Affichage minuterie Marche/Arrêt 1-4 tasses Auto On FONCTIONS D’AFFICHAGE : Affichage minuterie Montre l’heure. Des voyants indiquent si l’heure est AM ou PM. Affichage « temps écoulé » L’affichage indique le temps écoulé... -
Page 25: Préparer La Cafetière
Préparer la cafetière Nettoyage avant utilisation Laver le panier, le filtre permanent doré et la carafe dans de l’eau savonneuse chaude puis rincer à l’eau claire et sécher. Ne pas utiliser de produits de nettoyage abrasifs ou des tampons à récurer. Installer le filtre à... -
Page 26: Utilisation De La Cafetière
Préparer la cafetière 4. Appuyer sur les boutons « H » (heure) et « M » (minute) sous l’affichage de la minuterie pour régler l’heure et les minutes. Les chiffrent défilent rapidement si on continue d’appuyer sur le bouton « H » ou le bouton «... -
Page 27: La Fonction Pause Et Verser
Utilisation de la cafetière 4. Enlever le panier du dessus de la cafetière en le prenant par la petite anse sur le devant du panier. 5. Placer un filtre à café en papier à fond plat pour 10 à 12 tasses ou le filtre permanent doré... -
Page 28: Utiliser La Minuterie
Utilisation de la cafetière UTILISER LA MINUTERIE On peut programmer la cafetière pour faire le café à une heure déterminée, ce qui permet de se réveiller à l’odeur du café frais chaque matin. Pour programmer et mettre en route la minuterie : 1. -
Page 29: Suggestions Pour Faire Le Café : Conseil Pour Un Café Savoureux
Moudre correctement Le meilleur café provient de grains moulus correctement juste avant de faire le café. Des moulins à café comme le Moulin à café avec couteau KitchenAid à café de la Série Pro Line ou le moulin à ®... -
Page 30: Entretien Et Nettoyage
Entretien et nettoyage Nettoyer la cafetière 1. Enlever le panier et la carafe de la Cafetière. 2. Laver le panier et le filtre permanent doré dans de l’eau savonneuse chaude, puis rincer à l’eau chaude. Ne pas utiliser de produits de nettoyage abrasifs ou des tampons à... -
Page 31: Dépannage
• Si l’affichage minuterie ne s’allume pas : Vérifier que la Cafetière est bien branchée dans une prise à trois bornes à la terre. Si c’est le cas, vérifier le fusible ou le disjoncteur du circuit électrique sur lequel il est branché et s’assurer que le circuit est fermé. -
Page 32: Garantie Cafetière Kitchenaid
SI CET APPAREIL NE FONCTIONNE PAS COMME GARANTI, LE SEUL ET EXCLUSIF RECOURS DES CLIENTS EST LA RÉPARATION OU LE REMPLACEMENT SELON LES DISPOSITIONS DE LA GARANTIE LIMITÉE. KITCHENAID ET KITCHENAID-CANADA N’ASSUMENT AUCUNE RESPONSABILITÉ EN CAS DE DOMMAGES ACCESSOIRES OU INDIRECTS. -
Page 33: Garantie De Satisfaction Totale Et De Remplacement - 50 États Des États-Unis, District Fédéral De Columbia
Columbia Nous sommes tellement certains que la qualité de nos produits satisfait aux normes exigeantes de KitchenAid que, si la Cafetière cesse de fonctionner au cours de la première année, KitchenAid livrera gratuitement un appareil identique ou comparable à... -
Page 34: Comment Obtenir Une Réparation Hors Garantie - Tous Les Territoires
St. Joseph, MI 49085-0218 Comment obtenir une réparation en dehors de ces territoires Demandez à votre distributeur local KitchenAid ou au détaillant où la Cafetière a été achetée où la faire réparer. Comment commander des accessoires et des pièces de rechange Pour commander des accessoires ou des pièces de rechange pour votre... - Page 35 Desincrustación de la cafetera eléctrica ...44 Solución de problemas ...45 INFORMACIÓN DE GARANTÍA Y SERVICIO Garantía de la cafetera eléctrica KitchenAid Garantía de reemplazo sin dificultades en los 50 estados de los Estados Unidos y en el Distrito de Columbia ...47 Garantía de reemplazo sin dificultades en Canadá...
-
Page 36: Seguridad De La Cafetera Eléctrica
Seguridad de la cafetera eléctrica Su seguridad y la seguridad de los demás es muy importante. Hemos incluido muchos mensajes importantes de seguridad en este manual y en su electrodoméstico. Lea y obedezca siempre todos los mensajes de seguridad. Este es el símbolo de advertencia de seguridad. Este símbolo le llama la atención sobre peligros potenciales que pueden ocasionar la muerte o una lesión a usted y a los demás. -
Page 37: Requisitos Eléctricos
12. No use el electrodoméstico sin colocar la tapa apropiadamente en el contenedor (garrafa). 13. El contenedor (garrafa) está diseñado para ser usado con este electrodoméstico. Nunca debe ser usado en una estufa. 14. No coloque un contenedor (garrafa) caliente en una superficie mojada o fría. 15. -
Page 38: Características Generales De La Cafetera Eléctrica
Características generales de la cafetera eléctrica Tapa dividida Alojamiento envolvente Garrafa de vidrio Cuchara para café Boquilla JavaSpa™ Filtro permanente dorado Cesta del filtro Conducto de llenado del depósito Pantalla “Time Since Brew” (Tiempo desde que coló) Pantalla del temporizador de colado Base de control Clean Touch™... - Page 39 Características generales de la cafetera eléctrica Boquilla JavaSpa™ La boquilla extra ancha rocía la cesta del filtro en forma pareja con agua caliente asegurando la extracción pareja de café y un sabor extraordinario. Bomba de calor de 1100 vatios (no se muestra) La potente bomba de calor elabora un café...
-
Page 40: Funciones De La Pantalla Y De La Base De Control
Funciones de la pantalla y de la base de control Pantalla “Time Since Brew” (Tiempo desde que coló) Pantalla del temporizador de elaboración Encendido/ 1-4 tazas apagado FUNCIONES DE LA PANTALLA: Pantalla del temporizador de colado Muestra la hora. Pequeñas luces indican si la hora es AM o PM. -
Page 41: Preparación De La Cafetera Eléctrica Para Su Uso
Preparación de la cafetera eléctrica para su uso Limpieza antes del uso Lave la cesta del filtro, el filtro permanente dorado y la garrafa con agua jabonosa caliente y luego, enjuáguelos con agua limpia y séquelos. No utilice limpiadores abrasivos ni estropajos. Instalación del filtro de agua de intercambio iónico Se recomienda enfáticamente utilizar el... -
Page 42: Funcionamiento De La Cafetera Eléctrica
Preparación de la cafetera eléctrica para su uso 3. Presione el botón “Set (Clock)” (Ajustar (reloj)). La pantalla del temporizador de colado y el indicador “Set (Clock)” (Ajustar (reloj)) comenzarán a titilar. 4. Presione los botones “H” (hora) y “M” (minuto) ubicados debajo de la pantalla del temporizador de colado para ajustar la hora y los minutos. -
Page 43: La Función Pausa Y Vierta
Funcionamiento de la cafetera eléctrica .4. Retire la cesta del filtro de la parte superior de la cafetera eléctrica agarrando el aro que se encuentra en la parte de adelante de la cesta. 5. Inserte un filtro de papel de base plana para 10-12 tazas o el filtro permanente dorado dentro de la cesta del filtro. -
Page 44: Uso Del Temporizador De Colado Automático
Funcionamiento de la cafetera eléctrica flujo de café desde la cesta del filtro. El colado, sin embargo, no se detiene. Si la garrafa no se coloca nuevamente en la bandeja para la garrafa dentro de 25 segundos, el agua y el café desbordarán la cesta del filtro. -
Page 45: El Indicador "Cleaning Needed" (Limpieza Requerida)
La mejor taza de café se obtiene de granos de café molidos adecuadamente justo antes del colado. Los molinillos como el Molinillo para café de cuchillas KitchenAid ® , el Molinillo de café de placas de la serie Pro Line ®... -
Page 46: Cuidado Y Limpieza
Cuidado y limpieza Limpieza de la cafetera eléctrica 1. Retire la cesta del filtro y la garaffa de la cafetera eléctrica. 2. Lave la cesta del filtro y el filtro permanente dorado con agua jabonosa caliente y enjuáguelos con agua caliente. No utilice limpiadores abrasivos ni estropajos. -
Page 47: Solución De Problemas
Solución de problemas • Si la pantalla del temporizador de colado no está iluminada: Verifique si la cafetera eléctrica está enchufada en un contacto de pared de conexión a tierra con 3 terminales. Si la cafetera eléctrica está enchufada, verifique si el fusible o el interruptor del circuito eléctrico de la cafetera están conectados y asegúrese de que el circuito esté... -
Page 48: Garantía De La Cafetera Eléctrica Kitchenaid
SI ESTE PRODUCTO NO FUNCIONA SEGÚN SE GARANTIZA, EL ÚNICO Y EXCLUSIVO RECURSO DEL CLIENTE SERÁ LA REPARACIÓN O EL REEMPLAZO SEGÚN LOS TÉRMINOS Y LAS CONDICIONES DE ESTA GARANTÍA LIMITADA. KITCHENAID Y KITCHENAID CANADÁ NO ASUMEN NINGUNA RESPONSABILIDAD POR DAÑOS INCIDENTALES O CONSIGUIENTES. -
Page 49: Garantía De Reemplazo Sin Dificultades En Los 50 Estados De Los Estados Unidos Y En El Distrito De Columbia
Distrito de Columbia Confiamos tanto en que la calidad de nuestros productos cumple con las exigentes normas de KitchenAid que, si su cafetera eléctrica presentara alguna falla durante el primer año, le enviaremos un reemplazo sin cargo idéntico o parecido a su domicilio y arreglaremos la devolución... -
Page 50: Cómo Obtener El Servicio De Garantía Una Vez Vencida La Garantía - Todos Los Lugares
P.O. Box 218 St. Joseph, MI 49085-0218 Cómo obtener el servicio técnico fuera de éstas ubicaciones Consulte a su distribuidor de KitchenAid local o a la tienda donde compró la cafetera eléctrica para obtener información sobre el servicio técnico. Como realizer un pedido de... - Page 52 ®Registered trademark/Marque déposée/Marca registrada KitchenAid, U.S.A. ™ Trademark/Marque de commerce/Marca de comercio KitchenAid, U.S.A., KitchenAid Canada licensee in Canada/Emploi licencié par KitchenAid Canada au Canada. ©2006. All rights reserved. Tous droits réservés. Todos los derechos reservados. (5393dZw506)
Need help?
Do you have a question about the JavaStudio KCM511 and is the answer not in the manual?
Questions and answers