KitchenAid JAVASTUDIO KCM511 Instructions Manual
Javastudio collection programmable coffee makers
Hide thumbs
Also See for JAVASTUDIO KCM511:
- Instructions manual (24 pages) ,
- Instruction manual (52 pages)

Related Manuals for KitchenAid JAVASTUDIO KCM511


Summary of Contents for KitchenAid JAVASTUDIO KCM511
- Page 1 ® JAVASTUDIO COLLECTION PROGRAMMABLE COFFEE MAKERS iNSTRUCTiONS KCM511 KCM 514 KCM51 5 B00-541-6390 Details Inside...
- Page 2 1-800-541-6390 Monday through within the first year of ownership, Friday, 8 a.m. to 8 p.m. (Eastern Time), KitchenAid will arrange to deliver an or Saturday, 10 a.m. to 5 p.m. Give identical or comparable replacement the consultant your complete shipping address.
-
Page 3: Table Of Contents
Table of Contents INTRODUCTION Hassle-FreeReplacement Warranty ........... Inside Front Cover Product Registration Card ............Inside Front Cover Coffee Maker Safety ................... Electrical Requirements ..................Important Safeguards ..................FEATURES AND OPERATION Coffee Maker General Features................Display and Control Pad Features............... Pre-Use Cleaning ....................Installing the Water Filter ................... -
Page 4: Coffee Maker Safety
Coffee Maker Safety Your safety and the safety of others are very important. We have provided many important safety messages in this manual and on your appliance. Always read and obey all safety messages. This is the safety alert symbol. This symbol alerts you to potential hazards that can kilt or hurt you and others. -
Page 5: Important Safeguards
iMPORTANT SAFEGUARDS When using electrical appliances, basic safety precautions should always be followed, including the following: 1. Read all instructions. 2. Do not touch hot surfaces. Use handles or knobs. 3. To protect against electrical shock, do not immerse cord, plugs, or Coffee Maker in water or other liquid. -
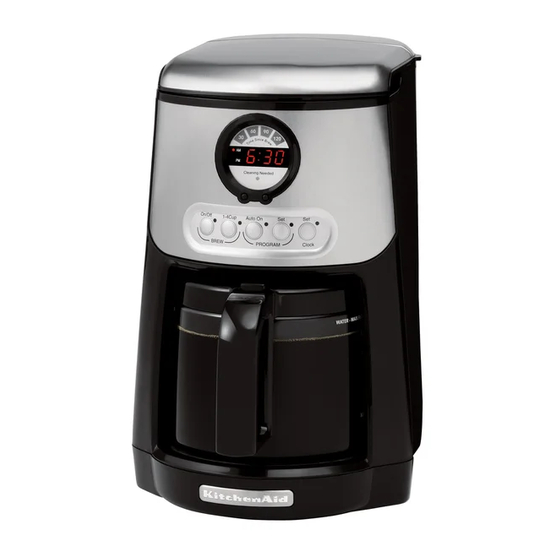
Page 6: Features And Operation Coffee Maker General Features
General Features JavaSpa Showerhead Basket Reservoir FiIFChannel "Time Since Brew" Display Timer Brew Display Clean Touch Wrap-Around Housing -- Glass Coffee Scoop Gold Tone Permanent Filter... -
Page 7: Cleaning The Coffee Maker
General Features Reservoir Fill-Channel JavaSpa Showerhead The Coffee Maker features a Extra-wide showerhead sprays the convenient front-fill water reservoir. brew basket evenly with hot water, Just lift the front lid and use the ensuring even coffee extraction and convenient fill-channel to add water. outstanding flavor. -
Page 8: Display And Control Pad Features
General Features Ion-Exchange Water Filter / Water Full-Length Cord Storage Level Indicator (not shown) (not shown) Advanced filter reduces chlorine and Compartment in back of unit keeps other contaminants which impair excesscord out of the way. coffee flavor. Filter also softens the water, which increases the time Wrap-Around Housing... - Page 9 Display and Control Pad Features DISPLAY FEATURES: Auto On Pressto turn the automatic brew Brew Timer Display timer on or off. When the brew timer Shows thetime-of-day. Smalllights is turned on, the ... indicate whetherthetimeis AM or , Programmed brew time will briefly PM.
-
Page 10: Pre-Use Cleaning
Preparing Your Coffee Maker for Use Pre-Use Cleaning 4. Place the filter cartridge in the circular well at the bottom of the Wash the brew basket, gold tone water reservoir, aligning the tab on permanent filter, and carafe in hot, the cartridge with the notch in the soapy water, then rinse with clean well. -
Page 11: To Set The Time-Of-Day Clock
Preparing Your Coffee Maker for Use Pressthe "H" (hour) and "M" To Set the Time-of-Day Clock (minute) Buttons below the brew timer display to set the hour and minutes. If a "H" or "M" Button is pressed and held, the digits will scroll rapidly. -
Page 12: Brewing Coffee
Operating Your Coffee Maker on the plate - if the carafe isn't Brewing Coffee seated, the pause and pour Fill a carafe with enough fresh, cool feature may engage and coffee water to make the desired amount may overflow the brew basket. of coffee. -
Page 13: Using The Thermal Carafe
Operating Your Coffee Maker 11. At the end of 2 hours, the Coffee Shake the brew basket slightly to even out the bed of coffee. This Maker and warming plate will will help ensure uniform coffee automatically shut off. To turn off extraction and excellent flavor. -
Page 14: The Pauseand Pour Feature
Operating Your Coffee Maker The Pause and Pour Feature Pressthe "H" (hour) and "M" (minute) Buttons below the brew The pause and pour feature enables timer display to set the hour and you to remove the carafe from the minutes. If a "H" or "M" Button is Coffee Maker and pour a cup of pressed and held, the digits will coffee before brewing is finished. -
Page 15: The Cleaning Needed Indicator
Operating Your Coffee Maker 5. The Coffee Maker will begin brewing at the programmed time. 6. Each time you want the Coffee Maker to brew at the programmed time, activate the automatic brew timer by pressing the Auto On Button. The Coffee Maker will always default to the last brew time set. -
Page 16: Coffee Brewing Suggestions: Advice For Great Taste
A proper grind is critical for good damage the Coffee Maker. coffee, and that means using a Coffee Maker Cleanliness quality grinder like the KitchenAid _R_ Blade Coffee Grinder, PROLINE Coffee oils build up quickly within the Series Burr Coffee Mill, or the brew basket and carafe. -
Page 17: Careand Cleaning
Care and Cleaning Cleaning the Coffee Maker Descaling Steps: 1. Unplug the Coffee Maker and 1. Before descaling, always remove allow it to cool before cleaning. the water filter (see "Installing the 2. Remove the brew basket and Water Filter" on page 8) and make carafe from the Coffee Maker. -
Page 18: Troubleshooting And Error Codes
Troubleshooting and Error Codes If "Err4" appears on the brew o If the brew timer display is not illuminated: timer display: Check to see if the Coffee Maker is A button is jammed. Unplug the plugged into a grounded 3 prong Coffee Maker, press each button outlet. -
Page 19: Warranty For The 50 United States And District Of Columbia
Coffee Maker Warranty for Puerto Rico on page 18. KITCHENAID DOES NOT ASSUME ANY RESPONSIBILITY FOR INCIDENTAL OR CONSEQUENTIAL DAMAGES. Some states do not allow the exclusion or limitation of incidental or consequential damages, so this exclusion may not apply to you. This warranty gives you specific legal rights and you may also... -
Page 20: Warranty For Puerto Rico
Arranging for Service Outside the 50 United States and Puerto Rico Coffee Maker for information on how Consult your local KitchenAid dealer to obtain service. or the store where you purchased the Ordering Accessories and Replacement... - Page 23 FOR THE WAY IT'S MADE._'_ @ Registered Trademark!TMTrademarkof KitchenAid, U,S,A, P05032002 00 © 2004. All rights reserved. (dZw504)
Need help?
Do you have a question about the JAVASTUDIO KCM511 and is the answer not in the manual?
Questions and answers