KitchenAid KPES100 Manual
Hide thumbs
Also See for KPES100:
- User manual (29 pages) ,
- Parts list (6 pages) ,
- Service manual (20 pages)

Related Manuals for KitchenAid KPES100


Summary of Contents for KitchenAid KPES100
- Page 1 I N E ™ E R I E S GUIDE PROFESSIONAL RESULTS Model KPES100 Espresso Machine...
- Page 2 ® FOR THE WAY IT’S MADE. ™ ® Registered trademark/™ Trademark of KitchenAid, U.S.A. © 2003. All rights reserved. Specifications subject to change without notice. dZw703...
- Page 3 I N E ™ E R I E S MODEL KPES100 ESPRESSO MACHINE Introduction Section Contents Table of Contents .......3 Espresso Machine Safety.....4 Important Safeguards......5 Proof of Purchase & Registration..6 Electrical Requirements .......7...
-
Page 4: Introduction Introduction
Great espresso is a dance of artistry and technique that is intimately tied to the performance of the espresso machine. The KitchenAid ® PRO LINE™ Series Espresso Machine blends commercial quality with innovative design to bring a new experience of espresso into the home. -
Page 5: Table Of Contents
TABLE CONTENTS INTRODUCTION TECHNIQUES BARISTA OF A ..........................Introduction What is Espresso? ..................Espresso Machine Safety Overextraction & Underextraction ............Important Safeguards Before Brewing: Elements of Great Espresso ..................Proof of Purchase & Product Registration Coffee Beans ............ -
Page 6: Espresso Machine Safety
ESPRESSO MACHINE SAFETY Your safety and the safety of others are very important. We have provided many important safety messages in this manual and on your appliance. Always read and obey all safety messages. This is the safety alert symbol. This symbol alerts you to potential hazards that can kill or hurt you and others. -
Page 7: Important Safeguards
IMPORTANT SAFEGUARDS The use of accessory attachments not recommended by the When using electrical appliances, basic safety precautions appliance manufacturer may result in fire, electric shock, or should always be followed, including the following: personal injury. Do not use outdoors. Read all instructions. -
Page 8: Proof Of Purchase & Product Registration
Always keep a copy of the sales receipt showing the date of Please complete the following for your personal records: purchase of your Espresso Machine. Proof of purchase will assure Model Number: KPES100 you of in-warranty service. Serial Number ___________________________________________ Before you use your Espresso Machine, please fill out and mail your product registration card packed with the unit. -
Page 9: Electrical Requirements
ELECTRICAL REQUIREMENTS Volts: 120 V.A.C. only. WARNING Hertz: 60 Hz NOTE: This Espresso Machine has a 3 prong grounded plug. To reduce the risk of electrical shock, this plug will fit in an outlet only one way. If the plug Electrical Shock Hazard does not fit in the outlet, contact a qualified electrician. -
Page 11: Features And Operation
I N E ™ E R I E S FEATURES OPERATION Features and Operation Section Contents Espresso Machine Features ....10 Preparing for Use ......13 Brewing Espresso......16 Frothing & Steaming Milk....19 Preparing Cappuccino.......20 Preparing Café Latte ......21 Dispensing Hot Water.......22 Care & Cleaning........23 Troubleshooting........26... -
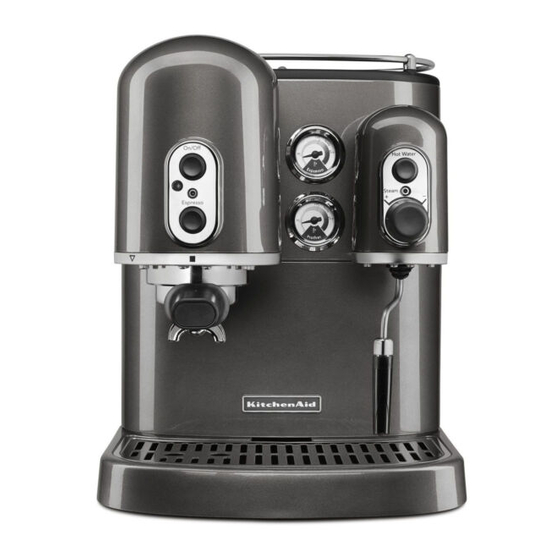
Page 12: Espresso Machine Features
The volume of steam is controlled by the dial position: rotate the dial counter-clockwise for more steam, Model KPES100 clockwise for less. To turn off steam, close the steam dial Espresso Machine... - Page 13 Brew Head Water Reservoir Commercial-size brew head is chrome-plated brass The removable 2 liter (67 oz.) water reservoir slides for exceptional durability and brew temperature left or right for easy filling, and features easy-to- stability. Brewing boiler is bolted directly to group see “max”...
- Page 14 MODEL KPES1 00 ESPRESSO MACHINE FEATURES Portafilter Coffee Scoop and Shower-Screen Brush Commercial-size portafilter features chrome-plated Use one level scoop of coffee for each shot (ounce) brass construction and an easy-to-grip flared of espresso. The shower-screen brush will help keep handle.
-
Page 15: Attaching The Cup Rail
PREPARING ESPRESSO MACHINE FOR USE Attach the Cup Rail Wash the reservoir in hot, soapy water and rinse with clean water. The reservoir can also be washed in the top rack of Align the three rail posts with the holes on top of the espresso the dishwasher. -
Page 16: Espresso Machine
PREPARING ESPRESSO MACHINE FOR USE Make certain the Steam Dial is closed by rotating it clockwise WARNING as far as possible. Electrical Shock Hazard Plug into a grounded 3 prong outlet. Do not remove ground prong. Do not use an adapter. Do not use an extension cord. - Page 17 Place a coffee cup underneath the brew head. Do not attach the portafilter to the brew head. Press the Espresso Button – it is not necessary to wait for the boiler to heat. This activates the water pump and fills the brewing boiler with water.
-
Page 18: Brewing Espresso
BREWING ESPRESSO For the finest results when brewing espresso, see “Techniques of A Position the portafilter underneath the brew head and align the Barista” on page 28. portafilter handle with the arrow located on the left side of brew group housing. Raise the portafilter into the brew head and Make certain the water reservoir has an adequate supply of tighten it with a firm twist to the right. - Page 19 Sweep any excess grinds from the rim of the portafilter, and Press the On/Off Power Switch to turn the espresso machine on. insert the portafilter into the brew head. Place one or two espresso cups on the drip plate under the spouts of the portafilter.
- Page 20 BREWING ESPRESSO 12.After removing the portafilter, place a cup under the brew head and press the Espresso Button for a second or two. This Barista Tips cleans the shower screen and flushes any coffee oils and grounds that have migrated into the brew head. When brewing multiple shots: Use a towel to clean and dry the filter basket before filling with coffee.
-
Page 21: Frothing & Steaming Milk
FROTHING & STEAMING MILK Frothing and steaming milk requires a bit of practice, but you’ll be With the frothing arm pointed into an empty cup, open the surprised how quickly your skills will develop. The PRO LINE™ Steam Dial for a moment to purge excess water from the line. Series Espresso Machine gives you all the tools you need: an 8 ⁄... -
Page 22: Preparing Cappuccino
FROTHING & STEAMING MILK Slowly open the Steam Dial by turning it counter-clockwise. The farther the Steam Dial is rotated, the greater the volume of Barista Tips steam that will be released. Tilt the pitcher to one side to create a whirling motion in the milk, keeping the tip of the •... -
Page 23: Preparing Café Latte
To prepare cappuccino, froth and steam the milk before brewing the espresso. This allows the froth to jell slightly and fully separate from the milk. Once the milk is prepared, brew a single shot (1 oz.) of espresso into a cappuccino cup, then pour the frothed and steamed milk into the cup with a gentle shaking motion. -
Page 24: Dispensing Hot Water
DISPENSING HOT WATER Hot water can also be dispensed from the frothing arm. This With the frothing arm pointed into an empty cup, open the provides a convenient way to make Americanos, tea, or hot Steam Dial by turning it slowly counter-clockwise. Then press chocolate. -
Page 25: Before Cleaning The Espresso Machine
CARE CLEANING Keeping the PRO LINE™ Series Espresso Machine clean is vital to brewing the best espresso possible. Stale coffee oils on the portafilter, filter baskets, and shower screen will ruin the flavor of the most expertly prepared coffee, and any milk left on the frothing arm should be removed. -
Page 26: Cleaning The Shower Screen
CARE CLEANING • Wash the portafilter in warm, soapy water and rinse with Using a short Phillips screwdriver, remove the screw at the clean water. Dry with a soft cloth. Do not wash the portafilter center of the shower screen by turning it counter-clockwise. in a dishwasher. -
Page 27: Priming After Long Periods Of Non-Use
Press the On/Off Power Switch to turn the espresso machine Priming After Long Periods of Non-Use on. It is not necessary for the boilers to heat before proceeding For the best tasting espresso, prime the espresso machine with fresh to the next step. water after a long period of non-use. -
Page 28: Troubleshooting
– espresso machine may need to be descaled If the problem cannot be fixed with the steps above, see the KitchenAid Warranty and Service section on page 37.* – coffee may be too finely ground *DO NOT return the Espresso Machine to the retailer – they do not provide service. -
Page 29: Techniques
I N E ™ E R I E S TECHNIQUES OF A BARISTA Techniques of a Barista Section Contents What is Espresso?......28 Overextraction & Underextraction ..29 Elements of Great Espresso....29 Espresso Brewing Technique ....30 A Glossary of Espresso Drinks ...36... -
Page 30: What Is Espresso
TECHNIQUES BARISTA OF A What is Espresso? Espresso began as an attempt in the 1800s to quickly brew coffee on demand, by the cup. The goal was to serve the freshest, most flavorful coffee possible and avoid the burned, stale taste of coffee kept warm on a stovetop. -
Page 31: Overextraction & Underextraction
Overextraction and Underextraction Before Brewing: The Elements of Great Espresso Brewing great espresso takes an understanding of what actually Before the espresso machine is even plugged in, you’ll need several winds up in the cup when coffee is exposed to water. Roughly 30% elements to produce great coffee. -
Page 32: Water
TECHNIQUES BARISTA OF A Great Tasting Water Espresso Brewing Technique An often overlooked element of great espresso is the brew water. If you Brewing Temperature don’t enjoy the flavor of your tap water, don’t use it to brew espresso – Water temperature and temperature consistency have a direct use bottled, purified water instead. -
Page 33: Grinding
• Never rinse the portafilter with cool water if you are brewing Dosing additional shots. After knocking the old grounds from the filter, Dosing is the process of measuring ground coffee into the filter wipe leftover grounds from the basket with a clean towel. Make basket. -
Page 34: Leveling
TECHNIQUES BARISTA OF A If the coffee in the portafilter has an imprint of the shower Properly Leveled Coffee screen or the shower screen screw, there is too much coffee in the filter basket! Leveling Leveling the coffee after it has been dosed into the filter is a critical technique for great espresso. - Page 35 Proper Tamping Technique Apply a second, finishing tamp (also called a polishing tamp). The tamper handle should be grasped like a doorknob, with the Press straight down on the coffee with about 35 pounds of base of the handle firmly against the palm. When tamping, try to pressure, then relax the force slightly (to about 20 pounds) and keep the tamper, wrist, and elbow in a straight line.
-
Page 36: Shot Volume
Expert Some grinders do not allow the fine adjustments necessary to correct baristas will watch the pour carefully and quickly stop brewing if it the extraction rate. The best solution is to invest in the KitchenAid ® starts to lighten. -
Page 37: The Golden Crema
The Golden Crema …is thin and fast-flowing: A mark of fine espresso is crema, the dense golden foam of emulsified coffee oils that captures the essence of coffee flavor. • review your tamping technique – the tamp may not be firm Good crema should be thick and cling to the side of the cup when enough to provide an even resistance to the brew water it’s tilted;... -
Page 38: A Glossary Of Espresso Drinks
GLOSSARY ESPRESSO DRINKS Americano Espresso Con Panna 6 to 8 ounces of hot water added to a single shot of espresso. This Espresso topped with a dollop of whipped cream. makes a superb cup of coffee. Espresso Lungo Café Latte Espresso “pulled long”... -
Page 39: Ordering Accessories And Replacement Parts
I N E ™ E R I E S WARRANTY SERVICE INFORMATION Warranty Information Section Contents Warranty for the U.S......38 Warranty for Puerto Rico ....39 Arranging for Hassle-Free Replacement ....39 Ordering Accessories and Replacement Parts .....40 Arranging for Service After the Warranty Expires....40 Arranging for Service Outside the U.S. -
Page 40: Warranty And Service Information Warranty For The 50 United States & District Of Columbia
District of Columbia. how to arrange for service. KITCHENAID DOES NOT ASSUME ANY RESPONSIBILITY FOR INCIDENTAL OR CONSEQUENTIAL DAMAGES. Some states do not allow the exclusion or limitation of incidental or consequential damages, so this exclusion may not apply to you. This warranty gives you specific legal rights and you may also have... -
Page 41: Warranty For Puerto Rico
Espresso Machine will be returned to you prepaid and insured. ARRANGING HASSLE-FREE REPLACEMENT IF YOU RESIDE IN THE 50 UNITED STATES and your KitchenAid ® When you receive your replacement PRO LINE™ Series Espresso PRO LINE™ Series Espresso Machine should fail within two years of... -
Page 42: Ordering Accessories And Replacement Parts
REPLACEMENT PARTS To order accessories or replacement parts for your Espresso Machine, Customer Satisfaction Center, KitchenAid Portable Appliances, call toll-free 1-800-541-6390 Monday through Friday, 8 a.m. to P.O. Box 218, St. Joseph, MI 49085-0218. 8 p.m. (Eastern Time), or Saturday, 10 a.m. to 5 p.m., or write to:... - Page 43 SERVICE ARRANGING FOR OUTSIDE 50 UNITED STATES AND PUERTO RICO Consult your local KitchenAid dealer or the store where you purchased your PRO LINE™ Series Espresso Machine for information on how to obtain service.
Need help?
Do you have a question about the KPES100 and is the answer not in the manual?
Questions and answers
Frother will not shut off