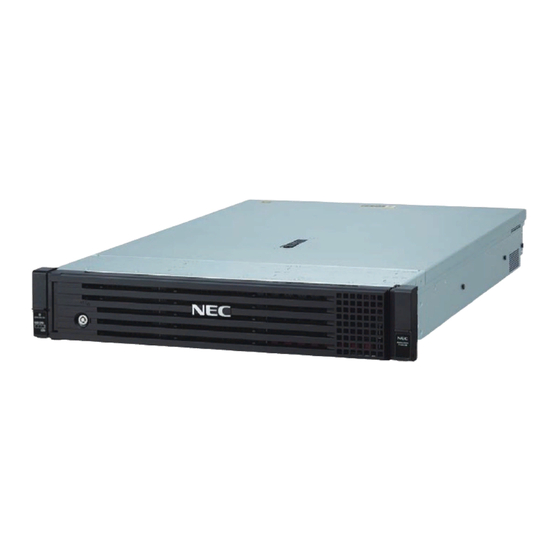
NEC Express5800/R120h-2M Getting Started
Hide thumbs
Also See for Express5800/R120h-2M:
- Maintenance manual (230 pages) ,
- User manual (218 pages) ,
- Installation manual (103 pages)
Advertisement
Quick Links
Getting Started!
Be sure to read this guide carefully before using this
server and retain it for reference.
This document provides information required to use your server safely and properly.
Keep this document nearby so that you may refer to it as necessary. Before using this server, be sure to read
this guide and "User's Guide" (User's Guide is available at NEC Web Site "http://www.58support.nec.co.jp/
global/download/"). It is recommended to keep the firmware of this server updated. For details of names in this
document, refer to Names and Functions of Parts in the "User's Guide".
Tips for your health and safety
Using a computer extensively may affect different parts of your body. Here are tips you should
follow while working on a computer to minimize strain on your body.
• Keep proper posture
• Adjust the angle, brightness, and contrast of the
display to suit your preferences.
• Adjust the angle of keyboard
• Take a break. Light exercise is also recommended.
The following describes the procedures from opening the carton box to
starting using this product. Be sure to follow these steps.
User's Guide
User's Guide is available at NEC Web Site
"https://www.58support.nec.co.jp/global/download/".
Search the product manual by the model number of the server you purchased.
Step 1
Express5800/R120h-2M
Open the carton box, and then make sure you have all the accessories listed below:
These accessories are required for setup and maintenance. Please keep them in a safe
place.
●
Getting Started (This guide) × 1
First Edition,
July 2020
●
Safety Precautions and Regulatory Notices × 1
Security key (attached to Front Bezel) × 2
●
Important: For set models and BTO (Build to Order) products, see also "List of
Embedded Products and Accessories".
Step 2
Install internal optional devices. (Go to Step 3 if you have not purchased options.)
Note: See Installing Internal Optional Devices in the "User's Guide" and the guide provided with the
optional device.
Step 3
Determine the location to place this product.
Set up a rack in an appropriate place, and then mount the server in the rack.
Note: See Installation and Connection in the "User's Guide".
CAUTION: Please do not use this equipment in the environment that contains
corrosive gases (Sulfur dioxide (SO
monoxide (NO), nitrogen dioxide (NO
ozone (O
aggravate corrosion.
The environment that satisfies the
following conditions
<Operating>
Ambient temperature:
10˚C to 35˚C
Humidity: 8% to 90%
Temperature gradient: ±10˚C/hour
Air pressure: 749 to 1040 hpa
Check the accessories.
●
Rack rail (Selection required option) × 2
●
Front Bezel × 1
Test & Diagnostic Tool CD × 1
●
Install internal optional devices.
Place the product to a proper location.
), hydrogen sulfide (H
2
), chlorine (Cl), ammonia (NH
2
)), or the environment exists components (salt or Sulphur) that
3
Do not use in the environment where
corrosive gas is generated.
There must be 1 m clearance in
front and behind the unit, 60 cm
on each side, and 40 cm above.
Outlet or UPS within
reach of the power cord
Attach stabilizers.
100/200 VAC two-prong
grounded outlet or UPS
On the flat and robust board
Step 4
Connect cables.
Connect the cables to the server.
Note: The figures below are reference diagrams including optional devices added.
See Installation and Connection in the "User's Guide".
8x 2.5-inch drive model
FRONT
8x 3.5-inch drive model
S), nitrogen
2
),
3
REAR
When installing
Management
multiple racks,
LAN port
be sure to
anchor them
together.
1000BASE-T/
USB3.0 device
100BASE-TX/
10BASE-T
*1 Connect the power cord to a circuit breaker of up to 15 A.
USB device
Display unit
Finally, connect the provided
power cord to an outlet *1
Device with serial interface
Advertisement

Summary of Contents for NEC Express5800/R120h-2M
- Page 1 Keep this document nearby so that you may refer to it as necessary. Before using this server, be sure to read this guide and “User’s Guide” (User’s Guide is available at NEC Web Site “http://www.58support.nec.co.jp/ global/download/”). It is recommended to keep the firmware of this server updated. For details of names in this Step 2 8x 2.5-inch drive model...
- Page 2 (3) If the STATUS lamp blinks in green (once per second), wait until it lights up. Standard Program Package Applies the driver to customize the server. (4) Press the POWER Switch on the front panel. After a while, the NEC logo appears on the NEC ESMPRO Monitors the server status.


Need help?
Do you have a question about the Express5800/R120h-2M and is the answer not in the manual?
Questions and answers