Table of Contents
Advertisement
Quick Links
AC/DC HIPOT WITH INSULATION RESISTANCE TESTER, CONTINUITY TESTER,
AC HIPOT WITH CONTINUITY TESTER AND RS-232 INTERFACE on 7620
Models
7620 , 7650
Item 38363
OPERATION AND SERVICE MANUAL
MODEL 7620 HypotULTRA
MODEL 7650 HypotULTRA
Electrical Safety Compliance Analyzer
AND RS-232 INTERFACE on 7650
Ver 2.14
SERIAL NUMBER
®
III
®
III
© Associated Research, Inc. 2006
13860 West Laurel Drive
Lake Forest, Illinois, 60045
U.S.A.
Printed May 17, 2007
Advertisement
Table of Contents

Subscribe to Our Youtube Channel
Related Manuals for Associated Research HypotULTRA III 7620


Summary of Contents for Associated Research HypotULTRA III 7620
- Page 1 AC/DC HIPOT WITH INSULATION RESISTANCE TESTER, CONTINUITY TESTER, AND RS-232 INTERFACE on 7650 AC HIPOT WITH CONTINUITY TESTER AND RS-232 INTERFACE on 7620 SERIAL NUMBER Models © Associated Research, Inc. 2006 13860 West Laurel Drive 7620 , 7650 Lake Forest, Illinois, 60045 U.S.A.
- Page 2 DECLARATION OF CONFORMITY Manufacturer: Associated Research, Inc. Address: 13860 W. Laurel Dr. Lake Forest, IL 60045 USA Product Name: Electrical Safety Compliance Analyzer Model Number: 7620/7650 Conforms to the following Standards: Safety: EN 61010-1:2001 EN 61010-2-031:1994 EMC: EN 55011:1998 Group I Class A...
-
Page 3: Table Of Contents
TABLE OF CONTENTS 1. Introduction....................... 1 1.1. Warranty....................... 1 1.2. Safety Symbols....................2 1.2.1. Product Marking Symbols ..............2 1.2.2. Caution and Warning Symbols.............. 2 1.3. Glossary of Terms ..................3 1.4. Safety......................4 1.4.1. Service and Maintenance ..............4 1.4.2. - Page 4 4. Programming Instructions ..................34 4.1. Setup System ....................34 4.1.1. Setup System Soft keys ..............35 4.1.2. System Parameters ................36 4.1.3. Cal Alert (Calibration Alert) ............... 41 4.2. Setup Tests Menu ..................45 4.2.1. Selecting a Memory................45 4.2.2.
- Page 5 7. Remote Control ....................... 71 7.1. Signal Outputs on Remote I/O..............71 7.2. Signal Inputs of Remote I/O and Programmed Test Files......72 8. Bus Remote Interface GPIB / RS-232..............75 8.1. A Brief History of IEEE-488............... 75 8.2. GPIB Messages................... 75 8.3.
- Page 6 10.4.12. Calibration of 350uA DC Current Range........130 10.4.13. Calibration of 999.99MΩ IR Range..........131 10.4.14. Calibration of 9999.9MΩ IR Range..........131 10.4.15. Calibration of 50000MΩ IR Range ..........132 10.4.16. Calibration of Continuity 20Ω............132 10.4.17. Calibration of Continuity 200Ω............. 133 10.4.18.
-
Page 9: Introduction
1. Introduction 1.1. Warranty Policies Associated Research, Inc., certifies that the instrument listed in this manual meets or exceeds published manufacturing specifications. This instrument was calibrated using standards that are traceable to the National Institute of Standards and Technology (NIST). -
Page 10: Safety Symbols
1.2. Safety Symbols 1.2.1. Product Marking Symbols Product will be marked with this symbol when it is necessary to refer to the operation and service manual in order to prevent injury or equipment damage. Product will be marked with this symbol when hazardous voltages may be present. Product will be marked with this symbol at connections that require earth grounding. -
Page 11: Glossary Of Terms
Hipot Tester: Common term for dielectric-withstand test equipment. Hypot®: Registered trademark of Associated Research, Inc., for its dielectric-withstand test equipment. Gas, liquid or solid material which has a volume resistivity of at least 10 12 ohm-cm and is used Insulation: for the purpose of resisting current flow between conductors. -
Page 12: Safety
The instrument, its power cord, test leads, and accessories must be returned at least once a year to an Associated Research authorized service center for calibration and inspection of safety related components. Associated Research will not be held liable for injuries suffered if the instrument is not properly maintained and safety checked annually. -
Page 13: Test Station
1.4.2. Test Station Location Select an area away from the main stream of activity that employees do not walk through in performing their normal duties. If this is not practical because of production line flow, then the area should be roped off and marked for HIGH VOLTAGE TESTING. No employees other than the test operators should be allowed inside. -
Page 14: Test Operator
1.4.3. Test Operator Qualifications This instrument generates voltages and currents that can cause harmful or fatal electric shock and must only be operated by a skilled worker trained in its use. The operator should understand the electrical fundamentals of voltage, current, and resistance. They should recognize that the test instrument is a variable high-voltage power supply with the return circuit directly connected to earth ground;... -
Page 15: Device Under Test
1.4.5. Device Under Test Never touch the Device Under Test (DUT) or anything connected to it while WARNING high voltage is being applied by the Hipot. When testing with DC, always discharge the capacitance of the item under test and anything the high voltage may have contacted--such as test fixtures--before handling it or disconnecting the test leads. -
Page 16: Introduction To Product Safety Testing
1.5. Introduction to Product Safety Testing 1.5.1. The Importance of Safety Testing Product Safety Tests are specified during the design and development stages of a product as well as in the production of the products to insure that it meets basic safety requirements. These tests are designed to verify the safety of the electrical products in that they do not jeopardize the safety of the people, domestic animals, and property of anyone who may come in contact with these products. - Page 17 The equipment used for this test, a dielectric-withstand tester, is often called a "Hipot" (for high potential tester). The "rule of thumb" for testing is to subject the product to twice its normal operating voltage, plus 1,000 volts. However, specific products may be tested at much higher voltages than 2X operating voltages + 1,000 volts.
- Page 18 AC testing advantages AC testing is generally much more accepted by safety agencies than DC testing. The main reason for this is that most items being Hipot tested will operate on AC voltages. AC Hipot testing offers the advantage of stressing the insulation alternately in both polarities, which more closely simulates stresses the product will see in real use.
-
Page 19: Insulation Resistance Test
which will indicate failure almost immediately if the total current reaches the leakage threshold during the initial charging of the product under test. Since a DC Hipot does charge the item under test, it becomes necessary to discharge the item after the test. -
Page 20: Run Test
integrity of that connection. Compliance agency requirements vary on how different products are to be tested. Most specifications call for test currents of between 10 and 30 amps. Test voltages at these currents are typically required to be less than 12 volts. Maximum allowable resistance readings of the safety ground circuit are normally between 100 and 200 milliohms. - Page 21 will vary depending upon point of contact, the surface area of the contact and the path the current flows. For these reasons, the specifications of the Measuring Devices are different depending upon the type of test being performed as well as the maximum allowable leakage current.
-
Page 22: Key Features And Benefits
1.7. Key Features and Benefits: HypotULTRA III § A complete all-in-one system HypotULTRA III combines four of the most common includes AC Hipot, DC Hipot, electrical safety tests required by safety agencies (AC Insulation Resistance and Hipot, DC Hipot, IR test, Ground Continuity test) into Ground Continuity tests in a a single instrument that takes up less rack space and enables a single DUT connection. - Page 23 § Storage of up to 50 setups A real benefit for manufacturers that test different with 30 steps per setup products. Each setup can store up to 30 steps, which can be configured to perform any of the safety tests. Each setup can be stored and named any combination of alphanumeric characters so it can be easily identified for recall.
- Page 24 § Digitally controlled arc Allows the operator to select whether low-level arcs detection system should be detected and provides the operator with the ability to digitally select and program multiple sensitivity levels. § Electronic ramping (up and Provides a gradual and timed method to increase or down) decrease output voltage to the DUT, minimizing any damage from quick high voltage changes to sensitive...
-
Page 25: Getting Started
2. Getting Started Introduction This section contains information for the unpacking, inspection, preparation for use and storage of your Associated Research, Inc., product. 2.1. Unpacking and Inspection 2.1.1. Packaging Your instrument was shipped in a custom foam insulated container that complies with ASTM... -
Page 26: Installation
• Use a strong double-wall container that is made for shipping instrumentation. 350 lb. test material is adequate. • Use a layer of shock-absorbing material 70 to 100 mm (3 to 4 inch) thick around all sides of the instrument. Protect the control panel with cardboard. •... -
Page 27: Environmental Conditions
Return Connection When the instrument Return is grounded, any internal and external stray leakage will be monitored due to currents that flow from High Voltage to earth ground (such as from HV to the chassis of the instrument). This current is inherent and will cause errors when trying to monitor very low leakage currents in the microampere range. -
Page 28: Specifications And Controls
3. Specifications and Controls 3.1. HypotULTRA III Functional Specifications, 7620 and 7650 INPUT 115 / 230 VAC ± 10 %, automatically selected Voltage 50/60 Hz ± 5% Frequency Fuse 4 Amp 250V Slo-Blo DIELECTRIC WITHSTAND TEST MODE Output Rating 5 KV @ 30 mA AC 5 KV @ 10 mA DC for 7650 only Output Adjustment Range:... - Page 29 DIELECTRIC WITHSTAND TEST MODE Range 1: 0.0 – 999.9µA for 7650 only Resolution: 0.1µA Range 2: 1000 – 10000µA for 7650 only Resolution: 1µA ± (2% of setting + 2 counts) Accuracy: Arc Detection Range: 1 – 9 Failure Detector Audible and Visual Voltage Display Range:...
- Page 30 DIELECTRIC WITHSTAND TEST MODE Maximum Capacitive 1uF----< 1KV 0.08uF----< 4KV Load in DC Mode 0.75uF----< 2KV 0.04uF----< 5KV 0.5uF----< 3KV AC Output Wave Form Sine Wave, Crest Factor = 1.3 – 1.5 Output Frequency Range: 60 or 50 Hz, User Selection ±...
- Page 31 INSULATION RESISTANCE TEST MODE, MODEL 7650 ONLY Resistance Display Range: 0.05MΩ – 50000 MΩ (5 Digit, Auto Ranging) Resolution: 500VDC 1000VDC MΩ MΩ MΩ 0.001 0.050 – 9.999 0.100 – 9.999 0.01 1.00 – 99.99 1.00 – 99.99 10.0 – 999.9 10.0 –...
- Page 32 CONTINUITY TEST MODE DC 0.1A ± 0.01A Total Resistance*: 0.00-33.0 Ω Output Current DC 0.01A ± 0.001A Total Resistance*: 31.0-330 Ω DC 0.001A ± 0.0001A Total Resistance*: 310-2000 Ω 0.00 – 19.99 Ω Resistance Display Range 1: 0.01 Ω Resolution: ±...
- Page 33 GENERAL SPECIFICATIONS PLC Remote Control Input: Test, Reset, Interlock, Recall Memory 1 through Output: Pass, Fail, Test-in-Process, Reset Remote Output Relays 125VAC@1AAC, 30VDC@ 0.5ADC Safety Built-in Smart GFI circuit Memory 50 memories, 30 steps/memory Interface Standard RS-232, Optional Printer Port with Date and Time Stamp or GPIB.
-
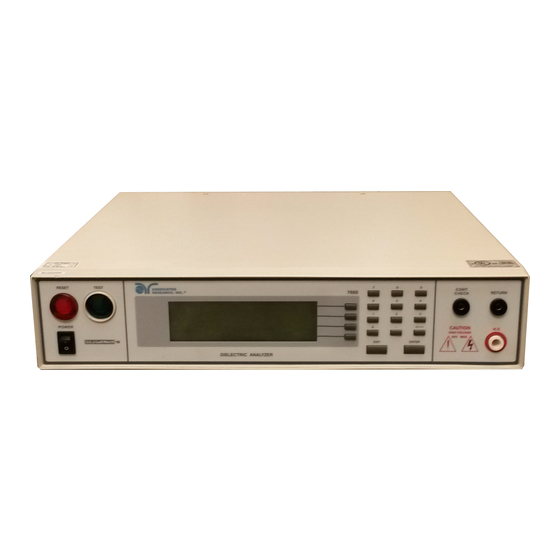
Page 34: Instrument Controls
3.2. Instrument Controls 3.2.1. Front Panel Controls 7650 DIELECTRIC ANALYZER 1. RESET BUTTON: Momentary contact switch used to reset the instrument. If a failure condition occurs during a test, you will need to reset the system to shut off the alarm and signal the system that you are aware of a failure condition. - Page 35 7650 DIELECTRIC ANALYZER 11. HIGH VOLTAGE ON INDICATOR: This indicator flashes to warn the operator that high voltage is present at the high voltage terminal. 12. HIGH VOLTAGE OUTPUT JACK: Connector used to attach the High Voltage test lead, adapter box high voltage lead, or test fixture high voltage lead to the instrument. The connector is recessed for safety when not being used.
-
Page 36: Rear Panel Controls
3.2.2. Rear Panel Controls 1. BUS INTERFACE: Standard connector for interconnection to the RS-232 Bus interface. Optional IEEE 488 interface may be substituted for the RS-232. 2. CALIBRATION BUTTON: To put the instrument into the calibration mode, push this button and turn on the power switch simultaneously. 3. - Page 37 11. INPUT POWER RECEPTACLE: Standard IEC 320 connector for connection to a standard NEMA style line power (mains) cord. 12. CHASSIS GROUND (EARTH) TERMINAL: This terminal should be connected to a good earth ground before operation.
-
Page 38: Quickstart
3.3. Quickstart This quick start guide assumes the operator has some familiarity with automated Electrical Safety testing. Locate a suitable testing area and be sure you have read all safety instructions WARNING for the operation of the instrument and suggestions on the test area set-up in the Safety section. - Page 39 The Perform Tests screen will now be displayed. The Perform Test screen will appear as follows: A C W T o t a l S e t t i n g s M e m N a m e * * 1 0 .
- Page 40 System Presets Results Last Lock Mem Lock Address (GPIB only) Smart GFI Results Last Cal Alert Date Security Password from Factory Security based on Password The initial test loaded for use is Memory 1, Step 1. If the ACW defaults are unacceptable for your DUT then refer to the section 4.2 Setting Up a Test, for instructions on how to program tests into the instrument.
- Page 41 the Remote Interface, Signal Input port to provide a connection to the interlock, the instrument will not perform tests. Please check your connections to be sure they are making good contact. Clear the area of any debris that may create a hazardous situation and ask any unnecessary personnel to leave the area.
-
Page 42: Programming Instructions
4. Programming Instructions 4.1. Setup System (Refer to FIG.1). 1. From the Perform Test screen, press the “ <more>” soft key. A second set of soft key selections will now be displayed. 2. From the secondary soft keys, press the “ System” soft key. The Setup System parameters will now be displayed. -
Page 43: Setup System Soft Keys
4.1.1. Setup System Soft keys Directional soft keys < >, ∧, ∨ The “< >, ∧, ∨ ” soft keys are used to scroll the cursor to the different system parameters. Edit The “ Edit” soft key is used to access the highlighted parameter and activates the Editing Menus. An example of one of the editing menus is as follows: P r e v P L C R e m o t e... -
Page 44: System Parameters
Change The “ Change” soft key is used to toggle parameters in the edit menus. EXIT The “ EXIT” key is used to return to the Perform Tests screen from the Setup System Menu or will bring you back to the Setup System Menu from the Editing Menus. 4.1.2. - Page 45 This function is used to temporarily override the automatic connection feature. When the Single Step function is ON the instrument will pause after each step is completed. To continue the test sequence, press the Test button to execute the next connected step. Each time the Test button is pressed the next connected step will execute.
- Page 46 The numbers corresponding to the different contrast settings are 0 through 9, 0 meaning the lightest color of displayed characters and 9 meaning the darkest color of displayed characters. After the number is entered, the display will automatically adjust to the new display setting. Results Highlight the Results parameter using the “<...
- Page 47 When P/F is selected, it is not possible to directly see the results of the test. In order to review the test results refer to section 4.2.3 Reviewing Test Results. When Last is selected, the results of the last step performed will be displayed on the Perform Tests screen.
- Page 48 Secure Lock and Mem Lock Access If a password has been created, when you press the “ Lock or Mem Lock” soft key, a password pop-up screen will appear. The pop-up message will appear as follows: P a s s w o r d XXXXXX In order for you to access the Lock or Mem Lock parameters, you will now have to enter the proper password.
-
Page 49: Cal Alert (Calibration Alert)
GFI is a circuit that monitors the current between the High Voltage output and earth ground. The GFI's main purpose is to protect the operator from prolonged exposure to High Voltage in the case of an accidental contact with the High Voltage lead and earth ground. If the operator accidentally touches the High Voltage lead and earth ground, the High Voltage will be shut off immediately and the test aborted. - Page 50 edit. Use the numeric keypad to change the values in the Date fields and press ENTER to accept the new number or press EXIT to cancel and return to the original number. Alert (Alert Date) The Alert date is like an alarm clock that will warn you in advance of the actual calibration due date.
- Page 51 Calibration Alert Screen The Calibration Alert Warning screen appears as follows: With all security settings set to off. C A L I B R A T I O N A L E R T M o d e l 7 6 5 0 i s d u e f o r c a l i b r a t i o n o n 1 0 / 1 6 / 0 5 .
- Page 52 4.1.4. System Presets HypotULTRA III comes from the factory with the following system presets: System Presets Setup Sys. PLC Remote Single Step Fail Stop Alarm Contrast Results Last Lock Mem Lock Address (GPIB only) Smart GFI Results Last Cal Alert Security Password from Factory Security based on Password...
-
Page 53: Setup Tests Menu
4.2. Setting Up a Test (Refer to FIG.2). 4.2.1. Selecting a Memory From the Perform Tests screen, press the “ Memory” soft key. The Memory Recall screen will now be displayed. N a m e M e m o r y N a m e L i s t R a n g e : 0 - 5 0... -
Page 54: Selecting A Step
Use the “< >, ∧, ∨ ” soft keys to navigate through the character map and use the bottom soft key to select a character. The backspace key may be used to delete the last character. Press ENTER to save or EXIT to cancel changes. The memory name can be no more than 10 characters in length. - Page 55 To change toggle parameters, simply press the “ Change” soft key. Once a parameter is edited, it is necessary to complete the edit either by pressing the ENTER key to accept the new setting or the EXIT key to cancel the edit and return to the original number. FIG.2 A C W T o t a l S e t t i n g s...
-
Page 56: Prompt
4.2.6. Prompt The Prompt function allows you to insert a short line of text in a step. The Prompt will appear on the screen before the step is initiated and remains on the screen until the TEST button is pressed. After the TEST button is pressed, the Prompt will clear and the step will initialize. At the Perform Test screen, use the “... -
Page 57: Test Parameters
4.3. Test Parameters Test Parameter Notes • Once you begin typing a new number, the parameter will blank and the cursor will begin blinking. This indicates that the parameter is being edited. Once a parameter is edited, it is necessary to complete the edit either by pressing the ENTER key to accept the new number or the EXIT key to escape from the edit and return to the original number. - Page 58 Ramp DN: A length of time that is allowed for the test voltage to decay from set point to 0. Arc Sense: During Hipot testing some low current arcing may be allowable. Arc sense is a maximum allowable threshold for arcing. The numbers corresponding to the different arc sensitivity levels are 0 through 9, 1 meaning the maximum threshold of allowable arcing, 9 meaning the minimum threshold of allowable arcing and 0=OFF.
-
Page 59: Ac Withstand
4.3.2. AC Withstand, Models 7620 and 7650 From the Test Parameter review screen, scroll the highlighted area to the Test Type and press the “ Edit” soft key. The Test Parameter edit screen will now be displayed. Now press the “ Change” soft key until the letters ACW appear in the parameter field. -
Page 60: Dc Withstand
separated, a doubling of the real leakage current can go virtually undetected by a total current measurement. Because Real Current is installed in HypotULTRA III, additional parameter selections are added to the ACW test parameters. The additional test parameters are Max Lmt R (Real Current Maximum limit), Min Lmt R(Real Current Minimum Limit) and Display. -
Page 61: Insulation Resistance
OFF), Scanner Channel selections if installed, and Prompt. Ramp-HI The Ramp-HI function is active during the Ramp period only. Ramp-HI will allow current higher than the normal Max-Lmt current setting of the DC Withstand Voltage test to avoid false failure due to charging current. Charge–... - Page 62 The Scanner selections will only appear if there is a scanner installed or an external scanner connected to the instrument. This is an auto detect feature in hardware. From the Insulation Resistance parameter review screen, the following parameters may be selected for editing: Voltage, Max-Lmt, Min-Lmt, Ramp Up, Delay Time, Ramp Down, Connect, Charge-LO, Scanner Channel Output Select if installed and Prompt.
-
Page 63: Continuity
4.3.5. Continuity, Model 7620 and 7650 Continuity test is generally used to test the ground conductor of a line cord. If the resistance exceeds Max-Lmt trip point or drops below the Min-Lmt trip point the HypotULTRA III will signal a continuity failure. If you are testing products with two prong plugs, do not activate the continuity circuit. -
Page 64: Default Parameters
4.3.6. Default Parameters Each of the test types (AC withstand, DC withstand and IR) have specific default test parameters that automatically load when test type is selected from the parameter edit screen. The following table is a listing of the Default Parameters for each of the different types of tests that are available in the HypotULTRA III. -
Page 65: Memory, Step, And Default System Parameter Initialization
Test Type Parameter Value Charge-LO 0.000uA Scanner OOOOOOOO Prompt CONT. Max-Lmt 10.00Ω Min-Lmt 0.00Ω Dwell 1.0s Offset 0.00Ω Connect Scanner 00000000 4.4. Memory, Step, and Default System Parameter Initialization Warning Initializing the instrument will overwrite all memories and steps with ACW default parameters! Press the 0 and 1 numeric keys and power the instrument at the same time, then press the soft key next to the word “... -
Page 66: Operating Instructions
5. Operating Instructions 5.1. Instrument Connections 5.1.1. Adapter Box Connections The adapter box provides an easy way to connect a DUT to the HypotULTRA III that is terminated in a two or three-prong line cord. The following diagram shows how to connect the adapter box to the HypotULTRA III to the device under test. -
Page 67: Perform Tests Screen
5.2. Perform Tests Screen The HypotULTRA III automatically defaults to the Perform Tests screen upon power up. The Perform Tests screen will appear as follows: A C W T o t a l S e t t i n g s M e m N a m e * * 1 0 . -
Page 68: Single Step
5.2.2. Analog Meters A new feature unique to HypotULTRAII is analog bar graph meters. The bar graphs represent voltage and current and are located directly below their corresponding digital meter. A C W T o t a l S e t t i n g s M e m N a m e * * 1 0 . -
Page 69: Results
5.2.5. Results At the end of a test sequence or single step test, you may review the measurements of each test by pressing “ <more>” and then pressing “ Results” . The Results screen will appear as follow: 0 1 - 7 A C W F A I L 0 1 - 8 D C W M a x L i m i t... -
Page 70: Performing A Test
5.4. Performing a Test 1. As instructed in section 4.2., select a memory and step that is suitable for the test you would like to perform. 2. Attach the appropriate load or DUT to the instrument (refer to section 5.1 for instrument connections). -
Page 71: Displayed Messages
5.5. Displayed Messages Directly above the Metering screens is the Test status display. This portion of the display is active during the test and allows you to view the type of test being performed and status of the test step. At the end of a test, the Test status display will inform you either that the test has passed or failed. - Page 72 Abort This message appears on the display if the test in process is aborted with the RESET button or remote Reset control. Max-Lmt This message appears on the display if the DUT measurement exceeds the Max-Lmt setting of any parameter. Min-Lmt This message appears on the display if the DUT measurement drops below the Min-Lmt.
- Page 73 P l e a s e c a l l 1 - 8 0 0 - 8 5 8 - 8 3 7 8 All of the buttons and keys are not active in this situation. The customer should contact Associated Research, Inc to receive further instruction. Fatal Error identification number will represent type of the failure that occurs.
-
Page 74: Instrument Verification
6. Instrument Verification Verification is a process by which an instruments fail detectors are proven to be functioning properly and thereby “ Verifying” the functionality of the electrical safety tester and connected accessories. Verification of failure detect circuitry of the electrical safety tester is required by safety agencies such as CSA, UL, and TÜV. -
Page 75: Continuity Verification
6.2.1. Continuity Verification, Models 7620 and 7650 From the Verification screen, press the Up or Down arrow keys to select “ Continuity” , then press the ” Select” soft key. An instructional prompt will now be displayed. The prompt will appear as follows: C O N T I N U I T Y V E R I F I C A T I O N O p e n t h e D U T c o n n e c t i o n b e t w e e n C o n t . -
Page 76: Ac Hipot Verification
6.2.2. AC Hipot Verification, Models 7620 and 7650 From the Verification screen, press the Up or Down arrow keys to select “ AC HIPOT” , then press “ Select’ soft key. An instructional prompt will now be displayed. The prompt will appear as follows: A C H I P O T V E R I F I C A T I O N S h o r t t h e D U T c o n n e c t i o n b e t w e e n H V a n d... -
Page 77: Dc Hipot Verification
6.2.3. DC Hipot Verification, Model 7650 Only From the Verification screen, press the Up or Down arrow keys to select “ DC HIPOT” , then press “ Select” soft key. An instructional prompt will now be displayed. The prompt will appear as follows: D C H I P O T V E R I F I C A T I O N S h o r t t h e D U T c o n n e c t i o n b e t w e e n H V a n d... -
Page 78: Ir Verification
6.2.4. IR Verification, Models 7650 Only From the Verification screen, press the Up or Down arrow keys to select “ IR” , then press “ Select” soft key. An instructional prompt will now be displayed. The prompt will appear as follows: I R V E R I F I C A T I O N S h o r t t h e D U T c o n n e c t i o n b e t w e e n H V a n d... -
Page 79: Remote Control
7. Connection of Remote I/O Two 9-pin “ D” type connectors are mounted on the rear panel that provides REMOTE-INPUT- OUTPUT control and information. These connectors mate with standard 9 pin D-sub-miniature connector provided by the user. The output mates to a male (plug) connector while the input mates to a female (receptacle) connector. -
Page 80: Signal Inputs Of Remote I/O And Programmed Test Files
The following describes how the relays operate for each test condition. PROCESSING - The relay contact closes the connection between pin (5) and pin (6) while the instrument is performing a test. The connection is opened at the end of the test. PASS - The relay contact closes the connection between pin (1) and pin (2) after detecting that the item under test passed all tests. - Page 81 REMOTE FILE SELECT TRUTH TABLE BIT 4 BIT 3 BIT 2 BIT 1 FILE # 1= Momentary Contact closure between BIT and COMMON 0= No Contact closure between BIT and COMMON Activating file program functions through the remote connector selects the WARNING file and starts the test that is pre-programmed into that file.
- Page 82 PLC Remote Pop-up message If you attempt to start a test from the front panel Test button and the PLC remote function is turned “ ON” , a pop-up message will be displayed. The pop-up message will appear as follows: PLC Remote ON...
-
Page 83: Bus Remote Interface Gpib / Rs-232
8. Bus Remote Interface GPIB / RS-232 This section provides information on the proper use and configuration of bus remote interface. The RS-232 remote interface is standard on model 76XX but the GPIB (IEEE-488) interface option can be substituted for the RS-232 interface. Please refer to the Option section of this manual for details on the HypotULTRA III options. -
Page 84: Gpib Connector
Data Lines: The eight data lines, DI01 through DI08 carry data and command messages. The 7-bit ASCII or ISO code set is used and the eighth bit DI08 is unused. Handshake Lines: The transfer of message bytes between devices is done via three asynchronous control lines. -
Page 85: Gpib Address
A maximum separation of 4 m between any two devices and an average separation of 2 m over the entire bus. A maximum total cable length of 20 m. No more than 15 device loads connected to each bus, with no less than two-thirds powered on. For example 1 GPIB controller and a maximum of 14 GPIB instruments. -
Page 86: Interface
8.8. RS-232 Interface This interface is standard on HypotULTRA III. This interface provides all of the control commands and parameter setting commands of the GPIB interface with the exception of some of the 488.2 Common Commands and SRQ capability. All commands can be found in the command list, section 8.9.1 to 8.9.6 of this manual. -
Page 87: Test Execution Commands
All commands that end with a question mark (?) are query commands and required an IEEE- 488 read command to retrieve the data from the device's output buffer. 8.9.1. Test Execution Commands The following commands are used to control actual output voltage and current from the instrument. - Page 88 Command Description Value Step Add CONT test Add all parameters of a <test,p1,p2,p3… > test SP <prompt message> Step Prompt Create prompt message = Valid ASCII (1) maximum 32 characters Step Prompt Delete SF {1|0} Step Fail Stop 1=On, 0=Off (1) "Valid ASCII"...
-
Page 89: Test Parameter Editing Commands And Companion Queries
The parameter values should use complete text and not use the coded values that are associated with the individual parameter setting commands such as "ON" and "OFF" for toggle field or words such as “ Real” or “ Total” . The LS? companion command will also list all parameters in complete text in the order as they appear in the following table, preceded by the step number. - Page 90 Command Name Test Value Types ECC {1|0} Edit Connect 1= On, 0=Off ECC? ED {1|0} Edit Current Meter 1 = Real, 0 = Total Display EV <value> Edit Voltage 0 - 5000V 0 - 5000V 50 - 1000V ECG < value > Edit Charge-Lo 0.0 - 350.0uA ECG?
-
Page 91: System Parameter Editing Commands And Companion Queries
Command Name Test Value Types EL < value > Edit Min-Lmt 0.0 - 10000uA 0.05 - 50000MΩ 0.0 - 2000 Ω CONT EF {1|0} Edit Frequency 1=60Hz, 0=50Hz EIS <scanner Edit Internal Scanner ACW scanner string = 1-16 element string> ASCII string consisting of H, L, EIS? or O. -
Page 92: Query Commands
Command Name Value SCA? SCDA < value > Cal Date mm,dd,yy or yy,mm,dd or dd,mm,yy SCDA? according to SDF setting SCDU < value > Cal Due mm,dd,yy or yy,mm,dd or dd,mm,yy SCDU? according to SDF setting SA < value > Alert Date mm,dd,yy or yy,mm,dd or dd,mm,yy according to SDF setting... - Page 93 Command Name Value List File Name Active selected memory LFN? List Memory (File) Number Active selected memory LF <memory number>? List File Name by memory memory number = 1-50 number List Prompt Active selected Step LP <step number>? List Prompt by step number step number = 1-30 List Step Parameters LS <step number>?
- Page 94 Read Scanner Status command will respond with a value that identifies the number scanners installed or connected to the instrument. Values 0 – 4 will indicate if there are no scanners connected, one Internal or External scanner, or if both an Internal and an External scanner are connected.
-
Page 95: Ieee 488.2 Common Commands
Service Request Enable Query 0 - 255 *IDN? Read the instrument identification string. Company =Associated Research Inc. *RST Reset the instrument to original power on configuration. Does not clear Enable register for Standard Summary Status or Standard Event Registers. Does not clear the output queue. Does not clear the power-on-status-clear flag. - Page 96 *CLS Clears the Status Byte summary register and event registers. Does not clear the Enable registers. *OPC Sets the operation complete bit (bit 0) in the Standard Event register after a command is completed successfully. *OPC? Returns an ASCII "1" after the command is executed. *WAI After the command is executed, it prevents the instrument from executing any further query or commands until the no-operation-pending flag is TRUE.
-
Page 97: Status Reporting
*SRE? Queries the Service Request enable register. Returns the decimal value of binary-weighted sum of bits. 8.9.7. Status Reporting Status reporting system is configured using two types of registers. An Event Register and a Summary register. The summary register is known as the Status Byte register and records high- level summary information acquired by the event registers. -
Page 98: Gpib Service Request
8.9.8. GPIB Service Request The service request capability is not available with the RS-232 interface. The SRQ line will be activated only after one or more of the service request functions have been enabled using the Status Byte Enable Register command *SRE. The status byte bit assignments are as described in the previous section for status reporting. -
Page 99: Non Volatile Memory
8.11. Non Volatile Memory The instrument saves each parameter in non-volatile memory when the parameters are sent to the instrument. The non-volatile memory has a limited write cycle life, therefore for programmers who wish to send all parameters before executing each test, should use Memory 50 step 30. -
Page 100: Options
9. Options Introduction This section contains a list and descriptions of available factory installed options at the time of this printing. The list of options contains an option code number that can be referenced on the data plate on the rear panel of the unit. Option Label On the rear panel of the instrument, you will find a label that contains the option code. - Page 101 channel set to the return point), H (scanner set to the high voltage point or continuity output) and O (OFF). Once the channel is set, press ENTER to accept the new setting or EXIT to cancel. Reviewing the scanner settings From the Perform Tests screen, press the “...
- Page 102 02 4 Channel Scanner with Continuity This option is the same as Option 01, 8 Channel Scanner with Continuity, with the exception that the numbers of channels are limited to 4. The scanner functions the same as the 8-channel option but the scanner status display will only indicate the status of channels 1-4, even though all 8 channel indicators are displayed.
- Page 103 08 Printer Port Option This option allows the instrument to generate a hardcopy printout of the test results. The printout can be configured to print automatically with each test or manually by pressing a front panel key. There is also capability to enter a device ID number to each test that increments automatically after each test is performed.
- Page 104 In the OFF mode, the printer card and printer menuing are disabled. Test Result From the Print Format setting screen, press the “ Test Result” soft key. As the soft key is pressed, the display will toggle between the words “ All” and “ Fail only” . This command selects which test results will be printed, “...
- Page 105 Sample Printer Outputs The following is a sample print of a two-step test with the Print Format settings as follows: Test Results: All, Test Setting: ON, Device ID: ON, Form Feed: ON = = = = = = = = = = = = = = = = = = = = = = = = = == = = = = = = = = = = = == == = = = = = = = = = Model: 7650 Time: 14:23:18 Date: 03/30/01 Device ID: 0123456789...
- Page 106 The following is a sample print of a two-step test with the Print Format settings as follows: Test Results: Fail Only, Test Setting: OFF, Device ID: OFF, Form Feed: ON. The failure occurred in the second step only. = = = = = = = = = = = = = = = = = = = = = = = = = == = = = = = = = = = = = == == = = = = = = = = = Model: 7650 Time: 14:23:18 Date: 03/30/01 Device ID: 0123456789...
- Page 107 Voltage xxxxV Total I xx.xxmA Real I xx.xxmA Time x.xs - - - - - - - - - - - - - - - - - - - - - - - - - - - - - - - - - - - - - - - - - - - - - - - = = = = = = = = = = = = = = = = = = = = = = = = = == = = = = = = = = = = = == == = = = = = = = = = Model: 7650 Time: 14:23:18 Date: 03/30/01...
- Page 108 DIELECTRIC WITHSTAND TEST MODE DC Range 1: 0.0 – 999.9µA for 7650 only Resolution: 0.1µA Range 2: 1000 – 10000µA for 7650 only Resolution: 1µA ± (2% of setting + 2 counts) Accuracy: Current Display Auto Range AC Total Range 1: 0.000mA –...
- Page 109 DIELECTRIC WITHSTAND TEST MODE AC Real Range 1: 0.000 – 5.000mA Resolution: 0.001mA ± (3% of setting + 0.05mA) All Ranges Accuracy: PF > 0.1 V > 250VAC Range 1: 0.0 – 999.9µA for 7650 only Resolution: 0.1µA Range 2: 1000 –...
- Page 110 The port labeled “ Barcode” is a PS/2-type connector that is used for the connection of a barcode scanner. The Ethernet port is for use with a standard CAT-5 Ethernet cable and may be connected to any compatible PC. The 9-pin D-type subminiature connector labeled “...
- Page 111 Associated Research, Inc. Ethernet Card Communications Information (To be completed by Network Administrator) Ethernet Card Address: ______:______:______:______:______ Device Name: _____________________ Device IP Address: _______._______._______._______ Gateway IP Address: _______._______._______._______ Subnet Mask: _______._______._______._______...
- Page 112 Saving New Settings Any time the user edits one of the Ethernet Card parameters and exits the Ethernet Card Settings menu, the following message will be displayed: S A V I N G N E W S E T T I N G S … The Ethernet Card will attempt to re-establish a connection with the server anytime the user modifies a parameter and exits the Ethernet Card Parameters Menu or uses the command set at the end of this option description.
- Page 113 I P A D D R E S S : N o n e R e c e i v e d P R E S S E X I T T O C O N T I N U E Press the EXIT key to remove the pop-up message and return to the HypotULTRA III’...
- Page 114 and return to the original setting. IP Address Highlight the IP Address parameter using the “∧, ∨ ” soft keys. When the IP Address parameter is highlighted, press the “ Edit” soft key. A specific IP Address must be entered into this field if the IP Setup parameter is configured to MANUAL.
- Page 115 I N V A L I D S E T T I N G S ! O n e o r m o r e o f t h e s e t t i n g s a r e i n v a l i d . P R E S S E X I T T O C O N T I N U E Press the ENTER key to save the new settings.
- Page 116 When the setting is SERIAL#, PRODUCT# or SER/PROD, the user can scan barcodes in the Perform Tests screen before the test is started. When a barcode is scanned, one of the following messages will appear on the display. S e r i a l N u m b e r : x x x x x x x x x x x x x P r o d u c t N u m b e r : x x x x x x x x x x x x x...
- Page 117 Using the RUN FILE feature will enable the instrument’ s output once WARNING the barcode is scanned. Do not touch the DUT at any time when using this feature in order to avoid potential shock or serious injury. When using a barcode scanner, the HypotULTRA III’ s responses to the TD? and RD x? commands will differ slightly from an OMNIA with the standard RS-232 interface.
- Page 118 The Autostart feature will not work with the SERIAL# setting. The Autostart feature will enable the instrument’ s output once the WARNING product number barcode is scanned a second time when in the PRODUCT# and SER/PROD modes. Do not touch the DUT at any time when using this feature in order to avoid potential shock or serious injury.
- Page 119 • However, the presence of this response does not mean that the instrument (in the case of these commands only) completed the command. These commands require a restarting of the hardware that controls the Ethernet Protocols. Because of this, the user must wait before the Ethernet Card will respond to another command. See the table below for the approximate wait times necessary after one of the commands in the table is sent.
- Page 120 R e s u l t s L i m i t 0 0 0 0 0 0 T i m e L i m i t 0 d a y s R S 4 8 5 A d d r e s s T e s t R e s u l t A L L S e r i a l P o r t...
- Page 121 parameter is highlighted, press the “ Edit” soft key. The Time Limit allows the user to receive an alert message on the display of the HypotULTRA III when any of the results saved on the Data Storage Card’ s internal Flash memory are older than the predefined setting.
- Page 122 serial port can be set to RS232, RS485, or OFF. RS232 Interface When selecting RS232, the protocol for interfacing and communicating with a PC can be found in section 8.8. RS232 Interface of this manual. RS485 Interface The RS485 interface of the Data Storage Card is designed to function on a two-wire (half- duplex) RS485 network, i.e.
- Page 123 Barcode I/P Highlight the Barcode I/P parameter using the “∧, ∨ ” soft keys. When the Barcode I/P parameter is highlighted, press the “ Edit” soft key. The Barcode Input setting can be set to SERIAL#, PRODUCT#, SER/PROD, OFF and RUN FILE.
- Page 124 scanned. Do not touch the DUT at any time when using this feature in WARNING order to avoid potential shock or serious injury. To completely enable this feature, the user must name the desired test file for a particular product the exact alpha-numeric code that is on the product’ s barcode label. For example, if Product A has barcode “...
- Page 125 Operation The Data Storage Card Results Menu can be viewed by pressing the “ Results” soft key while in the Perform Tests screen. After doing so the following menu will be shown: I n s t r u m e n t D a t a C a r d Pressing the “...
- Page 126 The following message will display if the “ Delete Result” soft key is pressed: D e l e t e R e s u l t ? P r e s s E N T E R t o D e l e t e . P r e s s E X I T t o c a n c e l .
- Page 127 This message will appear on the screen until the Time Remaining reaches 00:00. For each transfer, the Data Storage Card will copy all results in the internal Flash memory regardless if some or all of the results have been transferred before. During each transfer, the Data Storage Card will create a .txt file that will contain the information for all of the results.
- Page 128 CONT Test Test Test Voltage Voltage Voltage Resistance Test Dwell Leakage Leakage Resistance Time Current (T) Current Test Dwell Test Delay Leakage Time Time Current (R) Test Dwell Time Note: If barcoding is used, the barcoding information will be the final entries in the results file with Serial Number being first and Product Number being second.
- Page 129 D A T A C A R D A L E R T T h e e x t e r n a l m e m o r y d r i v e i s n o t c o n n e c t e d t o t h e D a t a C a r d .
- Page 130 configure it through the drive’ s properties in Windows.
-
Page 131: Calibration Procedure
This warranty can be extended an additional four years provided that the instrument is returned each year to Associated Research, Inc. for its annual calibration. In order to be eligible for the extended warranty instruments must be purchased and used in North America and returned to Associated Research, Inc. -
Page 132: Calibration Initialization
10.2. Calibration Initialization Press and hold the calibration key on the rear panel with a pen, pencil, or small screwdriver while powering ON the HypotULTRA III. The HypotULTRA III enters calibration mode after the power on sequence is complete. The Initial Calibration screens will appear as follows: C A L I B R A T I O N 5 0 0 0 V A C R 2 0 W / 3 0 m A... -
Page 133: Calibration Of Ac Hipot Voltage
10.4.1. Calibration of AC Hipot Voltage C A L I B R A T I O N C o n n e c t t h e s t a n d a r d 5 k V A C k i l o v o l t m e t e r f r o m H . -
Page 134: Calibration Of Ir Dc Voltage
10.4.3. Calibration of IR DC Voltage C A L I B R A T I O N C o n n e c t t h e s t a n d a r d 1 k V D C k i l o v o l t m e t e r f r o m H . -
Page 135: Calibration Of 3.5Ma Ac Total Current Range
10.4.5. Calibration of 3.5mA AC Total Current Range C A L I B R A T I O N C o n n e c t t h e 1 0 0 k Ω l o a d i n s e r i e s w i t h 3 . -
Page 136: Calibration Of 20W/30Ma Ac Real Current Range
10.4.7. Calibration of 20W/30mA AC Real Current Range C A L I B R A T I O N C o n n e c t t h e 1 0 0 k Ω l o a d i n s e r i e s w i t h 3 0 m A A C c u r r e n t m e t e r . -
Page 137: Calibration Of 2W/3.500Ma Ac Real Current Range
10.4.9. Calibration of 2W/3.500mA AC Real Current Range C A L I B R A T I O N C o n n e c t t h e 1 M e g Ω l o a d i n s e r i e s w i t h 3 . -
Page 138: Calibration Of 3.500Ma Dc Current Range
10.4.11. Calibration of 3.500mA DC Current Range C A L I B R A T I O N C o n n e c t t h e 1 0 0 k Ω l o a d i n s e r i e s w i t h 3 . -
Page 139: Calibration Of 999.99Mω Ir Range
10.4.13. Calibration of 999.99MΩ IR Range C A L I B R A T I O N C o n n e c t t h e s t a n d a r d 5 0 M e g Ω l o a d f r o m H V t o R e t u r n . -
Page 140: Calibration Of 50000Mω Ir Range
10.4.15. Calibration of 50000MΩ IR Range C A L I B R A T I O N C o n n e c t t h e s t a n d a r d 5 0 0 M e g Ω l o a d f r o m H V t o R e t u r n . -
Page 141: Calibration Of Continuity 200Ω
10.4.17. Calibration of DC Continuity 200Ω C A L I B R A T I O N S t e p 1 : S h o r t t h e C o n t . C h e c k a n d R e t u r n l e a d s t o g e t h e r . - Page 142 This screen will appear after both steps 1 and 2. C A L I B R A T I O N A u t o m a t i c c a l i b r a t i o n p r o c e s s .
-
Page 143: Replacement Parts List
11. Replacement Parts List Rev: G 3-30-2007 ECO 5255 Part Number Qty. Ref. Designator Description Supplied Accessories 38794 2U Rack Mount Handle 38793 2U Rack Mount Bracket 38549 Screw for Rack Mount Handle/Bracket 38388 Fuse 4A 250V Slow Blow 20mm 04040A-08 High Voltage Cable 02100A-13... - Page 144 Part Number Qty. Ref. Designator Description Internal Components 38235 IC 27 IC 29C020 EEPROM DIP 38424 IC 31 IC BQ3287 Real-Time Clock 38298 IC 40 IC ATF16V8B 20pin PLCC 38427 IC 41 IC 29C020 EEPROM PLCC 38428 IC 51 IC XA-G30 Microcontroller 38391 Input Transformer 38393...
-
Page 145: Schematic Index
12. Schematic Index Drawing Number Description Reference Pages Designator S07650 Wiring Diagram S38394 Main Control Board CON7650 S38194 Real Current Board REA7500 S38478 HV Control Board HV7650 S38390 Amplifier Board AMP7650 S38392 Connector Transfer Board CNR7650 S38396 Keypad Board KEYU3 S38401 Scanner Control Board CSU7650... - Page 146 Index AC Withstand..................47, 50, 52, 53, 54, 56, 57 Adapter Box................... 18, 27, 28, 29, 59, 136 Alarm Parameter........................38 Arc ..................17, 32, 52, 54, 57, 65, 82, 83, 98 Benefits ..........................15 Breakdown........................4, 65 Calibration Alert ........................15 Calibration Procedure ......................
- Page 147 Memory......41, 73, 78, 80, 81, 87, 88, 89, 92, 112, 113, 114, 118, 120, 121, 122 Menu......13, 15, 31, 35, 46, 47, 67, 96, 105, 106, 112, 113, 118, 119, 121, 122 Min-Lmt ..............32, 52, 53, 55, 56, 57, 58, 65, 82, 83, 84, 98 Offset ..........................17, 80 Operator................6, 7, 11, 15, 16, 17, 28, 31, 42, 73, 103 Options...................
- Page 148 Setup System......................106, 113 System ..........................96 Test..........................46, 47 Short ......................34, 38, 49, 56, 61, 65 Single Step ........32, 35, 37, 38, 45, 58, 61, 62, 99, 106, 107, 108, 110, 113 Smart GFI ..................20, 33, 35, 41, 42, 45, 58 Specifications ........................
Need help?
Do you have a question about the HypotULTRA III 7620 and is the answer not in the manual?
Questions and answers